Showing posts with label EPP. Show all posts

Monday, March 14, 2022

The Ups and The Downs

I don't like change!  How about you?

It took me a while (as I'm sure it did you) to settle into a Covid way of life and find a level of contentment in what I could safely function.  Now it seems I have to reverse engines and go back the other way.  The question is how far back do I want to go? 

As things would have it, an official diagnosis of arthritis in my back last week will be a factor in my return to "normal" (whatever that is?).  It's been suspected for several years and I've actually been taking steps to manage it with monthly maintenance sessions with a physical therapist, monthly massages, and a morning stretching routine since it was first a possible reason for my back issues.  But something about having the doctor say where it's located and that it's "severe" threw me for a bit of a loop and I spent lots of time last week fretting about what this means long term -- the DOWNS.

  I have to fret -- that's how I deal with change -- but today I'm done with the fretting and ready to make changes that will enable me to feel energetic and as pain-free as possible.

Thank goodness for my sewing!!  It has been my default for a long time when fretting -- the familiar actions of piecing calm me down and allow the rational, practical part of my character to activate.  While I haven't had any finishes for almost a month, I've made lots of progress on a variety of projects since doing anything more than 30 minutes at a time leads to backaches so lots of changing up around here!?!

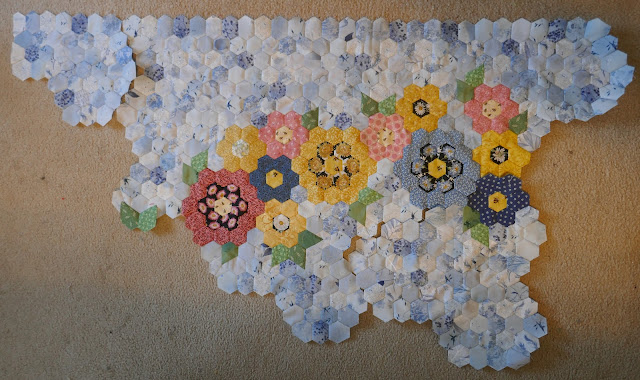
My version of @jemimas_creative_quilting EPP project has finally reached part 7.  The auditioning for each part goes slowly and I waffle about fabric choices though being a couple steps behind the release of the mystery parts is a bit of an advantage because I know where the design is going.  Actually, as I write this and look at the picture, I think the picture will help me make a couple of decisions.  I work on it during the evenings (watching murderous English TV series) and during webinars about native plants and pollinator insects (which are abundant right now).

I finished the blocks for Forever Friends (in the  book, Sisterhood of Scraps) -- settled on 24 blocks and started adding the sashing and setting the blocks together. 

 It should be about 40" by 60" -- nice laprobe!
I think I found a pressing misprint in the instructions for the strip sets in steps 6 (page 39) and 8 (page 41).  I noticed I was having to re-press every corner unit as I set the blocks together.  I tried pressing the strip sets opposite to the instructions and didn't have to do that anymore.  So if you try out this pattern, keep that in mind and see if you have the same experience.
 
Yesterday, I tidied up all the strips and had an inspiration -- drat?!?
Warm versus cool log cabin or pineapple blocks!?!  Sorted and ready to go!!!
But I'm not allowing myself to start that until I get this top quilted (and there are a few ahead of it in that queue) -- I need to cut more warm strips anyway.
 
For the moment, I'm caught up with Katja Marek's current sewalong, too!  Weeks 1 through 10 are pieced!  
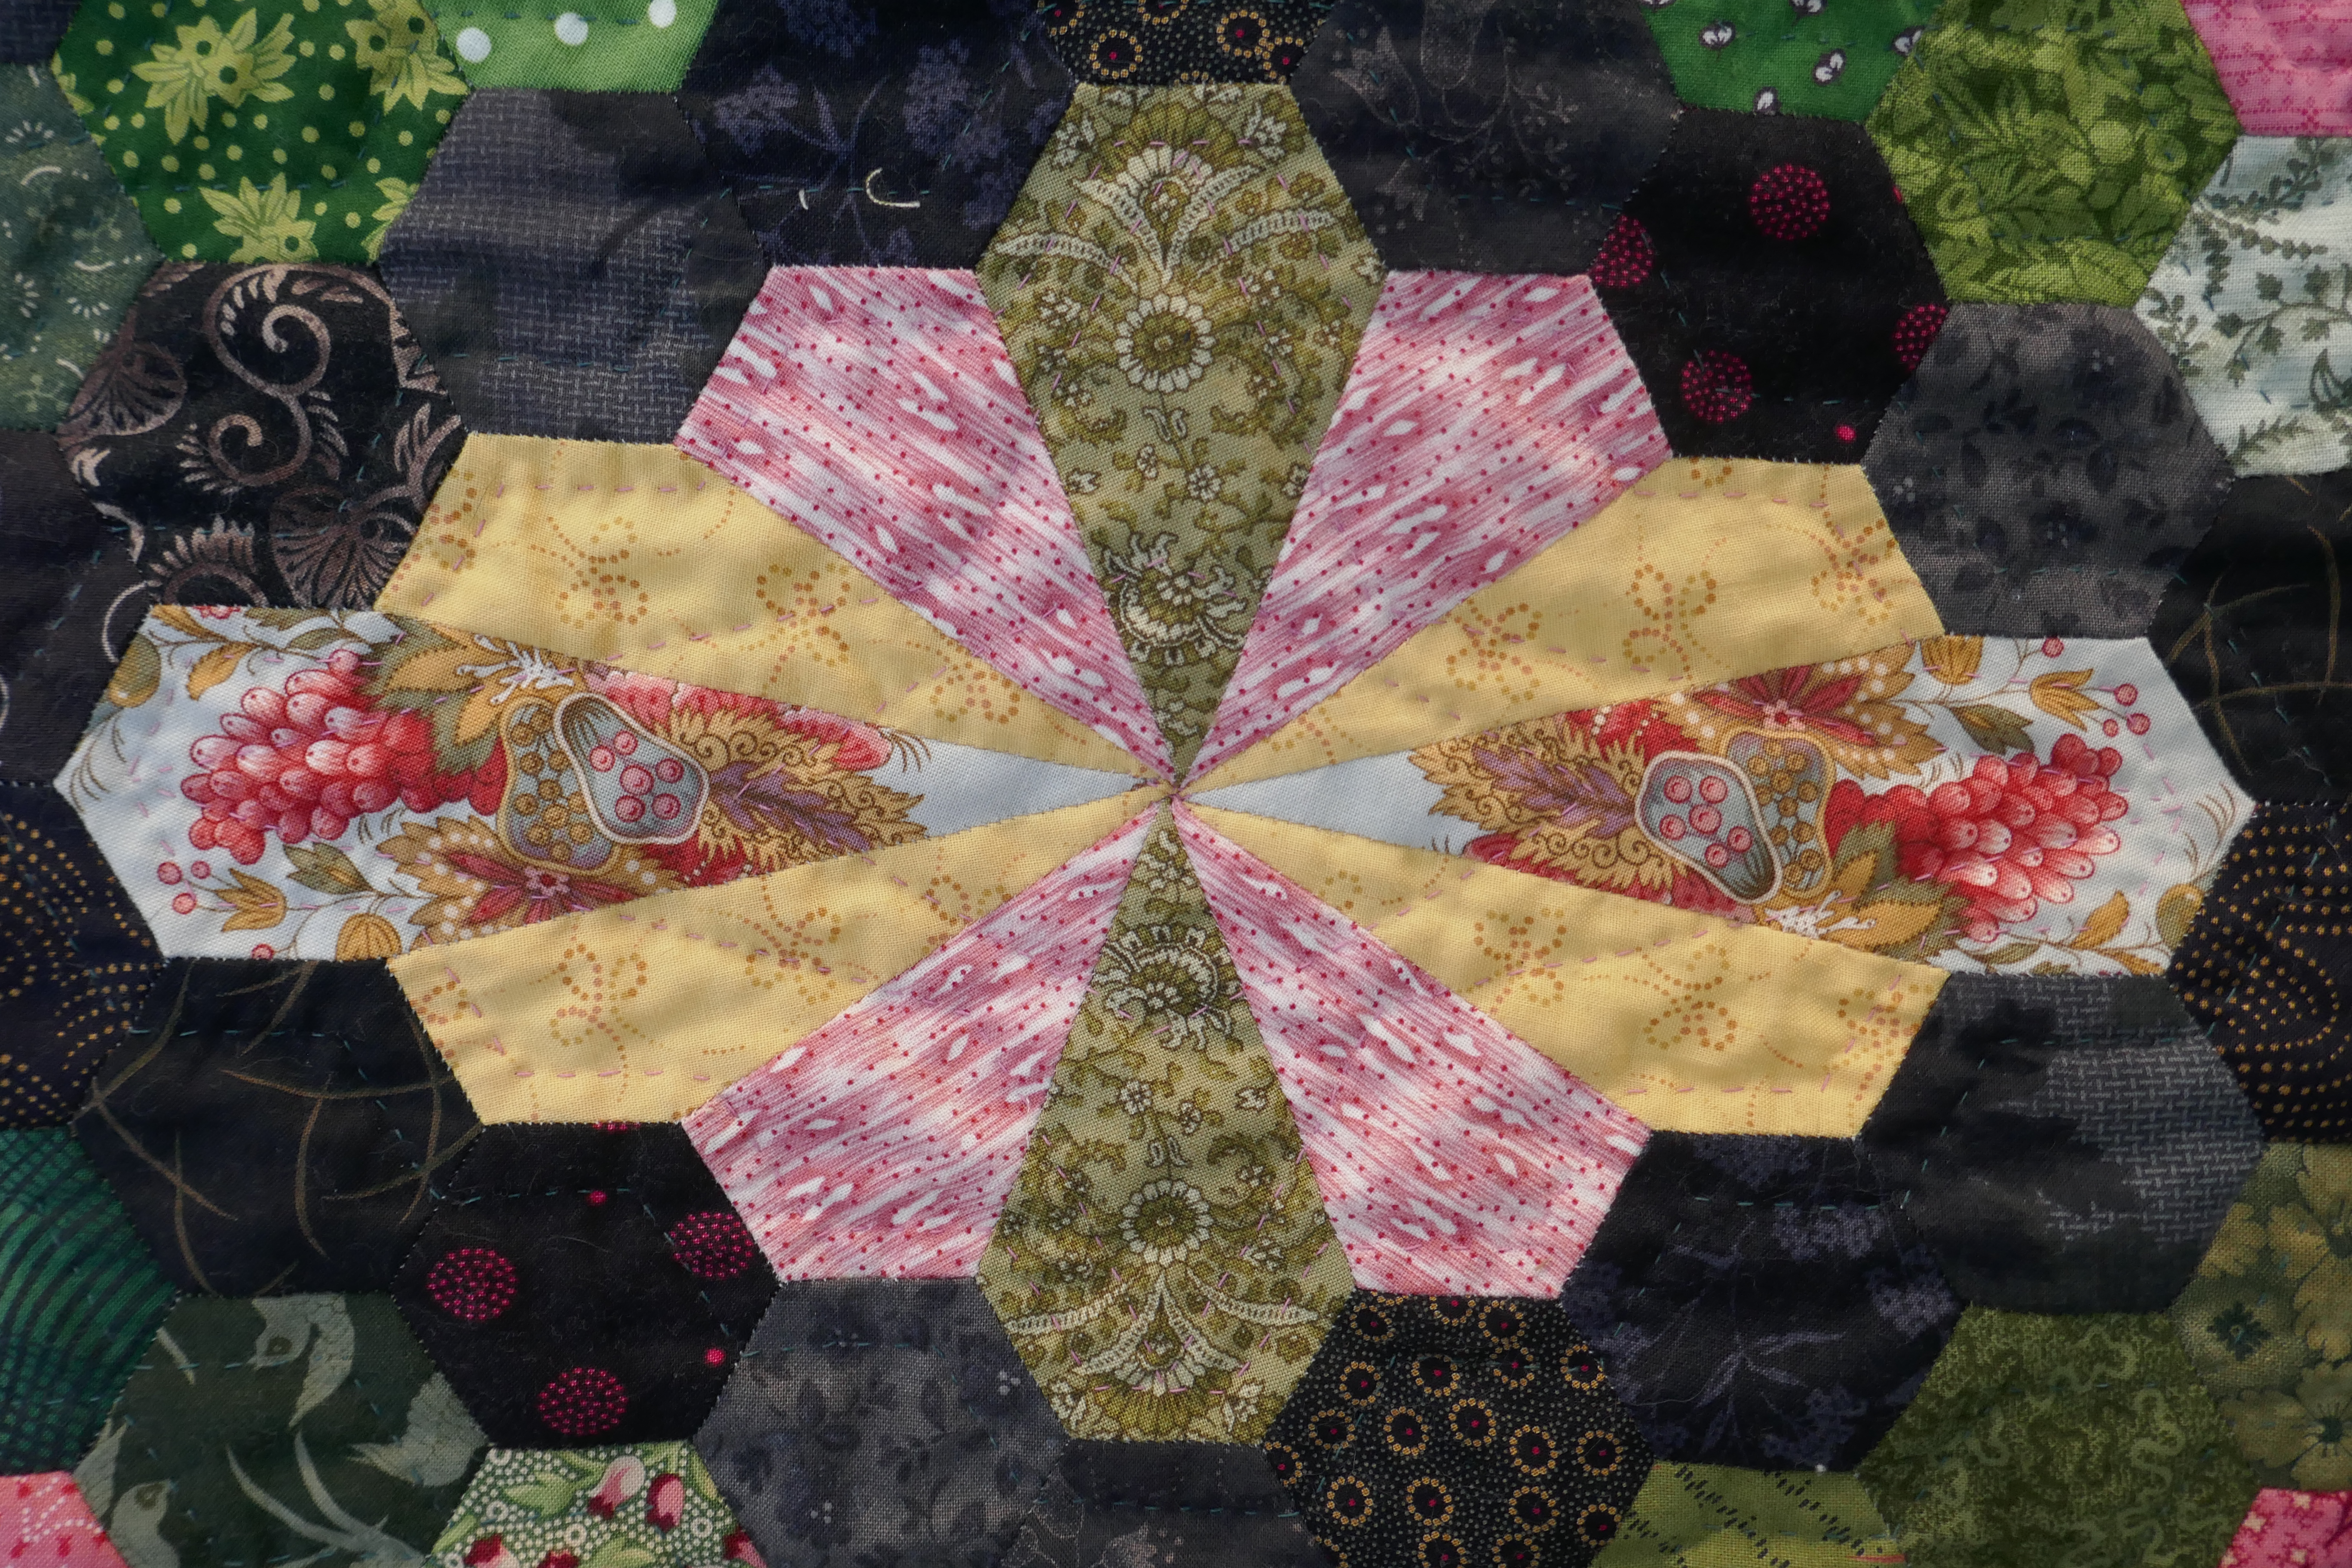
This is a close up of the "wreath" so far.   I'm using stash fabrics and my only fear is that I'll use up all my light blues . . . . but then I'll have to shop!!!
I'm a little behind on the pressing but doesn't it look great when it's done?
Week 11's flower is pink and I'll use it as "leaders and enders" as I assemble the Friends Forever top.
I managed to get back into my early morning machine quilting habit over the weekend -- finished one small piece and started working on this small quilt.  Seems to be the best strategy for me -- quilt 30 minutes first thing!
How's this for a cheerful bouquet?  There are a half dozen amaryllis bulbs in this big bowl -- I have more red than I remembered but a couple have yet to open so hoping the white one and the red and white striped one are among them.
We are expecting a week of mild weather here in Northeast Ohio -- that will be good!!
It  makes it so much easier to convince myself to go outside!  I'm looking forward to spring "firsts" as always -- the first red-winged blackbird is here, the turkey vultures are back, the garden witch hazel bushes are blooming and skunk cabbage has been sighted.  Singing frogs should be soon and I'm checking everyday for the rhubarb plant to poke through.  That also means it is time to cover the strawberry bed so the deer don't browse the plants and shift the pots full of spring bulbs to the patio entrance.

Looking forward to a week of being UP!
Mary


Tuesday, November 23, 2021

Crossing another one off the "to-do" list!!

 It's two days before Thanksgiving here in the USA.  This morning I've been thinking about the controversial aspect of this "holiday" and decided to focus on the "gratefulness" aspect of it.  Gratefulness is a universal attitude that can reframe mindsets and dissipate frustration.  The challenge is to look beyond the personal aspects and adopt a wider viewpoint of gratefulness so if you will indulge me for a paragraph before I share finish #17?

I'm grateful for all the courageous people who are calling out dominate cultural views and expanding my point of view on a variety of topics from racism to habitat protection.  It has been a year of discovery for me in spite of hardly leaving my little world.  I hope their impact on my thoughts and ideas will have a powerful impact on my life going forward.

I'm also grateful for each of you and your interest and support of my blogging and social media posts!!  You give more purpose to my life and efforts than you realize.

And finally I'm grateful for that loaf of bread baking in the kitchen and lifting my spirits with it's aroma.  Nice that the sun has decided to shine this morning, too!


Number 17 is finished!! Quilted, bound, and snuggle tested!

The blocks are paper pieced - a BOM from a very clever gal I found via Instragram -- Elisabeth at @lemonshark.  If you want to see some of the other versions or check out her blog with the PDF's for the blocks, search the hashtag #sharksdinnerbom2019 on Instagram.  There are twelve different blocks -- each has the same outer shape but the center of each one is a different configuration of shapes.  
(Also, the background/sashing is my design and everyone has been doing their own thing with that.)
The backing of the quilt is a scrappy Kaffe thing (I'm trying to use up that stack) as is the binding.
I "big stitched" this quilt with #8 perle cotton using Quilters Dream Request batting.  It is so soft and supple!!  The background/sashing is quilted the same on each block plus the entire "motif" is outlined with white thread.
I used an assortment of perle cotton colors -- orange and green, lavender and teal -- choosing colors to blend or contrast with the color of the pieces.
The quilting designs were spontaneous decisions -- sometimes I was inspired to quilt in such a way that a big motif was emphasized rather than the individual pieces that created it.
The gray crown in the middle of the block below is a good example of that.
Other times, my brain was stuck and so I simply outlined the shape often times using a contrasting                                                            thread color.  I enjoyed being spontaneous!                                                                                               

I usually do my handwork in the evening (while watching English murder mysteries) and each block took between 4 and 5 sessions.  It felt like I was zooming along!
I was zooming along!!!
I said there are twelve blocks so there is a second lap quilt underway with the six remaining blocks.  The blocks are about 22" square and I feel like two small quilts will be more useful and appealing than one big quilt given the boldness of my color/fabric combinations.
Quilt number 18 is about 75% machine quilted so it feels like there could be another finish before the end of the month -- woot, woot!!  
My biggest dilemma at this point is do I clean the house or make Christmas gifts??

Bread is done!!

Mary


Tuesday, August 17, 2021

Dodecagon Finish!!

 I can't believe I made this!!

70" wide by 98" long -- dozens and dozens of hexagons handstitched to set off twenty-one dodecagons and four beautiful printed floral motifs all hand stitched together from my bountiful fabric stash!?!

It all started late in 2016 when I discovered Marge Sampson-George's Dodecagon Quilt Pattern on Instagram.  It wasn't available in the USA at that point, but I contacted Marge and we figured out a way for her to send the pattern with templates and papers to a cousin in Australia who would then hand it off to her parents when they made their annual Christmas visit and they would bring it back home to me.  It took a couple months but I got the pattern and in February 2017, I launched my version!


My version looks nothing like the Aussie versions you'll see on Instagram -- search the #dodecagonquilt or #msg47 hashtags -- and it didn't take long for me to realize that I did not have the stash or the style-sense to pull of a replica of those gorgeous, spontaneous Bohemian looking fabric collages.  So I went with one of my strong suites -- reproduction fabrics.  I have lots of them and I've worked with them a great deal.  I've spent years as a shop keeper and a teacher helping people work with what they have and being true to their personal preferences.  The reason I advocate for this approach is that it's helped me finished more quilt tops and I find that attempting to imitate the style and preferences of other quilters has led to most of my piecing UFO's.

The other aspect that makes my Dodecagon quilt unique to me is it's a departure from Marge's setting.  I love that setting but I love so many other styles of English hexagon quilts that the list of tops I want to piece is longer than a lifetime.  This layout is actually a combination of three EPP quilt styles all pulled together in one design instead of making three separate quilts.  First there is the dodecagon motif, second is a medallion style layout, and the third element is the fussy-cut floral motifs framed with hexagons.  Thank goodness for my Electric Quilt program -- I could experiment and experiment and experiment to find the most appealing layout.
Staying motivated on a big project is often a challenge because there are so many distracting new ideas but I don't have to tell you that?!?   I stayed on task with several strategies to keep the project rolling along steadily.  The annual #100days100hexies challenge on Instagram was my motivation to baste hexies a couple times -- how can anyone baste just one hexie a day??  Another blogger's One Monthly Goal challenge helped me stick to goals for the sections as they grew.  Finally, I took this project to five different stitching retreats -- boy, is it easy to pack for an all hand-stitchng weekend!  

But you are here for the quilting close-ups!

Let me begin by saying if I had quilted 1/4" inside of every piece, I would not be finished yet!!
And in my opinion, stitch-in-the-ditch quilting is not an option for EPP.
So I focused on the "units" of the quilt.
All the dodecagons were outlined a bit more than 1/4" inside the seams to emphasis the overall shape.  That of course made the motif puff up and after some experimentation, I settled on a 4-pointed star motif with a 60 degree diamond in the center.
The pink lines of the diagram below illustrate that -- the black lines are the seams to show you the overall shape.
Because there are twelve seams coming to the center of the motif, it's difficult (perhaps impossible) to quilt very close to the center -- so the diamond shape flattened the center down and reinforced the elongated shape of the motif.

All the filler piecing is scrappy and a bit busy so elaborate quilting motifs would be a waste of time as they will melt right into the fabric.  But I still needed to keep the work interesting so I would stay engaged.  These clusters of three hexies that alternate around the center of the medallion take on a cohesive feel by treating them as a unit rather than three individual hexies.
The quilting diagram is C on the illustration below.
I inserted these clusters of four yellow hexies to break up the monotony of all those green hexies but how to quilt them?  It's hard to see in the photo but the unit is outlined both outside and inside which made the center puff up a bit too much.  It took some puttering but I finally hit on a small hexagon centered on the middle seam.  It's A on the illustration below.
There are only a few of these hexie "flowers" throughout the border area so to keep with the "feel" of my other quilting, its a simple star motif (illustration B) around the center hexagon and an outline about 3/8 " outside the motif (in the green). 
These two diagram sheets of how I quilted specific units will go into my "how I quilted that" file for future reference.  I have found that looking through these notes when starting to quilt a top often provides the kickstart I need.  I might not do the exact same design but it's a spring board.
I had to force myself to start the floral motifs -- I did not want to do any outline quilting though that would have been nice, but it would have been a arduous task and shut this gal right down.  The quilting design occurred spontaneously as I extended the edges of the hexie edge into the floral motifs and in the end it became a series of overlapping irregular hexagons.  Again the center was puffy and while it's difficult to see there is a central quilted hexagon that flattened it down a bit. Once I stitched the first one, the other three went quickly and I was glad to move on from that challenge!
Generally all the quilting is done 3/8" from the seams rather than 1/4" to avoid the bulk of the seam allowances which can be rather irregular in width with EPP.

The binding is scrappy and this is the only machine stitching in the quilt!
And the best part about having it finished??
Now I can start another big EPP project guilt free!
(Yes, there are two that have already reached the "piles-of-fabric" stage.)
If you want to see lots more pictures of this quilt as it grew, type Dodecagon into the "search" bar up there on the right side and see what comes up!

Twelve down and nine to go for my #quilt21in2021 challenge!!!
Wahoo!

Mary


Thursday, February 27, 2020

I'm Retreat Bound Again!

For the past couple years, I've been confining the retreat projects I haul out of the house to hand stitching only!  It's so much easier to pack and I'm more relaxed while at the retreat which makes it more fun to be away from the studio.
This weekend, I'm working on my 2019 #sharksdinnerBOM blocks.
I went back through my blog photo archive and was surprised to discover how few pictures I've shared on the blog?!?   
I shared lots of pics on my Instagram feed!! 
But these are the only four process pictures I shared on the blog?!? 
All my tile fabric assortments began with a large scale multicolor print from Kaffe Fassett.  I then worked to use other non-Kaffe prints and along the way, many of my "nature" themed prints started to become a regular feature of the tiles.
It has been a "sew my stash" project from beginning to end!!
These English paper pieced "tiles" were designed by Elisabeth @lemonshark in Switzerland and shared via her blog during 2019 -- twelve designs in all.  Each tile has the same exterior shape, but all of them have a different interior breakdown.  Then everyone making the tiles laid out the darks, mediums, and lights in different ways individualizing the finished look of each tile!  You can check some of them out by searching the hashtag #sharksdinnerBOM2019 on Instagram -- here's a link. (Scroll way down to see some of the variations more easily.)  

She did not however design a "setting" for the tiles so everyone has taken their own approach to this step. Kim, in England, has been designing crazy quilt looking backgrounds to English paper piece around each tile as she squares the blocks up.  I've been a bit intimidated by her ideas and in awe of her energy but one of her designs inspired me to design (a much simpler) machine pieced background for my blocks.

Working on graph paper to full scale, I designed a set of triangles that will frame each tile.  I contemplated random low volume fabrics but settled on black and white to emphasize the drama of each tile.
After the first test block to make sure my idea worked, I set to work every afternoon for the past two weeks piecing the backgrounds and basting the tiles to the backgrounds in preparation for a weekend of hand stitching to applique them in place. 
Each corner consists of a triangle with a mitered stripe border to I was able to use my Set-In Piecing Simplified tricks and my Marti Michell mitering tool*** to perfect results! 
This is what each finished background looks like -- the tiles are 18" across and I left that big empty center primarily because I didn't want to "waste" any of my terrific low volume white and gray prints!
I alternated the "sashing" borders between black and white which turned out to be better than I expected!  It sets off each tile beautifully.  The position of the tiles in the final layout isn't set in stone at this point, but the primarily "cool" tiles will definitely alternate with the primarily "warm" tiles as you see here.
Once a background was finished, I spent time removing all the papers which were thread basted in place.  (Sorry "glue lovers" but I don't like glue basting one bit and I've given it a fair try.)
Then with the background laying perfectly flat, I positioned the tile and basted it 1/8" from the folded edge.
As I left for the weekend, all twelve tiles are basted and ready for a weekend of stitching. 
The finished blocks are about 20" square (my design wall is not long enough, so they are overlapped here) and I did a quick trial stitch earlier this week and am predicting it will take about 90 minutes maximum to finish each block!
I'm feeling confident I'll return home with twelve big finished blocks ready to set together and contemplate borders!  (I packed a couple other hand work projects just in case, too!?!)

So often when we start a BOM based on someone else's ideas/designs, we become disenchanted for various reasons.  That happened with this project for me -- 7 months ago I couldn't imagine how I would pull these tiles into a cohesive quilt so I was losing interest.  It felt like I would end up with a bunch of big pillow covers!?!  Individually, I loved the blocks -- but together???  Not so much.
As I shared my frustration, several of the makers on Instagram encouraged me to keep at it with helpful comments that made me aware of what they were seeing that I didn't see.

I put all the tiles up on the auxiliary design wall to allow them to simmer in the back of my mind.  That's when I realized the warm versus cool color palettes and how much fun I was having incorporating some of my nature prints.  So I forged on with a new sense of purpose -- balance the warm and cool blocks plus include a nature print in every tile.

When I basted that first tile onto the background, it felt right!  Can't find better words than that?
The backgrounds are unifying the crazy fabric/color scheme so much better than I expected.
I'm so glad I shared my frustration and grateful for everyone's input.
This is going to be an awesome quilt!!

So if you feel letdown about a project, get it out and put it up someplace where your subconscious can work on it.  Share it with folks and get their perspective!  Carry on!!

Hope your weekend is a pleasant one!
Mary

***EDIT April 2025
Marti Michel closed her business in late in 2024 and while some shops may still have a stock of her templates, you can also find them on Ebay and Etsy. 

Thursday, February 20, 2020

My Dodecagon Quilt Top!!

 While I gave myself the "one monthly goal" challenge to use the entire month of February to get the five large sections of my dodecagon quilt together, once it started to happen I was anxious to see the finished top because it is so beautiful!!
(My pictures are a bit dark -- blaming cold cloudy Ohio winter days -- but you get the idea.)
I calculated that I needed to stitch twelve 1" seams every day to be finished!

First the upper right corner. 
Then the lower right corner!
And the lower left corner!
On Monday evening, I pushed to finish the upper left corner so I could take it for "show and tell" at the EPP group I attend at my local quilt shop, The Quilted Thimble in Chesterland, Ohio.
Three of the "tall" gals held it up for me and while it isn't a perfect picture, you get the idea.
The top is 70" wide and will be 97" long when I add a rows of these 80 modified hexies to the top and bottom to square up those edges.  They are all basted and I'm currently stitching them into two long bands to join the quilt top.
I made these pieces by printing out several sheets of 1" hexagons onto light cardstock.
I use this website to create a PDF which I can print out - click HERE
Then I cut them apart, a single sheet at a time as you see below -- the pieces with an "X" are sloppy cuts and needed to be discarded in the interest of accuracy. 
I made twenty-one dodecagon blocks using templates and papers from Marge Sampson-George (now available world wide through Broderie on Etsy).

The layout I used is my own design - a combination of several ideas I've seen for mosaic quilts over the years.  Marge's pattern uses 42 dodecagons and sets them together with a single band of hexagons. 

 I have counted and counted and counted -- my numbers might be off a couple but I cut and basted and stitched -- 348 pink hexagons, 216 yellow hexagons, 564 black hexagons, 954 green hexagons, plus 80 modified green hexagons for the upper and lower edges and 64 half hexagons for the sides for a total of 2226 (give or take a couple) hexagons. Most of the prints are reproductions or pieces that blend well with them -- all of them from my deep, deep stash.  Even the beautiful floral fussy cut motifs in the center was a piece I hoarded back in my shop keeping days!

The color scheme evolved as I played in my stash making the dodecagons -- from the beginning I wanted to use reproduction prints but I could not have told you what the color scheme was going to be at that point.

I've pulled some big hunks of fabric for backing auditions and I don't know how I will quilt this other than to say I intend to do it by hand.  Hopefully, I'll be quilting it soon - but I have a sweater to finish knitting and the applique of my #sharkdinnerbom tiles to finish before I dedicate my hand stitching time to quilting this!

In conclusion, I have to say "I can't believe this is all together".  It's taken about 3 years and a rough estimate of around 500 hours of stitching time.  It's a huge achievement and reinforces my belief that making steady use of 30 minutes here and there eventually produces the results!

If you'd like to revisit some of my past posts about the construction of this quilt top, just type "dodecagon" into the search box and a list will pop up for your reading pleasure!

So exciting!!
Enjoy the weekend!

Thursday, January 30, 2020

One Monthly Goal!!

I've been using the "One Monthly Goal" goal link-ups at Elm Street Quilts for a couple years now to push myself through this BIG project which I began in February, 2017.
I fell in love with Marge Sampson-George's Dodecagon Quilt (thanks Instagram) and since it wasn't available in the United States or on-line at that point, I used my Aussie family connection to buy the templates and papers!
Over the course of piecing the dodecagons, I fell in love with several other English paper pieced designs that featured a medallion style center - long story short - I designed my own layout using the dodecagon blocks and several of the ideas I loved.  I felt certain I could get one quilt done instead of starting two or three more!
All the dodecagons have been finished for almost two years. I lots of time in 2018 basting dozens and dozens of black, green, pink, and yellow hexies.
I think this past weekend was the fifth time I've spent a 3-day stitching retreat focused on assembling the units.  First I outlined the dodecagons with black hexies.
Then I made enough strips of green hexies for the entire quilt.
All this time, I was designing and redesigning the layout in Electric Quilt 7 -- I kept changing it a bit here and there until finally I just had to make myself quit messing with it -- you know how that is!?!
Early in 2018, I laid out and began the assembly of the large central unit that features my five favorite dodecagons alternated with four large floral motifs.  
Stitching retreats gave me the focus to gradually organize the four corner sections and work out the best assembly approach.  After each retreat, I continued to chip away at the assembly process.  Several times I've had to stop and baste more green hexies -- if I never see a green hexie again, it will be too soon.
There have been weeks when the living room floor has been covered in hexies -- good thing the kids are grown and out of the house!!
The first three weeks of this year saw a messy living room again as I organized and stitched up the last five setting units so that when I arrived at this month's retreat, I'd make some serious progress!!
I arrived with my last few green hexies!
Happily I had an entire table to lay out the units and stay organized.
Nothing to do but stitch, nibble, and chat for three days!! 
Soon I was popping out papers right and left!
I didn't quite make it all the way, partly because I discovered I was six green hexies short -- argh!
This picture gives you some idea how I break down the sections.
You can see lots more of my assembly details along the way by typing "dodecagon" into the search bar -- about six blogposts pop up (though not in exact chronological order).  The one I've had the most feedback about shares my personal tips for assembling the dodecagon blocks.
And here it is -- a finished fourth corner!
(sorry about the poor lighting -- it's late!)
Now I can begin to pull the other sections off the auxiliary design board (storing them there has kept them flat and unwrinkled) and spend February stitching up the final four long seams!!
I estimate I have just 268 one-inch seams to stitch!!
Wahoo!!
The only down side of finishing the piecing will be having to plan the quilting -- never my favorite step.

Of course, there's another hand stitching project in the wings and with any luck that will be my focus during my next stitching retreat at the end of February!!
Mary