I can't believe I made this!!
70" wide by 98" long -- dozens and dozens of hexagons handstitched to set off twenty-one dodecagons and four beautiful printed floral motifs all hand stitched together from my bountiful fabric stash!?!

It all started late in 2016 when I discovered Marge Sampson-George's Dodecagon Quilt Pattern on Instagram. It wasn't available in the USA at that point, but I contacted Marge and we figured out a way for her to send the pattern with templates and papers to a cousin in Australia who would then hand it off to her parents when they made their annual Christmas visit and they would bring it back home to me. It took a couple months but I got the pattern and in February 2017, I launched my version!
My version looks nothing like the Aussie versions you'll see on Instagram -- search the #dodecagonquilt or #msg47 hashtags -- and it didn't take long for me to realize that I did not have the stash or the style-sense to pull of a replica of those gorgeous, spontaneous Bohemian looking fabric collages. So I went with one of my strong suites -- reproduction fabrics. I have lots of them and I've worked with them a great deal. I've spent years as a shop keeper and a teacher helping people work with what they have and being true to their personal preferences. The reason I advocate for this approach is that it's helped me finished more quilt tops and I find that attempting to imitate the style and preferences of other quilters has led to most of my piecing UFO's.

The other aspect that makes my Dodecagon quilt unique to me is it's a departure from Marge's setting. I love that setting but I love so many other styles of English hexagon quilts that the list of tops I want to piece is longer than a lifetime. This layout is actually a combination of three EPP quilt styles all pulled together in one design instead of making three separate quilts. First there is the dodecagon motif, second is a medallion style layout, and the third element is the fussy-cut floral motifs framed with hexagons. Thank goodness for my Electric Quilt program -- I could experiment and experiment and experiment to find the most appealing layout.

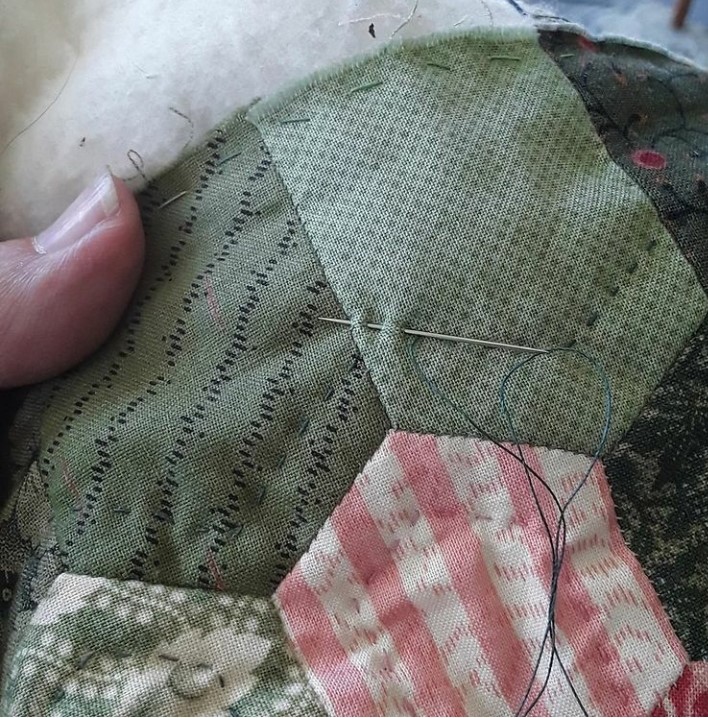
Staying motivated on a big project is often a challenge because there are so many distracting new ideas but I don't have to tell you that?!? I stayed on task with several strategies to keep the project rolling along steadily. The annual #100days100hexies challenge on Instagram was my motivation to baste hexies a couple times -- how can anyone baste just one hexie a day?? Another blogger's One Monthly Goal challenge helped me stick to goals for the sections as they grew. Finally, I took this project to five different stitching retreats -- boy, is it easy to pack for an all hand-stitchng weekend!
But you are here for the quilting close-ups!
Let me begin by saying if I had quilted 1/4" inside of every piece, I would not be finished yet!!
And in my opinion, stitch-in-the-ditch quilting is not an option for EPP.
So I focused on the "units" of the quilt.
All the dodecagons were outlined a bit more than 1/4" inside the seams to emphasis the overall shape. That of course made the motif puff up and after some experimentation, I settled on a 4-pointed star motif with a 60 degree diamond in the center.
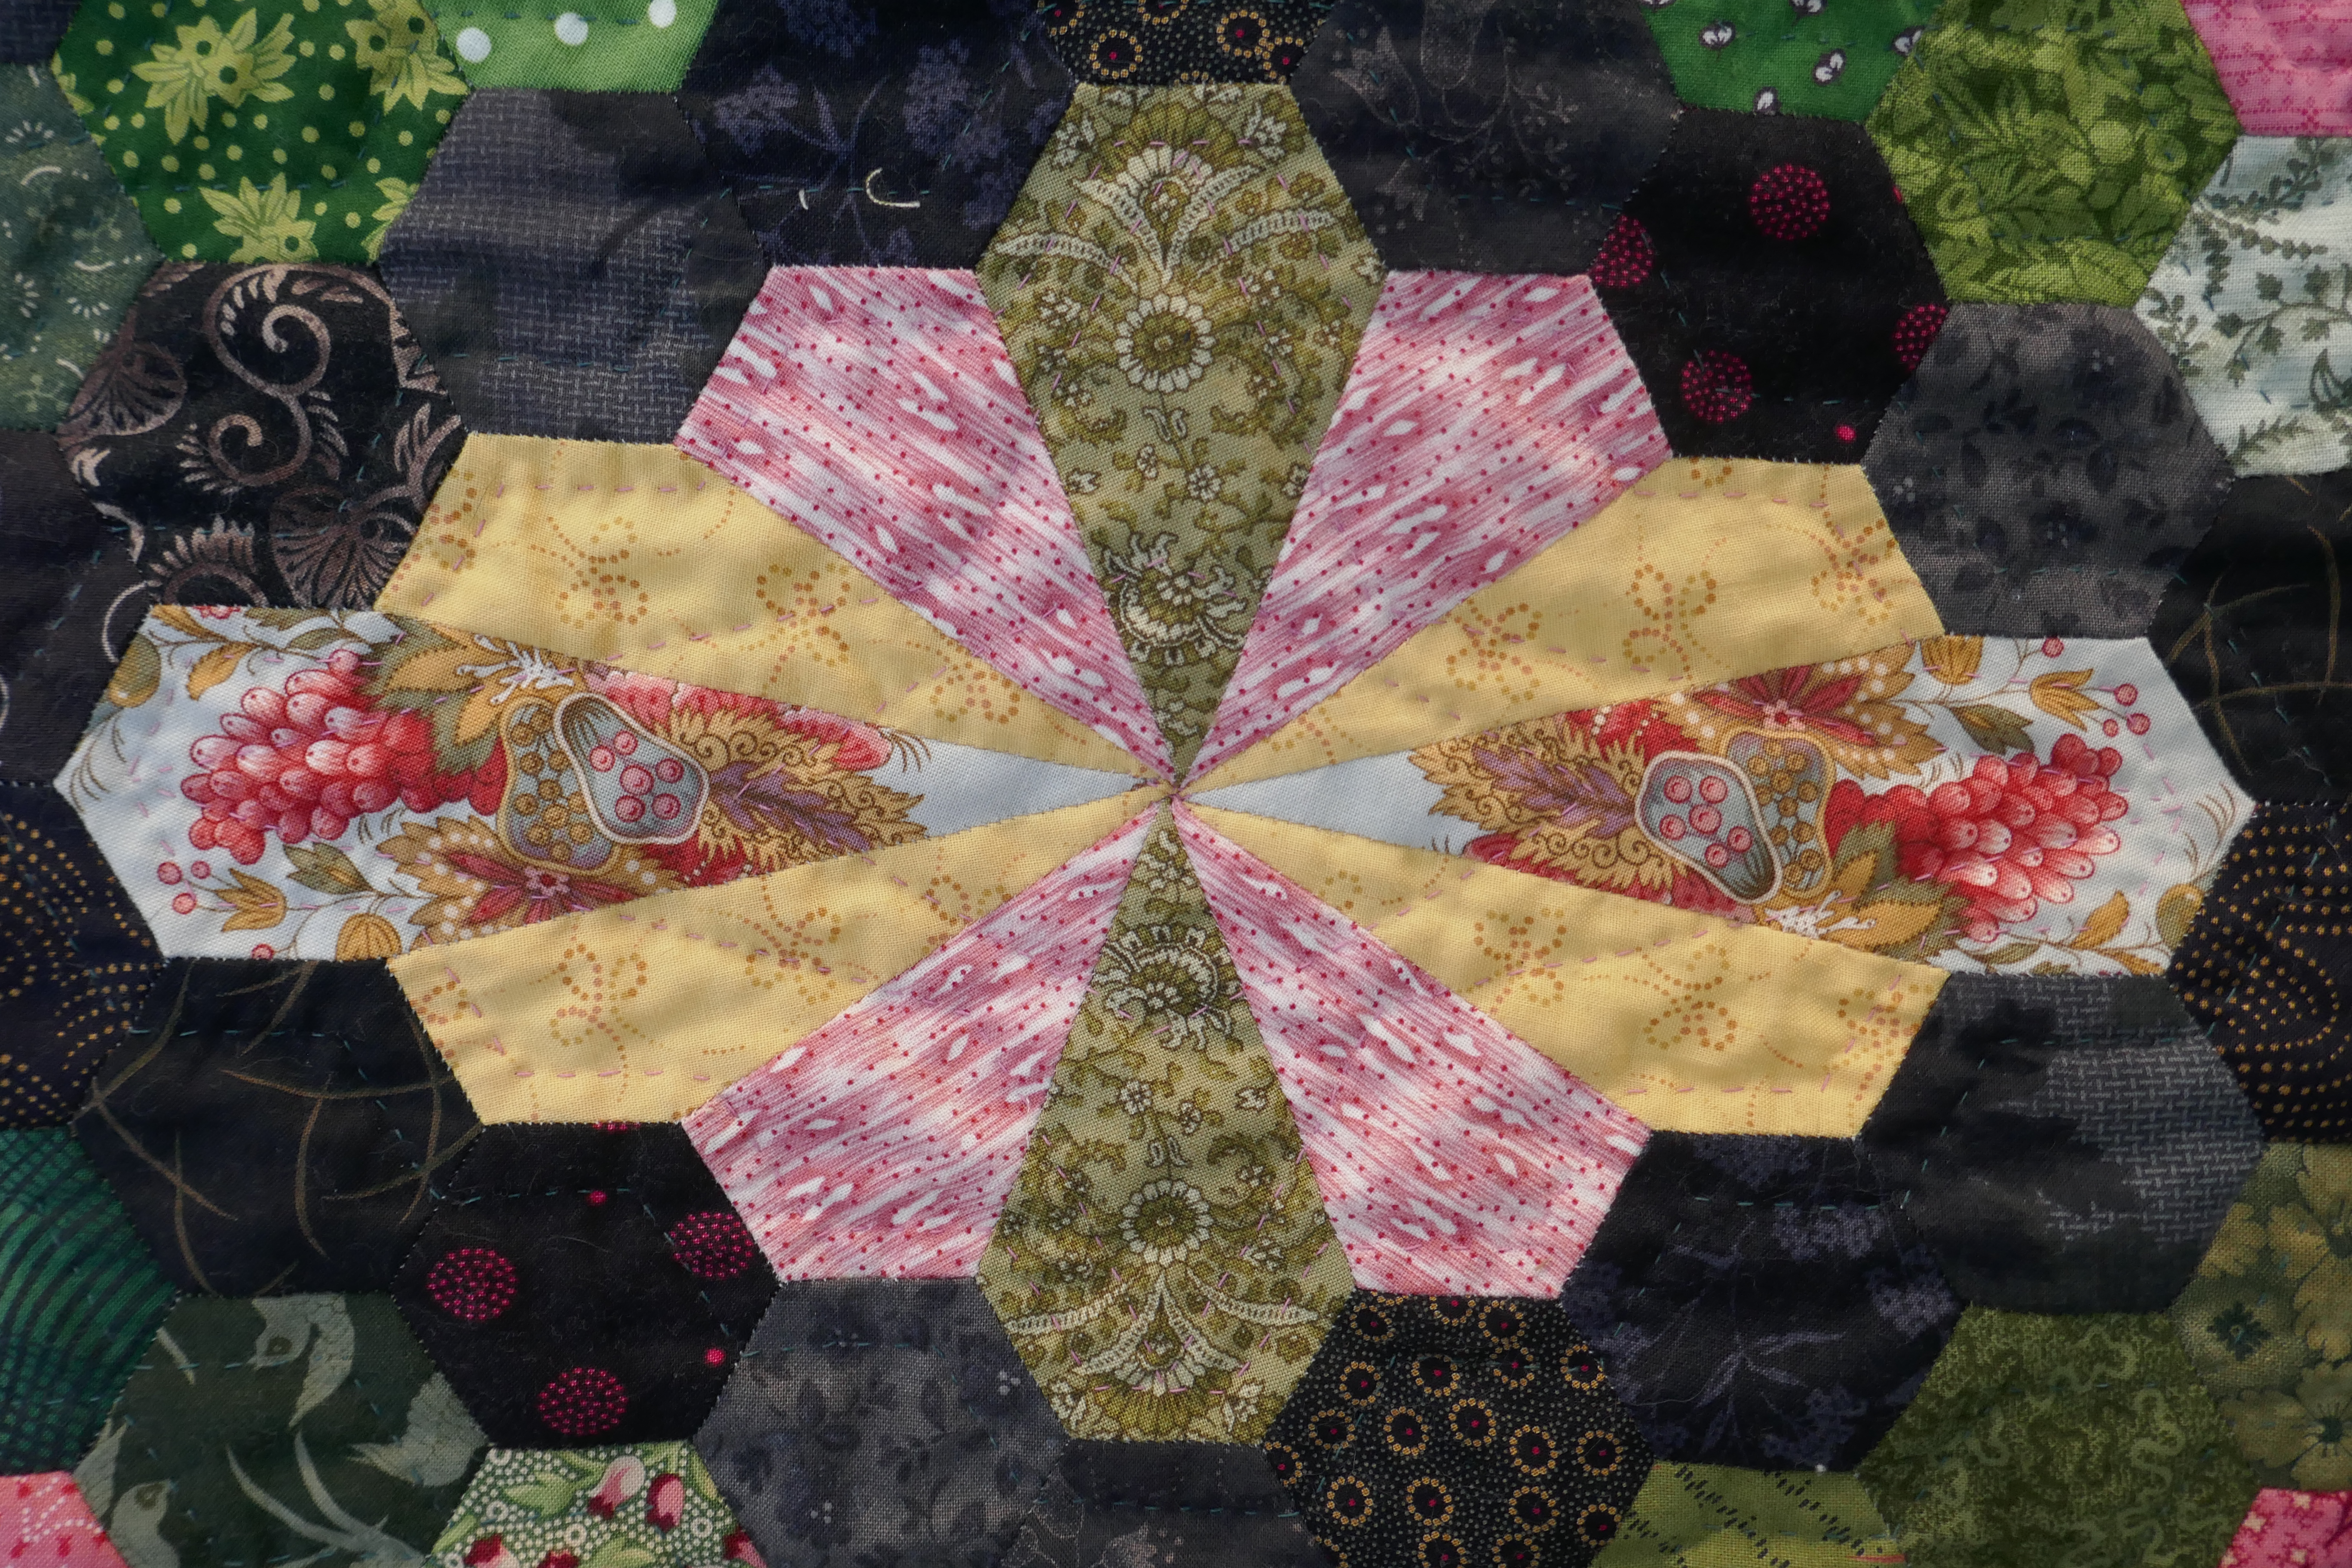
The pink lines of the diagram below illustrate that -- the black lines are the seams to show you the overall shape.
Because there are twelve seams coming to the center of the motif, it's difficult (perhaps impossible) to quilt very close to the center -- so the diamond shape flattened the center down and reinforced the elongated shape of the motif.

All the filler piecing is scrappy and a bit busy so elaborate quilting motifs would be a waste of time as they will melt right into the fabric. But I still needed to keep the work interesting so I would stay engaged. These clusters of three hexies that alternate around the center of the medallion take on a cohesive feel by treating them as a unit rather than three individual hexies.
The quilting diagram is C on the illustration below.

I inserted these clusters of four yellow hexies to break up the monotony of all those green hexies but how to quilt them? It's hard to see in the photo but the unit is outlined both outside and inside which made the center puff up a bit too much. It took some puttering but I finally hit on a small hexagon centered on the middle seam. It's A on the illustration below.

There are only a few of these hexie "flowers" throughout the border area so to keep with the "feel" of my other quilting, its a simple star motif (illustration B) around the center hexagon and an outline about 3/8 " outside the motif (in the green).

These two diagram sheets of how I quilted specific units will go into my "how I quilted that" file for future reference. I have found that looking through these notes when starting to quilt a top often provides the kickstart I need. I might not do the exact same design but it's a spring board.

I had to force myself to start the floral motifs -- I did not want to do any outline quilting though that would have been nice, but it would have been a arduous task and shut this gal right down. The quilting design occurred spontaneously as I extended the edges of the hexie edge into the floral motifs and in the end it became a series of overlapping irregular hexagons. Again the center was puffy and while it's difficult to see there is a central quilted hexagon that flattened it down a bit. Once I stitched the first one, the other three went quickly and I was glad to move on from that challenge!

Generally all the quilting is done 3/8" from the seams rather than 1/4" to avoid the bulk of the seam allowances which can be rather irregular in width with EPP.
The binding is scrappy and this is the only machine stitching in the quilt!

And the best part about having it finished??
Now I can start another big EPP project guilt free!
(Yes, there are two that have already reached the "piles-of-fabric" stage.)
If you want to see lots more pictures of this quilt as it grew, type Dodecagon into the "search" bar up there on the right side and see what comes up!
Twelve down and nine to go for my #quilt21in2021 challenge!!!
Wahoo!
Mary