Tuesday, August 29, 2017

Productive Procrastination

Why does "procrastinating" always get such a bad rap?  
If you are productive in the midst of it, isn't that okay?
I'm suppose to be sanding woodwork and bead board wainscoting to prepare it for a new coat of pain.
Hate sanding!! 
Even with power equipment -- hate it!!
But I'm not wasting my time -- no!!
Not surfing Instagram, not gazing out into space.
I'm getting other things done!!

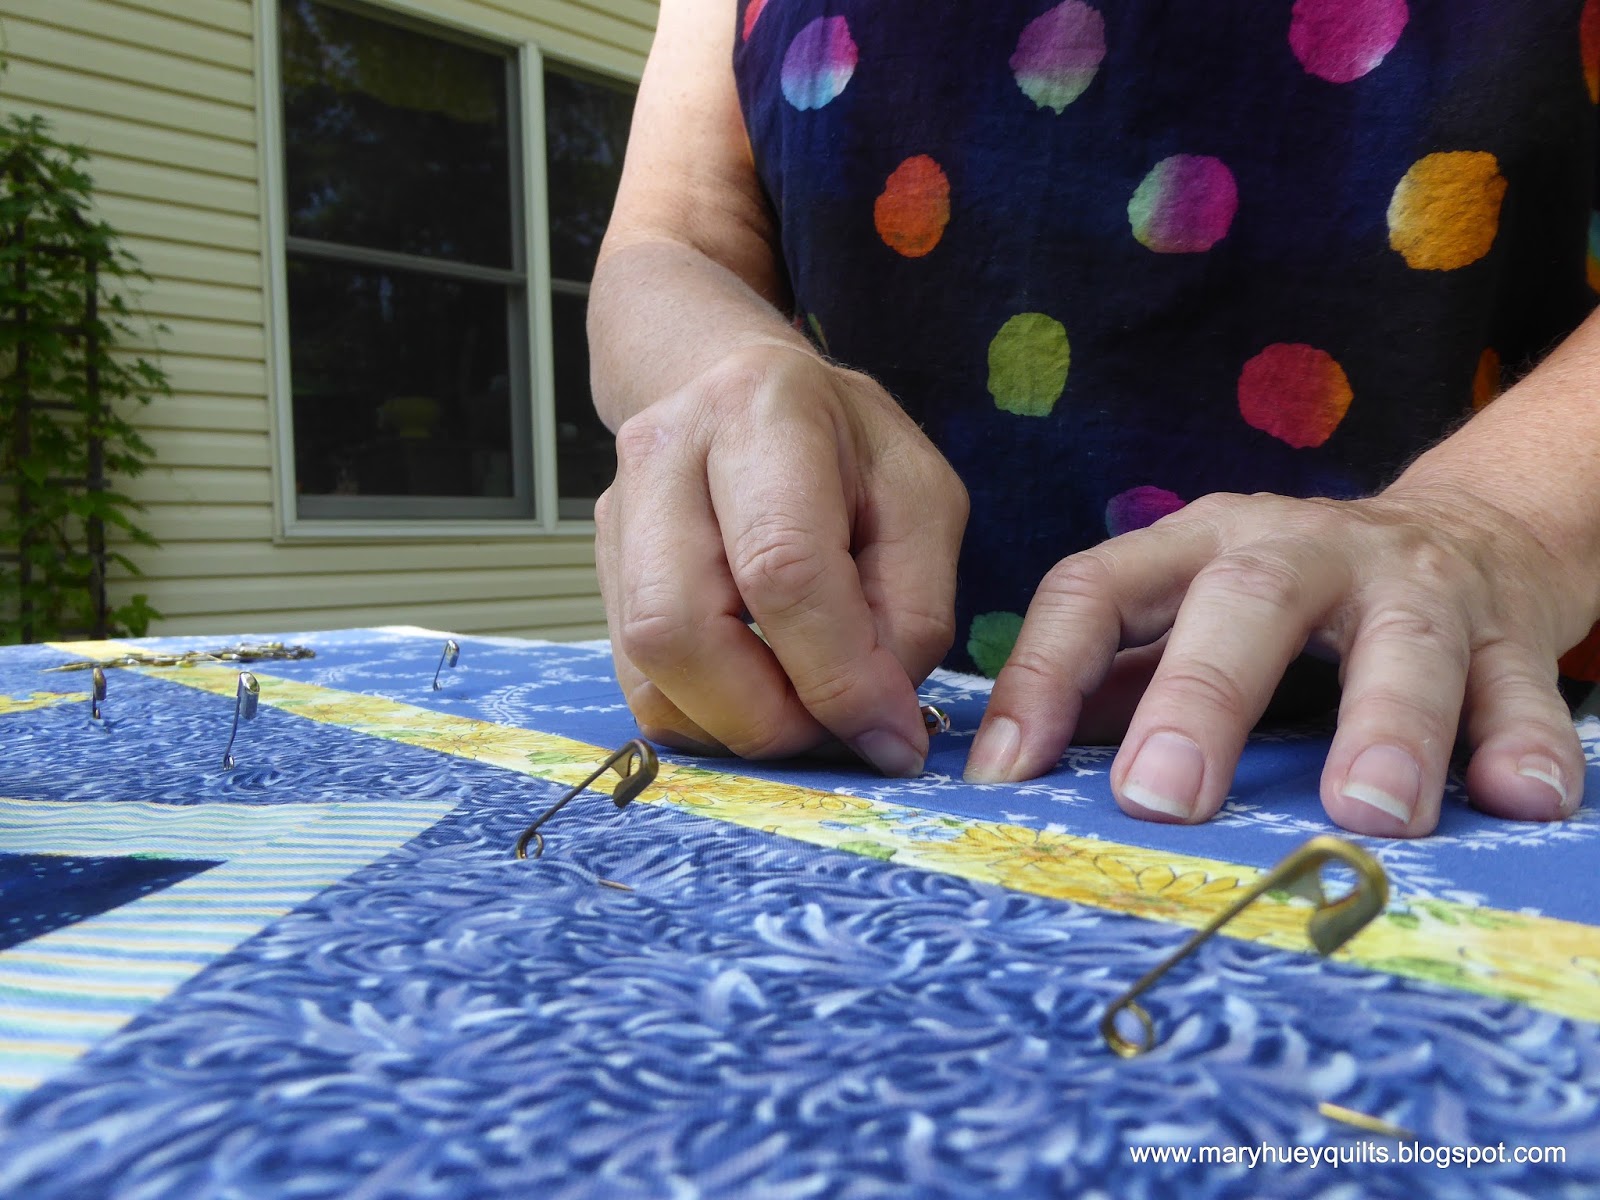
For example, I've started quilting one of the tops I layered earlier this month!
I've only made one pass across it but it went well and if I complete two passes a day, it will be ready to bind this weekend!
Excellent!!
I revitalized my sourdough starter!
It took two batches of pizza dough and a batch of pancakes, but it's better than it's ever been.
Turns out, I've been adding too much water during the feeding process.
I made two loaves of bread -- they didn't get very high, but the texture and flavor is perfect.
Next time it will be higher!
I've been working all weekend to finish the blocks for the two Advent quilts I'm making for my grandchildren.  The blocks were designed by Lorna at SewFreshQuilts and are part of the Jolly Little Christmas SewAlong.
Check it out HERE.
We are having unusual August weather here (read not hot), so I took the cutting tools and fabric out to the patio on Saturday and filled these file folders with everything needed to make the last few blocks.
I also sanded (for about 30 minutes) -- maybe if I break it down into little sessions?
I made the Christmas Lights blocks first -- easy piecing.
So cheerful!! 
Time for some more sanding!
Then the Wreath blocks.
The details Lorna works into the blocks fascinate me -- look at the right side and the under side of the ribbon. 
Must go sand!
The quilts will be similar but I'm customizing them a bit with the color choices but I've also made just one reindeer (for my granddaughter's quilt) and one moose (for my grandson).
With so many pieces, I find it helpful to sort everything before I start to sew.
A set of those alphabet letters to clip to each stack would be helpful but one would have to remember to look for them at my LQS. 
I also keep a ruler next to my sewing machine so I can check measurements -- yep, this one is too short -- grrrrrrrr. 
I like Lorna's instructions -- they include lots of diagrams to illustrate the words.
Aren't these antlers cute? 
Cute, yes.
Wrong, yes.
I puzzled for a couple minutes what was wrong -- pays to look carefully at the diagrams before stitching!
Now they are right! 
Here's the finished block!!
Just too cute!! 
Here are the twelve blocks on the design wall -- some rearranging will happen before the sashing is added and I might need to shop for border fabric but we'll see. 
I still have two more blocks to stitch together and half the sanding is finished.
Wanna bet where I'm headed now?

Mary

P.S. Oh, yes and I cleaned up the work bench in the basement -- well, I had to find all the stuff I needed to start the sanding in the first place??


Thursday, August 24, 2017

Layering a Quilt -- another viewpoint

Layering quilts is not one of my favorite pastimes!
But it's a necessity if one wants to finish quilts, so I try to make it as pleasant as possible.
That means not doing it on the floor!

My approach is based on what I learned from Mary Ellen Hopkins, one of my longtime mentors, thirty-plus years ago.
I use a single table -- size doesn't matter.
When I had the shop, I worked with a larger table but this 2 foot by 4 foot table is light weight and easy for me to handle alone.  It's important that the table have either a scratch proof surface or is one that you don't care about scratching.
I have a couple of these tables, one of which has "expandable" legs that bring the table up to a comfortable standing work height, but a set of "bed lifts" (shown here) will accomplish the same thing. 
"+" marks the spot!
This is the center of the table -- marked here with a sticker -- this first step is always helpful but especially important when working solo.
After pressing the backing, I fold it into quarters with the right side out.
When laying it on the table, I match the center of the backing to the center of the table.
Then I begin to unfold it -- halfway.
And completely open.
Because I folded it with the right side out, it is correct when I unfold it and there is no wrestling with it trying to get it flat and centered.
You can use 1" or larger binder clips (from the office supply) at this point to hold the backing taunt, but my clips don't work on this table.
Don't worry, I'm going to take that into account before pinning -- keep reading.
The batting is also folded into quarters -- you can't see the "dot" I put on the wrong side of the backing fabric, but it's there to guide me in placing the batting.
I'm working with batting off a roll so there aren't any contrary folds to fight.  If you are working with a batting out of a package (how long has it been living in there?) try putting it into the dryer for 5 minutes on a low setting to relax most of the folds out of the batting -- worth the extra time!!
Same process -- unfold the batting into position.
Once the batting is opened up completely, it saves time to check and be sure that the backing and the batting are evenly aligned up on all four sides.  There is nothing more infuriating that discovering the backing is an inch short after you've started pinning!!
Here you can see the dot I put on the batting to help center the quilt top.
When I finish pressing the quilt top, I fold it into quarters with the wrong side out.
Not as pretty, but it is easy to position and simply unfold onto the top of the quilt sandwich!
Once again, take the time to be sure everything is aligned.  
I've learned not to assume the quarter folding process keeps everything as it should be.
And here I am -- all three layers in position -- backing and batting are evenly distributed.
Time to baste?
One more step.  
(It was a challenge to get a good picture of this step so if my explanation isn't clear, say so!!)
In the picture below, I have my left hand pressing down on top of the sandwich at the center of the table.
With my right hand, I'm taking hold of just the backing and giving it a tug.
If there are any pleats, wrinkles, etc. in the backing -- they pull right out.
I work my way along the entire side in approximately 8" intervals and around all four sides of the quilt.
Once you've done this, the weight of the quilt hanging over the edge of that table does a good job of keeping everything smooth.
Now I can baste!
I pin baste using 1" safety pins.
When they aren't working in a quilt, they live in a little tub -- open.
Yes, they get a little tangled up but I find that less aggravating than having to open a couple hundred pins.  
Now I think this is the deal breaker!
Let the table "push" the pin back up to the top -- don't lift the fabric -- and leave all the pins open like this until the entire quilt is pin basted.
You may not realize that in the process of closing a pin, we lift the quilt sandwich slightly.
(Go try it -- I'll wait.)
That lifting can cause a shift in the backing fabric.
And those little shifts can lead to a rumpled backing.
If you wait to close the pins until they are all inserted, you can move the sandwich around as much as you want and the backing isn't going to budge!
Now the fun begins -- pinning.
(Cue the movie or the book on tape, please.)
Once a section is pinned (but no pin closing yet), I pull the hanging part of the quilt up onto the table.
There will be rumples.
Smooth them out and then repeat the backing tugging process before you continue to pin.
Mary Ellen advised pinning a "fist" apart in a grid -- that is about 3" to 4" between pins -- and after 25 years of pin basting, I've found that to be a good guideline.  On a big quilt, that might be 400 pins.  It is a lot of pins but needing them for the next quilt means I'm more inclined to finish the quilting so I can use those pins.
Here's the back of my quilt -- pretty smooth.
Another UFO ready to quilt!
And I'm not crippled up from crawling around on the floor basting or pinning!
So to review, the important points!
1.  Fold the layers for easy unfolding to minimize wrestling.
2. Mark the center of everything for easy alignment.
3. Check alignment before basting!!
4. Tug the backing smooth before basting.
5. Use a 3" to 4" interval for pin basting.
6. Leave the pins open until all are in place -- don't cheat!!

So there you go. 
What do you think?
I hope some of my tips help make your layering process easier.
It's so important to do this step well but it's so tedious that it's easy to go too fast.
Perhaps you'll have time to baste up one of your UFO's this weekend and give it a try!

Almost forgot -- the quilt featured is my first merger of batiks and florals done back near the turn of the century (-; when Karla Alexander's book, Stack A Deck, was first published!!

Mary

Linking up today at WHOOP, WHOOP


Monday, August 21, 2017

Finish #3 for the Quarter!!

Over the past week, I've been steadily quilting this scrappy trip around the world lap robe.
A simple grid of (mostly) straight lines 1/4" on each side of all the seams was just right.
Not much thinking required, no threads to bury!!
I used orange thread (Aurifil 50wt/2ply) to highlight the orange in the plaid of the backing fabric.
I cut it close on the binding, but I made it!! 
My daughter graciously held it up for me on the front porch this morning before she left for work.
Close-up!
And one more shot because Willie showed up for his cameo.
Now I've reached the halfway point on my third quarter Finish-A-Long 2017 list!!

I spent the afternoon checking out the eclipse -- Northeast Ohio was in the 70% zone.  My science teacher daughter secured the correct eye gear and so I stayed outside most of the afternoon checking the status every 15 minutes and creating this page in my Haiku journal.
Apparently, I have no memories of past eclipses even though folks tell me I have experienced them.
Probably wasn't impressed because there were no birds involved?
The birds and animals didn't seem effected by the event.
This female/immature ruby-throated hummingbird spent 5 minutes scouring every flower in the patio pots for nectar.
I also added another species to the list of neighborhood animals that eat from Willie's outside dinner bowl -- a little short-tailed shrew -- lives under the back steps and darts out and grabs bits of dry food from the dish!?!

Several readers asked so I'm working on a post for Friday showing how I layer my quilts on a single table without a helper.  

Hope the week is off to a good start!!

Mary

9/26/2017 -- linking up to the 3rd quarter 2017 Finish A Long!!


Monday, August 14, 2017

NNP August?

NNP stands for NO NEW PROJECTS!!
I am trying to have pass through the month of August without beginning any new quilting projects!
There is so much temptation out there but I'm determined!!
Don't worry, I won't be bored -- there is plenty in production already.
While I do have a little trouble staying with a project when it is no longer challenging, I should be okay.

The straight line quilting I'm doing on this piece is only interesting for about 5 lines and then I'm ready to do something else!
I'm pleased with the results -- stitching 1/4" on each side of all the seams.
To hold some focus, I'm trying to work on improving the consistency of my stitch length and eliminate "jiggles" at my start/stops.
Theory is if I improve in those two areas on this quilt, it will translate to the next one?!?
I'm not going to start the ZenChic Triangle QAL via the Bernina blog even though I've pulled such a great stack of fabric to go with the little bundle I bought last week of Down by The River by Lewis and Irene.
Found the fabric at www.fabricworm.com!
It's quietly sitting in a chair in the studio waiting for September 1.
The first step is simple work so catching up should not be a problem.
I really should sew up this blouse -- all cut out and wouldn't take an afternoon!!
I finished three more dodecagons while visiting my youngest daughter and her family last week!
Only 5 more to go, fabric combos all picked out, just need to cut!!
Monday morning when I stumbled across the #100days100hexies2017 on Instagram (the enabler is @sewfoxymama), I did not start a new project -- I decided to use it as an excuse to prep lots of black hexies for bordering my dodecagons!
I will be overachieving though and do 10 a day (cause I need a lot).
Every evening, I'm putting about an hour's worth of stitching into the quilting of a previous hexie masterpiece, Karen's Value Proposition FAL from 2015 (or was it 2014?). 
And I won't do more than one of these blocks a day . . . . aren't they fabulous??
It's @lorena_in_syd's fabulous design, Opal Essence!!
Well, I needed something up on the design wall -- can't just stare at a blank wall?!?
I only have to be strong for 16 more days!!
Back to the quilting!
Mary