Tuesday, June 28, 2016

Fun Without Focus

As I've mentioned before, I'm easily distracted and it seems to be more prevalent during summer.
This weekend, I started quilting my wonderful bird quilt made with blocks from the creative member of the 2015 Stash Bee Hive #7.
I'm keeping it simple with wavy meandering parallel vertical lines.  I had hoped to be ready to bind by today, but . . . . . .
the milkweed outside the window at the quilting machine came into bloom.
That means butterflies!!  This fritillary was not easy to photograph.
But the yellow swallowtail was very accommodating.
I bounced back and forth between the machine quilting and organizing a border for the heart quilt to be donated to the Orlando MQG.  Have you checked out the #quiltsforpulse hashtag on Instagram yet?  Over 2000 posts and some very creative inspiring ideas!!
The top is set together and I've been piecing together a "piano-key" border.  Since I am using up scraps, I cut 6" strip rather than make long strip sets.  I laid out my stacks strips in an "opposites attract" order rather than a rainbow order.
The strips are random widths and a bit longer than needed to allow for trimming.
I like the way it's coming -- there will be a scrappy border of background fabric before the pieced border and I think some hearts in the corners for a simpler transition.
(Check out those Hexathon blocks in waiting down the left side of the design wall!!)
Then this arrived in my in-box -- I was part of Nicole's test group for her new pattern!!
Wicked Weaver!
Everything else stopped.  Since I had so much going on, I took the simple road with the fabric pull and used the texture from this Kaffe print for the body of a common garden spider.
I didn't take any progress pics but can report that I am pleased with the results.  This is the smallest of the three sizes included in the pattern.  I was impressed with the detail and accuracy of the design. 
Look at how those legs align?!?   
Check out the #wickedweaverpattern hashtag on Instagram -- you can do that from HERE on your computer!
I hadn't done paper piecing for quite a long time -- was delighted to find all my tools for it in the right place and to recall the "how-to's" from the past.  Want the pattern for yourself? 
Just go HERE!!  It's fun.
 
Back to the birds and the hearts!
 
Mary Huey


Thursday, June 23, 2016

Not Much Stitching . . . . .

Between taking a day off to wander around with a bunch of botany nerds in search of the Eastern prairie fringed orchid on Wednesday . . .
. . . and packing the car on Thursday to move all this stuff to the group yard sale . . .
I haven't done much stitching the past few days. 

Meandering through wild areas, off-trail in search of this lovely wild orchid was like being 12 years old again and exploring the over grown fields around my childhood home.  I feel like I'm with my tribe when I hang out with folks that enjoy all the nuances of exploring wild places!
The orchids are scarce and we were distracted by anything interesting like frogs -- but not just any frog -- Leopard frogs!!  They seem rare these days compared to my youth.  But not in the swamp forest at Maumee Bay State Park in Northwest Ohio -- we counted over 120 as we searched along the boardwalk near the Nature Center for more orchids. 
I could catch one of these with my bare hands when I was 10!!
It hasn't been seriously hot here (yet) but it's quite dry (we need rain!!) -- but it's perfect weather for dragonflies which accompanied us every where we wandered -- I would estimate close to a dozen species and hundreds of individuals.  A first for me in my sixty years of exploring.
I think they are lovely but can't identify any of them without a book or a friend.
The thinning out of my fabric stash and the painting of the studio are complete!!  I like the transformation in my studio.  There are even empty spaces on the shelves?!?
Expecting to have stitching time,  I've packed a knitting project
and an applique project that reappeared during the stash clean-up for the slow moments.
I'm looking forward to a couple leisurely days plopped in a lawn chair with my stitching and friends!
Hope your weekend is a good one!!

Mary Huey


Monday, June 20, 2016

My Morris Hexathon is Moving Along

Today I'm sharing another update on my Morris Hexathon progress.  In the last post on this topic (HERE), I confessed to being "math" challenged (which is different than being geometry challenged which I'm not by the way).  I shared my frustration with Barbara via a comment and she responded with a clearer explanation and a complete post a week ago.  It's HERE.  Even if you aren't doing the Hexathon, you should check out her post -- it's amusing and filled with charming photos. 

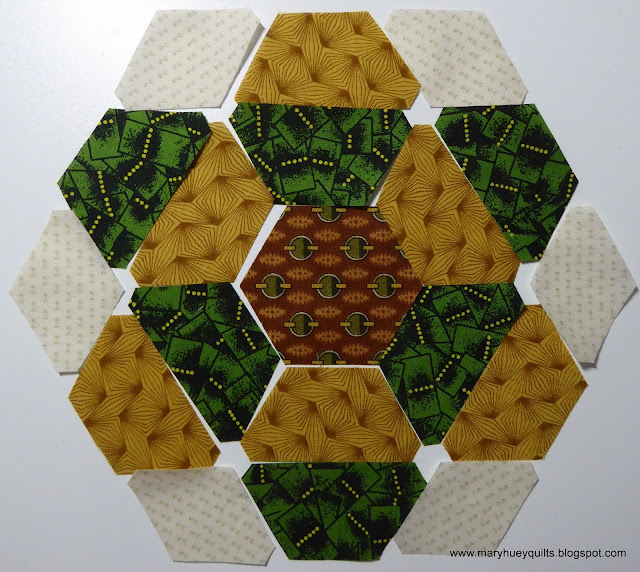
As promised, the blocks have become a bit more complex with more pieces.  I had the good sense to save the templates I made for the second block -- the half diamond was the only shaped needed for the sixth block, the South Kensington Star. 
The machine piecing process began with piecing the half diamonds of two fabrics together to make the split diamonds.
I pressed the center seam open to make managing the bulk easier.
If you follow me regularly, you recall that I make three units at this point rather than two halves.  You can read that complete post HERE.
 
For those who have adopted the Set-In Piecing Simplified technique from my DVD or workshops, remember as you add the third piece, the most important match point is where the three seams of the y-intersection meet, not the outer ends of the piece.
And here is the finished star!!  I like this block a lot!!  Feeling pretty cocky about that center, too!!
The seventh block is called Avebury Stones.  Barbara included some of the history of this English landmark in her post with the pattern as well as examples of the blocks from several historic collections.  Be sure to check out the photos of the exquisite English Hexagon medallion recently sold at auction -- an inspiring masterpiece that used many of this block.
Happily, this block used three templates from Set G -- #46, #47, and #48!
Inspired by all the photos in Barbara's post, I auditioned a couple different layouts -- top half or bottom half?
Or how about this?  This block has lots of options much like the Rose Star blocks so it would be fun to make a quilt full of them!
I choose a layout that made the green shine.  The only y-seams are used to piece the center hexagon unit.  After that, it's all straight seams!
One does need to study the pressing as you assemble the block to maintain opposing seams.
And here's the finished block!
Still caught up!!  That is such a good feeling isn't it?
 
I've finished my stash cull -- 25% thinner for sure.  If you live in Northeast Ohio, I'll be participating in a group yard sale on Friday (6/24) and Saturday (6/25) to sell the 500 plus yards I'm parting with!?!  The address is 4578 River St., Willoughby, 44094.
I've also thinned out my library and have about 50 quilting books.
  Fabric will be $4 a yard for pieces 1 yard or over and $3 a yard for smaller pieces.  I'll be measuring the smaller pieces by the pound (1 pound equals about 3 yards) to keep it simple.  If you liked to shop in my store, you enjoy shopping from my stash, too! 
I'll bring along Marti's templates and my DVD and patterns, too.
So maybe I'll see you!!
 
Hope your week is off to a pleasant start!
 
Mary Huey


Friday, June 17, 2016

Hearts for Pulse

It was at least 15 years ago that I joined a group at the local community college to work through The Artist's Way by Julia Cameron about "unblocking creativity" that I first encountered the idea of not paying attention to "breaking news".  One of the chapters in the book urged us to go one week without reading or listening to the news.  It was a challenge at first but gradually it has become a habit for me.
 
I've discovered I feel calmer without the constant negative pounding of minor "news" and when there is really important news, it always comes to my attention.  So I wasn't the first to know about the massacre in Orlando this past weekend, but I knew about it by Monday morning via Instagram and a friend who shared the initiative of the Orlando Modern Quilt Guild.
 
Perhaps you are also aware of this initiative by now.  The guild is gathering quilts filled with hearts to comfort those who have been impacted by this tragedy.
My first eight were on the design wall Tuesday morning.
As I stitched, I thought of my long time teaching mentor, Mary Ellen Hopkins.  She introduced me and dozens of other teachers to this "stitch and flip" technique which she dubbed "connector corners" as a way to create snowball blocks.  Over the years, this idea has filtered out through the quilting world and most are no longer aware of it's origins.
 
Mary Ellen was so excited by the concept that it resulted in five books published between 1990 and 2000.  She would be so into this project!!
There are the first heart blocks, on page 41 of Connecting Up.  These original hearts have a diagonal orientation but they used those stitch and flip squares to create a rounded look.
I started in my scrap bag looking for mono-color prints in a rainbow of cheerful colors.
Construction of the blocks lends itself to chain piecing and once I've finished digging around for the fabric, I can cut and piece a half dozen in an hour.
The tutorial at cluckclucksew.com includes a chart of sizes from 4" to 10" so I made the largest heart I could from each scrap.
Once I had depleted the usable scraps, I turned to the stash and focused on the largest size hearts.
I had hoped to be farther this morning than a first layout draft but stuff happens (as you know).
One modification I made was to cut large triangles using my Marti Michell Multi-size Half-Square Triangle Ruler -- stretches small bits of background fabric and eliminates new scraps for the bag!!
Before I left the studio last evening, I did clump together the six smallest hearts which I will merge into three blocks. 
I pulled all the medium size hearts and will frame those with background strips so all the blocks are the same size.  The background fabrics are pulled and I spritzed them and left them hanging over the ironing board to shed wrinkles so the start-up ironing today will go more quickly!
 I did the math so that I don't have to think at the beginning of today's studio session -- just iron, cut, and start stitching!
I love that I can be part of this project even though I live 1045 miles away!
I love how quickly the quilting community has supported this project.  The Orlando Modern Quilt Guild initiated the first Instagram post on Monday and as of this moment (4 days later), there are 678 posts with the #quiltsforpulse hashtag. 
 
Not on Instagram? -- HERE is a link to the guild's blog and the information about the project or go to their FACEBOOK page to see this project come together day by day.
They are accepting blocks, quilt tops, and finished quilts so all of us that wish can easily participate.  Just another example of the good things we do with our stitching every chance we get!!
 
Bravo, quilters!!
 
Mary Huey


Monday, June 13, 2016

Hexie Pillow Finish!

Do you wander around Instagram? 
I do because it is loaded with inspiration. 
Last week while making that cute Jelly Clip purse for an upcoming workshop sample, an idea drifted into my head for another EPP project sample using a slightly larger hexagon (1 1/4").

My head is currently swimming with dozens of images from Australian quiltmakers whose fabric style I've dubbed "Aussie Bohemian" -- it's fresh and exciting to me.  One thing I've learned in the past 40 years of quilt making is learning to work in a new fabric style takes practice so I'm experimenting with fabric I already own in hopes that I'll absorb some of the essence of this style's spontaneity and whimsy.  Once I accomplish that, my fabric shopping will shift to build up more flexibility.  I learn more via that "trial and error" route than I do buying kits with all the "right" fabrics.

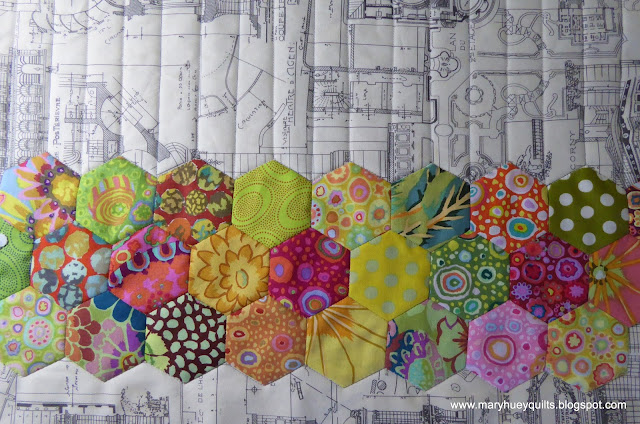
A stack of Kaffe Fassett charms provided a quick starting point and I spent an afternoon cutting and basting my hexagons.  I did all my calculation for 1" hexagons and . . . . . 
then used 1 1/4" papers.
That's what happens when I get too excited. 
So too many hexies, but in the end it was fine as I had more flexibility in my design.   
I pulled out most of the cool color pieces -- another project?
My goals were not to exert too much control over the fabric arrangement (there is that mostly yellow hexie flower near the middle) and to use an edgy (for me) background fabric. 
It was fun to realize how many background options I owned!
In the end, I settled on this soft graphic print.
Once the band of hexies was appliqued in place, I spent a hot and happy afternoon with this box of silk embroidery threads my mother brought to me many years ago quilting the hexies.
Some of the thread choices contrast with the fabric and some blend into them.
I planned to machine quilt the background with simple straight lines and in preparing to do that realized that my band has gone slightly askew during the applique process. 
 It wasn't perfectly aligned with the "grain of the print". 
 Arrrgh?!? 
So doing straight lines on both sides wasn't going to work because the background fabric "insisted" on straight aligned stitching!!
It took a few hours but I finally realized that using zigzag lines to echo the opposite edge of the band would camouflaged it perfectly.  Once again, a mistake leads to a creative solution and a discovery!!
The finished product is a neck roll pillow and by extreme good luck, I was able to create a band that would connect continuously around the pillow. 
This isn't really a tutorial, more of a recounting of what I did -- it took a couple days to think through things and come up with a way to achieve it.  There was quite a bit of measuring and testing as I proceeded.

The fuchsia/orange and the upper half of the green hexagons are not appliqued in place yet.  After quilting, I trimmed the background, batting, and backing to allow a 1/2" seam allowance as seen here.  More seam than usual just in case it's needed!
The top edge (in this picture) of the center green hexagon will join to the other end of the band right on top of the seam needed to create the tube for the pillow, so I stair-stepped the hexagons at both ends because I "felt" it would be easier to merge them after the background was seamed.
I also trimmed the batting out of the seam and used fusible batting tape to attach it to the backing fabric so the seam would be less bulky.  This is a great idea from Marti Michell who sells the tape in 1" and 2" widths.  I explained how I use it in THIS TUTORIAL.
I was nervous about stitching that seam in the backing so I machine basted it first.  All my fussing paid off, the hexies aligned perfectly!  Now to applique everything in place and hand quilt the remaining hexies at the joining seam.
I lifted my sewing machine up to access the free arm easily and machine quilted around the tube with  lines echoing the edge of the hexie band.
Right side.
Wrong side.
I used my tutorial from last spring on making a neck roll pillow -- boy, am I glad that I wrote that out, it came in handy!!  It's HERE.  And what fun to find a twill tape tie from a fabric bundle in my ribbon stash -- the colors and the twill tape are perfect!
It's hard to send it off to the shop, but it will only be gone for six weeks.
And those left over hexies won't go to waste!  How about this?
Or maybe this? 
So what is the next thing I'm going to do? 
Why order a fat eighth assortment of new Kaffe Fassett fabrics that SHABBY QUILTS brought to my attention in an e-mail this morning!!

And then I better layer up a quilt and quit procrastinating all the FMQ staring me in the face!

Have a good week!

Mary Huey

P.S.  The Orlando Modern Quilt Guild has put out a call for help making heart blocks and quilts to cover survivors and victims' families of the massacre on Sunday.  If you are so inclined, follow this link to the blogpost with information and a link to a simple pieced block.


I documented how I finished this style of pillow last spring while making gifts for my grandchildren -- click HERE to revisit it!