Showing posts with label Morris Hexathon. Show all posts

Tuesday, March 21, 2017

Ahhhhhhhhhhhhhhhhhhhhhhhh

The seasons changed today -- spring is in the air here Northeast Ohio -- yeaaa!!
I've spent the last few hours organizing a new page for the blog!!
And I was playing around with the layout, too.
So if things look a bit different today, it's because my "tech" skills aren't quite up to my piecing skills.
(I'll be e-mailing my tech advisor right after this -- HELP!!!)

But now I'm too tired to write much of anything?!?

The new page -- (see the new tab up top?) -- is a collection of all my posts from last year as I followed Barbara Brackman's Morris Hexathon.  As I taught my Studying the Stars workshop this weekend, I realized it would be great for my students to have easy access to those posts to help them as they continue to work with 6-pointed stars and related hexagonal blocks.
And now that's done!!
I'm also adding the two-day
workshop to my teaching page -- if your guild or shop is looking for an intensive machine piecing introduction to 6-pointed stars, I'd love to talk with you! 

And since I had the blocks out for the setting experiments part of the workshop, I made a few new ones and will continue to add more blocks until I have enough to do a lap size quilt!
Just needed a break, I guess?!
I should make "keeping the studio in a state of chaos" to my list of goals because I started the Long Time Gone SAL based on Jen Kingwell's BOM Sunday evening!?! 
It's only one block a week???
Marti is blogging instructions to use her templates as part of the three blogger SAL. 
You can check her first post out HERE just in case you need another project???
I'm going to use my stash of "text prints" and scrappy brights!
If you aren't a Marti template enthusiast, there are two other bloggers posting alternative instructions and you can access them from Marti's first post.

I also went "duck hunting" for a couple hours earlier today so I can blame some of my tiredness on all that cold fresh air!  I'm up to 15 duck species seen so far this year -- still a few to go for a complete list of all the usual suspects!!

Look for signs of spring!!
Mary


Tuesday, January 24, 2017

Abort Mission, Abort

Sometimes I just can't engage with a project.
This set of blocks is from the Morris Hexathon that Barbara Brackman hosted on her blog this past fall.  I chose to use scrappy Civil War reproduction fabrics and my plan was to have the blocks assembled into an interesting setting before my two day Studying the Stars workshop in mid-March.
Once the blocks were spread out on the design wall, I sorted them into two groups -- warmer and cooler color palettes because I've found that I can balance the arrangement of a group of scrappy blocks more effectively this way.
Then I began to arrange and document various settings -- most inspired by work of other piecers, current and historical.
The pictures help me evaluate for balance and visual impact more easily that looking at them on the design wall -- a photo has more perspective.
The arrangement below was inspired by a quilt of simple 6-pointed stars with hexagons for the background pieces.  Reversing the idea and making the stars the "background" is my thought here.
It morphed into a circular arrangement which I like.  It needs one more piece block along the lower edge.
So I auditioned some fabrics for possible use as the "background" stars.
I eliminated the red and green because it pulled my eye away from the blocks and the blue was too dark -- the beiges washed out the blocks too much for me.
 The winners of the elimination process were the browns.
Then a piece of paper with photographs of two antique quilts caught my eye in a stack of papers and I was off on another tangent.  I have a little stash of large exotic prints that I can see as a central motif surrounded by the hexagons and perhaps use the brown diamonds for another frame?
In the end, I decided I'm not ready to assemble these blocks into a top quite yet.
First, I need more blocks for greater flexibility.
Second, I need to eliminate the blocks I don't like.
Third, I might need to bring in a Civil War fabric expert for brainstorming.
 
So the mission to finish this quilt during the first quarter 2017 Finish Along is being aborted.
I've written down some thoughts, reactions, and ideas to remember what isn't working for me.
  The blocks have come down off the wall.
The patterns collected during the Hexathon and the box of reproduction fabric is back out. 
 I'll eliminate three or four of the blocks and make six to nine new ones. 
My creative subconscious will be working on this challenge in the background and when I come back to it, the solutions will be easier.
 In the meantime, the blocks will come along with me to the March workshop and serve as a settings demonstration for student experimentation.
 
It may seem like not much was accomplished during this experimentation process but it has helped me sort out my ideas and make some good decisions that will result in a finished quilt in the future!
Writing down my reactions is important as it will save me time when I come back to this project and enable me to start back to work on it more easily. 
 
When something isn't working, it's better to pinpoint the problems and step away for a while!!
 
Stepping away is not failure!
Mary


Friday, November 4, 2016

Last Hexathon Blocks!!

Stack o'blocks anyone?
Here they are
-- 23 finished Morris Hexathon blocks --
3" on the outside edge, all machine-pieced ala Set-In Piecing Simplified!! 
Thank you once again, Mary O'Keefe for sharing your y-seam piecing idea with me!!
Barbara Brackman released block #26 this past Saturday and I also had #25 left to make. So one evening this week, I retreated to the studio for some stitching time.  I could only find one usable Marti Michell template for each of them -- the 3/4" hexagon from Set N and the 1" hexagon from Set G.
I applied strip piecing to #25, Sussex Cottage and I decided to paper piece the six sections needed for #26, Clouds.  I made a second copy of that pattern, cut out the six segments and began to prepare myself mentally for an evening of paper piecing (ugh!).
My brain froze up as I peered down into this hoard of 19th century reproduction prints and felt uncertain about picking two more scrappy fabric combinations.
Spreading out all the blocks was the key -- it just took one glance to see that I needed more pink or that pink one would become a focal point of the finished quilt.  And perhaps another brown block.
This should balance it out a bit!
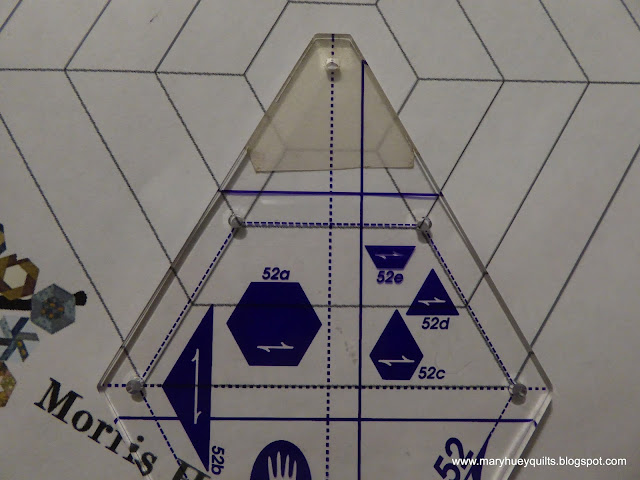
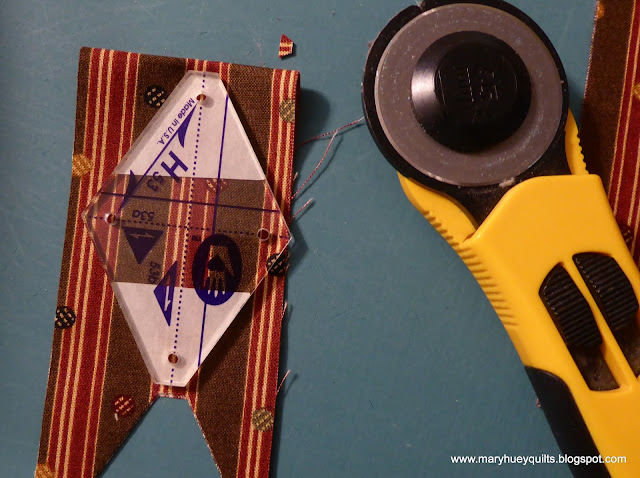
I cut the three strips for #25 a wee bit wider than the measurement hoping to offset the shrinkage of stitching and pressing in the finished width of the set.  My strips were 1 1/8" + by 22" long.  After stitching the strips together, I pressed the seams in the same direction.  I planned to use my small 60 degree triangle ruler to cut the segments but H52 aligned almost perfectly with the pattern and was easier to use. Lining up the horizontal dashed line across the center of the template with the edge of the pattern page was the key. 
All six segments were quickly cut -- if you strip piece this segment, be sure to explore the impact that has on the design.  If you want the same fabric in each round rather than the alternating layout I have, you'll need to make a longer strip set and you'll have enough segments for two different blocks.
I compared the edge of the center hexagon (cut with N78) and determined I needed a little trim.
Just a sliver off each one and it was a perfect fit!! 
The seams in each segment are aligned just right for easy matching and the block went together quickly thanks to Set-In Piecing Simplified!
Here's the back so you can see the pressing up close.  Look at those perfect little tumbling blocks around the central hexagon!!
And the finished block!!
As I was digging through my stash of reproduction fabrics, this one caught my eye for the center hexagon on #26.  
My fussy cutting eye is getting better -- practice does pay off!  (A set of auditioning mirrors helps.)
Isn't this fun??
I precut all the pieces to the shapes needed for the paper pieced segments -- about 1/4" larger than the actual cutting measurements.  I used the template just for the correct angle, not the size.
For the parallelograms which are "rights and lefts", I cut two strips 18" long and layered them right sides together so cutting yielded a set for each segment. 
As I laid out all the pieces and sat down at my machine, it occurred to me I might not need to paper-piece!!  Those brown pieces are actually half hexagons that were rejects from a previous block!!
Because the tip of an 60 degree triangle is the same size no matter how large the triangle, could I piece the segments and then trim them down to the right size? 
It was worth experimenting so I pieced and pressed one segment.
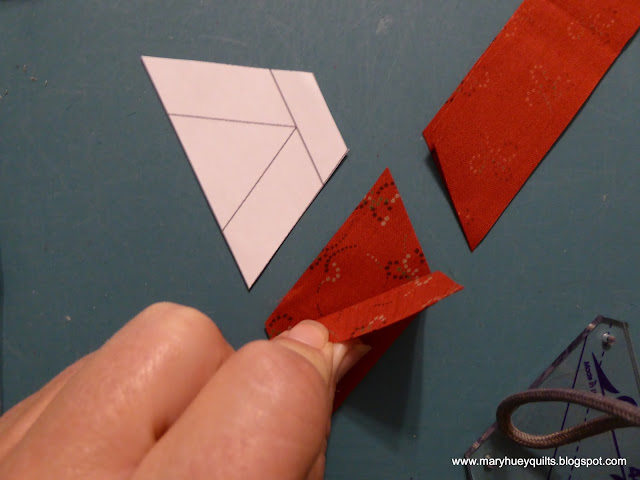
I lined up the paper pattern matching the interior lines of it to my seams.
By lining up the 1/4" line of a ruler with the edge of the paper pattern, I was able to trim the unit to the perfect size.
Yes, it worked!!!
So cool!!  I'm feeling awesome and the block was together in no time.  Here's the backside.
And a finished block (though it's not very brown)!?!
Next step is to decide if 23 blocks are enough for something (there are actually 26 blocks in the set, but I wimped out on 3 of them) and start to contemplate a setting plan.  I'd like this set of blocks to move forward as a WIP rather than becoming a UFO!!

This weekend is a busy one here, but I'm hoping to spend all the free moments stitching!!
How about you?

Mary


Tuesday, October 18, 2016

Running out of steam -- Morris Hexathon

There are only two blocks left to go in Barbara Brackman's Morris Hexathon and I'm now three blocks behind.  But I have an excellent reason?!
I can't cut any of the pieces for them with my templates.  )-:
And two of the three involve applique -- I can do it, I'm just not confident enough about it to work in such a small scale and I'm hesitant to get involved with the extra seams at some of the intersections .
If I decide I need a full 26 blocks, I may just make a couple duplicates of my favorite blocks or find some interesting variations.
 
I did make #22 Hyde Park -- H53 and N78 work together for this one!
I used N73c to measure the width of the strip for the small diamonds and then referred back to an earlier post (HERE) to refresh my mind on how to cut small diamonds with this template -- so glad I shared that idea with you so it doesn't get lost.  The sixth picture down from the top in that post was the one I needed.
This is the backside of N78 and you'll notice that I don't take off all the paper when I start using a template -- it's a great anti-skid surface!!  I needed a half hexagon and added my own line to the paper to cut those.
H53 has a dashed line down the center and I used it to line up my template on this stripe for the large diamonds.  I folded the strip in half wrong sides together -- it's an uneven stripe and doing this enables me to create crisp, clean chevrons at the center of the star as you'll see in the following pictures.
Making the three piece units for the outer edge of the block is just like piecing tumbling block units!  Start at the outside edges, stitch to the center dot, and pivot out. 
Here are the outer edge units ready to insert in the three star segments.  I always make 6-pointed stars this way -- the results are so much better for me than making two half-stars. 
You can read my explanation of how I do it HERE in a post from my Diamond Star Playtime series. 
Here are the three completed segments ready to set together into the star. 
The star is ready for the final three outer units. 
And here it is, Hyde Park star.  I like this block and intend to use it in a larger size for a future quilt. 
At this point, it often takes me longer to pick out the fabric than it does to piece the block using the set-in simplified technique featured on my DVD.  It's now been just over four years since Mary O'Keefe shared her idea with me in a set-in piecing workshop and what a blessing it has been to my piecing!!
 
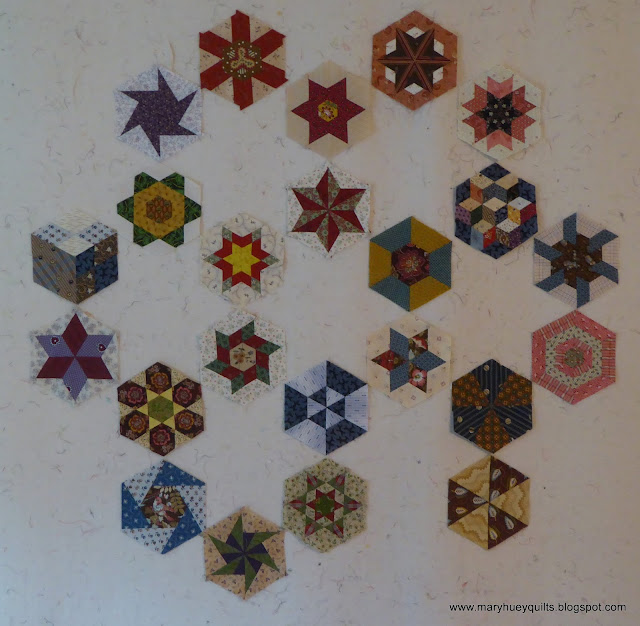
Here are my twenty-one finished blocks in no particular order.
What do you think?
I really like all the stars, not so crazy about some of the simpler blocks -- they look clunky but Barbara doesn't intend for them to sit edge to edge like this.
At the very least, they will make a great teaching tool during my expanded workshop this winter!
 
Keep on piecing!!
 
Mary


Tuesday, September 27, 2016

Morris Hexathon Blocks -- #20 and #21

With only 5 more blocks to go for Barbara Brackman's Morris Hexathon, I'm only one block behind.  This weekend, I pieced #20, Walthamstow named after the village where William Morris grew up.
It's an easy block to machine piece but none of my templates were the right sizes, so I fiddled my way through the cutting process which is why the outer triangles look too big in the photo below.  It would probably have been easier to make templates!!  If you do this block, watch the cutting of the triangles -- you don't want some to be reversed.  Cut a single layer and keep both fabrics right sides up!!
The other block I finished is #21, Queen Square named for his early home and workshop in London.
I was able to use Templates G48 and G49 to cut all the pieces needed.
It's so helpful to trim the tips of the 60 degree corners of the triangles for #20!  Use Marti Michell's Deluxe Corner Trimmer if you don't have any of her 60 degree templates.
The trim takes all the guess work out of matching the triangle to the center hexagon. 
The first seam on this block should be a partial seam -- stopping about half way along the seam. 
The remaining seams can then be stitched completely from raw edge to raw edge. 
Once all the triangles are stitched in place, the first seam can be finished. 
And here is my finished block (after trimming)! 
There are probably several ways to break down block #21 for construction.  It's always a good idea to lay out the units before you begin to stitch!
Since I was using 3 different pinks and wanted the pairs of diamonds to be touching, I had to lay out each step and be sure I was stitching the right arrangements together.  Had I stitched the pieces together the way I laid them out above, it would have been wrong. 
Once the four piece units were assembled, I constructed three units as below -- it was much like piecing a tumbling block unit if you use the Set-In Piecing Simplified technique. 
Haven't learned this amazing technique for y-seams yet?
You can order my DVD HERE for only $15.95 which includes shipping!
As in any six-pointed hexagonal block, pressing each unit identically gives the best results. 
This is the result of going too fast and not checking before I stitched . . . .
 "you know what to do, Mary"!
 
 Don't press once the three units are together as the final diamonds will be easier to insert. 
And here's the final result!  Pretty block!  I fussy cut the six center diamonds with lovely results from a small busy all-over floral thanks to all the inspiration I get on Instagram watching the Aussie EPP stitchers I follow create awesome blocks! 
It's a quilty week here in Northeast Ohio. 
 
The National Parks 100th Anniversary Quilt touring exhibit continues on display through October 5, 2016 at Lake Metroparks Farmpark in Kirtland, Ohio.  I haven't been yet, but friends who have are enjoying it!
 
The Streetsboro Quilt Guild's 31st Annual Show will be this weekend -- Friday, September 30 and October 1 -- click HERE for complete information!
 
Also on Friday and Saturday, the Tree City Quilters of Wooster, Ohio is hosting their biennial guild show and you can get updates about it on their Facebook page HERE.  I'll be at this show helping Denise from Mercantile On Main (Coshocton, Ohio) in her booth -- actually, we'll just be laughing a lot -- so stop by and say hello!
 
Mary