Friday, January 29, 2016

Workshop Teaser -- Jen Kingwell's Glitter

As soon as I saw Jen Kingwell's book, Quilt Lovely, I recognized that this delightful block which she has named Glitter would be a perfect workshop project using the y-seam technique that I teach.  Participants need to have already taken a basic workshop on the technique with me or used my DVD, Set-In Piecing Simplified to learn it.

I started out with this little group of 4 blocks and have been adding to them all summer and fall -- what fun it is to pick out the fabrics!  Each block is it's own little quilt-let!
One of the skills that is part of the workshop is learning to make templates and set them up for easy, accurate cutting and matching! 
I decided to make a lap size quilt -- there are 66 blocks.  I have not seen anyone put borders on this quilt but I auditioned it just to be sure and decided not to add them.
Last weekend I layered it up with Tuscany Wool batting -- love the loft of that batting -- and began to quilt.  I wanted to keep the quilting simple -- easy for me to complete and easy for my students to duplicate if they want.
My first idea was straight line channels from top to bottom.
As it lay on my work table, the long ovalish shape where the blocks come together caught my eye and I decided to emphasize that with the quilting.
After laying down a grid of horizontal and vertical lines, I used my favorite pumpkin seed motif to create a flower that fits gracefully into the oval.  The best part of this quilting design on this quilt was that every line started at an edge and ended at an edge -- no threads to bury!!
This weekend, I'll bind the quilt at my annual January quilting retreat and then send it off to the Farmpark to hang with the other workshop samples! 
There are open spaces in the workshop and you can register by visiting the Lake Metroparks website HERE.  You already have plenty of fabric so all you'll need to purchase is Jen's book, Quilt Lovely.

Don't live in near me?  My DVD, Set-In Piecing Simplified, will take you step-by-step through the process of learning this exciting method of y-seam piecing.  Just last week, Michele in Kentucky wrote this note to me after purchasing the DVD -- "Thank you, thank you, thank you.  I had a chance to watch your DVD today and used your technique to finish a quilt that was headed to the trash.  I think it has been in a box for at least 3 years.  The instructions left a lot to be desired and I was struggling with all of the y seams.  After watching the DVD, I wanted to practice on something right away.  I pulled this quilt out, followed what you did and everything fit together and the top is now done and ready to be quilted.  The DVDs was fantastic and I'm so glad I ordered it."

It's exciting to know not only was Michele able to understand the technique from the DVD, but she was able to rescue a doomed UFQ!! 

I hope you are able to do as much stitching this weekend as you want!!

Mary Huey


Tuesday, January 26, 2016

Workshop Teaser -- Dresden Stars

It took about 2 minutes for me to get excited about the possibilities of cutting this block with Marti's templates and piecing it using the y-seam technique I teach.

It will be one of my workshops during the Lake Metroparks Farmpark Quilt Show which opens on February 12, 2016.  This workshop will be Saturday, February 20 from 9:30 a.m. to 4:30 p.m.  If you live in Northeast Ohio or Northwest Pennsylvania and would like to join me that day,

My first sample is a single block that is centered in a big (silly) six-pointed star.  One of the topics we'll be discussing during the workshop is figuring out a setting for this block so I am currently working on a larger sample with seven full stars and four half stars.

As good fortune would have it, I won a sampler packet of Moda's Good Karma fabric line by Stephanie Ryan (love that Instagram!!) a month ago so I had this up-to-date group at hand!!  It came as a bundle of 10" squares.
After pressing all the pieces and gazing at them for a bit, I started to sort and shuffle the pieces into possible pairs.
It didn't take long to cut all the pieces I needed.
And with the chain-piecing approach to y-seams, I soon had little piles of diamonds ready to set together into the stars.
There was a pleasant evening spent picking out motifs and creating the center hexagons by basting them EPP style for applique to the finished blocks.
The blocks are now on my work wall being moved around and shifted this way and that while I work up a setting for a small quilt.   
It will be a bright quilt for sure!!

I think the blocks would also look great in 1930's reproductions -- I wonder if the quilt Karen showed me was from that era?  It's a perfect scrap quilt for sure!

Once I get all the kinks out of the instructions, I'll offer a pattern for all you Michell template lovers!!
Now I need to get back to the studio and play with this layout some more.

Think about joining the workshop!!

Mary Huey


Friday, January 22, 2016

A Flexible Border Quilting Design to Draft

Earlier this week, I shared my finish of the English mosaic hexagon quilt and said I would share the border design I drafted.  I wanted to get it all documented for myself because it is a flexible design that can be adapted to lots of border sizes.  This is my original draft.
This morning I sat down with my 11 by 17 pad of graph paper and my colored marker set to do that and I'm taking you along with a series of step-by-step instructions. 
My pencil lines represent the border width -- from the seam where it joins to the quilt top to where the binding attachment seam will be (if all goes as planned).  The first step is to divide the length of the border less the corners into an even number of segments -- for example 10, 12, 14, etc.  An odd number of segments makes turning the corners with a consistent motif impossible.  The actual length of these segments doesn't matter.
Here you can see yellow dots dividing the length of the border into an even number of segments and pinpointing the center of the design area as well.  I put my dots (using a chalk pencil) 5/8" (approx. 1.5 cm) from the seam line and the outer dots 7/8" (approx. 2.5 cm) from the raw edge of the border.  The third (center) row of dots is midway between the first two rows of dots. 
This is all the marking that needs to be done!!  Now you are ready to quilt!
I work on a stationary long-arm machine (the APQS George) and use a plexiglass straight edge (from www.accentsindesign.com) with my edge following presser foot to stitch straight lines.

The complete design takes 10 individual lines of stitching and I go all the way around the quilt with each line but you could chose to stop at the corners, tie off and do the next line, etc. until you have one side finished.   I'm going to go through all 10 border lines and then at the end I'll show you the corner but I stitched continuously through the corners on my quilt.

The first line is represented by the green dashes.  It begins at the midpoint dot just before a corner (see the last photo).  I set my straight edge tool 1/4" (more or less) to one side of the dots and line up across the middle of the design area connecting to the dot on the opposite side of the border. 
Stopping in the dot at the end with the needle down, I pivot and align the straight edge to the opposite edge of the border.
Once that line is completed and tied off, I add the second line.  As these first two lines cross at the center, they create the diamonds that are the basis of the design.  The size of the diamonds will vary from quilt to quilt but they will always be evenly proportioned.
The third and fourth lines echo the outer edges of the diamonds to define them.  I used the edge of my presser foot to measure the space between them -- it's a bit more than 1/4" but the consistency is more important than the measurement and I can maintain that easier by using the edge of the presser foot.
You may have a different strategy but that doesn't matter as long as the spacing between the lines is consistent.
The fifth and sixth lines are straight lines that touch the tips of the diamond echo lines and are (hopefully) an even distance from the seam line of the border and from where the seam line of the binding will be when you finish the quilt.  If you do a test of this design, you may find that you need to move the dots in the first step towards the center a bit to make a personal adjustment for your tools and presser foot. 
Once these six lines are stitched, you could actually do anything you wanted in the diamond and triangle spaces.  As I'm looking at this picture, I'm thinking it would be fun to stitch assorted tiny buttons where each of the center dots are in the diamonds!!
I used the pumpkin seed motif to fill in my diamonds and triangles.  I am confident about stitching "arcs" so it's enjoyable.  It took four lines to complete the pattern.  I hope the lines and little arrows show you the path I follow clearly.
These lines can be done in any order.
The size of the diamonds determines the scale of the pumpkin seed motifs and the dot in the center of each diamond gives you a target for the arc.  Generally, I do one arc, stop, reset my hands (and brain), do the next arc, repeat.  However you proceed, I advise that you stop at the ends of arcs, not in the middle of an arc -- it's easier to camouflage a start-up jog in a corner than on an arc!
As I stitched the final line of the pumpkin seeds, my brain was practically shouting "yahoo" outloud as I got closer and closer to the finish!!
Turning the corners is easy though my strategy didn't yield a perfect diamond.  The dashed blue and green lines in this diagram represent the path I followed to connect the side diamonds and get around the corner. 
This diagram shows the first pumpkin seed line turning the corner.  The second line inside the diamonds will complete the remainder of the pumpkin seed motif in the corner diamonds.
If you are concerned about that wonky looking corner diamond -- if they are all the same, consistent shape, that's good in my mind.  The issue for me would be if they weren't the same, but you may be able to come up with a different solution that suits you better.
Here is another look at the design from the back side of my quilt.
Finally, when I trimmed the edge of my quilt before adding the binding, I measured from the last line of the quilting design so that when the binding was added the distance from the binding seam to the outside line of the design was consistent.  Unfortunately, I forgot to take a picture so I hope that sentence makes sense.

So print this out or bookmark it and give it a try the next time you are stumped for a border design!  I'd love to hear how you use it.  I know I'll be using it again!!
I hope you get to do lots of stitching this weekend!!

Mary Huey


Tuesday, January 19, 2016

Trusting the Quilting Muse

Over the past month, I've been machine quilting a masterful reproduction of an English-style hexagon mosaic quilt which I pieced by machine to exhibit how well the y-seam method I teach works.
You've seen me posting about it before HERE and HERE and HERE.
I love the top and as usual was hesitant to start the quilting.
What if I ruin it???
But it's not actually a quilt until it's quilted, so . . . . . I started the process.
I began by studying lots of photos of finished hexagon quilts -- not much inspiration there.
Either the quilting was too plain or too fancy.
In the end, I went back to a vintage Grandmother's Flower Garden that I machine quilted two years ago -- you can read about it HERE.
I spread it out on a bed and studied all the motifs picking the ones I liked best. 
There were lots of experimental designs, some not so successful, but I finally settled on this one with a prettier center and it became the basis for all the motifs in my mosaic quilt.
I decided to draft out several hexagon grids on scrap fabric at the same scale of the quilt (1" hexagons) and used those to practice the stitching motif and experiment with a filler design for the background. 
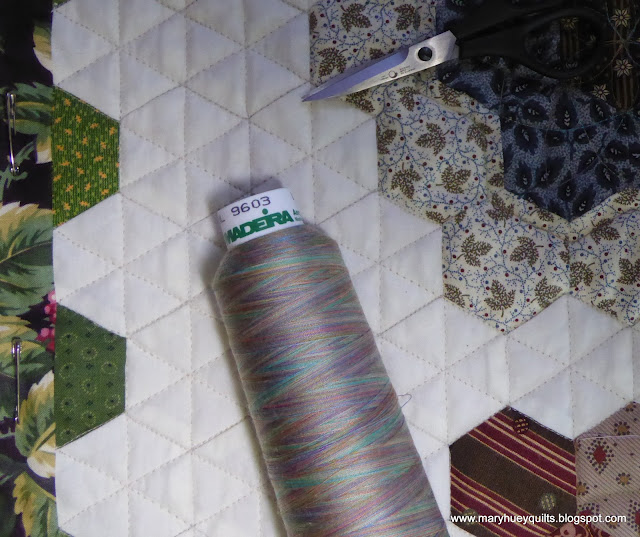
The thread color I chose was unconventional -- it is a variegated palette of colors that I hoped would blend nicely with all the reproduction prints I used.  It's a 40wt. polyester from Madeira and I'm pleased with the results.
Since I had three sizes of rosettes, the basic design evolved with each round of hexagons.
I marked the center hexagon's midpoint before beginning.
Then I began at an outside intersection and arced gracefully to an inner intersection, then back to the outer edge and so on until the first three arches were complete.
At that point, I worked part of the center hexagon's pumpkin seed flower.  I stopped working on that part of the design when I reached a point that hadn't been touched by an arch, did the remaining three arches, and returned to the same "corner" of the center hexagon to finish the flower -- one start, one stop!
These are the smallest rosettes and here's a look from the back side. These next few pictures are a bit blurry -- poor light for photos but really showed up the quilting -- and a shaky hand.
For the medium size rosettes, I added a second ring of arches and outlined the entire rosette shape.  The background quilting added the second outline of the rosette.
While experimenting on my stitching samples with marking pens, I stumbled onto this expansion of the design that makes the largest rosettes look like snowflakes from the back of the quilt.  It's not so apparent on the front.
And this is the large central 6-pointed star motif.  The little pumpkin seed flowerets at the tip of each point are my solution for filling that empty space. 
and once they were done, I realized I could repeat the motif in some floating clusters of hexagons.
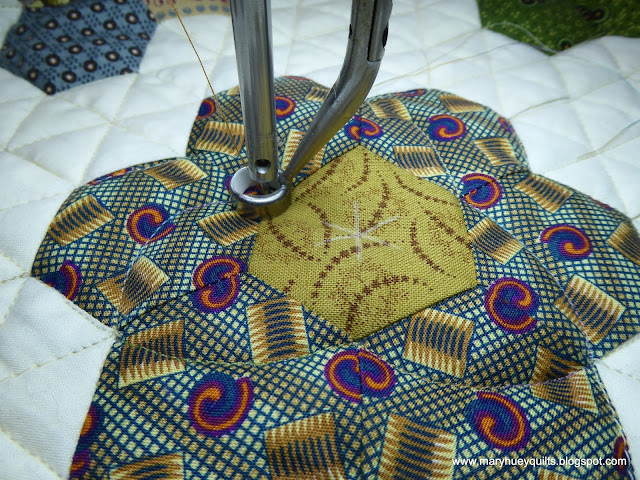
Here is one from the front.  I used the size of my presser foot to stay centered and stop at the same point on each hexagon.
As I proceeded, my confidence grew and then the center of the quilt was finished and I hit a bump -- no plan for the borders.  After two days of sketching and rejecting, this is the border design I settled on.  I was able to repeat the pumpkin seed elements in diamonds.  I think this design could be adapted to many border sizes and I'm working on another post detailing how to rescale it. 
It took 10 passes along the borders to complete the design, but being completely made from straight lines and pumpkin seeds, it was easy to achieve a professional look.  Here's the entire quilt from the back -- the lighting was perfect for catching the shadows of the designs. 
I got lots of experience using my "Fine Line" Quilter's Ruler for all the background quilting.  There wasn't a consistent pathway to accomplish the grid and it took longer than I anticipated, but in the end I love the way it sets off the rosettes.  The consistent pressing strategy I showed you HERE also was a great benefit during the background quilting process because when I needed to stitch in the ditch it was consistent all the way across the quilt!
And here is the finished quilt!!
Finishing this quilt crosses off one of my six Finish-A-Long goals for the first quarter of 2016.  Now to maintain the momentum -- that's always the tricky past isn't it??  The original list is HERE.

Happy Quilting!!
Mary Huey