Showing posts with label 2016 Finish Along. Show all posts

Friday, December 30, 2016

And it's a Wrap!!

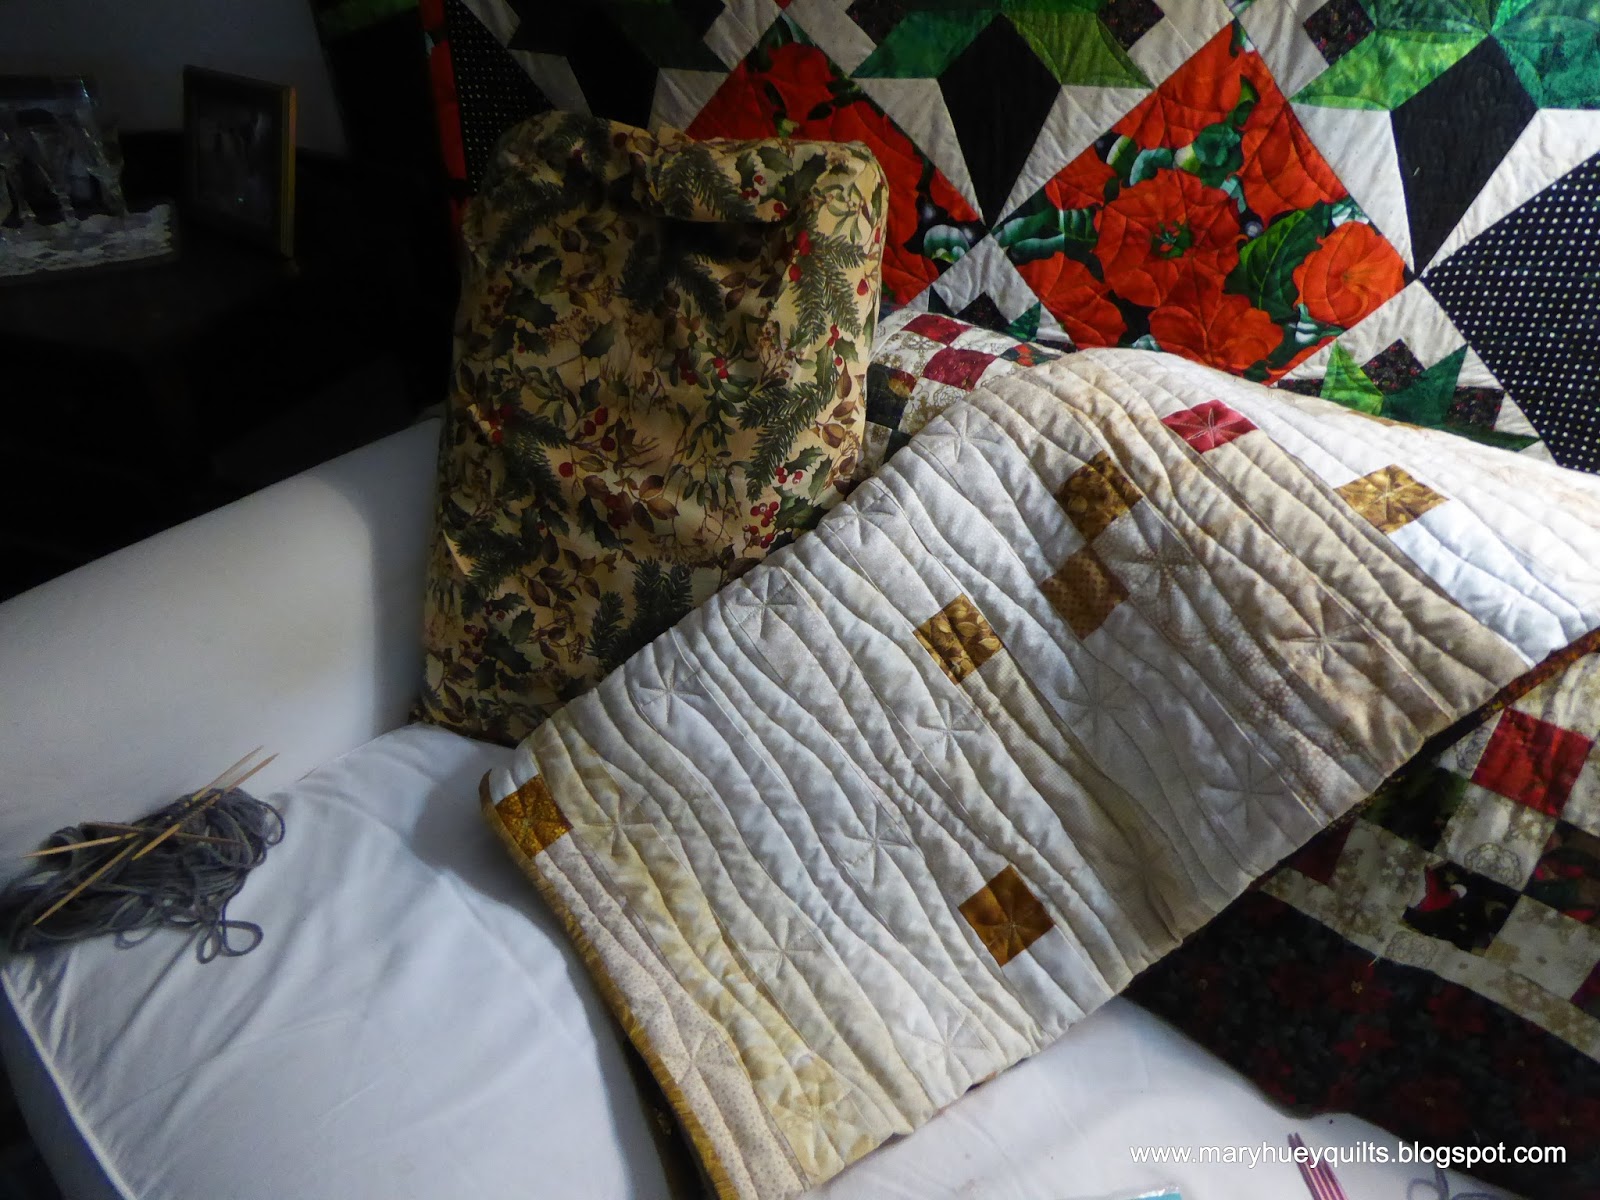
There it is, my fifth finish for the fourth quarter of the 2016 Finish Along!!
It's also my final finish for the year.
This evening it will be covering my lap when I settle in for an evening of murder mystery and knitting.
I pieced this quilt which I call Cardinals in the Snow during my annual piecing retreat in January 2015.  You can visit the original post HERE.  At the end of that post, I mentioned that I might unstitch the center seam and make two lap size quilts rather than one generous twin size. 
That's exactly what I did so I was able to share half with someone and keep half for myself.

Earlier this fall I spent an evening layering up both of them. 
Arrrggggh!?!
The first one was quilted quickly in November and two weeks ago, it went to a young person whose family is in transition with the help of Cleveland's City Mission.
I wanted to evoke the feeling of falling snow with the quilting, so rambled from top to bottom with vertical lines of stitching.  I alternated a straight(ish) line interrupted with "snowflakes" with three rambling lines.  The quilting went quickly which was good since our delivery deadline was impending, but I wasn't completely satisfied with the result.
Keeping such long lines straight is not easy for me.
 I decided to use all rambling lines on the second one.
Happily, I chanced onto one of Lori Kennedy of The Inbox Jaunt's tutorials on Pinterest! 
You can check it out HERE.  I incorporated her snowflake stitching process and the idea of staggering their placement into my rambling lines.  I started in the center strip of the quilt and set up the first snowflakes at approximately 12" intervals. 
The snowflakes in the next strip were centered approximately between the snowflakes in the first strip setting up a staggered placement pattern.
On my practice piece, I inserted two "plain" rambling rows of stitching but that didn't seem to work as well on the quilt.  In this picture I have just stitched the snowflake line down the center of a strip.
After a little trial and error, I realized it was easier to maintain some balance of the lines by stitching the snowflake line down the center of a strip first.  Then it was easier to insert a no-snowflake line between two lines of snowflakes lines.
I've been quilting at a steady pace each day and today it was ready to trim and bind.  This afternoon was dreary so I turned on all the lights in the studio, made a pot of tea, chopped up the last of the fruitcake and pushed through the binding process while listening to Levison Wood's book, Walking the Nile on Hoopla. 
I enjoy a good walking adventure, but Wood's is over the top -- and bonus, he's a good writer!
I backed the quilt with one of my favorite "I can't cut it up" fabrics!!
It's a great accomplishment to finish all five of the projects I put on my fourth quarter list!  HERE is the original list!  Now it's time to reflect on my finishes during 2016 and set my sights on more finishes in 2017.  As I do that I find I have a new sense of personal realism about the quilting part of making a quilt  as a result of all the machine quilting I've done this year. 

I'm ready to admit I'm primarily a utilitarian quilter who quilts my tops because they are more useful finished and I'm not fussy enough to do best of show work.  It's a very freeing acknowledgement and the energy it's bringing to my work is terrific.

So adieu to 2016 and on to 2017!!
Happy New Year!!
Mary


Tuesday, December 20, 2016

Quilting a Vintage Top

I should go back and see how many times I've had finishing this quilt on my goal list.  Finally, I'm right on the edge of success.  I layered it up at the end of November and have been slowly moving through the quilting process. 
I began with almost no plan for the quilting so I ditch quilted all the sashing and blocks hoping that was enough engagement with the process to kick start some clever quilting ideas.
The blocks are around 80 years old -- they were started by a lifelong friend of mine when she was in her teens.  She in turn gave me the blocks to finish when I was in high school.

I asked myself how it would have been quilted in the 1930's when it was started? 
The best answer to that question is "simple" and probably by outlining the appliques and using a grid  for the background.

Since I don't feel my skill is good enough to outline the applique right at the edge, I echoed the shapes instead.
A grid would have meant so much stop and start work so I experimented with this inner frame of three lines 1/4" apart.  It was easy to do with a straight ruler and my ruler foot.
I also echoed the shapes 1/4" inside the appliques -- I'm really pleased with the impact it has on the flowers!
A simple 4-petal flower in the cornerstones repeated the shapes of the flowers and leaves and was easy to stitch.
I was pleasantly surprised at how well a spool of standard Mettler cotton thread worked on my machine -- meant not having to leave the house on a hunting foray for thread!
Up to that point, the ideas came steadily and the stitching progressed!
But then it was time to quilt the sashing.
I drew on it with my chalk wheel.
I drew on paper. 
 I pulled out quilting stencils and books of designs
I made a mock-up and experimented with different designs.
Nothing!
So I quit experimenting and jumped to the borders -- simple lines 1" apart perpendicular to the edge of the quilt -- no picture because it doesn't show up enough.

I came back to the sashing and decided to just start by stitching a box 1/2" inside of each rectangle.
As I did the first box and pondered how to fill it in, two chance events the day before resulted in an idea!!
On Instagram, a gal shared her experiments with quilting a repeating design inside boxes which she had drawn on her fabric.  Later the same day, I had a conversation with a friend about using "dots" to mark alignment points to use with quilting rulers.
When the idea came, it seemed very quick but there had been a week or more of contemplation and experimentation which probably had to precede the final result.
The two diamonds came first and are the result of dividing the space into quarters.
Marks along the edges were used to align the quilting ruler. 
I realized that by starting at the center of the end of the sashing, that would set me up to start the diamonds without breaking the thread.  I hope I can remember that strategy in the future! 
Here's my ruler in place for the longest line as I zigzagged across the center of the sashing. 
On the way back up the sashing, I finished the diamonds. 
and added the floating (and very organic) circles, one half circle at a time --  
 over to the opposite point and back, retracing the lines connecting to the diamonds and finishing the circle.  The first circles were an after thought since the diamonds looked empty, clunky.
The entire design was stitched continuously with the help of dots to guide my ruler placement.
Each motif is taking about 8 minutes to complete including the time to mark it. 
I'm very pleased with the impact of the sashing design on the overall quilt -- it has an art deco look that I think fits perfectly with the design.  There are only a dozen sashing units left to quilt and then I'll be ready to bind and cross another UFO off the lists.  Hooray!!
Update -- 12/27/2016
It's completely finished -- I took this picture just before putting it into the washing machine.
I took it along for the Christmas weekend in Pennsylvania and finished stitching the binding and tying off all the quilting threads (I hope).
Later this week, I'll deliver it to it's new home!!
My fourth finish for the fourth quarter 2016 Finish Along goals!!
I think I'm going to finish all the pieces on this quarter's list HERE!!

Mary


Tuesday, November 15, 2016

Kaffe Hexie Pillow Finish

In the spring, I created this neck roll pillow as a teaching sample for an introductory EPP workshop using a random assortment of Kaffe prints on an architectural background print.
There were leftover hexies, all basted and ready to play so when I began to redecorate my living room this summer, I decided to finish them into another neck roll pillow.
 That pillow shape is very comfortable for resting my left arm when I'm stitching on the couch plus it looks nice!
I took the hexies along on a late summer trip and pieced them into this motif.
I decided the motif I created would not fit on a neckroll pillow form but that was okay because I found a 14" by 28" rectangle form which I liked!
That meant the quilted cover was not large enough or the right shape but I have lots of fabric.
A couple days of "intuitive" auditioning and I was ready to finish the pillow cover!
I added fabric (and batting and backing) to both sides, then more to the top and bottom to make a quilted piece large enough to cover the pillow.
While this isn't a route I would encourage for making a pillow cover, I wanted to share how I enlarged this piece after it was quilted.  My process is an adaptation of techniques gleaned from Marti Michell's book, Machine Quilting in Sections.

I began by adding more backing fabric -- in this photo, I've pushed the top layer and batting to the left to stitch it in place.  I pressed the backing away from the finished section pressing the seam towards the new piece of backing.
In this photo, I'm adding batting. I've trimmed the edges of batting straight with a rotary cutter and butted them together.  This "butted seam" is to the right of the backing seam about 1/2" to minimize bulk and I used my walking foot with a wide, long zigzag to stitch the batting edges together.  The stitching goes through the backing fabric which wouldn't work on a quilt but is fine for a pillow.  If I were doing this on a quilt, I would use a fusible batting tape to join the seam.
Finally I added the "border" fabric to the sandwich to expand the size of the top.  Notice that this seam is to the left of the batting seam.  I've learned through trial and error that having the three seams -- backing, batting, and top -- staggered rather than piled on top of each other makes a better finish.
I quilted the side border sections.
And repeated the process to add top and bottom borders. 
After these were quilted, I was ready to finish the pillow cover. 
At this point, my completed cover is 29" square. 
I used my serger to finish all four sides of the piece. 
Then I inserted a 22" zipper in the back seam just the way I learned to do it in a dress 50 years ago.  I stitched the quilted piece into a tube from end to end, switching to a basting stitch for the section where the zipper will fit and then back to a standard stitch length. 
At this point, I realized I was taking the awkward route -- stitching the zipper in place inside a tube was a bit of challenge. 
After the zipper was in place, I took out the basting stitches and pulled the zipper open before centering the zipper on the back side of the pillow cover and stitching the ends of the tube closed.
 
Happily, it worked!!  And now I have two new pillows for the couch!  There is third piece in this set that is still in progress -- check out my fourth quarter Finish Along list HERE.  It too won't be what it was intended to be and I'll share that with you next week!
I made another apple cake, too!  It will be donated to the refreshment table at a club meeting tomorrow evening.  I tried reducing the oil to 3/4 cup and used only 1 1/2 cups of sliced apples, but added 1/2 cup of fresh cranberries.  It's nice!!
If you missed the recipe last week, you can find it HERE.  If you copied the recipe last week, be advised that I left out "1 teaspoon of baking soda" -- it's corrected in the blog post but be sure to add it or you'll be irritated with me and my recipe!!

Tomorrow I'm committed to doing some "good deed" stitching -- very utilitarian and not at all interesting.  Vinyl covers to hold upholstery foam in place on some metal poles in my church's fellowship hall.  I hope it goes smoothly and doesn't take more than the day!!

I hope your week is off to a good start!!

Mary


Tuesday, October 25, 2016

Fourth Quarter 2016 Finish Along -- First Finish!

Between lots of extra walks in the woods to enjoy fall in Northeast Ohio, I managed to cross the first finish off my fourth quarter 2016 Finish Along list.   
Wild grapes growing up through a sassafras tree

It involved finishing a quilt pieced and almost finished by our church organist's wife who passed away last winter.  He found it while going through her things and brought it to me to see what needed to be done to finish it and if I would do it.  On first look, it seemed to just need the binding but it wasn't long before I discovered that the borders were not quilted -- more work than I had anticipated for sure!
And she had hand quilted it.  I only hand quilt for myself, no one else.
Plus the quilt was much bigger than I typically make -- 92" by 108" -- with a heavier batting than I use.  After a conversation with Jim, it was agreed that I could machine quilt the borders -- whew!!
There was some procrastinating brought on by the size and weight of the quilt -- it engulfed my machine table completely!  But in the end, it went more smoothly than I was anticipating.  It was an advantage that I only had the borders to do.

I did a simple design in the white setting triangles -- the quilting of the interior of the quilt is simple cross hatching.   
I stayed with the simple theme for the border -- straight lines perpendicular to the edge.  As you can see the quilting disappears into the fabric.  It would have been good practice with a fancier design but the idea of wrestling with the bulk of the quilt discouraged that idea. 
In the end, it took about 8 hours to add the quilting.   The quilt pattern is called Trellis and was designed by In The Beginning fabrics for this fabric . . . or was it the other way around?
Here it is folded in quarters and centered on my double bed -- it's huge!!
I have to smile when I see quilters neatly folding or rolling the binding -- as you can see I don't do that -- just a pile on the floor to my right.
I stitched the binding completely by machine and it took two hours to wrestle it around -- bonus was that I had to clean off my machine table before I started! 
And here it is.  Folded up and ready to take to Jim on Sunday morning. 
The delivery didn't illicit much of a reaction other than to ask if he could bring the "other one" next Sunday. 
 Other one?!?
How do we get ourselves into these obligations?

Hope you have some stitching time every day this week!!

Mary