Tuesday, June 26, 2018

Quilting!!

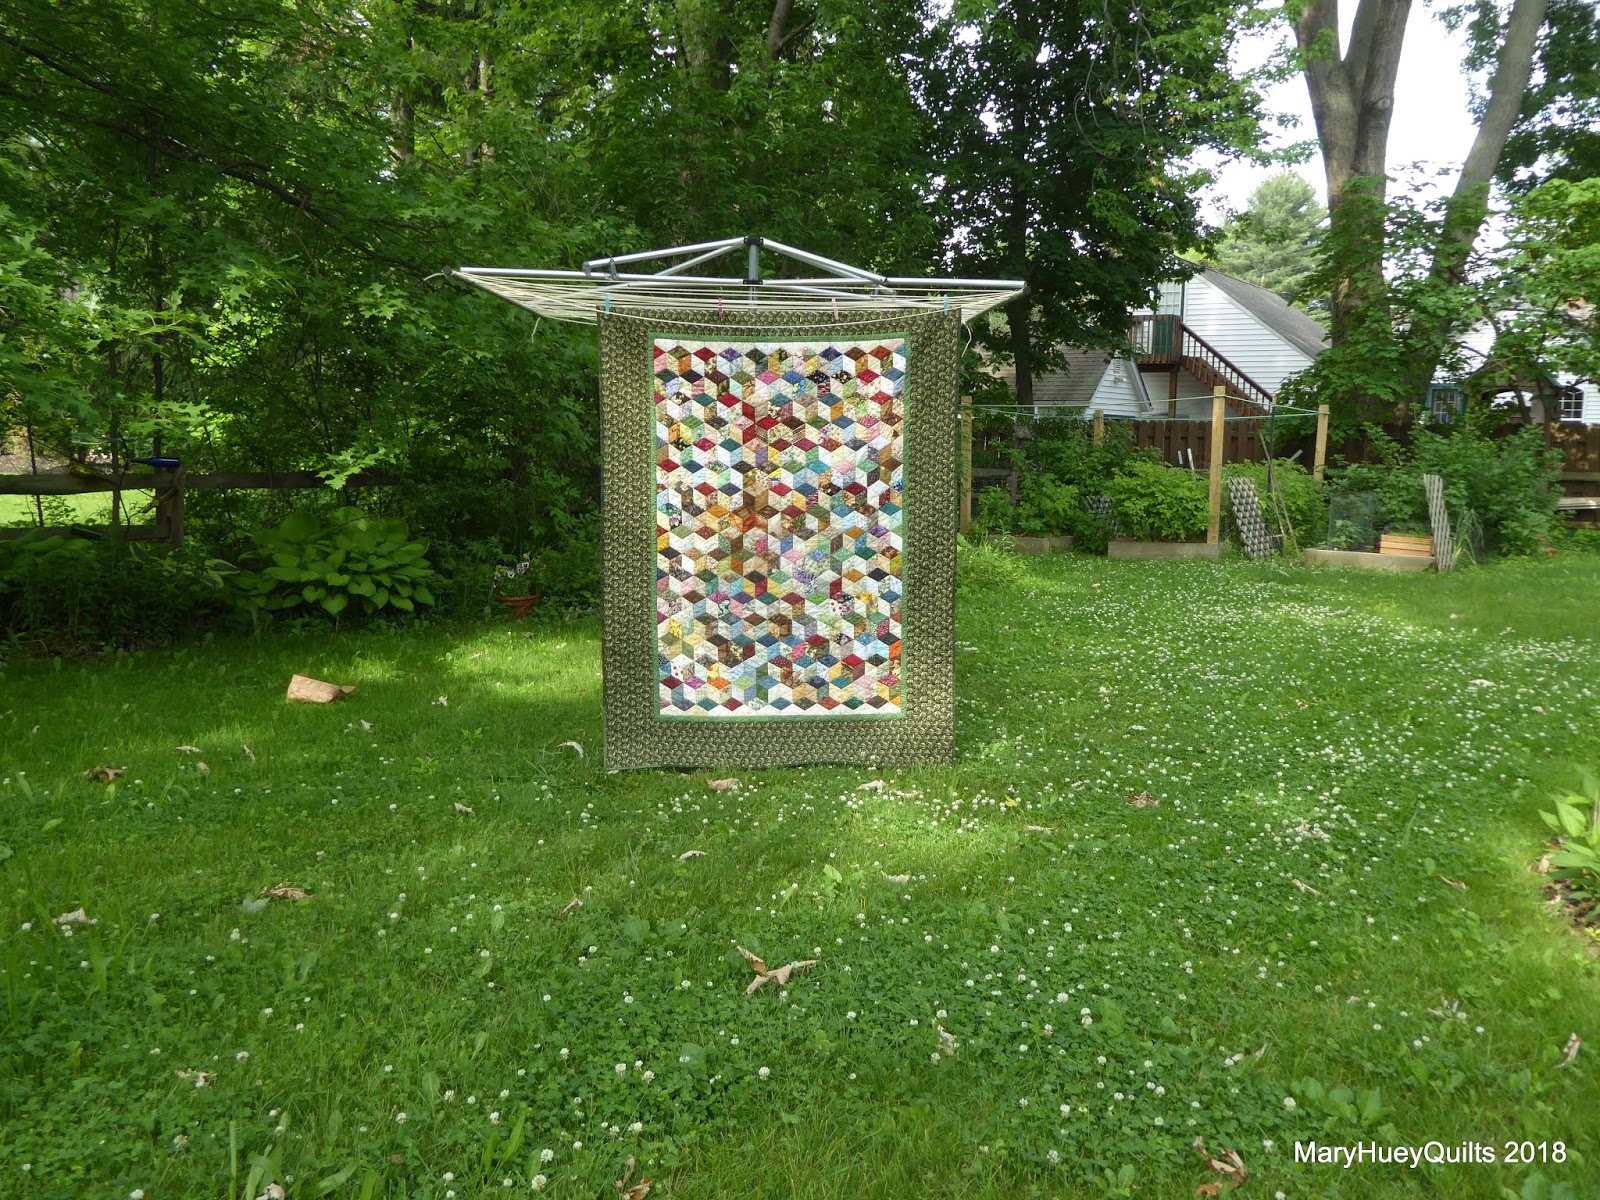
Back at the end of May, I showed you my version of ZenChic's Bernina Triangle quilt along.
Even though I don't have a definite purpose/recipient for this quilt, I put it on my second quarter goal list for the 2018 Finish Along challenge.
Keeping it up on the design wall forced me to keep the momentum going -- it needed to come down in one complete quilt top or not at all since it took quite a bit of concentration to get it up there in the first place following the diagram that Brigette Heiland shared with us! 

So I was pleased to have everything together!!  This is one of those quilts that is more interesting at close range -- my soft palette of colors plus the low contrast of value between the assorted prints and the green background (it's one of the Moda grunges) make it difficult to photograph.
It was a bit short in length for me so I added a border to the top and bottom but I used the height of the inner rows and inserted a couple of the feature prints to camouflage them. 
Time to make a backing!
My determination to use lots of what I already own sent me on a stash diving adventure.
Happily I was able to pull a half dozen pieces that echoed the palette of the quilt top!
If you've never made a pieced backing, it's a bit like an improv puzzle.
I pressed all the fabric and then put the largest  pieces on the design wall -- I pinned a note with the measurements to each piece of fabric.
Like many of you, I find it easier to proceed if there is a "visual" in front of me. 
Next step is to sort the pieces into "similar" width groups. 
In this case, I discovered that I had enough fabric to make two fairly wide columns. 
The space between represents a third column that will bring the backing up to the needed width. 
I keep the vertical grain of the fabric going up and down so the backing behaves more like one piece of fabric -- that makes the quilting easier!
And if I can keep selvages along the outer edges of the left and right columns, that's even better!!
Once the two outer columns were long enough, I started working on the center column.
(There was more stash diving at this point!) 
Here's my backing -- 5 yards of some "on the edge" of very old fabric in it's new forever home!! 
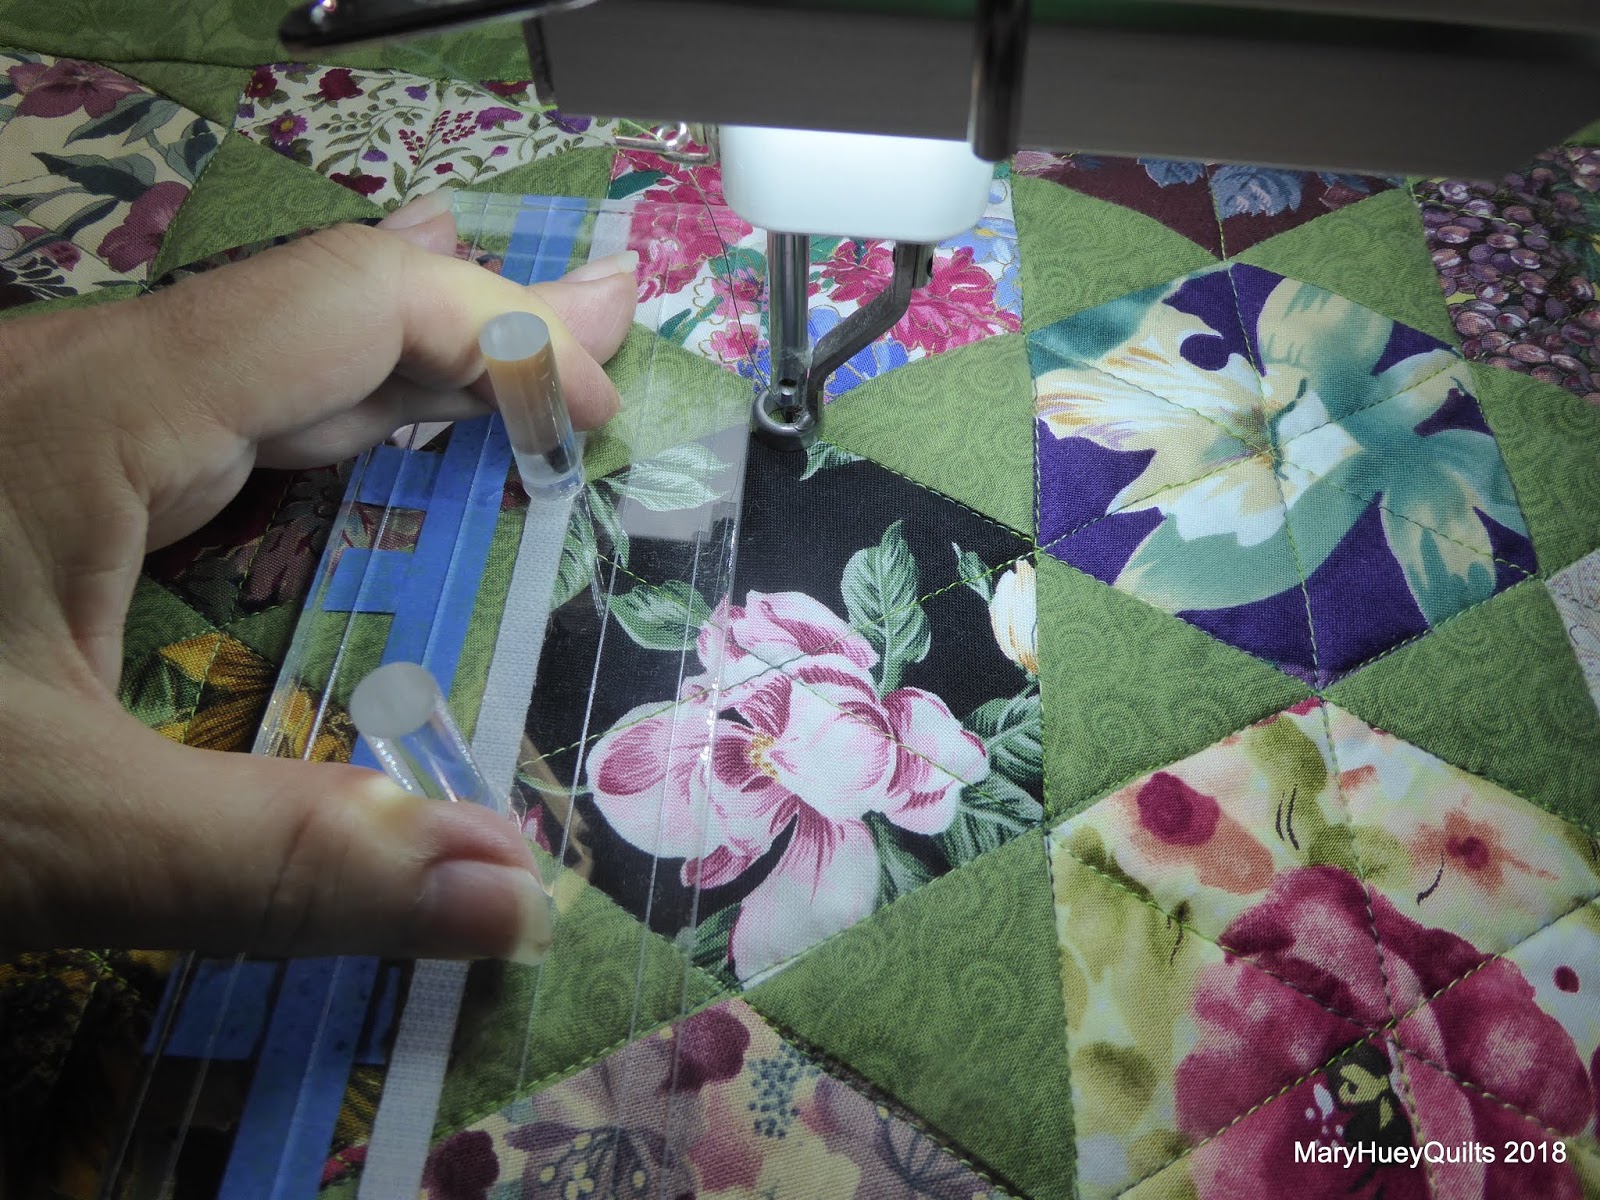
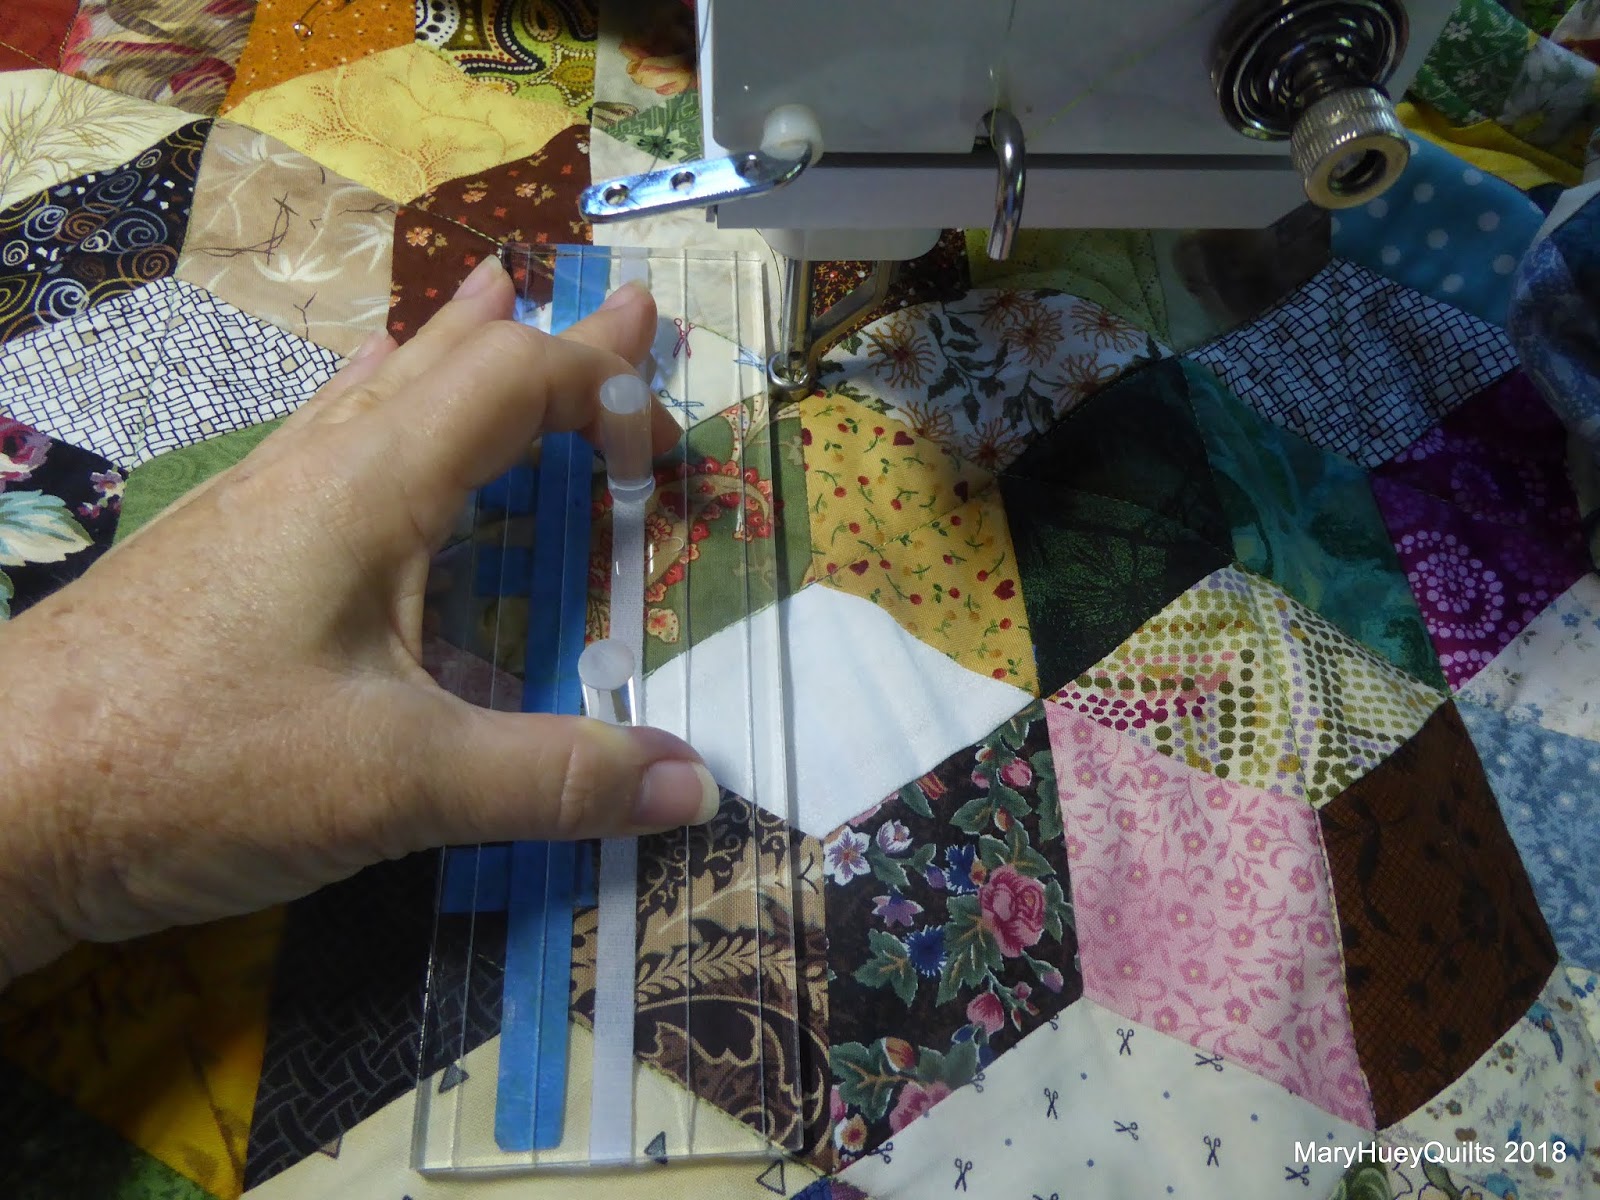
At this point, the quilting is underway -- all straight(ish) lines -- 1/4" on each side of the seams.  That was the basic plan in my head as I finished piecing the top, but when I saw Brigette's blog post (HERE) about the quilting of her version, I was sure my idea was good!!
My goal is to finish by Saturday, June 30?
And I could do it -- not much on my calendar for the week!
I had a great outing yesterday so hopefully I'll be content to stay close to home and quilt!
Want to see some of what I saw?

I joined a group of damselfly and dragonfly lovers along a local river -- one thing that could help me add pursuing this lovely little creatures more often is that they don't fly until the sun is shining -- no early mornings for them unlike birds!!

But the morning stayed cloudy and the river was high, so insect sightings were challenging. 
Happily, the forest edge along the river is lush -- no signs of heavy deer browsing which unfortunately is becoming an all too common a sight in my area!!
Native Ostrich ferns underneath a canopy of large sycamore trees.
And these Canada lilies were abundant!!
They tower above the rest of vegetation and I've never seen so many!
Look at this color!!
Once the sun came out, we did begin to see quite a few insects.  I can remember seven different species including this one which was new to me -- a Violet Dancer. 
It's about 2" long and the shade of violet along it's body varies a bit but is always tipped with a blue/violet.
I just noticed that interesting beetle in the lower right of this picture?!?
Wonder what that is?
I will also say that dragonflies and damselflies can be more challenging to spot than birds!
But it's interesting to become more educated about them.
They are a good indicator of good quality environments so it's important to understand and appreciate them!

Okay, back to that quilting!!
Have a lovely week!
Mary


Tuesday, June 19, 2018

Dodecagon EPP Update!

Early in February, 2017, I began my Dodecagon journey using Marge Sampson-George's pattern and templates.  I've shared my progress in several posts since then and today's share is exciting to me!!  I have the center of my layout almost completely assembled and it's coming together so beautifully!! 

Back in January (read it HERE), I shared how I was setting up the four large floral units and some tips (ala Karen @faeiriesandfibres -- you can read through her posts for lots of great EPP tips HERE!!).  
Once the four units were finished, I began spending my evenings with the units laying on the living room floor, adding rows of hexagons in preparation for assembling the large central diamond section of my layout.

Every stage of completion gets me more and more excited about the final quilt!!
At this point, I needed to organize more pink and yellow hexies to complete the border around the outside of the center.  
Finally, the nine center units were ready to set together!!
In the picture below, I have the two top rows stitched completely together but snapped this photo so you can see how I've dissected the units for the most logical (to me) assembly.  
The units interlock together -- that was necessary to applique the floral motifs into position without losing the hexie paper's stability along the outer edges.

And a closer look!
Once the center section is together, I'll do some more auditioning -- I have a layout design but it has changed a bit here and there as I work with the fabrics and see the interaction of the colors.
These are my grab-n-go baggies for stitching on the run -- one dodecagon plus enough black hexies to border -- there are only seven left!!
Actually, I was "worrying" yesterday about what I can "take along" when these are done?!?
Ahhh, but it just occurred to me that I can bag up sets of the green hexies to stitch into bordering strips that will be set between the dodecagons in each corner of the quilt -- dilemma, no more!! 

I'm doing well to stay focused on this project as there are so many tempting other EPP things going on out there -- the Kingfisher SewAlong with Jodi Godfrey of @talesoflove keeps popping up in my Instagram feed and then there's the #roseofkaleighsewalong based on one of Sue Daley's patterns -- arggghhhh.
But at my age, I need to focus on "leaving quilts, not fabric".
This will NOT become an ancient UFO!!
Check out this thoughtful post from Jenny Kae -- as one who has been dealing with UFO's for over a decade, I could have written this and you need to read it!!

Have a good week!!
Mary

Edit -- September, 2019 
Marge Sampson George now has the pattern, templates, and papers available via this Etsy shop for this quilt -- click HERE.

Tuesday, June 12, 2018

Drying on the Clothes Line!!

With just hours to spare (typically), I finished this scrappy tumbling quilt, washed it, and it's hanging out on the line as I write this.  It is a retirement gift for my pastor. He has been our pastor for 9 years and we hate to see him go, but it's hard to begrudge a person the joy of retirement.
As I shared last week, I kept the quilting simple with an equilateral grid guided by the piecing seams.
It took about a week -- 30 minutes to an hour a day.  By traveling around the quilt like a maze, I kept the thread burying to a minimum!
By the time I started quilting the border, I realized I had 3 days to finish rather than the luxurious 6 days to my original target date.  Focus and simplicity were the keys to being done on time! 
Rather than a standard "piano key" border which was my first thought, I alternated a pair of lines 1/4" apart with a freehand squiggle about 1" from that.   It allowed me to work back and forth from the edge to the accent border with no tie-offs!!
Rather than use a mathematical approach to the spacing, I "eyeballed" the spacing from the double set of lines to the squiggle.  Many years ago, a teacher/mentor explained to me why she preferred to draw her feathers freehand over using a stencil -- it looks more organic, like a human did it.
That's my rationale!!
As I came to a corner, I marked a diagonal line that would serve as a stopping mark for the lines as I worked my way into the corner.
When I arrived at the diagonal chalk line, I traveled along it to the beginning of the next line of the design.  It leaves gaps in the diagonal line, but if I pay attention to where I begin to work my way out of that corner, I catch all the gaps in the diagonal line as I started the next side. 
Here's a picture of one of the corners from the back side.  
I'm good with the spontaneous flow!
At a distance, it looks very jumbled in the middle of the quilt.
That's the result of the five 6-pointed stars that are inserted randomly around the quilt.  They are a bit more random than I intended -- someone moved one of them to a different row?!?
Random elf at work again!
It finished at 56" by 74". 
It's finish #2 on my second quarter goal list for the 2018 Finish Along and another potentially ancient UFO averted!!

What's next in the studio?  
It's time to organize this pile of fabric into a backing for my ZenChic Bernina Triangle Sewalong quilt top!  Maybe layer it up and keep the quilting momentum going?!?
Of course, it's my favorite birding time of the year -- breeding season! So I may not actually get to the quilting, but whatever progress is made will be progress!!
Yesterday, I found the pileated woodpecker nest at the park I visit the most!
Look at those two chicks, leaning out of the nest hole, scanning for one of the adult birds to arrive with a tasty morsel!!
I'll be back next week with more ancient UFO progress!!

NOTE:  Blogger isn't currently forwarding comments to me (their glitch) so please excuse me if I don't respond with a personal e-mail.  I'll post replies on this post but that means you'll need to come back for another visit to read it.  Sorry if that is an inconvenience and thanks for reading today's post! 

Mary 


Tuesday, June 5, 2018

Finishing Quilts!

Little did I realize back in January, 2016 when I was finishing up this hexagon reproduction quilt that the grid I used to quilt the background of that quilt would become my "go-to" strategy for all future hexagon-based quilt designs!
I like the results and it's easy to stitch with minimal decisions to be made!
So I used it again this past February for my really yellow Project Quilting piece.
So it was a simple decision as to how I'd quilt this I Spy style garden quilt top.
Through  all the hexagons and along all the seam lines to create the equilateral triangle grid.
A new quilting tool arrived while I was working on it -- the Squiggy designed by Angela Walters.
I put it right to work guiding me through a border of clamshells.  
Isn't the border fabric gorgeous -- it's an oldie from my stash.
Since I didn't take the time to do very in-depth math, each of the corners is slightly different and I was only able to use 3 rows of clamshells.  Some simple "piano key" quilting finished the border.
Overall I'm pleased with the finished results.
I bound it on Sunday evening -- had fun playing "thread roulette". 
I lost and had to find another spool of green thread.
Today I mailed it off to a longtime friend who retired from teaching high school sciences this past week.  She has a bevy of grandchildren who love to snuggle with her so I hope the quilt will be enjoyed by all!
There was another quilt basted and ready to go -- also a retirement gift!  
And it's one of my goal finishes for the second quarter of the 2018 Finish Along!
There are seven 6-pointed stars hidden in this tumbling block quilt, so I quilted each of them first to emphasize them a little.
But the rest of the quilt?  You guessed it -- back to the equilateral triangle grid!!
I'm at the half way point today and need to have it ready to gift by June 15 -- think I'm good!!

This little quilt went out the door today, too.
It's destined for a first grader who is learning that people die so I hope it's becomes a snuggler!
I love having a string of finishes!!
Better yet, one of the three was an ancient UFO -- so happy to find a good home for it!!
Are there more finishes on the horizon?
I hope so!!

NOTE:  Blogger isn't currently forwarding comments to me (their glitch) so please excuse me if I don't respond with a personal e-mail.  I'll post replies on this post but that means you'll need to come back for another visit to read it.  Sorry if that is an inconvenience and thanks for reading today's post! 

Mary