Showing posts with label machine quilting. finishalong. Show all posts

Tuesday, June 12, 2018

Drying on the Clothes Line!!

With just hours to spare (typically), I finished this scrappy tumbling quilt, washed it, and it's hanging out on the line as I write this.  It is a retirement gift for my pastor. He has been our pastor for 9 years and we hate to see him go, but it's hard to begrudge a person the joy of retirement.
As I shared last week, I kept the quilting simple with an equilateral grid guided by the piecing seams.
It took about a week -- 30 minutes to an hour a day.  By traveling around the quilt like a maze, I kept the thread burying to a minimum!
By the time I started quilting the border, I realized I had 3 days to finish rather than the luxurious 6 days to my original target date.  Focus and simplicity were the keys to being done on time! 
Rather than a standard "piano key" border which was my first thought, I alternated a pair of lines 1/4" apart with a freehand squiggle about 1" from that.   It allowed me to work back and forth from the edge to the accent border with no tie-offs!!
Rather than use a mathematical approach to the spacing, I "eyeballed" the spacing from the double set of lines to the squiggle.  Many years ago, a teacher/mentor explained to me why she preferred to draw her feathers freehand over using a stencil -- it looks more organic, like a human did it.
That's my rationale!!
As I came to a corner, I marked a diagonal line that would serve as a stopping mark for the lines as I worked my way into the corner.
When I arrived at the diagonal chalk line, I traveled along it to the beginning of the next line of the design.  It leaves gaps in the diagonal line, but if I pay attention to where I begin to work my way out of that corner, I catch all the gaps in the diagonal line as I started the next side. 
Here's a picture of one of the corners from the back side.  
I'm good with the spontaneous flow!
At a distance, it looks very jumbled in the middle of the quilt.
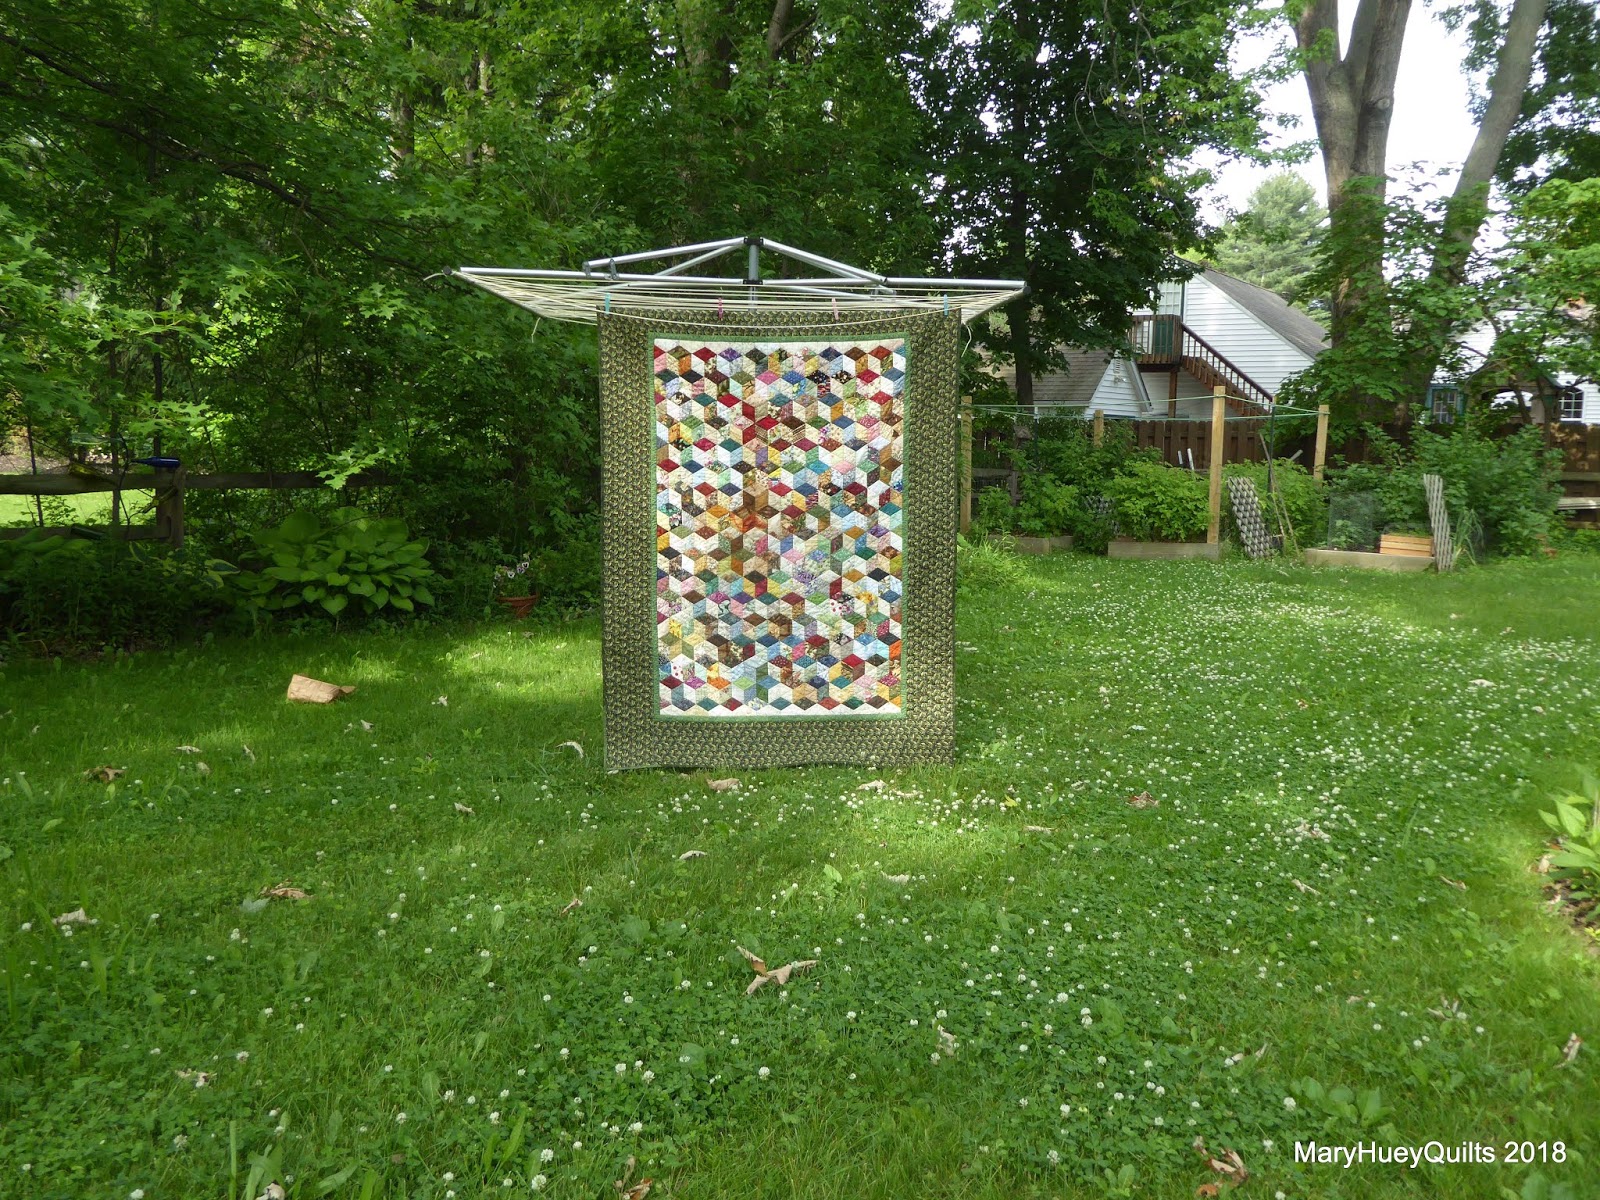
That's the result of the five 6-pointed stars that are inserted randomly around the quilt.  They are a bit more random than I intended -- someone moved one of them to a different row?!?
Random elf at work again!
It finished at 56" by 74". 
It's finish #2 on my second quarter goal list for the 2018 Finish Along and another potentially ancient UFO averted!!

What's next in the studio?  
It's time to organize this pile of fabric into a backing for my ZenChic Bernina Triangle Sewalong quilt top!  Maybe layer it up and keep the quilting momentum going?!?
Of course, it's my favorite birding time of the year -- breeding season! So I may not actually get to the quilting, but whatever progress is made will be progress!!
Yesterday, I found the pileated woodpecker nest at the park I visit the most!
Look at those two chicks, leaning out of the nest hole, scanning for one of the adult birds to arrive with a tasty morsel!!
I'll be back next week with more ancient UFO progress!!

NOTE:  Blogger isn't currently forwarding comments to me (their glitch) so please excuse me if I don't respond with a personal e-mail.  I'll post replies on this post but that means you'll need to come back for another visit to read it.  Sorry if that is an inconvenience and thanks for reading today's post! 

Mary 


Wednesday, April 25, 2018

A Scrappy Pineapple Quilt!

I just finished quilting this scrappy pineapple lap size quilt -- doesn't it look great.
It began life as a demonstration/teaching sample for Marti Michell's 1" Pineapple Set*** and I recently finished the piecing and decided to gift it to one of my nephews.
This is the third pineapple quilt I've made using Marti's templates -- the best part is once the pieces are cut, there is no trimming, no paper to remove, and the blocks are consistent in size!
I was feeling intimidated about the "how" of quilting it, but I'm pretty happy with the design that evolved.  It's hard to photograph clearly but I used a series of simple edge-to-edge lines so I'm going to try to share that process here (partly, so I'll remember how I did it!!).

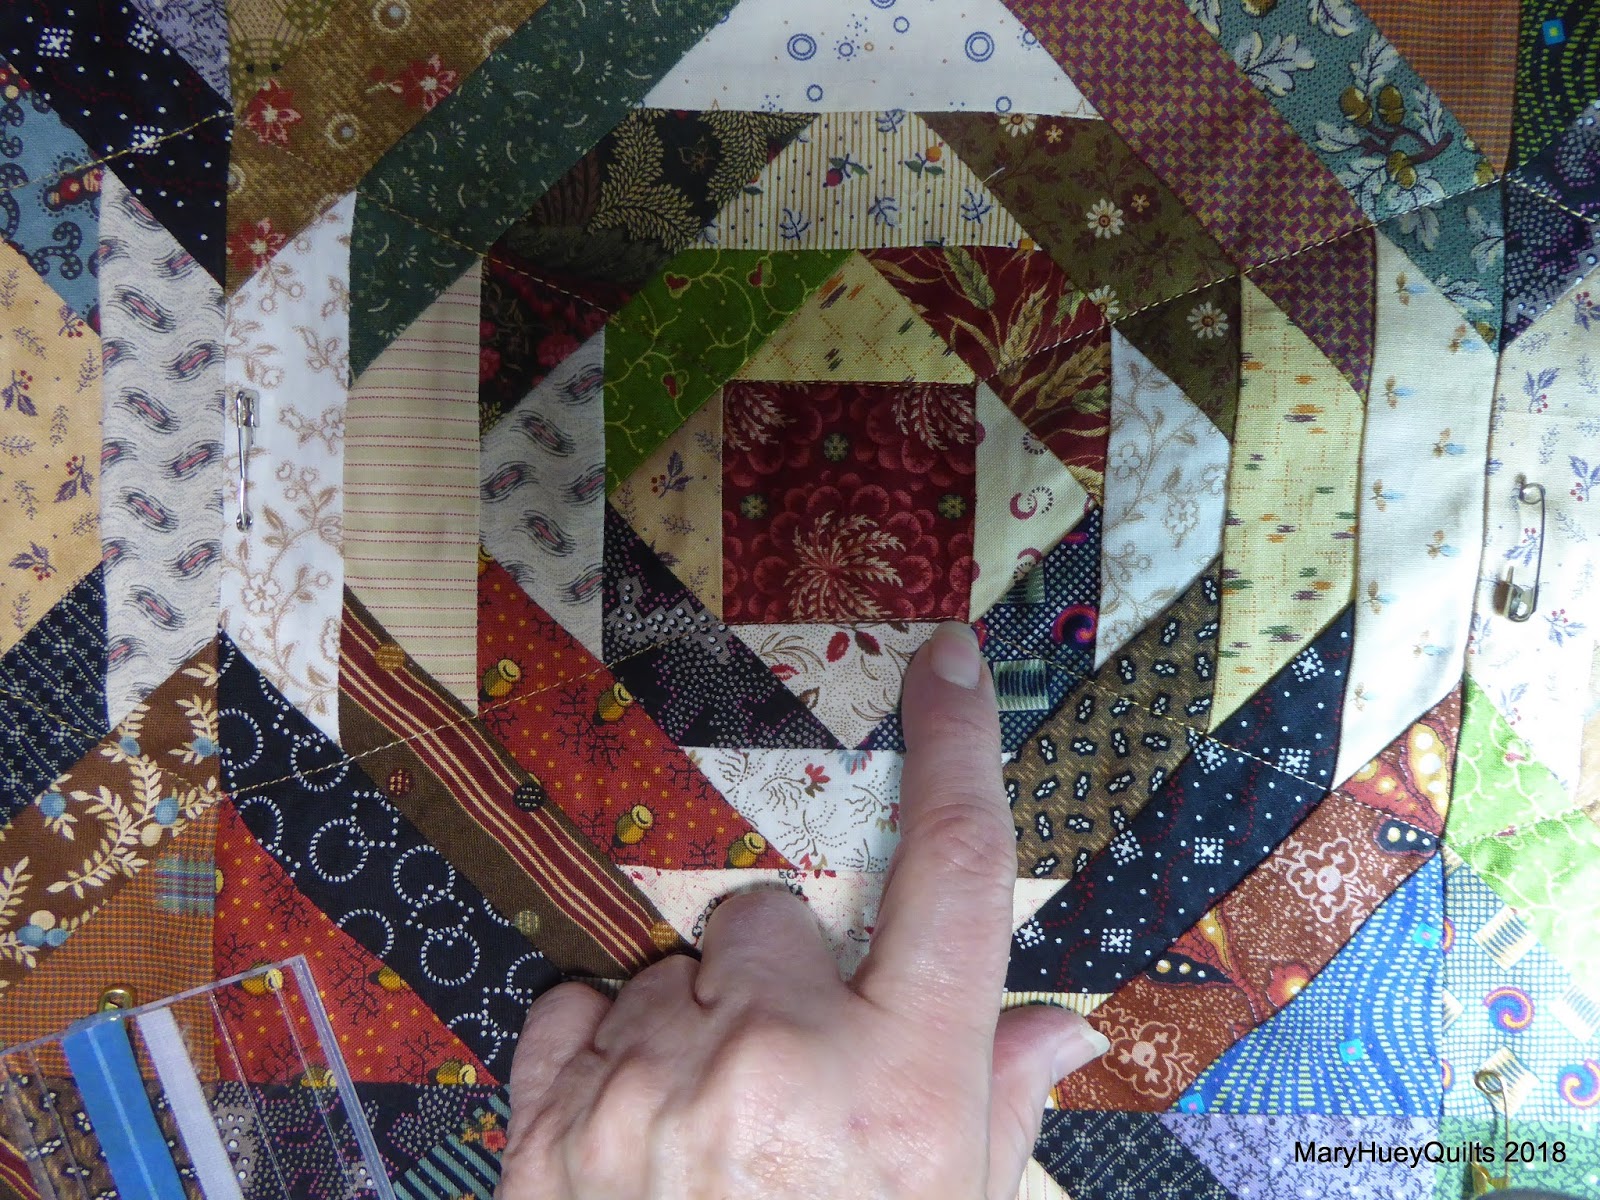
The first set of lines started at the outer edge of the quilt and worked through the dark areas of each block.  I'm pointing to the spot where I entered each block.
Using a straight guiding ruler, I stitched across the dark pieces to the corner of the center square. 
Then "in the ditch" along one edge of the square. 
And from there, back along the "points" to the next block. 
By repeating that pathway up and down and across the quilt, until all the blocks were stitched, I created these 4-pointed star like shapes and there were no threads to bury since every line went edge-to-edge on the quilt. 
After finishing this step, there was too much open space so after several days of contemplation, I stitched a second set of lines through the light areas of the blocks.  These lines went across the "ditch" along the outer edge of the first round of triangles -- from the needle to my finger in this picture.
From that point, I stitched over into the light sections going along the ends of the points (from the needle on the right to my finger on the left). 
Then continuing from that stopping point across to my finger -- this part of the line ends at the adjacent blocks center,  
but I ignored that for the moment and traveled back to the right. 
Follow the finger -- back to the beginning of that section. 
To move down to the next area, I stitched "in the ditch" to the next corner of the center of the block. 
Marti includes a line drawing in the instruction booklet which I copied out and drew colored lines to help me recall this stitching plan in the future.
The first set of lines are green in my diagram and I stitched them up and down, left and right across the entire quilt.
The next set of lines I stitched are red -- these only need to be done up and down.  
The first line zigs over to the left as I moved down the quilt and catches the horizontal light sections.  
Then a second line (not draw out in the diagram) just moved down the quilt vertically because the third line (a repeat of the red line drawn) will zig to the left and catch all the remaining light areas of that row of blocks.
I was still not satisfied with the density of the quilting, so after more contemplation and a couple false starts, I echoed each 4 point star 1/2" inside the first lines (blue lines above).
Each of these were stitched separately and were the only threads that needed tied off!!
Now it's all washed and ready to go!!
It's five by seven blocks (50" by 70") and used lots of reproduction prints.  I did lots of the piecing as "leaders and enders" while working on other projects! 
The quilting is simple and was easy for me to manage with my APQS George -- all straight lines!!

This is my first finish for the second quarter Finish Along 2018 -- yea!!
Another UFO out the door!!

Have a great week!
Mary


***EDIT April 2025
Marti Michel closed her business in late in 2024 and while some shops may still have a stock of her templates, you can also find them on Ebay and Etsy.