Showing posts with label tumbling blocks. Show all posts

Sunday, May 5, 2019

Some Creative Thoughts

Five days ago, I posted a picture on my Instagram feed and declared my intention for the week as part of the #onethingwithamy hashtag -- "turn this motley group of leftover y-seam demo units into a cute baby quilt flimsy as I continue to clear out the aftermath of 35 years of teaching quiltmaking". 

This is where it was a couple days ago when last you saw me!
I finished setting it together and then . . . . how am I going to make this "cute"???

It needed to be a bit longer and so I fell back onto my often used strategy of adding a pieced band top and bottom plus more of the "float" bands of fabric.  There were leftover diamonds I could use.
Taking time to trim the points of the diamonds with Marti Michell's Point Trimmer*** make assembling a row of these diamonds easy and accurate.
Perfect alignment every time. 
And a straight band of pieced diamonds. 
The ends ones were cut on the angle at just the end being joined to the band so they could be trimmed straight on the outside end. 
That was easy!!  But now what?
Nothing to be done but pull out anything with lots of color that might say "cute" loudly!!
(I didn't photograph the rejects, but I did put them away.)
And the winner is . . . 
this cute farm print I grabbed at an end-of-bolt sale!!

I needed to piece the upper and lower borders to make the best use of the fabric I had.
To make the joining seam less obvious and eliminate "cow-butts" and "headless cows"
I folded back the end of the right hand strip until I found a less obvious area for the seam. 
Then I cut off sections at the correct ends of the strips being joined. 
The seam isn't a perfect match but it is less obvious! 
And here is the "cute" quilt!!!

So here's the "creative thought" for the day -- if I had not defined the look I wanted this quilt to have before I started working on it, I think I would still be stuck up in the studio trying to figure out how to border this piece.  It's not just a jumble of colors, it's a jumble of print styles and while that makes it a true scrap quilt, it can also make it harder to unify the finished look of the quilt.  

When I started pulling potential borders fabrics, "cute" defined where I started -- if it was a cute, multi-colored print, I auditioned it!  The moment I laid this hunk of fabric next to the pieced center, I knew immediately it was the right piece because it was colorful and "cute".

So thank goodness, I defined my creative goal for this motley stack of pieces.
I'm not sure I always do that but I'll pay more attention in the future because it certainly made this project come together easier and more successfully than I imagined!

This quilt is destined to become one of my charity makes.
It measures 44" by 58".
I even pulled the backing together today!

Check out the hashtag #onethingwithamy to see what other quilters are doing!

Mary  


***EDIT April 2025
Marti Michel closed her business in late in 2024 and while some shops may still have a stock of her templates, you can also find them on Ebay and Etsy.  


Tuesday, June 12, 2018

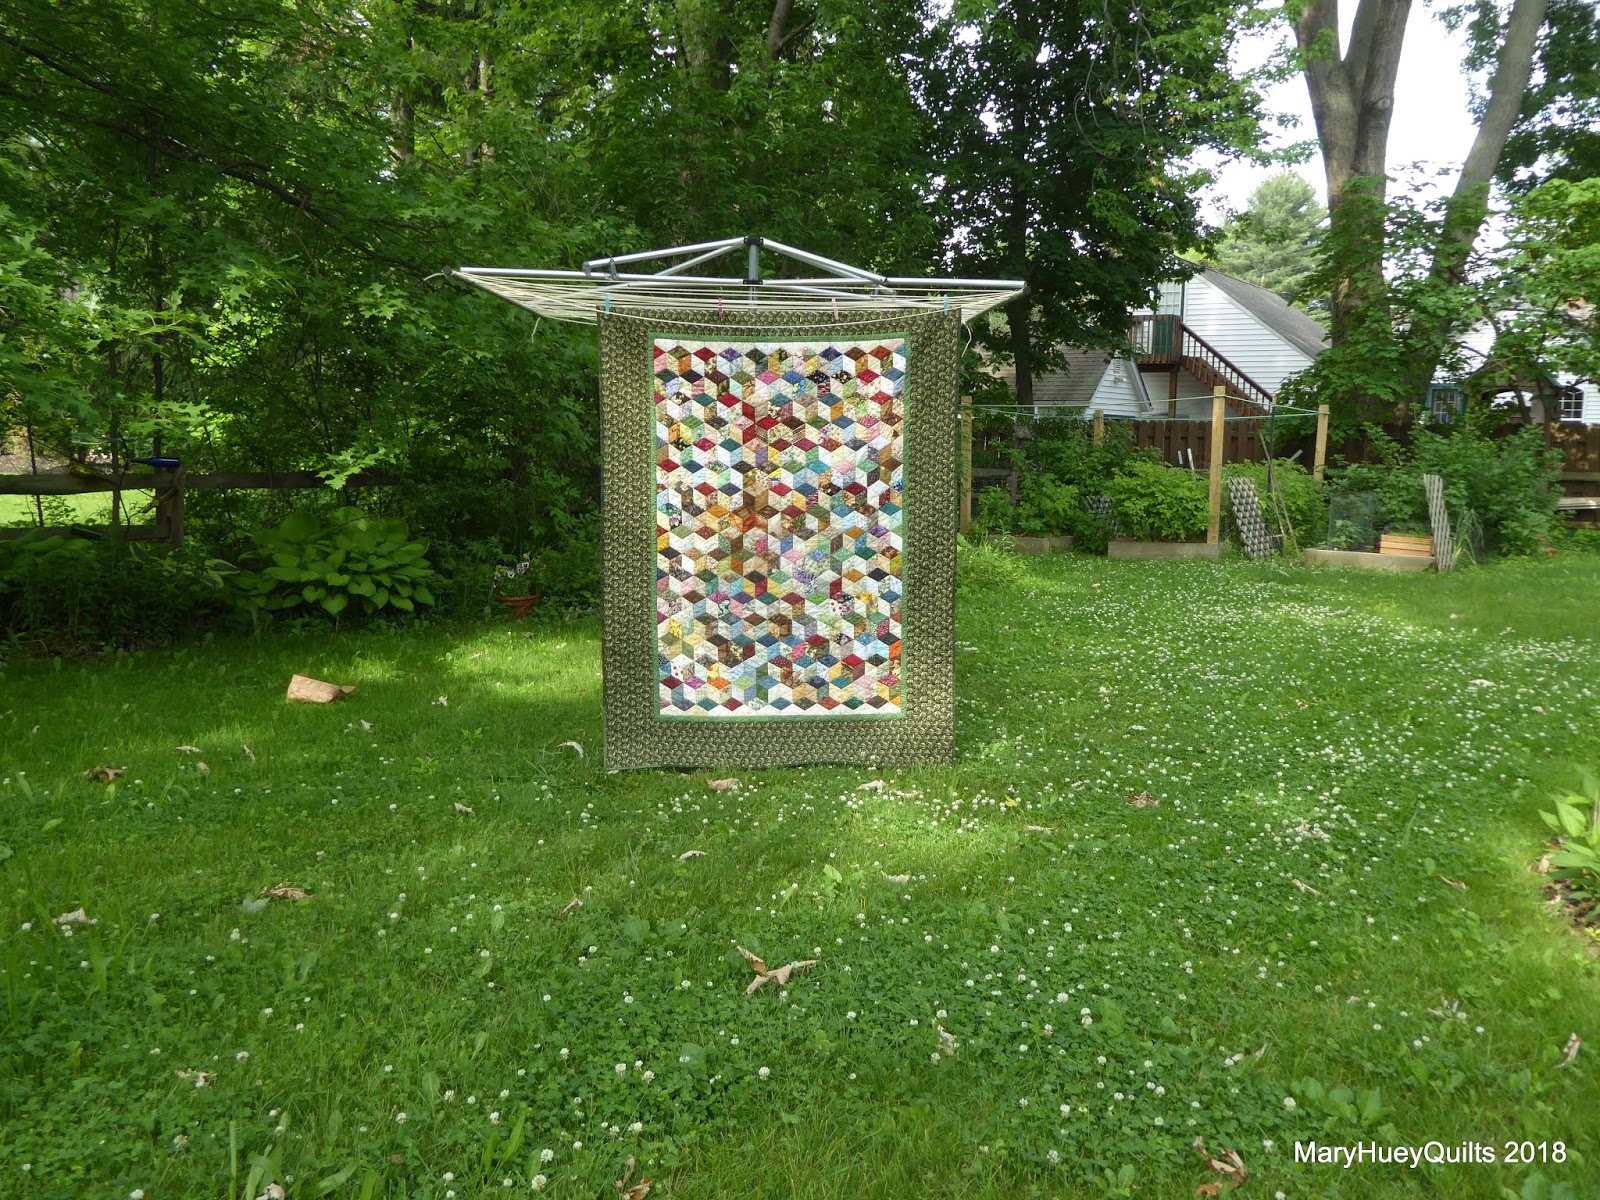
Drying on the Clothes Line!!

With just hours to spare (typically), I finished this scrappy tumbling quilt, washed it, and it's hanging out on the line as I write this.  It is a retirement gift for my pastor. He has been our pastor for 9 years and we hate to see him go, but it's hard to begrudge a person the joy of retirement.
As I shared last week, I kept the quilting simple with an equilateral grid guided by the piecing seams.
It took about a week -- 30 minutes to an hour a day.  By traveling around the quilt like a maze, I kept the thread burying to a minimum!
By the time I started quilting the border, I realized I had 3 days to finish rather than the luxurious 6 days to my original target date.  Focus and simplicity were the keys to being done on time! 
Rather than a standard "piano key" border which was my first thought, I alternated a pair of lines 1/4" apart with a freehand squiggle about 1" from that.   It allowed me to work back and forth from the edge to the accent border with no tie-offs!!
Rather than use a mathematical approach to the spacing, I "eyeballed" the spacing from the double set of lines to the squiggle.  Many years ago, a teacher/mentor explained to me why she preferred to draw her feathers freehand over using a stencil -- it looks more organic, like a human did it.
That's my rationale!!
As I came to a corner, I marked a diagonal line that would serve as a stopping mark for the lines as I worked my way into the corner.
When I arrived at the diagonal chalk line, I traveled along it to the beginning of the next line of the design.  It leaves gaps in the diagonal line, but if I pay attention to where I begin to work my way out of that corner, I catch all the gaps in the diagonal line as I started the next side. 
Here's a picture of one of the corners from the back side.  
I'm good with the spontaneous flow!
At a distance, it looks very jumbled in the middle of the quilt.
That's the result of the five 6-pointed stars that are inserted randomly around the quilt.  They are a bit more random than I intended -- someone moved one of them to a different row?!?
Random elf at work again!
It finished at 56" by 74". 
It's finish #2 on my second quarter goal list for the 2018 Finish Along and another potentially ancient UFO averted!!

What's next in the studio?  
It's time to organize this pile of fabric into a backing for my ZenChic Bernina Triangle Sewalong quilt top!  Maybe layer it up and keep the quilting momentum going?!?
Of course, it's my favorite birding time of the year -- breeding season! So I may not actually get to the quilting, but whatever progress is made will be progress!!
Yesterday, I found the pileated woodpecker nest at the park I visit the most!
Look at those two chicks, leaning out of the nest hole, scanning for one of the adult birds to arrive with a tasty morsel!!
I'll be back next week with more ancient UFO progress!!

NOTE:  Blogger isn't currently forwarding comments to me (their glitch) so please excuse me if I don't respond with a personal e-mail.  I'll post replies on this post but that means you'll need to come back for another visit to read it.  Sorry if that is an inconvenience and thanks for reading today's post! 

Mary 


Tuesday, May 17, 2016

Tumbling Blocks Progress Report

After an awesome spring day on Friday, we had to endure a wet, cold weekend that played havoc with lots of outdoor activities like the plant sale I managed for my church mission team and the early morning bird walk on Sunday which I co-lead.   I should have painted but after wet, cold mornings outside I was too tired to do anything except sit at the sewing machine.

I decided to finish making the units for my tumbling block quilt.  I verified that everything was in the right place and then counted up how many side units were needed.
I found the bag of scrappy diamonds quickly (lovely to have something organized)!  There were even several finish tumbling blocks and soon I was underway, laying out the remaining side units and stitching them together.  The little stack of diamonds and half diamonds on the left served as "leaders and enders" so I could keep the chain going through all the y-seams.
Have you noticed Barbara Brackman's new follow along project -- the Morris Hexathon?
I have and it's only one small block a week and I can machine piece it and so I failed the resolve "not to start a new project in May" -- more about that next week!
Once all the side units were finished and added to the design wall, I focused on making the top and bottom edges straight.  I use half hexagons like these to achieve that.  With straight edges on all four sides, adding the borders is simple.  I show how I do this in a previous post -- HERE. 
I needed 10 of these units.  One of the habits that makes chain piecing easier and keeps me focused is to lay out the pieces in the positions they will occupy in the finished block with the right sides up.     
Of course, that doesn't guarantee I won't make a mistake but it's generally foolproof.
One of these isn't like the others!?! 
The chain piecing technique enabled me to fly through these units.
Here you (barely) see them across the lower edge -- I can't reach the top of the design wall so the remainder will sit beside the machine until needed.
Before I left the studio, I chose border fabrics.  Now to get back in there and finish setting the top together!  I love that I can use just about any border fabric that suits me that day on scrappy quilts like this! 

If you are also playing with y-seams during the month of May, I'll be opening up another Y-Seam Warrior Link-up next week on Tuesday, 5/24/2016.  It will be open for five days and you can link from your blog, Flickr, and Instagram!
The spring garden weeding is progressing slowly and on my daily "walk-about" the yard, I noticed this mob of tiny just hatched spiders scrambling around the end of my window box -- pinhead size.
And I love the composition of this picture of the chives coming into bloom -- total accident -- no editing!  Might have to print some notecards using this one!
Time to do some more painting!!

Mary Huey