Thursday, July 30, 2015

Thoughts on building momentum for quilt makers


I'm delighted to share this post with you that I created for the end of the second quarter 2015 Finish Along with Adrianne over at On the Windy Side.  It ran on her blog earlier this month.  I believe strongly in the positive impact that is the result of working at one's craft daily.  Read on. . . . .

I’ve quilted for over 40 years during which time I've taught for 35 years and owned a quilt shop for 26 years.  In other words, I’m an expert UFO enabler!!  For years, I’ve been helping quilters start projects but since I closed my shop in 2005, I’ve been trying to help quilters finish projects.

I love the “cartoon” that circulates around Facebook every so often with two women chatting and one says to the other, “I hear it takes a long time to finish a quilt you’re not working on . . . . “  It’s funny, but it’s sad at the same time.  We love to start, but many of us forget that we also need to love to finish! 

Over the years, I’ve observed that an overload of UFO’s will kill creative energy faster than a cranky husband – the guilt that travels with UFO’s extinguishes enthusiasm relentlessly!

So how do you deal with UFO’s?  Certainly participating in the 2015 Finish-a-long is a good step in the right direction.  That end of the quarter deadline that is fast approaching can stimulate lots of positive activity!   I have always been a deadline finisher myself!

Several years ago I created a course for quilters to use to tackle their UFO’s more successfully and one of the topics I cover is "building momentum".  At the end of each lesson, I assigned participants several tasks.  The most important task and the one that was at the end of every lesson was “to work at your craft/art every day!”
I'm lucky to be able to commandere the couch every evening so I just leave my current projects out and ready!

It’s one of the most effective strategies I use personally to get UFO’s finished.  Sometimes it’s only 20 minutes, but it’s easier for me to find 20 minutes every day than it is to find big blocks of stitching time.  And if that’s all I can get during a busy week, those 20 minutes daily sessions equals over 2 hours a week?! 

I’m going to make a big assumption here – you quilt because you enjoy it?  So keeping at it on a daily basis is good for you.  Seriously, science has shown that it relieves stress and calms us down.  Using our hands bolsters self-esteem and confidence in all areas of our life.  So why aren’t you stitching every day.  You can’t wait until you have the time and the energy.  You have to figure out how to make it a regular part of your day.

I started an accountability journal almost 10 years ago to document my daily progress.  When I first started mine, there were days when I didn’t have anything to “tell” my journal so I would dash back up to the studio and sew madly for 15 minutes so I could make an entry before I went to bed.  Now it’s a routine part of every day.  One of the surprises you may encounter if you’ve never journaled your stitching is how much you really get done.  After 10 years, I still love to write “FINISHED” in that journal and add to my annual tally in the margin of the pages.  I now know that I average 45 finishes a year – feels good.

“Yes, but I work” you are saying.  The most important strategy I use to keep me stitching every day is to leave my work areas set up so I can plop down at the end of the day and just start stitching without thinking about what to do.  I find if I don’t have to think about the “what”, it’s easier to pick up my work and continue.  So I leave the next step set out when I leave my studio at the end of the afternoon.  I hand stitch or knit every evening – so before I head to bed, I thread the needle and organize the next step.  It’s waiting for me to return the next evening when I’m too tired to think.  It isn’t that we are too tired to stitch, we are too tired to think – our decision maker is just closed for the day!!

Ready and waiting for me to return -- no thinking required, just plop down and turn on the machine!!
I’ve also observed that stitching every day leads to increased skill without much effort – practicing every day really does work!  Your piecing will get better, your cutting will become more consistent, the more you do, the better you get!!  I’ve also noticed the creative solutions to challenges and problems has become almost effortless.  I think it’s because our subconscious keeps working on a project when we keep coming back to it each day rather than waiting until we have a couple free hours to stitch.  It watches quietly for ideas and searches that memory bank of experience we own without being asked.  Next thing I know, there is an "idea"!  Where did that come from?
 
My current travel stitching being restocked for the next outing -- the tools never leave the pouch!!


Quick personal story – my mother unfortunately suffered a horrible descent into dementia during the last year of her life.  I live the closest and tried to be with her every day.  Her anger and frustration was heaped on me and as time went on, it became harder and harder to endure.  Because I was already in the habit of stitching EVERY DAY, it became my respite.  It was an escape from my reality and soothed me every day to sit down and stitch.  Interestingly, although it was the most difficult experience of my life it was an incredibly creative and productive year for me as a quilt maker.   Had I not already figured out the importance of daily stitching to me as a creative person, I don’t believe I would  have sought that avenue to manage the stress.  I would have been too tired.  Everything in my life came down around my head, but my stitching soared and kept me afloat. 
 
If you don't stitch everyday, I encourage you to start today.  The benefits are astonishing and you won't be sorry.  You'll finish more, you'll be calmer, you'll be more creative and all that leads to more happiness!!
 
Mary Huey
 

Friday, July 24, 2015

Just for Inspiration

A couple weeks ago, I took a few days off from my quilting to join a group of botany nerds from the Ohio Natural Areas and Preserves Asso. for a 3-day field trip to the Upper Peninsula of Michigan.  We visited bogs and fens and wetlands and dunes between Lake Michigan and Lake Superior.
The bogs and fens were a relatively new habitat for me and a first look doesn't reveal much of the true nature. 
 
This is what one discovers in a pair of knee high boots and a bug head net!
Northern Pitcher plants were every where!!
Many were just finishing blooming!
I tried to stick around and see if the fly on this one would slide down into the watery pitcher. 
The color and the patterns were so beautiful. 
Round-leafed sundew were more plentiful but their small size makes them easy to overlook.
This is my favorite picture of the trip, a little island of spatula-leaf sundew at the edge of a small pool. 
Bogs and fens begin as small lakes and over time, plants form a mat of vegetation that fills in the lake.
This puddle is the last stand of waterlilies in an old lake that has become a large bog. 
Orchids like this grass-pink dot the soggy landscape.
And these showy lady slippers were just past their peak bloom but still captivating! 
The sand dunes offered a completely different landscape filled with other interesting plants.  This "sedge" (I think? -- they lost me on that group of plants) grows in straight lines -- cool!!
These harebells
and this pucoon were growing along the edge of the beach belonging to our hotel.
 
This piece of driftwood hosted a colony of lichen and the red is the "bloom" of it. 
We visited some of the large dunes along Lake Superior and found quite a few unusual orchids including this pyrola which was about 8" tall and also had a pink variety.
This is spotted coralroot, a parasitic orchid with no leaves. 
These two bugs caught my eye -- no idea what they are -- the one on the left seems to be a beetle and the one on the right a bee.   They both look like creatures from Star Wars?!
I am primarily a bird nerd, so I was a bit out of my depth, but the trip broadened my appreciation for some rare habitats.  If you'd like to see more pictures (with scientific captions), visit ONAPA's Facebook page HERE and browse a bit.  The photos of Dave Kuehner are excellent.
 
I wonder if there is a quilt inspiration that will surface from this trip -- I sometimes get a color theme idea from visiting a new part of the world.  We'll see?!?
 
Have a pieceful weekend!!
 
Mary Huey


Tuesday, July 21, 2015

UFQ Assault in Progress!!

Later this week, I'll be presenting a talk Friday afternoon during the Sew & Sews Quilt Guild of Athens, Ohio's summer quilt show.  One of the ways I prepare to present a talk is to read over my notes and actively work in my studio.  This puts me in the best frame of mind.  I have a couple deadlines that needed attention.
 
So I began my stitching day by quilting the tabletopper I shared in my last post as a warm up for the major goal for the day.
The major goal was to get this quilt layered and start the quilting process.
Mission accomplished!!  As I pin basted it, I began to audition various quilting ideas and trace them with my finger.  They will no doubt evolve as I actually do the quilting, but I've found this to be a good starting point.

Since it's a beautiful day here, I set up to do the pinning on the front porch and imagine my delight when the mailman handed me two thick envelopes with more little bird blocks to add to my growing flock!! 
My hive in the 2015 Stash Bee are making these for me this month and I can't wait to get all them and go to work on something fun!! 
As I was adding them to the work wall, the APQ UFO Challenge 2015 chart caught my eye.  I keep it in the way so I don't forget to "meet the challenge".  I need to get it out . . . . .
. . . . . to the box!  I'd like to point out that it now closes which was not the case in January when I chose 12 projects for my list!!
It's not this one (Mississippi Mud that I'm helping my daughter finish).
It's not this one (really cool drunkard's path crib quilt). 
It's not this one (cat BOM ready to be quilted -- pretty cool backing, huh?). 
It's this one.  Pretty sure it's the oldest UFQ in the box -- 24 pieced blocks from about 1986?
There's a lump of fabric. That's good.
There's a really cool border plan though I'm not sure I'm that ambitious at this point.
Obviously since it's now the end of July, this quilt won't be "finished" but I'd be happy to get the blocks into a quilt top and organize a backing.  Then it can wait for a reason to finish it and I won't feel guilty.
 
One of the most important principles for a successful assault on your UFQ's is to know what you have.  That means they ALL need to be organized in one place and sorted by "stages".  I have three categories for this.
 
I have a shelf of tops with backings (easy to pull one out and finish it for a gift or donation) -- in fact the top I layered this morning is just that -- it's perfect for the person to whom it will go and having a "goal" (more than just a finish) will keep me focused and moving. 
 
I have a shelf of projects that are more than half finished and a third shelf of projects that will take more time and focus (such as the 24 blue grape basket blocks).
 
If I can find something quickly, I'm more likely to consider finishing it as a need arises.  I believe it's important to review my stock of UFQ's on a regular basis -- at least once a year -- so when I get a shower invitation or a call goes out for a fundraiser I want to support it's easier to answer the need by finishing a UFQ rather than starting a new project!!
 
So the rest of my July will be focused on these two UFQ's -- quilt the charming little basket quilt and organize the pieced blocks into a top with a backing.
 
Then I can play with those birds!!!
 
Mary Huey


Friday, July 17, 2015

A New Magazine!!

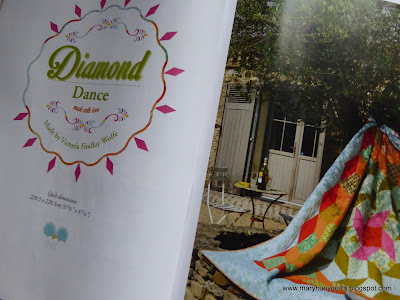
 A few days ago, I stopped by my local Barnes & Noble bookstore to see if the new Quiltmania publication, Simply Moderne had arrived.  There it was!!
I retired to the nearest chair and flipped through it to see what it was all about.  I don't profess to be a "modern" quiltmaker, but a good idea is a good idea no matter where it occurs.
It didn't long for me to decide it was worth the investment as it includes three designs that I can piece by applying the chain-piecing technique from my DVD, Set-In Piecing Simplified!!
Each design has instructions for a quilt size project, patterns, and beautiful color photos.  It was my intention to share my thoughts on each of them with you today but I got so stimulated by this one from the gals at Moose on the Porch Quilts that the others will have to wait for another day.
It's always interesting when circumstances converge and provide an opportunity for me.
I've had this booklet, Simple Hexagons since it came out last spring but never did more than read through it.  (There are some great ideas!!)  
I really shouldn't start a new LARGE project at this point (many, many oars out of the boat already).  I need a small gift for a wedding next week.
While teaching Baby Blocks for Beginners yesterday, I shared my string pieced hexagon tabletopper (check it out HERE) with the class. 
 
So when I went up to my studio at 9 a.m., all that was rolling around in my head. 
 I opened the magazine to start prepping to write this post and an idea appeared!!
A tabletopper using the Gemstones would be perfect -- nice photos for a blogpost, a small quilt, and a lovely gift for my niece! 
 
 To the stash!!!
 
I like to give newlyweds something Christmasy and so that was the pile I went through first.
This beautiful print offers interesting fussy cutting options.
Partridge in the middle, pears all around -- yes!
I "fussy-cut" six pears for the centers of the "gemstone" units and then began to audition for coordinating prints and the placement of them.  If you follow my blog, you know I work with Marti Michell's templates most of the time and for this one, I used the large hexagon and half hexagon from Set G rather than the patterns included in the magazine just because the cutting was faster.
 
Here's a little tip -- to do all the marking necessary, I lay out a batch of pieces wrong side up and then mark, mark, mark -- seems faster than picking one piece up, laying it down, marking it, moving it, picking one up, etc., etc., etc.  It feels more efficient.
By 9:45, I was piecing -- chain-piecing -- through the "gemstone" units.  No pressing yet -- waiting until the unit is completed means it's easier to keep the seams out of the way which is necessary with set-ins.
10:15 and all six are assembled half way!  Zoom, zoom!!
At 11 a.m., I cut the partridge hexagon (used Marti's Multi-size Hexagon Ruler) and started to assemble the units into the tablemat. 
 
Whoa!!  Moving too fast!!  That's not right!!!
When I left the studio at noon, I had the piece together and up on the workwall to audition whether I will add a 60 degree diamond in each "corner" to make it a big hexagon or leave it with the "zig-zag" edge.  Either seems fine and I'll finish it with a "fall" print on the back (so it's multi-functional) and the no-binding finish I wrote about HERE last fall.
I pressed my units different than the instructions because as I set the first pair together, I decided I wanted the seams to be opposing.  If you used the same fabric all the way around each hexagon as in the magazine pattern, you could rotate the units and achieve that.  This is the way they advised pressing each unit.
I could have pressed three like this and the other three opposite (does that make sense) but I didn't see that until just now?!?
 
This is the way I re-pressed mine (because I didn't want to unstitch anything).
It's important to look at all styles of quilting, not just your favorite style -- I consider myself a traditional piecer, but I look everywhere for ideas!!  I'm glad each of these designers were willing to work with Quiltmania and provide so much inspiration. 

I look forward to future issues of Simply Moderne!!

Have a pieceful weekend!!

Mary Huey


Wednesday, July 15, 2015

A Finished Top!!

After a botanizing break in Upper Michigan last week, I was looking forward to getting back in the studio and adding the border to this masterpiece!! 
 I made the edges of the top straight by using half-hexagons so I could continue the "all machine-pieced" theme.The hexagons for the top and bottom edges were more like 3/4 hexagons which I cut from straight strips like this so that the top and bottom edges would be on straight of grain.
Talk about boring piecing!!  I did most of them as "leaders and enders" for other projects that were in process at the same time. 
The sides pieces were half hexagons of a variety of green prints chosen to blend with the border fabric. 
Before I could add the borders, I had to press almost the entire piece.  Only the center star was completely pressed and let me tell you, it was just as boring a task as you might image.  Then it occurred to me to set myself up for some lap ironing!!
One episode of Poldark, one episode of The Crimson Field, and two episodes of Crossing Lines and it was all done!  Here's a close-up -- once I found the rhythm and got absorbed in the drama, it went quickly.  I worked in straight lines, swirling each intersection and pressing my way along with a dry iron.  Notice the seams pointing in the same direction as your eye moves across the piece.  That was the key!!
It felt like a major accomplishment to get it all pressed. 
Time for the border print -- from the stash -- can't remember how I obtained it but it was best choice from the options I pulled out of my stash.  The main motif is staggered and flipped in rows across the print and I had about 1 1/4 yards of it which meant the borders needed to be pieced.
There was lots of auditioning on the workwall before I decided to cut the fabric horizontally rather than vertically.  In the process, I realized it would be easier to focus on the smaller repeated motif and after several math sessions, I was ready to cut.
The cuts are 3 15/16" -- yep!  4" was too much and 3 3/4" was too little to enable me to align the strips end to end to get the length needed for each border.
Two of the borders have the motifs aiming to the right and the other two are opposite.  I'm not sure anyone would have noticed if I had put a right facing strip with a left facing strip, but I feel it would have made it look awkward.
I attempted to "match" the motifs -- the first time I forgot that some of the motif would disappear into the seam allowance.  Question is when I make a little discovery like that -- will I remember the next time to go slower?  Probably not.
I don't like to press seams open unless I'm trying to camouflage the seam as in this case. 
Three of my joins looked okay even though they aren't perfect, but the one on the right had to be adjusted.  It was too obvious to my eye.
Much better!!
I mitered the corners -- I think a graceful floral looks better with a mitered corner even if the design doesn't mesh flawlessly.  And I like to show off how easy it is with Marti Michell's My Favorite Mitering ruler. 
You can cut the angle before stitching when you are confident. 
Or draw a line when you want to be cautious!
Here it is pinned and ready to go to the machine. 
Excellent results are the norm when using this tool and I have to confess that it's fun to show-off a bit.
And here it is -- a finished quilt top!!  Totally machine pieced with the chain-piecing technique of Mary O'Keefe as shared in my instructional DVD, Set-in Piecing Simplified.
It's 58" by 62" made with 1" hexagons that I cut using Marti Michell's Set G.  It will take some time to consider the quilting but for now I'll rummage through the stash and find a fitting backing fabric!!
 
Hope your week has some stitching time included everyday!!
 
Mary Huey