Wednesday, January 30, 2019

Rainbow Nundle Dilly Bag Finish!!

I'm so pleased with my finished bag that I've already filled it with the next knitting project!!
I just have to finish the toe of the final Christmas sock and I can cast on this new cardigan for me!!
I showed you these rainbow bands of hexies last week on my way out the door to a weekend stitching retreat.  Many of the hexies were basted during the fall session of #100hexies100days2018 on Instagram with the intention of making myself Brigitte Giblin's Nundle Dilly Bag.
I made one for my knitting daughter and loved it so much that I wanted my own!
Happily, I met my weekend goal to have the outer shell of the bag finished and ready to line when I got back into my studio on Monday.  Once I had the finished shell in hand, it was easier to choose the finishing fabrics.  I repeated the black polka dots for the casings.
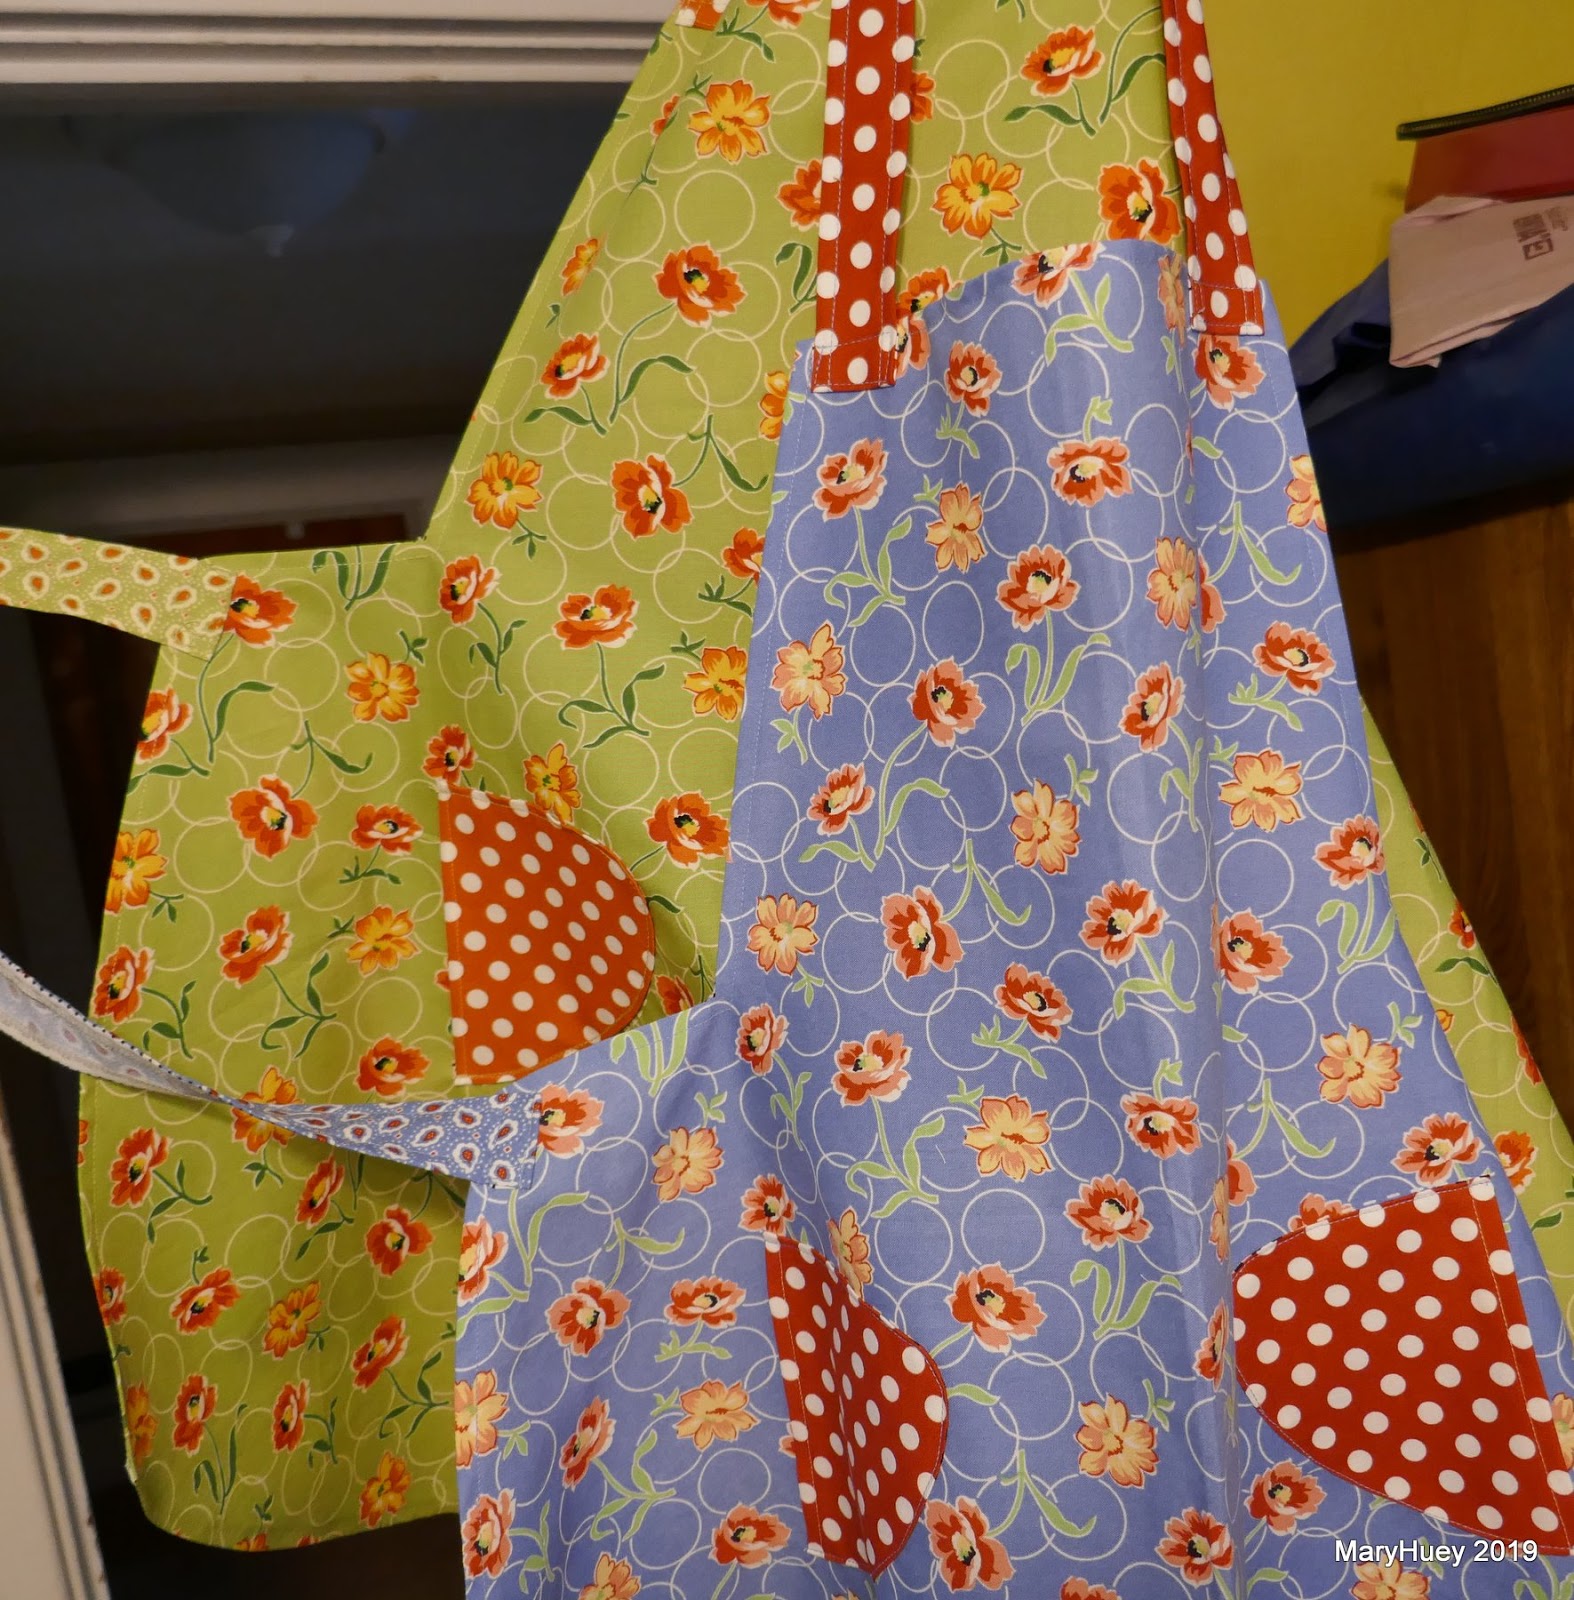
I chose a cheerful floral for the lining -- there wasn't quite enough so I added strips of the bright green and then used that for a couple pockets.
I even added a "fob" just in case!?! 
I made a detour from Brigitte's instructions for the lining to streamline the process a bit.
I cut the bottom circle as two half circles (don't forget to add seam allowances if you try this).
When I stitched them together, I back stitched about 1/3 of the way across, lengthened my stitch to basting for the center 1/3, and then shortened again to a standard stitch length and back stitched at the 2/3 mark and continued on to the edge.
Before pressing the seam to one side, I snip the first and last stitches of the basting section, both topside and underside -- this makes it easier to remove the stitching when I'm ready for that step. 
I divided the circle and the lower edge of the lining tube into 8 equal sections each -- I'm a lazy pinner so I only pinned at those 8 points, then eased as I stitched the base to the lower edge of the lining tube. 
Stitching the with base circle on the top is the best way to proceed and I was happy to get back to the beginning with no pleats necessary!!  Now I removed the basting stitches from the center seam of the base piece and pressed the lining.
I settled the lining inside the outer shell of the bag -- right sides together.
I always hesitate at this point to recheck - right sides together - right - I don't want to goof up.
During this recheck, I discovered one of my whip stitch seams was starting to come loose along the top edge, so I pulled the lining out and re-stitched the seam!
Whew!!
The "hole" in the base of the lining allows me to machine stitch all the way around the top edge to attach the lining and secure the casing units.
 One more check of the seam and then I turned the bag through the hole in the lining base!!
Magic!!
I pushed the lining down into the bag just to be sure and good thing -- it was 1" too long.
I must have had my ruler laying backwards on the fabric when I cut it?   Grrrrrrr!
Deep breath -- un-stitch the seam,  and I trimmed an inch off the top edge of the lining and restitched. 
Perfect!!
Now the plastic base circle was inserted and the opening stitched closed in the base. 
All that was left to do was insert cords for closing.  A search of my trims and cords box yielded nothing and the idea of making cords from fabric is really low on my list of "things I enjoy doing" -- okay, it's on the other list --"things I don't enjoy doing".

Shopping was required!!
And I "really" needed to go out for a bit yesterday because today, we are entertaining the "polar vortex" -- current temperature is -1F with winds gusting to 30 mph -- and I'm happy not to be going anyplace!!  (We need to trade some "degrees" with Australia!!)
Three errands later (including a few groceries) and I came home with supplies for an idea spawned by watching Sarah @coopcrafts Instagram posts as she hand stitches fuchsia grosgrain ribbon to cover the piping on an ugly couch.
I used two layers of 1/2" grosgrain ribbon and after stitching one side together, I inserted a 1/4" strip of  cotton batting in between and stitched down the second side. 
It's a sturdier cord that just using a single layer of ribbon.
My casing is a bit tight but I can un-stitch that and loosen it up easily. 
So here it is!!
My Rainbow Nundle Dilly Bag.
Purple, yellow, blue! 
And on the other side, orange, green, red! 
Now to finish that sock and watch my birdfeeders for the rest of the day -- checking to be sure all the regulars show up today.  This white-breasted nuthatch just checked in so he survived the super cold night.  All the juncos and house finches, both of the cardinals, and extra goldfinches plus my ubiquitous fox squirrels are present and accounted for as well! 
24 hours more to go little fellas until it warms back up.
Stay warm if it's cold and cool if it's hot!!
Mary


Wednesday, January 23, 2019

My January UFO Assault Campaign

As 2019 began, I determined not to set lots of specific goals in the hope that it would give me more flexibility (and less guilt) to pursue new opportunities and ideas. 
I set one specific goal for January and one general goal.
My general goal was "to deal with 10 UFO's during January" -- I purposely did not say "finish" because that makes progress or elimination equally successful tactics!

This quilt adapted from a magazine pattern (my pieces are larger, I am machine piecing rather than EPP, and the quilt is smaller - crib/throw size) was very exciting when I started it early in 2018.  I had all the flowers together in a snap and then bogged down when faced with the background hexagons.
So it was first up.  
It took an evening of sorting, laying out, and contemplating to get the piecing back on track.
I set the flower units with two background hexagons and made six half-flower units to fill out the staggered vertical rows. 
I am using these half hexagon pieces to build a straight edge on the left and the right edges. 
Using the "set-in piecing simplified" technique for all the y-seams means I'm work on two rows at a time -- glad for pins to keep everything straight.
I finished listening to Barbara Kingsolver's new book, Unsheltered, as I pieced.
Good book as always, though hard to hear some of the ideas she shares about our culture -- true ideas, but hard to acknowledge those truthes. 
At this point I have the left side row to piece and then the two long vertical seams -- results should be that I'll have a finished quilt top by the end of January -- yea!!!
I'll organize a backing and binding and add it to the "to be quilted" shelf to await it's final purpose! 
That's one!!

Winter finally arrived on Ohio's North Coast this weekend.
(This is a breakwall at a downtown Cleveland marina on Sunday - I love the ice sculptures that are created along the shoreline by the wind and waves.)
Since Saturday was really cold, snowy, windy, bad roads - I stayed in my studio all day and faced this "pile of shame" that sits right in full view by the ironing board!
Theory behind stacking the pile there is that I'll have to look at it often and be motivated to deal with it?!?  Right . . . . . . 
(Don't ask how long it's been there!!)
I changed the thread on my serger and finished two pre-printed apron panels that I could not resist at some point in the past.  I even used the serger to cut the apron pieces apart -- just follow that solid black line with the little red mark on the right side of the presser foot!!
The aprons really are cute!!
They are now in the "gifts to give" drawer for some future purpose! 
I've been tossing "orphan" blocks in that pile for "potholders" as I clear out teaching samples so I layered up four and quilted them.  I would have done more but I ran out of Thinsulate for the inner layer (two layers of dense cotton and one of Thinsulate).
I raided my overflowing box of  2 1/2" strips for bindings!
So much quicker than searching the stash! 
Finished!!
These may end up in my own kitchen since the current stock is looking pretty tacky. 
Finally I turned these two tiny orphan blocks into a notebook cover and mug mat.
Keeping the notebook, gifting the little mat!
All the rest of the orphan blocks are going up for adoption and are packed up for the retreat I'm attending this weekend.  
I'm committed to hand stitching only this trip!  This afternoon, I gleaned work to take along from the messy library table in the living room.
Block #2 from the #sharksdinner2019BOM is coming -- all basted and ready to stitch together! 
This is the only new project I allowed myself to start in January and I'll be caught up when I get home!
The rainbow panels for my newest version of Brigitte Giblin's Nundle Dilly Bag are packed and will come home ready for the lining construction next week! 
I have several hundred hexies basted and ready to add to my version of Marge Sampson-George's Dodecagon quilt.  I'm determined to get this top set together over the next couple months so I can start one of Marge's other EPP designs called Mrs. Peach.
If you follow me on Instagram, I'll post my progress over the weekend. 
Such a little pile ready to be loaded into the car?!?
Feels like something is missing.
Maybe I'll throw in the socks I want to finish knitting this month? 
I anticipate a total of six finishes for the month plus letting go of a stack of orphan blocks and a couple small quilt tops as well as getting one top ready to quilt.
TEN less UFO's
Well done, Mary!!
Maybe I'll try for "eight" in February -- fewer because the main reason I was able to get to ten this month was each one was small.  The more UFO's I eliminate, the bigger the remaining UFO's are and the more time required for a successful assault.

I hope you have a stitchy weekend!!
Mary


Monday, January 14, 2019

January Stitching

I can't believe it's mid-January already!?!
I set a personal goal at the beginning of the month to "deal with 10 UFO's" -- that may or may not mean finishing of course!!

I have finished one pair of Christmas socks with a second pair moving in the right direction.
In an effort to transition from "plain" socks I grabbed several new "fancy" sock patterns during the #sockvent18 in December event on Instagram.  This charming Vanilla Spice pattern with the faux cable up the back of the leg caught my eye and is an easy knit.
The yarn is a hand-dye sock yarn from Barnyard Knits (another Instagram discovery!!) -- Stormy Skies is the colorway -- so perfect for Northeast Ohio where we survive much of the winter season under these gray threatening skies.
I found a hexagon machine piecing project with lots of finished units ready to set together so that is happening while listening to Barbara Kingsolver's newest book, Unsheltered.
Have you started that book?  It's a hard read/listen, but so relevant - so I'm persisting.
I'll share the finished flimsy very soon though it may not get quilted before month's end.

I just set one "published" goal for January -- to finish my rainbow Nundle Dilly Bag -- it's English paper pieced, incorporates all the hexies basted during #100hexies100days blast in the fall on Instagram.  It took me quite a while to organize a layout I like, but that's done and the stitching is progressing slowly.
So four UFO's dealt with and probably time this month for a few more though I'm not sure there's time/energy for six (unless it involves ditching them)?!?

I've also drawn up a list of questions/problems for my husband's family genealogy effort.
If you have caught that interest, you know what a time eater it can be!!
Last week, I took advantage of a sunny day to drive east to the county of his ancestors to search out cemeteries and answers at the library.

Hardly anyone in my family fought in the Civil War, but several of Doug's ancestors did and it's an honor to find the "veteran's star" in the cemetery and to stand where his family stood as they mourned a century ago.
One of my unsolved mysteries is the result of a family that lived in Pennsylvania but many of the documents I'm finding that pertain to them are from Ohio.  Finally, I found this map from 1870 that explains everything!
They lived in Pennsylvania, but just barely, and the nearest town was 1 mile to the west -- in Ohio.
Their farm is the second farm from the Ohio Pennsylvania border - P. Franklin, 50 acres.
Thank goodness, people save stuff like this and then share it to historical collections!!
Now I know how to proceed and hopefully, answers I want will appear.
Of course, I know myself very well so I did allow myself to start "just" one new project!
And limiting myself to ONE is so hard -- there are so many exciting possibilities for new projects in January, isn't there?

I settled on an English paper piecing "block of the month" designed and led by @lemonshark via Instagram and her website.  It's one block a month (two in January) and they are good size!
The patterns are free on her website and she has lots of useful EPP tips!
Each of my blocks will begin with a large print by Kaffe Fassett from my hoard.
Once I made all the fabric decisions, I cut everything and organized a tray to keep it all together.
 I added letters to label and identify the pieces including right side and left side pieces, before I cut the pattern sheets apart.  I labeled the overall drawing of the block to match -- that small step has saved so much mental energy!!
After thinking about the assembly order I decided on two units of four pieces as the simplest approach though as with many English paper piecing designs there is more than one way to do this.
Here are the last two finished units ready to set into the block.
Later today, I'll stitch them into place! 
The finished tile is 18" across from point to point and they will be appliqued onto a background.  I'm going to wait until I have three or four tiles finished as I think it will be easier to decide on the background squares size at that point.
The rest of my day will be stitching and knitting -- UFO's beware!!

Mary


Wednesday, January 2, 2019

New Year's Stitching - My Fussy Cutting Sew Along Quilt Top!!

This summer, I showed you my design for this hexagonal center medallion quilt that would absorb the 52 hexie flowers I have been making as part of the #fussycuttingsewalong on Instagram.
That pair of pheasants in the center is one my favorite blocks from the weekly sewalong.
I have been admiring and collecting photos of hexagonal medallion quilts for several years. The growing stack of blocks inspired me to design my own medallion layout as their final resting place.
 I also realized that the stack of  twenty-some Morris Hexathon blocks from 2016 were the same size and could be blended in with the current blocks.
Yea!!!  Bigger quilt faster and one less UFO!!
I used the Set-In Piecing Simplified technique (downloadable PDF teaching guide available HERE in my Etsy Shop) to piece all the blocks and during the fall, this medallion center was my "sew-off" while I chain-pieced through the weekly blocks.
I broke it down into several units that could be "mass produced" and then added each to the central motif.
The setting fabric I selected builds a soft frame around the entire piece. 
I made it a bit larger than needed so I could trim to make it fit -- none of my "math" ideas were going to work so took the easy way!!
In the end, I trimmed 1/2" off each side for a perfect fit.  
Because I made sure that the outside edges of the medallion were straight of grain on all sides, there wasn't any stretching!!
Last week, I pieced the final hexie flower and finished piecing some "half flowers" for the ends of some of the rows.
For the past two days, I have been shut up in my studio setting everything together and it looks terrific!!  Since I've been adding white background diamonds to each hexie flower as I made them, it was easy to prepare them for setting with the simple addition of an equilateral (60 degree) triangle!
I used Marti Michell's Set G to cut all my hexagons for a finished 3" block.
That meant, cutting with the equilateral triangle ruler would yield the correct size setting triangles
I needed a few half-triangles (easy to cut with Marti's tool) and with two layers of fabric, wrong sides together, cutting "rights" and "lefts" was effortless.  Marti's tool features point trimming as you can see below and taking the time to make those trims set me up for easy and perfect matching! 
Most of the blocks have been on the design wall for weeks -- there has been lots of moving around and shifting to achieve a "spontaneous" balance.  The Morris Hexathon blocks didn't work (to my eye) just mixed in randomly so they are divided into diagonal rows in each corner.  There were also a few six-pointed stars from teaching demos that are positioned evenly around the central medallion.  All the hexie flower blocks were allowed to stay where I first plopped them unless there two very similar ones together - such as same color, same fussy cutting style, etc. 
 
All the hexagon blocks, except for those at the ends of the rows, were prepared by adding triangles. 
Each triangle has one straight of grain edge and I always keep that edge horizontal across a quilt.
If my block piecing is accurate, the triangle will match the corners of the hexagon block perfectly!!
Ready to piece a row!!
It goes fast as there are only straight seams from this point forward!!
Here's a trick I discovered a couple years ago to match angled seams when working with diamonds.
If you have consistent seam depth, when you layer the two units right sides together, match the end of the previous seam to the corner of the diamond.  
Here, I'm sliding the corner of the diamond (top layer) over to match the end of the seam on the lower layer.
 It's faster and much less frustrating than searching for the perfect spot with "pin poking". The intersection of the diagonal seams will be accurate 95% of the time -- no matter the actual depth of your seam allowance and I don't pin!!
Try it next time you do this!
To maintain straight seams only construction throughout the quilt top, I pieced the center of the quilt in sections rather than long rows.  Two of these large triangle units set on opposite sides of the center medallion were the key!
Once those were added to the center medallion, I made the left and right units by working in short rows.  
This is the result of two pleasant afternoons in the studio!!
I have left it in 3 sections at this point while I think about my quilting approach.
Do I machine quilt or hand quilt or some of both?
If I machine quilt, will I work in sections which is easier for me to manage and I'll do a better job. 
So for a few days, I'll enjoy this view from my machine while I fiddle with some neglected UFO.
The questions will answer themselves and I'd like to make this piece one of my 2019 finishes!!

If you have a question about my approach to setting this quilt together, please leave a comment below and I'll answer it in the comments so everyone learns from it, too!

So here's to a productive start to 2019!!
Another year, more fun!!
Mary