Showing posts with label Sharksdinner BOM. Show all posts

Tuesday, November 23, 2021

Crossing another one off the "to-do" list!!

 It's two days before Thanksgiving here in the USA.  This morning I've been thinking about the controversial aspect of this "holiday" and decided to focus on the "gratefulness" aspect of it.  Gratefulness is a universal attitude that can reframe mindsets and dissipate frustration.  The challenge is to look beyond the personal aspects and adopt a wider viewpoint of gratefulness so if you will indulge me for a paragraph before I share finish #17?

I'm grateful for all the courageous people who are calling out dominate cultural views and expanding my point of view on a variety of topics from racism to habitat protection.  It has been a year of discovery for me in spite of hardly leaving my little world.  I hope their impact on my thoughts and ideas will have a powerful impact on my life going forward.

I'm also grateful for each of you and your interest and support of my blogging and social media posts!!  You give more purpose to my life and efforts than you realize.

And finally I'm grateful for that loaf of bread baking in the kitchen and lifting my spirits with it's aroma.  Nice that the sun has decided to shine this morning, too!


Number 17 is finished!! Quilted, bound, and snuggle tested!

The blocks are paper pieced - a BOM from a very clever gal I found via Instragram -- Elisabeth at @lemonshark.  If you want to see some of the other versions or check out her blog with the PDF's for the blocks, search the hashtag #sharksdinnerbom2019 on Instagram.  There are twelve different blocks -- each has the same outer shape but the center of each one is a different configuration of shapes.  
(Also, the background/sashing is my design and everyone has been doing their own thing with that.)
The backing of the quilt is a scrappy Kaffe thing (I'm trying to use up that stack) as is the binding.
I "big stitched" this quilt with #8 perle cotton using Quilters Dream Request batting.  It is so soft and supple!!  The background/sashing is quilted the same on each block plus the entire "motif" is outlined with white thread.
I used an assortment of perle cotton colors -- orange and green, lavender and teal -- choosing colors to blend or contrast with the color of the pieces.
The quilting designs were spontaneous decisions -- sometimes I was inspired to quilt in such a way that a big motif was emphasized rather than the individual pieces that created it.
The gray crown in the middle of the block below is a good example of that.
Other times, my brain was stuck and so I simply outlined the shape often times using a contrasting                                                            thread color.  I enjoyed being spontaneous!                                                                                               

I usually do my handwork in the evening (while watching English murder mysteries) and each block took between 4 and 5 sessions.  It felt like I was zooming along!
I was zooming along!!!
I said there are twelve blocks so there is a second lap quilt underway with the six remaining blocks.  The blocks are about 22" square and I feel like two small quilts will be more useful and appealing than one big quilt given the boldness of my color/fabric combinations.
Quilt number 18 is about 75% machine quilted so it feels like there could be another finish before the end of the month -- woot, woot!!  
My biggest dilemma at this point is do I clean the house or make Christmas gifts??

Bread is done!!

Mary


Thursday, February 27, 2020

I'm Retreat Bound Again!

For the past couple years, I've been confining the retreat projects I haul out of the house to hand stitching only!  It's so much easier to pack and I'm more relaxed while at the retreat which makes it more fun to be away from the studio.
This weekend, I'm working on my 2019 #sharksdinnerBOM blocks.
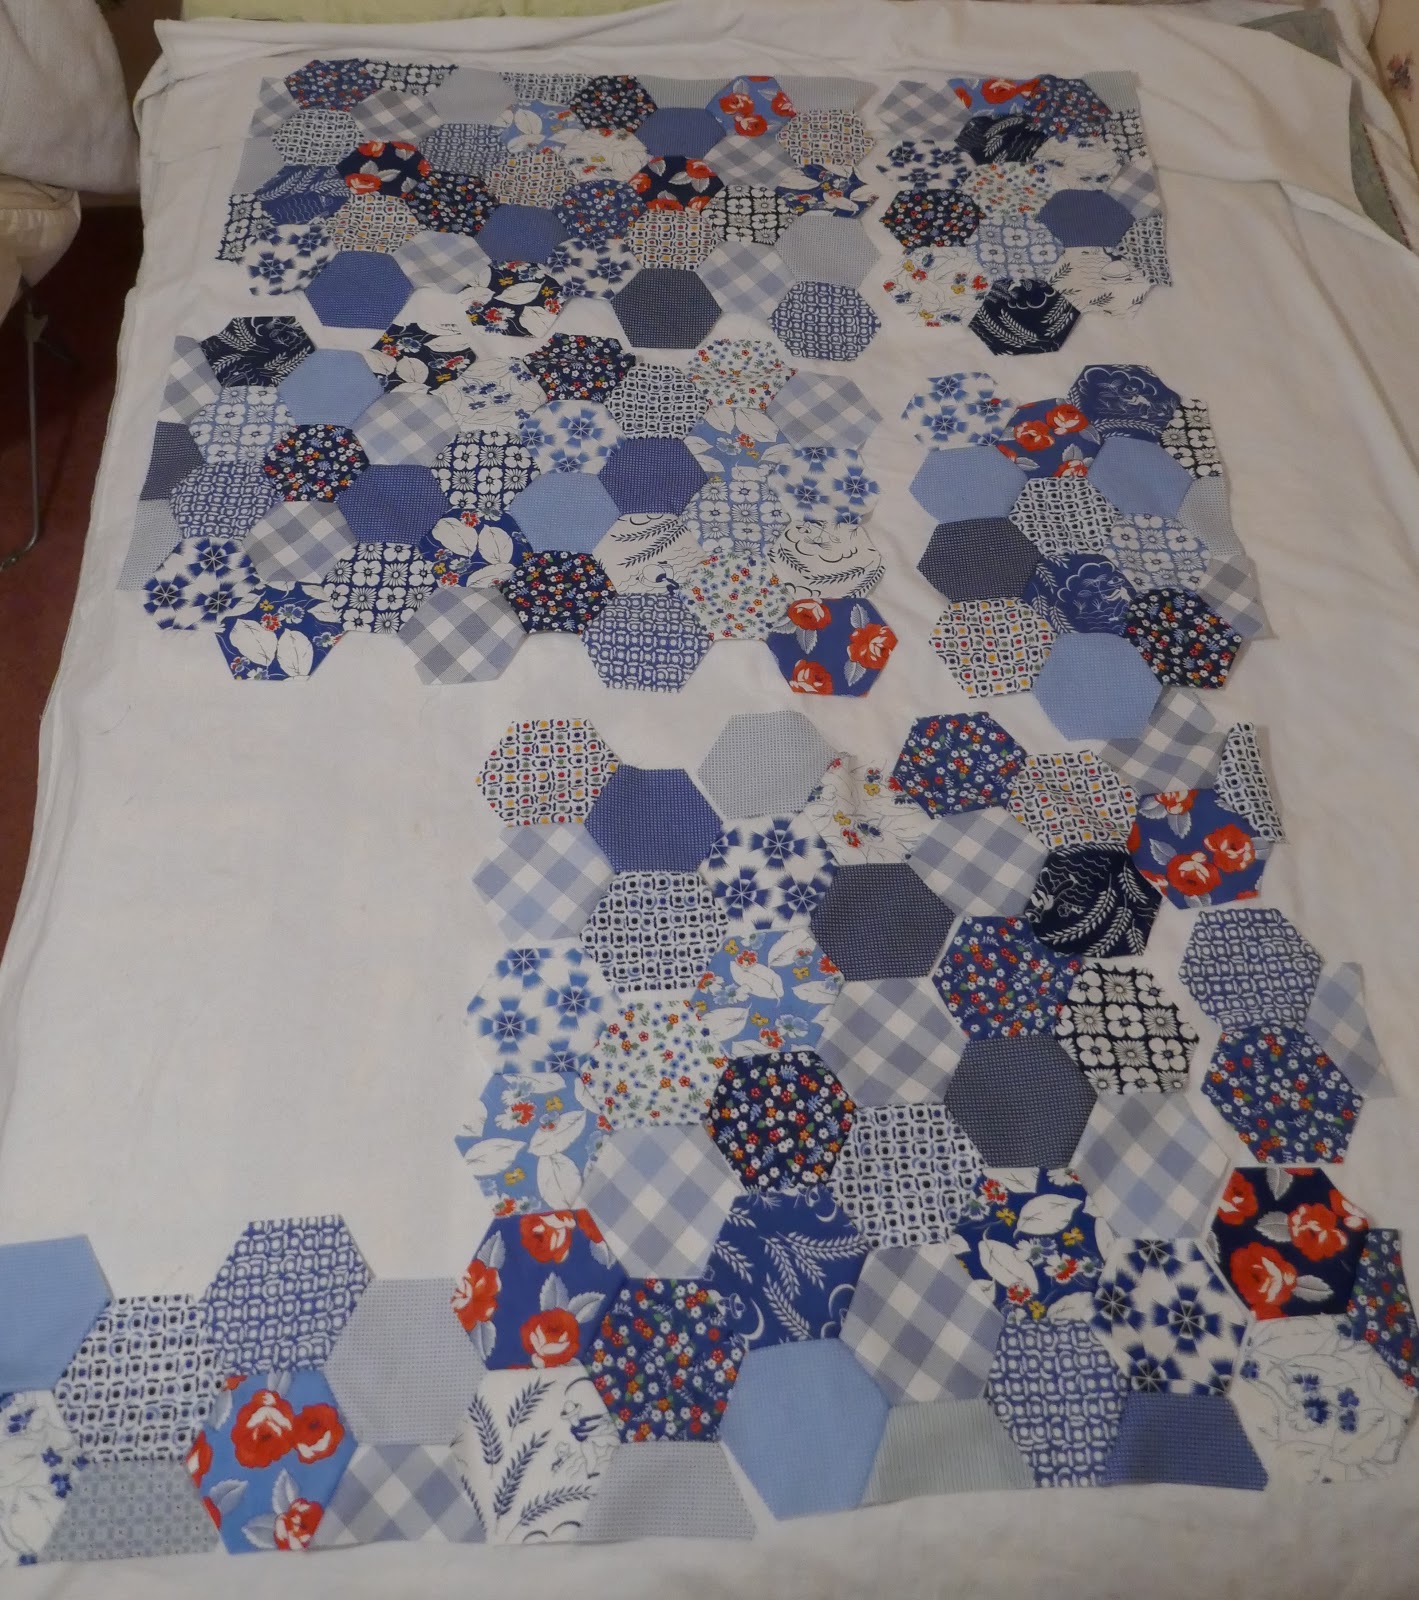
I went back through my blog photo archive and was surprised to discover how few pictures I've shared on the blog?!?   
I shared lots of pics on my Instagram feed!! 
But these are the only four process pictures I shared on the blog?!? 
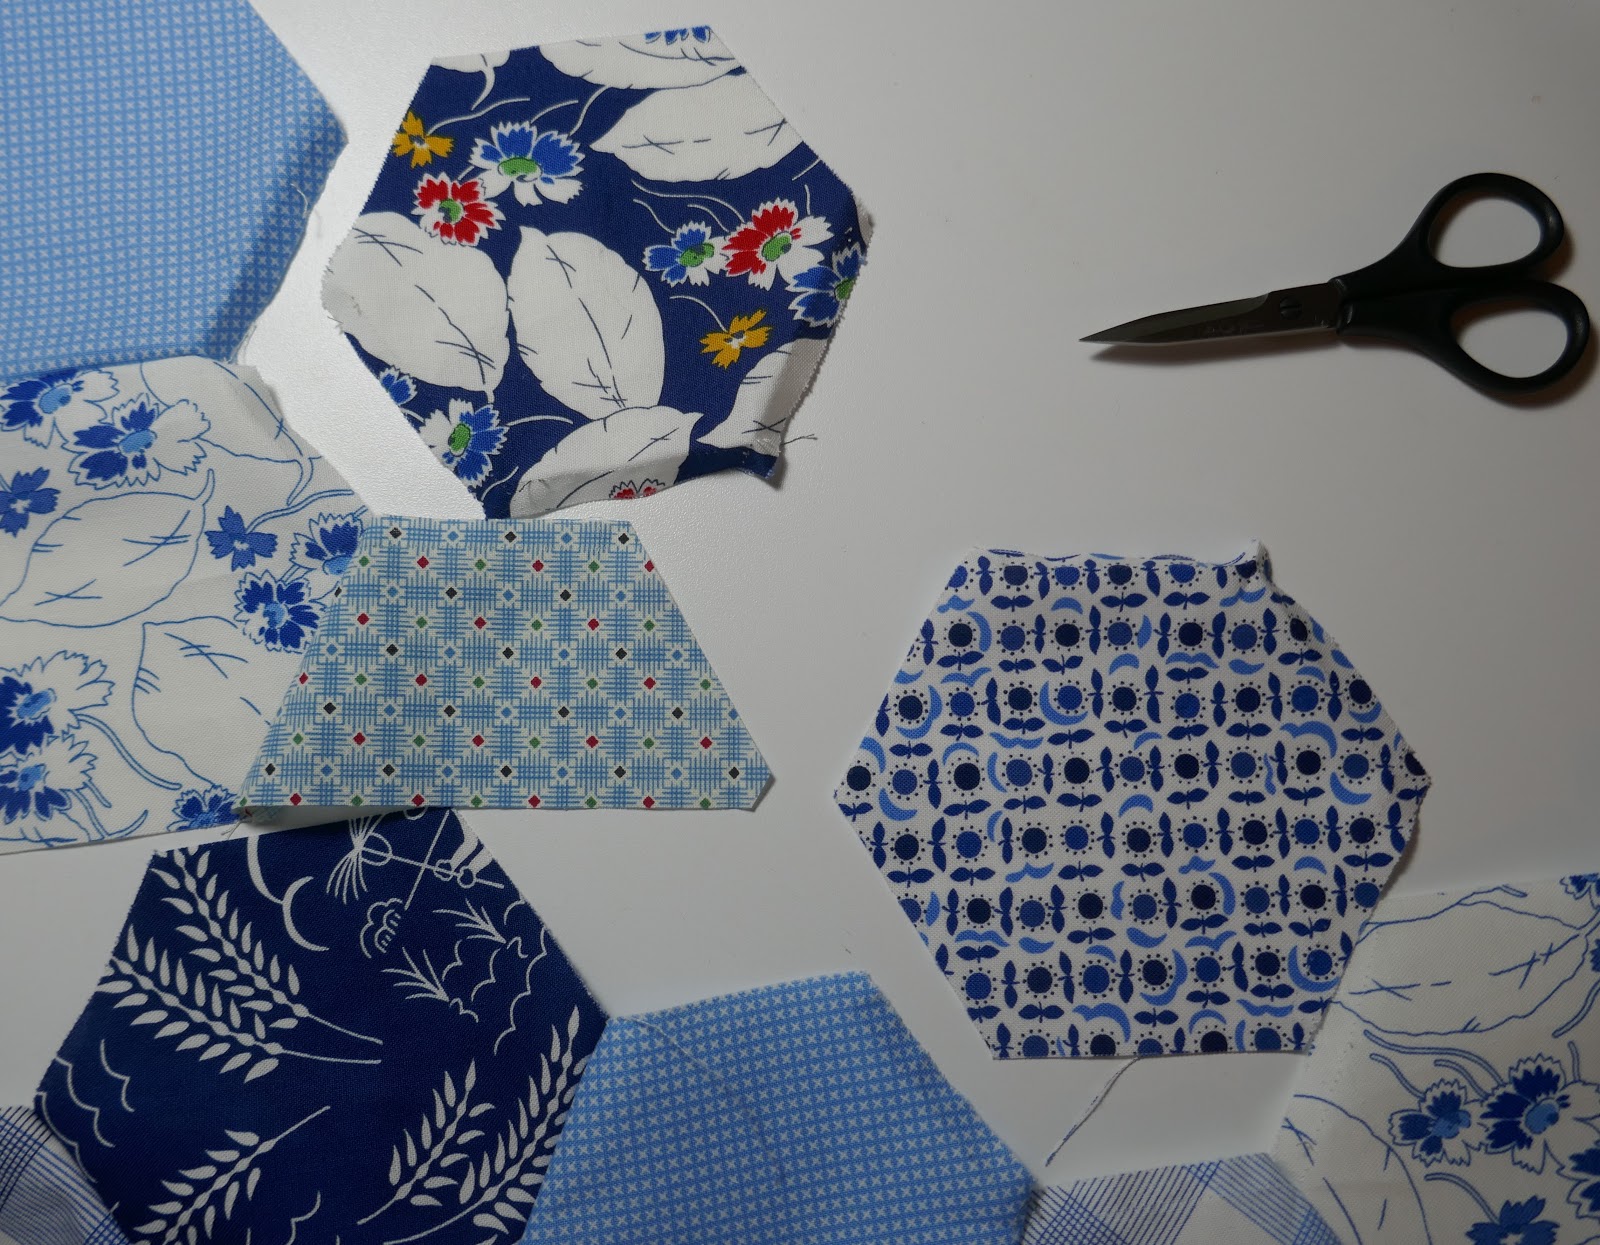
All my tile fabric assortments began with a large scale multicolor print from Kaffe Fassett.  I then worked to use other non-Kaffe prints and along the way, many of my "nature" themed prints started to become a regular feature of the tiles.
It has been a "sew my stash" project from beginning to end!!
These English paper pieced "tiles" were designed by Elisabeth @lemonshark in Switzerland and shared via her blog during 2019 -- twelve designs in all.  Each tile has the same exterior shape, but all of them have a different interior breakdown.  Then everyone making the tiles laid out the darks, mediums, and lights in different ways individualizing the finished look of each tile!  You can check some of them out by searching the hashtag #sharksdinnerBOM2019 on Instagram -- here's a link. (Scroll way down to see some of the variations more easily.)  

She did not however design a "setting" for the tiles so everyone has taken their own approach to this step. Kim, in England, has been designing crazy quilt looking backgrounds to English paper piece around each tile as she squares the blocks up.  I've been a bit intimidated by her ideas and in awe of her energy but one of her designs inspired me to design (a much simpler) machine pieced background for my blocks.

Working on graph paper to full scale, I designed a set of triangles that will frame each tile.  I contemplated random low volume fabrics but settled on black and white to emphasize the drama of each tile.
After the first test block to make sure my idea worked, I set to work every afternoon for the past two weeks piecing the backgrounds and basting the tiles to the backgrounds in preparation for a weekend of hand stitching to applique them in place. 
Each corner consists of a triangle with a mitered stripe border to I was able to use my Set-In Piecing Simplified tricks and my Marti Michell mitering tool*** to perfect results! 
This is what each finished background looks like -- the tiles are 18" across and I left that big empty center primarily because I didn't want to "waste" any of my terrific low volume white and gray prints!
I alternated the "sashing" borders between black and white which turned out to be better than I expected!  It sets off each tile beautifully.  The position of the tiles in the final layout isn't set in stone at this point, but the primarily "cool" tiles will definitely alternate with the primarily "warm" tiles as you see here.
Once a background was finished, I spent time removing all the papers which were thread basted in place.  (Sorry "glue lovers" but I don't like glue basting one bit and I've given it a fair try.)
Then with the background laying perfectly flat, I positioned the tile and basted it 1/8" from the folded edge.
As I left for the weekend, all twelve tiles are basted and ready for a weekend of stitching. 
The finished blocks are about 20" square (my design wall is not long enough, so they are overlapped here) and I did a quick trial stitch earlier this week and am predicting it will take about 90 minutes maximum to finish each block!
I'm feeling confident I'll return home with twelve big finished blocks ready to set together and contemplate borders!  (I packed a couple other hand work projects just in case, too!?!)

So often when we start a BOM based on someone else's ideas/designs, we become disenchanted for various reasons.  That happened with this project for me -- 7 months ago I couldn't imagine how I would pull these tiles into a cohesive quilt so I was losing interest.  It felt like I would end up with a bunch of big pillow covers!?!  Individually, I loved the blocks -- but together???  Not so much.
As I shared my frustration, several of the makers on Instagram encouraged me to keep at it with helpful comments that made me aware of what they were seeing that I didn't see.

I put all the tiles up on the auxiliary design wall to allow them to simmer in the back of my mind.  That's when I realized the warm versus cool color palettes and how much fun I was having incorporating some of my nature prints.  So I forged on with a new sense of purpose -- balance the warm and cool blocks plus include a nature print in every tile.

When I basted that first tile onto the background, it felt right!  Can't find better words than that?
The backgrounds are unifying the crazy fabric/color scheme so much better than I expected.
I'm so glad I shared my frustration and grateful for everyone's input.
This is going to be an awesome quilt!!

So if you feel letdown about a project, get it out and put it up someplace where your subconscious can work on it.  Share it with folks and get their perspective!  Carry on!!

Hope your weekend is a pleasant one!
Mary

***EDIT April 2025
Marti Michel closed her business in late in 2024 and while some shops may still have a stock of her templates, you can also find them on Ebay and Etsy. 


Monday, September 23, 2019

So Much Temptation!! So Much Stitching!!

The blue hexagon quilt is not ready to layer up and quilt because apparently, one of my retirement goals is to start as many projects as possible concurrently?!?
Not really, but I do have more "oars out of the boat" right now than might be a good idea.
  I did make good progress and am certain (?) I'll have it ready to quilt next week. 
There have been a few little hiccups as I discover two of the same print setting next to each other (the work of gremlins in the night), not just once, and if it bothers me now, it will always bother me.
So taking a deep breath and fixing them.  
Since I don't have any extra hexagons, it means I have to switch each one with a hexagon in another part of the quilt top.  Since I haven't joined all the units at this point, it is less work than it could be.  Because many of the seams are on the bias, I snip every fourth or fifth stitch . . . . . 
. . . . . flip it over and pull on the bobbin thread to remove all the stitches without stretching the edge.  One thing I have learned -- always do this "stitch-clipping" with the hexagon being removed on top!
If I don't do that, I sometimes undo the wrong seam.  
Grrrrr. 
Two hexagons out, switched and ready to stitch back in place! 
I've been in the studio quite a bit and am keeping up with my #100days100blocks blocks -- I pieced the 85th one today while switching the hexagons!
I tidied up the fabrics I'm using that have been living on the floor for the past 85 days
 and cut the next few days blocks this morning while waiting for my morning tea to kick my brain into gear.  Ahhh, the zen of rotary cutting!!
The quilt is looking great and I've started to stitch some of the blocks together into groups of four.
If you go onto my Instagram feed (@hueymary), you'll see some pretty cute hedgehog peek-a-boo happening!
During the past week, I also accomplished my #onemonthlygoal for September by assembling the upper left corner of my current masterpiece using Marge Sampson George's Dodecagon blocks.
Just two more corners to assemble!  My traveling stitching box is full of green, yellow, and pink basted hexagons to assemble into the various units needed for the next corner.
I'm continuing to assemble these large English paper pieced tiles from the #sharksdinnerBOM -- nine are ready for the background and I should finish basting the last few pieces for the tenth one this evening to assemble by the end of the month!
The challenge I set myself (using Kaffe collective fabrics with my stash) may be the undoing of me with this project as there's not as much cohesiveness as I'd had hoped.  The blocks are terrific individually but I may have either two quilts (a warm color palette and a cool color palette) or twelve large pillow covers if I can't resolve my frustration with the color palette as I add the background fabrics.   
I will say that my EPP skills have improved as a result of this project!!
And @lemonshark is a very creative designer!!
Because all that isn't enough to have going on -- this week, I started the #littlemisssawtoothqal!?!
I didn't have to leave the studio to find the fabrics and I have a purpose for the finished quilt.
Surely that is enough justification??
The layer cake I'm using has been on my shelves for at least three years (along with 1 1/2 yards of the polka dot background).  Plus my youngest grandson will need a big boy bed quilt (in a couple years) and his middle name is Fox and early indications are that might be his moniker, so . . . . .  I'm good, right?!?

So this morning's tea worked and it's been a good day!!
A morning in the studio followed by a tidy up in my office (even washed windows and changed the valances) and still hand stitching to look forward to this evening!!
I think I might go for a walk just in case I crash and burn tomorrow.

Mary


Monday, January 14, 2019

January Stitching

I can't believe it's mid-January already!?!
I set a personal goal at the beginning of the month to "deal with 10 UFO's" -- that may or may not mean finishing of course!!

I have finished one pair of Christmas socks with a second pair moving in the right direction.
In an effort to transition from "plain" socks I grabbed several new "fancy" sock patterns during the #sockvent18 in December event on Instagram.  This charming Vanilla Spice pattern with the faux cable up the back of the leg caught my eye and is an easy knit.
The yarn is a hand-dye sock yarn from Barnyard Knits (another Instagram discovery!!) -- Stormy Skies is the colorway -- so perfect for Northeast Ohio where we survive much of the winter season under these gray threatening skies.
I found a hexagon machine piecing project with lots of finished units ready to set together so that is happening while listening to Barbara Kingsolver's newest book, Unsheltered.
Have you started that book?  It's a hard read/listen, but so relevant - so I'm persisting.
I'll share the finished flimsy very soon though it may not get quilted before month's end.

I just set one "published" goal for January -- to finish my rainbow Nundle Dilly Bag -- it's English paper pieced, incorporates all the hexies basted during #100hexies100days blast in the fall on Instagram.  It took me quite a while to organize a layout I like, but that's done and the stitching is progressing slowly.
So four UFO's dealt with and probably time this month for a few more though I'm not sure there's time/energy for six (unless it involves ditching them)?!?

I've also drawn up a list of questions/problems for my husband's family genealogy effort.
If you have caught that interest, you know what a time eater it can be!!
Last week, I took advantage of a sunny day to drive east to the county of his ancestors to search out cemeteries and answers at the library.

Hardly anyone in my family fought in the Civil War, but several of Doug's ancestors did and it's an honor to find the "veteran's star" in the cemetery and to stand where his family stood as they mourned a century ago.
One of my unsolved mysteries is the result of a family that lived in Pennsylvania but many of the documents I'm finding that pertain to them are from Ohio.  Finally, I found this map from 1870 that explains everything!
They lived in Pennsylvania, but just barely, and the nearest town was 1 mile to the west -- in Ohio.
Their farm is the second farm from the Ohio Pennsylvania border - P. Franklin, 50 acres.
Thank goodness, people save stuff like this and then share it to historical collections!!
Now I know how to proceed and hopefully, answers I want will appear.
Of course, I know myself very well so I did allow myself to start "just" one new project!
And limiting myself to ONE is so hard -- there are so many exciting possibilities for new projects in January, isn't there?

I settled on an English paper piecing "block of the month" designed and led by @lemonshark via Instagram and her website.  It's one block a month (two in January) and they are good size!
The patterns are free on her website and she has lots of useful EPP tips!
Each of my blocks will begin with a large print by Kaffe Fassett from my hoard.
Once I made all the fabric decisions, I cut everything and organized a tray to keep it all together.
 I added letters to label and identify the pieces including right side and left side pieces, before I cut the pattern sheets apart.  I labeled the overall drawing of the block to match -- that small step has saved so much mental energy!!
After thinking about the assembly order I decided on two units of four pieces as the simplest approach though as with many English paper piecing designs there is more than one way to do this.
Here are the last two finished units ready to set into the block.
Later today, I'll stitch them into place! 
The finished tile is 18" across from point to point and they will be appliqued onto a background.  I'm going to wait until I have three or four tiles finished as I think it will be easier to decide on the background squares size at that point.
The rest of my day will be stitching and knitting -- UFO's beware!!

Mary