Showing posts with label hand applique. Show all posts

Thursday, January 11, 2024

Flourishes BOM Update

As promised, here are all twelve finished blocks from my 2023 year-long BOM project.
This was a stash-busting goal -- the patterns with fabric kits have been in my stash for over 10 years and before that, they were in my Mom's stash for about the same length of time!?!
The pattern is Flourishes, designed by the Piece O'Cake duo of Becky Goldsmith and Linda Jenkins.  They released it as a BOM with a fabric line at the same time with one of the original quilting cotton fabric vendors, P & B Fabrics.
I worked on one block each month and happily was able to finish each in about two weeks of evening hand stitching.  The pace kept me on track and a week or more break between blocks prevented boredom.
This was the last block I stitched -- #12 in the series and well-placed because by this time, my confidence was solid.  If I'd started with this block, I think all those little circles would have defeated me?!?
Hmmm, why is this picture sideways?
Well, I have no idea -- but I'm blaming Microsoft!  They seem to have intervened and "upgraded" the photo app I use (thanks, so much???) and I haven't figured out how to import my photos from my camera disk.
To get around this issue (which may stem from impatience on my part), I'm importing photos taken on my phone and automatically stored in my Google account.  Actually, it makes this step simpler but I didn't take the time to figure out how to edit them.  Apparently my phone turned some of the pictures sideways and I'm stumped.
But the pictures are clear and the colors accurate and since my mental energy is a bit low this morning, I'm going with it.   
Random thought -- will this make the post more memorable??
The sideways photos, I mean.
I grabbed a light table years ago and have rarely used it until this project.  Every morning, I would trace 4 to 5 pieces onto the prints using the light table.  Then aligning the background block on top of the full size pattern on the light table again, I would position and pin the pieces in place ready for an evening of stitching.
(Upside down, really??)
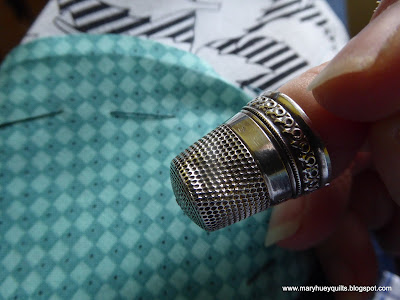
I used the needle-turned applique method, but one thing I do to make it easier is to finger press all the way around a piece on the (chalk) pencil lines because I find the needle-turning goes more smoothly.  Much to my surprise, I enjoyed not having to make any fabric decisions -- the fabrics in the kits matching the pattern cover exactly! Generally, I like to do my own thing -- picking fabrics that please me but it was a nice change.
Along about September, I began to think about assembling the quilt top and getting it quilted.  These are large blocks -- 20" and in the designers' layout, they are set edge-to-edge on the diagonal.  
We're talking BIG quilt.
So that creates a "quilting" challenge for me -- too big for me to machine quilt and perhaps too much for my hands to hand quilt?  To send it out will be expensive since the design would be "ruined" by an edge-to-edge pattern and would require "custom-quilting" which would be elegant but out of my budget.
Plus who gets the quilt down the road???
The solution I've come up with solves both issues -- make three smaller quilts!
Easier for me to quilt myself and I have three granddaughters, so . . . . 
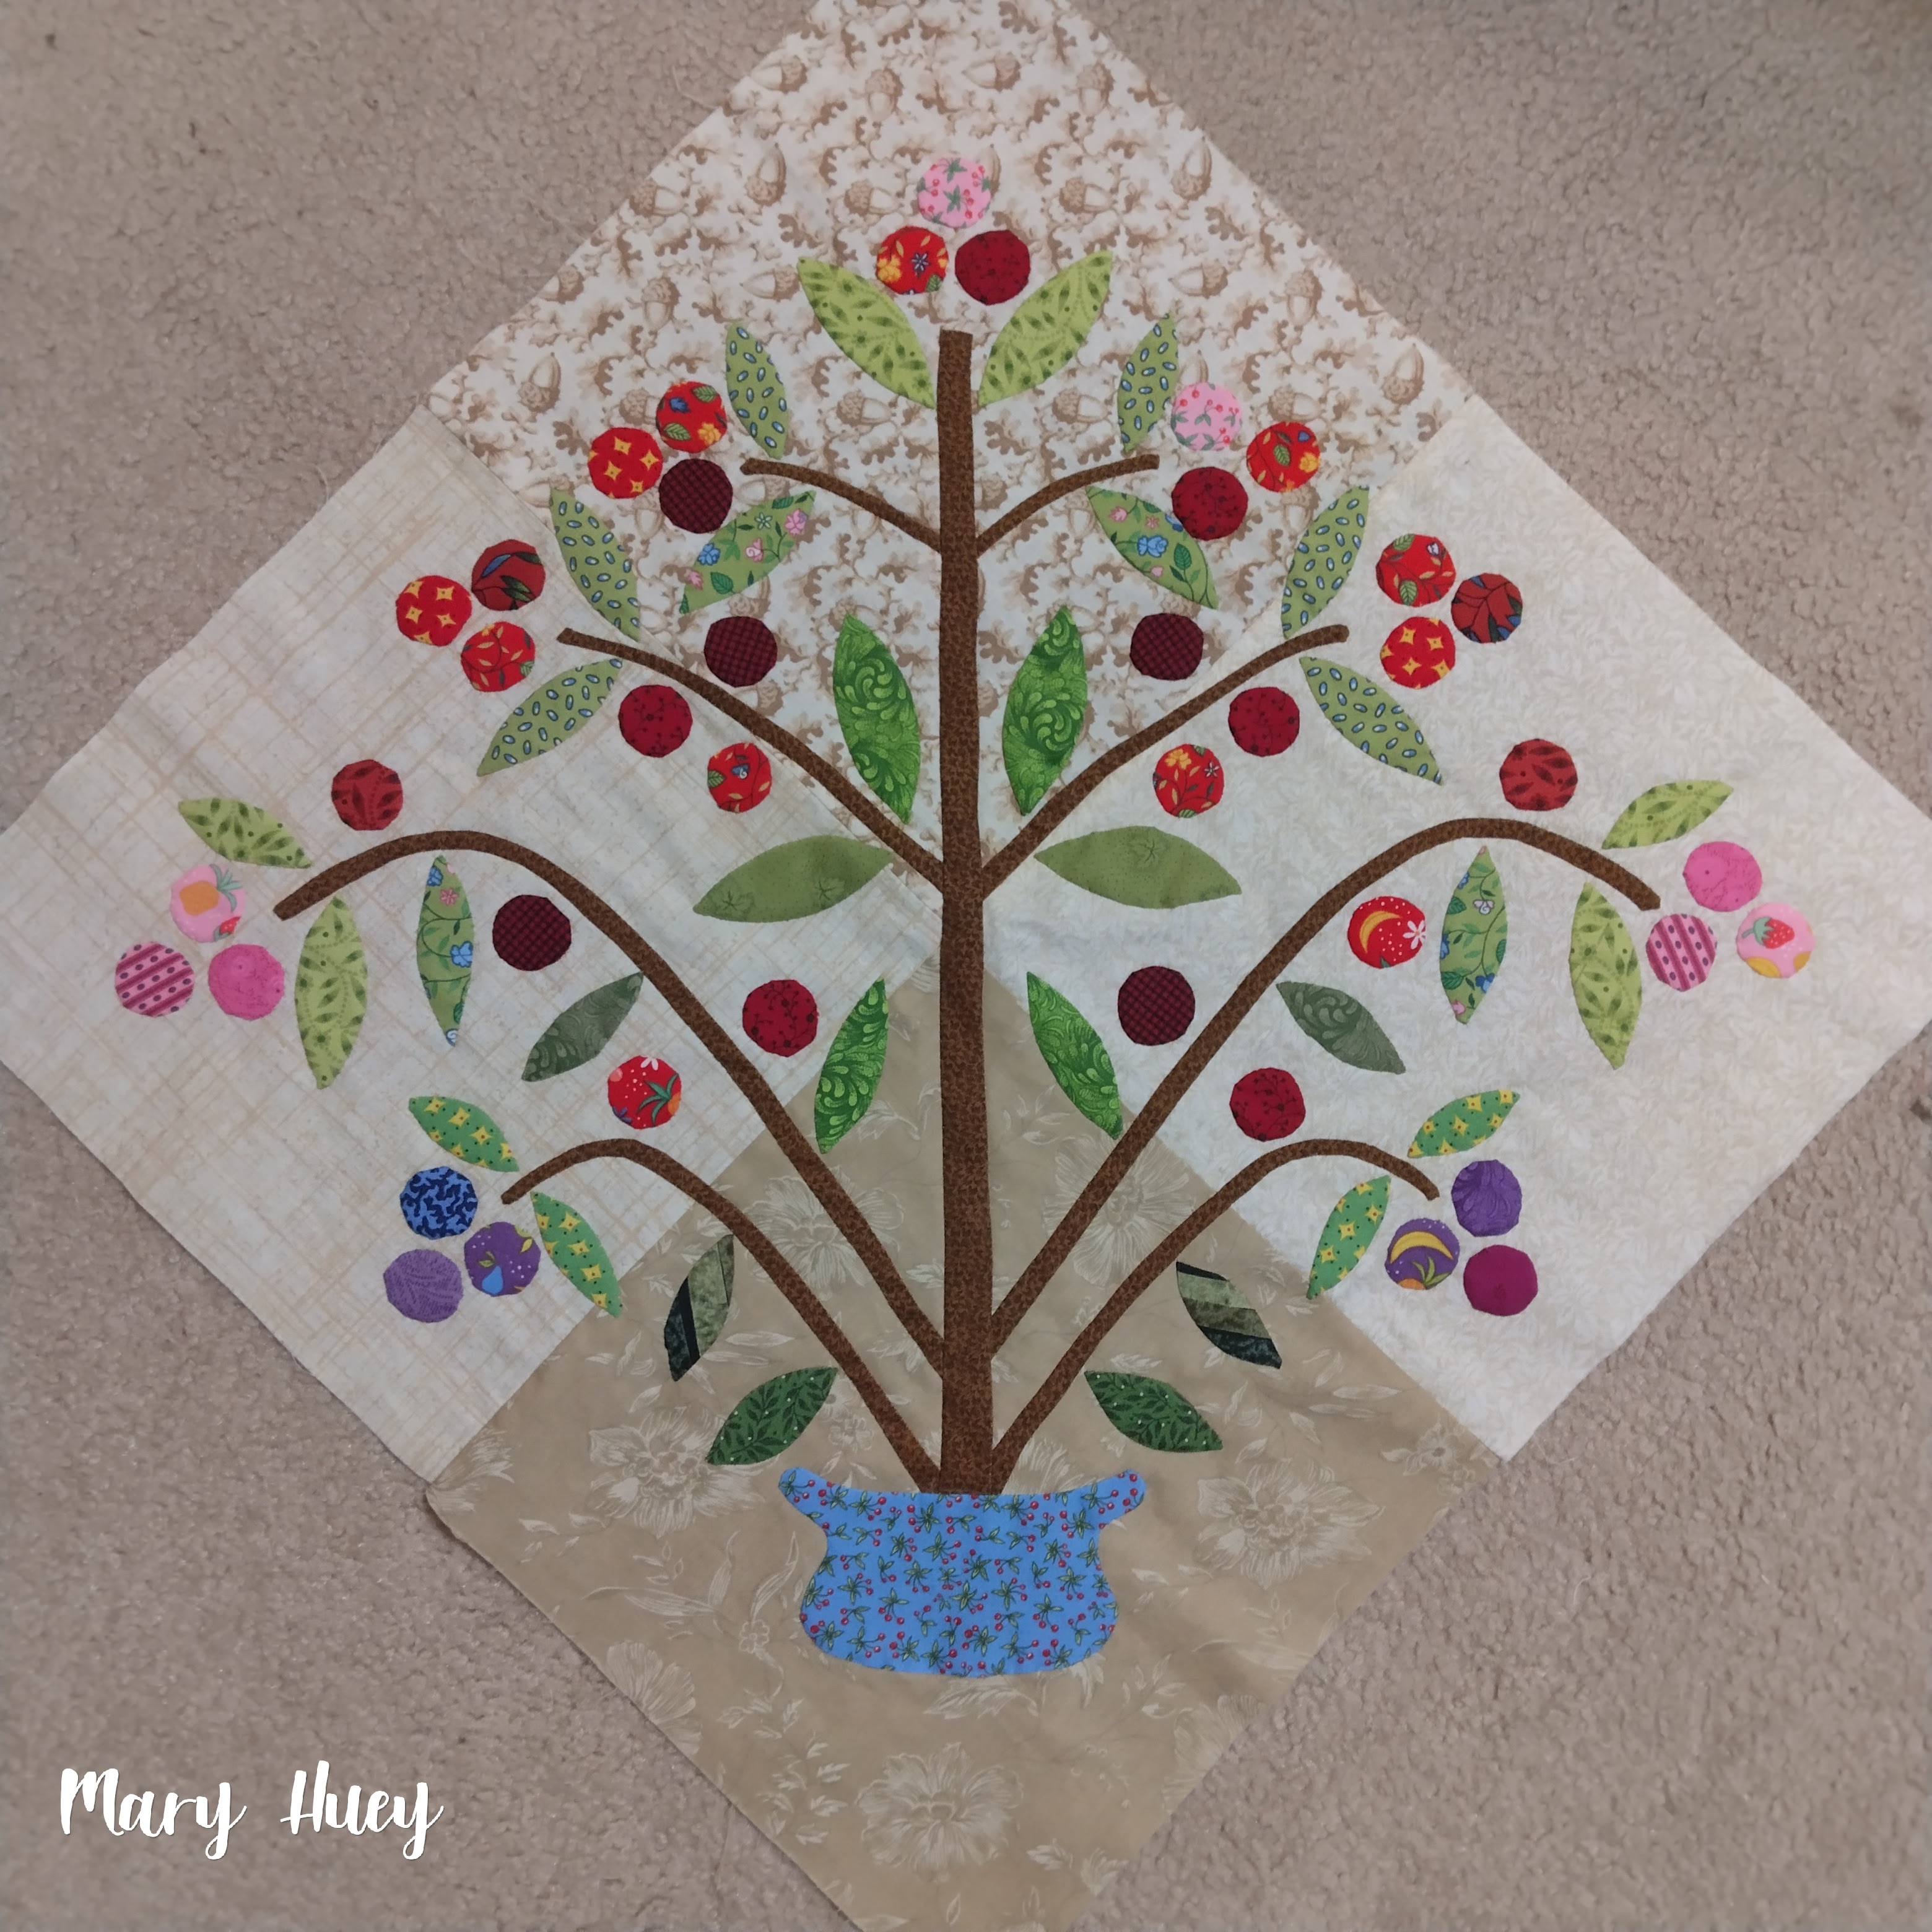
After laying out four blocks for a smaller quilt, I decided to make three more blocks, so each quilt will have five blocks.  Towards that end, I've been saving all the leftover bits of fabric from the kits that came with each month's pattern.  I chose three of the patterns I enjoyed making for the "fifth" blocks.
This is the first duplicate block.  I've had to do a little stash-diving to substitute for fabrics I used up from the pattern kits but that's not really a problem -- deep, deep stash here!?!
I'm heading off for a few retreat days at the end of next week and the duplicate blocks will be my focus.  My prep work is to applique the stems of each block (my least favorite part) and cut all the applique pieces so I'm sure I have compatible fabrics.  It would be wonderful to come home with three completed blocks but even if I don't, I'll have made significant progress!

Other plans for the retreat include layering a couple large quilts (to take advantage of extra hands that will be available!) and prepping an antique quilt top for a little rework (dissembling and removing basting threads) and perhaps cutting a Moda BOM from the summer of 2022?   
And eating cookies?!?

Are you going to be able to enjoy a retreat this winter?  I enjoy them more now that I've stopped taking my sewing machine.  Focusing on hand-stitching and prep work (layering and cutting) makes the planning and packing easier plus I'm not "nose-down" at my machine for the weekend (i.e., more social time).  If you aren't part of group, organize a couple of your favorite stitching friends and rent a place -- quite a few small retreat venues have popped up in this region and if you have to cook for yourselves, indulge in a few days of eating badly to take the pressure off?!?

Mary


Thursday, February 27, 2020

I'm Retreat Bound Again!

For the past couple years, I've been confining the retreat projects I haul out of the house to hand stitching only!  It's so much easier to pack and I'm more relaxed while at the retreat which makes it more fun to be away from the studio.
This weekend, I'm working on my 2019 #sharksdinnerBOM blocks.
I went back through my blog photo archive and was surprised to discover how few pictures I've shared on the blog?!?   
I shared lots of pics on my Instagram feed!! 
But these are the only four process pictures I shared on the blog?!? 
All my tile fabric assortments began with a large scale multicolor print from Kaffe Fassett.  I then worked to use other non-Kaffe prints and along the way, many of my "nature" themed prints started to become a regular feature of the tiles.
It has been a "sew my stash" project from beginning to end!!
These English paper pieced "tiles" were designed by Elisabeth @lemonshark in Switzerland and shared via her blog during 2019 -- twelve designs in all.  Each tile has the same exterior shape, but all of them have a different interior breakdown.  Then everyone making the tiles laid out the darks, mediums, and lights in different ways individualizing the finished look of each tile!  You can check some of them out by searching the hashtag #sharksdinnerBOM2019 on Instagram -- here's a link. (Scroll way down to see some of the variations more easily.)  

She did not however design a "setting" for the tiles so everyone has taken their own approach to this step. Kim, in England, has been designing crazy quilt looking backgrounds to English paper piece around each tile as she squares the blocks up.  I've been a bit intimidated by her ideas and in awe of her energy but one of her designs inspired me to design (a much simpler) machine pieced background for my blocks.

Working on graph paper to full scale, I designed a set of triangles that will frame each tile.  I contemplated random low volume fabrics but settled on black and white to emphasize the drama of each tile.
After the first test block to make sure my idea worked, I set to work every afternoon for the past two weeks piecing the backgrounds and basting the tiles to the backgrounds in preparation for a weekend of hand stitching to applique them in place. 
Each corner consists of a triangle with a mitered stripe border to I was able to use my Set-In Piecing Simplified tricks and my Marti Michell mitering tool*** to perfect results! 
This is what each finished background looks like -- the tiles are 18" across and I left that big empty center primarily because I didn't want to "waste" any of my terrific low volume white and gray prints!
I alternated the "sashing" borders between black and white which turned out to be better than I expected!  It sets off each tile beautifully.  The position of the tiles in the final layout isn't set in stone at this point, but the primarily "cool" tiles will definitely alternate with the primarily "warm" tiles as you see here.
Once a background was finished, I spent time removing all the papers which were thread basted in place.  (Sorry "glue lovers" but I don't like glue basting one bit and I've given it a fair try.)
Then with the background laying perfectly flat, I positioned the tile and basted it 1/8" from the folded edge.
As I left for the weekend, all twelve tiles are basted and ready for a weekend of stitching. 
The finished blocks are about 20" square (my design wall is not long enough, so they are overlapped here) and I did a quick trial stitch earlier this week and am predicting it will take about 90 minutes maximum to finish each block!
I'm feeling confident I'll return home with twelve big finished blocks ready to set together and contemplate borders!  (I packed a couple other hand work projects just in case, too!?!)

So often when we start a BOM based on someone else's ideas/designs, we become disenchanted for various reasons.  That happened with this project for me -- 7 months ago I couldn't imagine how I would pull these tiles into a cohesive quilt so I was losing interest.  It felt like I would end up with a bunch of big pillow covers!?!  Individually, I loved the blocks -- but together???  Not so much.
As I shared my frustration, several of the makers on Instagram encouraged me to keep at it with helpful comments that made me aware of what they were seeing that I didn't see.

I put all the tiles up on the auxiliary design wall to allow them to simmer in the back of my mind.  That's when I realized the warm versus cool color palettes and how much fun I was having incorporating some of my nature prints.  So I forged on with a new sense of purpose -- balance the warm and cool blocks plus include a nature print in every tile.

When I basted that first tile onto the background, it felt right!  Can't find better words than that?
The backgrounds are unifying the crazy fabric/color scheme so much better than I expected.
I'm so glad I shared my frustration and grateful for everyone's input.
This is going to be an awesome quilt!!

So if you feel letdown about a project, get it out and put it up someplace where your subconscious can work on it.  Share it with folks and get their perspective!  Carry on!!

Hope your weekend is a pleasant one!
Mary

***EDIT April 2025
Marti Michel closed her business in late in 2024 and while some shops may still have a stock of her templates, you can also find them on Ebay and Etsy. 


Friday, November 3, 2017

Winter Workshop Preparations`

Last week, I got a reminder from the Lake Farmparks Quilt Show coordinator that it was time to submit a supply list for my February workshop and then the brochure arrived for this winter's classes.  Time to drop everything and organize some more for this workshop.  Registration begins on November 13, so there is time to consult your calendar and make plans!  I hope you'll consider joining me to start your own version of Lorena Uriarte's Opal Essence!

My first contact with the pattern was via Instagram when it was first released in Desert to Sea, a compilation of original quilt patterns from 10 Australian designers.  I ordered the book as soon as it was available and have leisurely been making blocks.  This week, I pushed my dodecagon blocks to one side of the design wall and put up the large scale tumbling blocks for Opal Essence!  Lorena made the pattern available this past year as a digital download -- you can order your copy HERE .
I was so inspired by Lorena's color scheme that I'm using it, but there are other possibilities in my head!  At this point, I've decided to make a large lap size quilt using 15 blocks (though it might get larger). With an eye to "what colors are missing", I prepped another stack of pieces yesterday.
Last year when I was re-organizing the studio (again), I set up a hand stitching area with a much loved wooden rocker that fits me perfectly by a window overlooking a little wild area of my yard.
However, since I do most of my hand stitching in the evening in front of television, I have rarely used this cozy corner.  Yesterday, I changed that and spent a happy hour doing the hand applique and enjoying the sounds of a warm fall day. 
Adding the arcs to the diamonds can be machine pieced, but I have decided to ease myself back into hand applique (big project waiting on the "to-do" shelf) so this project is a good preparation.  I'm doing needle-turned applique.  I baste the arcs in position and finger pinch the line before I begin to stitch.
Lorena uses freezer paper templates to prepare her appliques and describes it on her blog HERE
A thimble is a must use tool for me -- I hear lots of protests about the awkwardness of a thimble from new hand stitchers but after pushing the eye end of a needle into my finger many, many years ago, it only took me about 3 weeks of daily practice to fall in love with thimbles!
This is my favorite and it belonged to my husband's grandmother!
I am listening to a book on tape, but I'm not loving the reader of this one, so after about 30 minutes I'm ready to take a break.  I was glad that the weather was warm enough to have the window open and enjoy the sounds of the foraging birds below the window. 
Once the hand stitching is complete, I remove the basting thread and cut out the diamond behind the applique. 
I recently invested in this collection of MasterPiece thread and this is the first time I've used it for applique -- love it!!
No matter what color the fabric is, there is a color in here that will blend nicely. 
Once the applique is finished it takes about two minutes to stitch the block together and of course, I'm applying my "set-in piecing simplified" technique at this point!
Chain-piecing for the quickest most secure assembly of y-seams!
Order my new downloadable version of SET-IN PIECING SIMPLIFIED from my Etsy Shop.
Making a few blocks at a time and adding them to the mix is the best way to maintain color balance.  I've seen other color palettes on Instagram and have an idea in my head to work with a collection of green, aqua, and blue backgrounds with yellow and orange arcs.
You can explore Lorena's students' work on Instagram by searching the hashtag - #opalessencequilt -and I will continue to share my color experiments here on the blog.
I just need one more block and then I can begin to cut the fill-ins for the outer edges.
I'll look at it over the weekend and decide if the size is good before I start the final assembly.
The surprising aspect of this quilt is how easy the block is to construct. 
The scale of the blocks is large so the quilt is coming together faster than I expected!
(Look back up at the picture of the block with my hand on it.)
My Opal Essence Workshop is two days (Friday, 2/16/18 and Saturday 2/17/18 from 9:30 to 4:30) at Lake Metroparks Farmpark during the annual show, Quilts 2018.
The fee is $125 plus you will need to purchase the pattern from Lorena ($12 Australian which is about $9 US).  (If you are looking at the workshop booklet, ordering the pattern yourself is a change since the descriptions were written this summer.) 
 I advocate shopping in your stash for the majority of the fabrics but have determined that one can cut six large diamonds from a fat quarter so thinking some swapping could happen during the workshop to help everyone expand their range of backgrounds.

The website for the show is live so you can review it HERE and has all the information including an entry form if you'd like to show off a quilt, but registration doesn't open until 11/13/2017.
If you live in Northeast Ohio or Western Pennsylvania -- this show is accessible.
For those farther away, I'd be glad to help you find accommodation locally.

Since yesterday might have been our last pleasant day before winter, I headed to the closest woods once I was satisfied with the day's stitching progress.  I often feel a little guilty about these escapes but that evaporated quickly when the first sight waiting for me was this young red-tailed hawk!
I think he was trying to catch a squirrel but the squirrel was too feisty (this time).
We watched one another for about 10 minutes and I hope we'll meet again during the course of the winter.
I hope your weekend includes time with the world around you!!
I'm anticipating the "big leaf drop" any day now and want to be out in it!!
Think yellow leaves falling all around you while scuffling down a trail!

Mary