Showing posts with label workshops. Show all posts

Friday, November 3, 2017

Winter Workshop Preparations`

Last week, I got a reminder from the Lake Farmparks Quilt Show coordinator that it was time to submit a supply list for my February workshop and then the brochure arrived for this winter's classes.  Time to drop everything and organize some more for this workshop.  Registration begins on November 13, so there is time to consult your calendar and make plans!  I hope you'll consider joining me to start your own version of Lorena Uriarte's Opal Essence!

My first contact with the pattern was via Instagram when it was first released in Desert to Sea, a compilation of original quilt patterns from 10 Australian designers.  I ordered the book as soon as it was available and have leisurely been making blocks.  This week, I pushed my dodecagon blocks to one side of the design wall and put up the large scale tumbling blocks for Opal Essence!  Lorena made the pattern available this past year as a digital download -- you can order your copy HERE .
I was so inspired by Lorena's color scheme that I'm using it, but there are other possibilities in my head!  At this point, I've decided to make a large lap size quilt using 15 blocks (though it might get larger). With an eye to "what colors are missing", I prepped another stack of pieces yesterday.
Last year when I was re-organizing the studio (again), I set up a hand stitching area with a much loved wooden rocker that fits me perfectly by a window overlooking a little wild area of my yard.
However, since I do most of my hand stitching in the evening in front of television, I have rarely used this cozy corner.  Yesterday, I changed that and spent a happy hour doing the hand applique and enjoying the sounds of a warm fall day. 
Adding the arcs to the diamonds can be machine pieced, but I have decided to ease myself back into hand applique (big project waiting on the "to-do" shelf) so this project is a good preparation.  I'm doing needle-turned applique.  I baste the arcs in position and finger pinch the line before I begin to stitch.
Lorena uses freezer paper templates to prepare her appliques and describes it on her blog HERE
A thimble is a must use tool for me -- I hear lots of protests about the awkwardness of a thimble from new hand stitchers but after pushing the eye end of a needle into my finger many, many years ago, it only took me about 3 weeks of daily practice to fall in love with thimbles!
This is my favorite and it belonged to my husband's grandmother!
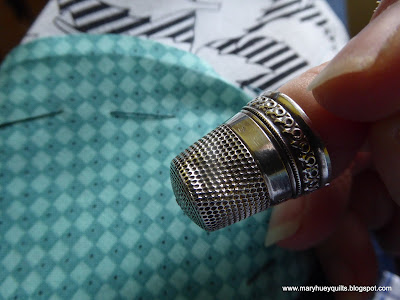
I am listening to a book on tape, but I'm not loving the reader of this one, so after about 30 minutes I'm ready to take a break.  I was glad that the weather was warm enough to have the window open and enjoy the sounds of the foraging birds below the window. 
Once the hand stitching is complete, I remove the basting thread and cut out the diamond behind the applique. 
I recently invested in this collection of MasterPiece thread and this is the first time I've used it for applique -- love it!!
No matter what color the fabric is, there is a color in here that will blend nicely. 
Once the applique is finished it takes about two minutes to stitch the block together and of course, I'm applying my "set-in piecing simplified" technique at this point!
Chain-piecing for the quickest most secure assembly of y-seams!
Order my new downloadable version of SET-IN PIECING SIMPLIFIED from my Etsy Shop.
Making a few blocks at a time and adding them to the mix is the best way to maintain color balance.  I've seen other color palettes on Instagram and have an idea in my head to work with a collection of green, aqua, and blue backgrounds with yellow and orange arcs.
You can explore Lorena's students' work on Instagram by searching the hashtag - #opalessencequilt -and I will continue to share my color experiments here on the blog.
I just need one more block and then I can begin to cut the fill-ins for the outer edges.
I'll look at it over the weekend and decide if the size is good before I start the final assembly.
The surprising aspect of this quilt is how easy the block is to construct. 
The scale of the blocks is large so the quilt is coming together faster than I expected!
(Look back up at the picture of the block with my hand on it.)
My Opal Essence Workshop is two days (Friday, 2/16/18 and Saturday 2/17/18 from 9:30 to 4:30) at Lake Metroparks Farmpark during the annual show, Quilts 2018.
The fee is $125 plus you will need to purchase the pattern from Lorena ($12 Australian which is about $9 US).  (If you are looking at the workshop booklet, ordering the pattern yourself is a change since the descriptions were written this summer.) 
 I advocate shopping in your stash for the majority of the fabrics but have determined that one can cut six large diamonds from a fat quarter so thinking some swapping could happen during the workshop to help everyone expand their range of backgrounds.

The website for the show is live so you can review it HERE and has all the information including an entry form if you'd like to show off a quilt, but registration doesn't open until 11/13/2017.
If you live in Northeast Ohio or Western Pennsylvania -- this show is accessible.
For those farther away, I'd be glad to help you find accommodation locally.

Since yesterday might have been our last pleasant day before winter, I headed to the closest woods once I was satisfied with the day's stitching progress.  I often feel a little guilty about these escapes but that evaporated quickly when the first sight waiting for me was this young red-tailed hawk!
I think he was trying to catch a squirrel but the squirrel was too feisty (this time).
We watched one another for about 10 minutes and I hope we'll meet again during the course of the winter.
I hope your weekend includes time with the world around you!!
I'm anticipating the "big leaf drop" any day now and want to be out in it!!
Think yellow leaves falling all around you while scuffling down a trail!

Mary


Friday, August 12, 2016

Progress!!

Earlier this week, I shared my renewed efforts to finish my version of Lucy Carson Kingwell's Smitten quilt.
The work continues and I'm very close to getting the top completed.  In this photo, the upper left corner is assembled and the next diagonal row is set together.  Since these are y-seams, the seams stop at the 1/4" seam and don't go all the way to the raw edge of the blocks.  I find it's better to leave the seams between the hexagon blocks unpressed for now.  It's easier to move them out of the way if they haven't been pressed.
I'm working from the left side diagonally towards the upper right side.  For those of you who have invested in my DVD workshop, Set-In Piecing Simplified (order it HERE) this is another look at the approach I take for setting hexagonal blocks together (this is covered in the second half of the DVD).

Half triangles are used to straighten the left and right sides of the quilt and it's easiest to add those to the hexagon block before you begin to attach the blocks together.
Of course, each seam is a stop and start process but it is greatly simplified by using the chain-piecing process featured in the DVD. 
It's also more accurate and more secure than any y-seam technique I've tried.

Here is the first seam stitched together between two rows.
I have discovered (and perhaps others have as well) that after completing the first seam, if I skip the next seam and go to the third one, this process is half as challenging.  So in the picture below, I have the third seam pinned and am holding open the second seam so you can see it easier. 
This is the result after stitching the third seam pair. 
Now you can fold the entire piece matching the second pair of seams and all the rest of the quilt top falls out of your way easily.  For me, this simplifies the process a great deal!
I continue to hop over a pair of seams, stitch a pair of seams, and then return to close up the gap.
Give it a try and let me know what you think!
Two rows joined!  Everything is flat and secure!! 
Here it is with three rows joined!  I still have to cut and piece about 10 small hexagon blocks which will be assembled into clusters of three to match the size of the large blocks plus the half blocks for the lower edge.
This is going to be an exciting workshop to teach!! 
 I love the combination of teaching a great technique (Set-In Piecing Simplified) and helping students discover all the possibilities of experimenting with value and color.  The two-day format will enable students to leave with a working plan well underway! 
If you can't get to Northeast Ohio, I travel!! 
 Give me a shout at maryhueyquilts@hotmail.com if you like to discuss having me come to teach for your guild/shop/group!
 
There's still some summer to be enjoyed up here, so get out there this weekend and do it!!
 
Mary Huey


Tuesday, August 9, 2016

Another UFQ Adventure and Some Ideas on Getting Unstuck!

Once again, there is nothing like a deadline to motivate me!
I started piecing Lucy Carson Kingwell's Smitten over a year ago and as is so often the case with me, other projects pushed in and took priority.
This year, I listed it as one of my "goal" projects for the APQ Resolution challenge which helped me get back at it briefly earlier in the year.  Then a student asked me to consider using the pattern for a future workshop and the idea formed to follow through on that for my 2017 Farmpark Workshop.
 
It's too early to book for it at this point, but I can tell you it's
Friday and Saturday, March 17 and 18
at Lake Metroparks Farmpark Quilt Show!
 
So back out everything came and the finished blocks took over the design wall.
Now I have a deadline to motivate me but I need stimulation to actually do the work!
I find that a good place to start is to sort through all that fabric pulled for the project and reorganize it.
Nothing gets my juices moving like sorting fabric into color and value piles!
Another useful strategy for me is to start cutting pieces without making "matching" decisions.  For this set of small blocks I needed a central hexagon.  Cutting some that I thought were pretty is the quickest way to move forward. 
The "visual" of the shape laying there suggests what to use more quickly than other approaches.
And as I was handling a piece of fabric, I cut some extra pieces -- large diamonds for fillers I would need, a set of background diamonds for a small star, triangle wedges.
(A good pot of tea and a lovely teacup help stimulate creativity.)
Soon I was back in the groove and piecing blocks at a productive rate! 
By adding the newly pieced units to the design wall as they were finished, I can evaluate where I need more of the three main color families -- pink, green, and yellow.  If you don't have a design wall, it is such a helpful resource you might want to give it some thought.
Even though I haven't finished all the interior blocks, I stared to create the half blocks needed for the upper and lower edges.  I have a photo deadline I'm trying to meet!!
I've also begun to incorporate ideas from other sources to build my enthusiasm and maintain momentum -- sometimes I get bored with doing what someone else has done and just need to give it a twist!  Treehouse Textiles is a shop in Australia that I follow on Instagram and they often post ideas for using vintage textiles in their quilted projects (such as this). 
I had three of these tea towels too precious to "use" but if I didn't do something with them, they were doomed for a donation box someday -- now they will always be fondled and appreciated!
I've started to assemble the upper left side working in diagonal rows. 
Friday, I'll share some tips on how I manage this part of the process.
Must head back to the studio for now and stitch, stitch, stitch!!
 
Mary Huey


Tuesday, June 7, 2016

A New EPP Workshop Project

Last week, I scheduled an EPP (English Paper Piecing) Workshop at The Sew'n Place in Fayetteville, PA during my August visit with my grandchildren.  I wanted to have a small project that gives students a chance to try the technique for the first time without overwhelming themselves.
My inspiration was these darling Jelly Clips by Lecien which I hoarded on a recent shopping trip.  Have you seen them?  They come in three sizes and a delightful array of summer colors!
I have seen a few finished projects on Instagram using patchwork covers.  I used the largest clip for my sample and made pieced fabric with thirty-five 1" hexagons.  The pattern which is included with the jelly clip was my guide for the patchwork.
Instructions are included with each clip however they are in Japanese but that is not a problem.  Happily Lecien provides English instructions for the jelly clip purses on their website HERE.  There is an appropriate sheet for each size of clip.  Notice that I pulled the seam allowance of the hexagons loose and pressed them out before adding the fusible interfacing to the wrong side of each layer.
The assembly is simple -- there are a couple darts on each piece to contour the base of the bag.
The outside and the lining are stitched together and then turned right sides out.
But then, the final assembly requires G-L-U-E?!?!?!?
I am not a fan of glue -- don't like messy fingers -- but I did have the good sense to look on-line first and see if anyone has created video instructions for this stage.  What a relief and bless this gal's heart!!  I watch this video (HERE) how to twice and then waited (okay, procrastinated) a few hours before mustering the courage.  She demonstrates the complete process and includes supply suggestions.
I did the back side first and it went okay.   It was actually easier than I expected!!
So I forged ahead and did the front.  The glue did not dry instantly and allowed me to push things around to make adjustments -- not like working with a super glue.
I used a heavy duty jewelry finding to attach the strap to the purse which measures about 7 1/2" deep and 8" wide.
A 2" strip of coordinating fabric folded twice to make a 4-layer strap went together quickly.  I almost forgot to fold in the ends for a finished look.
Now to edit the workshop description, finalize the supply list, and everything is ready to send off.
I took it along to show my Wednesday afternoon sewing buddies and they pronounced it to be "cuter in person"!!

If you are one of my followers in southeastern Pennsylvania, this hand-stitching workshop will be Monday, August 8 from 1 to 4 p.m.  We won't get the purse finished, but I'll include a demonstration of the final assembly.  I'm also working on a pillow project option and will share that with you later this week.

Mary Huey

** There are Affiliate Links in this post -- using them results in a small commission for me -- thanks!! 


Friday, August 1, 2014

Stopping at the "DOT" for set-in piecing tip

As those of you who have taken a Set-in Piecing Simplified workshop with me or used the teaching guide, Set-In Piecing Simplified may already know, not every sewing machine presser foot makes it easy to "stop at the dot"!!   Since I piece on a Bernina 1031 most of the time and the quarter-inch foot, #37, makes it easy to see right into the needle, I didn't realize what a challenge this can be with other presser feet.
In my workshops, I usually encourage students to try several different presser foot until they find the easiest one to use and achieve the "stop" easily.  What I've discovered is that isn't always possible.   
When part of the foot obstructs your view of the fabric directly in front of the needle, it can be frustrating.  So I put a different foot on my machine and set to work to find a solution.  And I think I have it!!

It will take some practice to feel at ease with it but I feel it's worth the effort to master it.  And here it is in a nutshell!

When the "obstructing" part of the presser foot connects with the "stop-dot" -- where my scissor tip is pointing -- STOP.  Now move forward one stitch at a time and counting the stitches -- one, two, three, . . .  -- until the needle arrives at or just before the dot. 
I had to lift the presser foot and crane my head around to see if I was there yet -- took a couple trials, but I finally arrived! 
And now I know with that presser foot for that stitch length on my machine, it is 4 stitches from the beginning of the obstruction to the dot.  On your machine, with your presser foot, at your stitch length, it may be a stitch less or a stitch more -- 3, 4, or 5 stitches -- but once you've figured it out, it will smooth out the process of stopping at the dot for you.

The counting didn't seem cumbersome to me -- after all, you have to be focused anyway to execute set-in piecing, so counting 4 stitches as the dot passed under the bridge on the front of this presser foot didn't slow me down.  Try it and let me know what you think!

And here's a peek at what I'm working on these days.

I think this idea will work with any piecing technique where you need to stop at a dot, whether you are using the Set-In Simplified technique discovered by one of my students, Mary O'Keefe, or not.  If you are curious about the technique, order the teaching guide!!  It's opened up a whole new world of designs for me to have a simpler way to stitch through Y-seams!!

So go try it out while it's fresh in your mind -- right now -- and leave me a comment about how it works for you.  If my instructions need to be clearer, let me know that, too.  And I'll edit this post to clarify.

Really, it will only take 5 minutes to find a piece of fabric, put a dot on it, and try it out -- you don't have to start a new project!!

Mary Huey