Wednesday, June 28, 2017

Is "Catching Up" Possible?

I've been pondering that possibility the past couple days -- no answer yet, just more questions.
I'm supposed to be on a little botany trip with friends but a brief illness changed my plans and yielded 4 empty days -- bonus!!  I can get caught up!!
A little naïve, perhaps?

I've fallen behind on the blocks for Sew Fresh Quilt's Jolly Little Christmas SewAlong so spent time last week getting three of the blocks cut.
And now happily, here's the time to piece them
I tackled the snow men first!  Look at these cute little faces!?!
Zoom, zoom, the piecing goes so quickly!
Although all these units had to be "destitched". 
Going too fast and forgot to insert the brim of the hat pieces -- not just once, but six times!
One of the "perks" of chain-piecing?
Soon I was back on track and in the end finished two more darling blocks for the piles!
Wouldn't this block make the cutest border or row in a quilt?? 
The Holly and Berries blocks went together quickly and Lorna has shared a design on her blog for a cute tablerunner project using this block!
This is always the dangerous moment for me -- I'm on a roll, really making good progress!
"Let's do the third set of blocks", she said!
Going carefully, double checking the organization of the pieces to be stitched!
Achieving consistent skinny bands by measuring the seam allowance from the left instead of the right -- excellent tip someone shared with me years ago and easy to do with the Bernina #37 1/4" foot.
Ornaments ready to trim and press -- this block is so cute!! 
All the units are stitched and in the correct positions -- awwwesomme!!
(You need to say that word in a falsetto sing-song voice (-;  )
Oops -- the top half and the bottom half aren't lining up?? 
It seems that in my confident state of mind,  I fell into the "look at the pictures and skip the words" trap.
Result -- units that needed trimmed were not and now there needs to be more destitching.

Conclusion -- no, catching up is not possible today -- because I've made more work for myself by being careless and not reading everything!  Lorna does a great job of organizing these posts and writing instructions -- I need to do a better job of using them!!
Perhaps I should do a study on whether it takes longer to read or destitch??

I'm out of here -- going for a walk and get centered!!
Mary


Saturday, June 24, 2017

The Sisters Outdoor Quilt Show

Have you ever been to the Sisters Outdoor Quilt Show?
It's huge!! And outdoors!!
Just one day -- always the second Saturday in July.

I went once -- 2010 -- have the t-shirt to prove it!
Sisters is in the high desert of Eastern Oregon and rain is uncommon in July, so hanging thirteen hundred quilts outdoors is less risky than it might seem.  I understand the quilt hanging begins at dawn and by 9 a.m., the streets are open and the typical 10,000 visitors have until 4 p.m. to take in as much as they can.
As I recall, the picture below is the side view of Jean Well's shop, The Stitching Post.  Jean began the show in 1975 and today, the whole town seems to be involved.
The buildings are equipped to make the hanging of the quilts go quickly and efficiently.
There are special exhibits tucked here and there and inspiration abounds.
There is also a week of workshops these days during the previous week.  
Entries come from all over and this year, two of them are mine!
Both are for sale (time to thin out my collection a bit) and while I won't be at the show this year, I will be lurking on the social media sites for updates!

Trip to the Stars is one of my own designs that I created to teach my students and followers how to use Marti Michell's Sashing Stars tool set when it was introduced.  I originally ran it as a mystery quilt but it is now available as a (downloadable) pattern in my Etsy shop!
This is the middle size (approx. 69" square) -- the pattern also includes instructions for the wallhanging size (46") and a bed size (92").
I also sent off my version of a One Block Wonder.  It's a gorgeous quilt but it doesn't fit into my house décor so it spends too much time living in the pile of teaching samples on the guest bed.
Hopefully, someone will fall in love with it and buy it during the show!!
Do you want to see more? 
Click HERE to get to the website and explore their social media links and watch the video from a previous show!  Then maybe you'll make plans to visit it in the future!!
It's fun!!

Mary


Monday, June 19, 2017

Long Skinny Triangles

Long skinny triangles -- isosceles -- not my favorite shape to stitch up until Marti Michell introduced the Peaky & Spike Triangle Set.  

I wrote this post when it first came out (HERE) so I know how well it works, but I still wasn't eager to make this unit of the Long Time Gone SAL quilt top!  So I procrastinated it all weekend and then realized late Monday that I was leaving early Tuesday morning on a quick teaching trip to the Indianapolis, Indiana area -- grrr.
The tool set features those brilliant engineered trimming corners so I knew the stitching would go well, but I hadn't cut any of the pieces and I realized during supper that a deer chomped on my young sassafras tree so I needed to spray the entire yard which is ready to burst forth in daylilies flowers (aka, deer candy) before I left town or I'd really be fuming!!
Having secured the garden's bounty for another couple weeks, I decided to try knocking out the piecing before bed since all was packed for an early departure in the morning.
As with any of these odd shapes, the trimming is critical since it simplifies setting up the pieces for stitching!!  No guessing, just align the trimmed corners!!
I ignored the pressing guidelines and pressed one side away from the center triangle and the other towards it.  My purpose was to make nesting the two finished triangle units possible. 
A quick layout and a bit of rearranging for the sake of variety.
And I was ready to stitch the pairs together - love how precise those side intersections are!
Here is the back so you can see the pressing. 
Rather than stitch the diamonds into rows, I set together pairs . . . .  
then clusters of four diamond units . . . . .  
and here is the finished result!!
All together in a little over an hour (yeaa!!) plus I ironed my clothes for the trip!!
(I hope I took a lopsided picture and that the piece isn't actually crooked.)
Once again, I encourage you to wander over to Instagram and check out #longtimegonesal to see what other quilters are doing!!
I also put together the first section of the quilt top over the weekend so it can travel with me and be part of the trunk show Tuesday evening.  I'm using a rather old black print with silver stars -- dates to the early 1990's?  If I remember correctly, the print was inspired by a piece of fabric found in a movie wardrobe studio.  Mary Ellen Hopkins approached her friend Irwin Bear at P&B Fabrics with it and he printed it in several color ways.  Mary Ellen would have loved this scrappy quilt and I like the way the black gives one's eyes a place to rest. 
My pineapple blocks are a little catty-wampus -- not sure why but I'll need to be more careful on the rest of them -- still 13 to go but that's next week!!

Make sure it's a stitchy week!
Mary


Thursday, June 15, 2017

And the beat goes on . . . . .

The past couple weeks of the Long Time Gone SAL have been all about triangles -- HST's and flying geese.  Little HST's and little flying geese!?!
My typical strategy is to use my big blocks of time for cutting and then grab time to stitch as I can.
Chain piecing to the rescue!!
I am using Marti Michell's templates for the cutting (you can check out her blog posts HERE -- they are full of lots of extra tips and tricks) so I'm not trimming my HST's once they are made.
Sometimes they look a bit wobbly but with 25 years of "fudging" experience under my belt the end results usually work.   A quick layout to get the pattern organized and then time to leave the room.
When I came back it was easy to pickup out the HST's that needed changed like the oranges and yellows together and the clumps of polka dots.  Of course, you know that you can shift pieces around forever and still see pieces to move.
At some point, you just have to stop adjusting and start stitching.
I join everything into pairs. 
Then the pairs into "4-patches" and then pairs of "4-patches". 
It's easier to fudge units together in sections like this than in rows because I can "nest the seams" on all four sides of each section.
And a finished block!!  Looks a bit wobbly around the edges but the points are crisp and I can fudge a bit more during the final assembly.
Time to take on the flying geese!
Have you explored all the posts on Instagram from the quilters that are doing this SAL?
Check out #longtimegonesal -- there are over 5000 posts -- lots of color inspiration!!
I love seeing how others organize their colors.
My primary focus with this group of blocks was to spread the yellows around since they are the lightest value in the blocks so they jump right out! 
I now have all the flying geese units finished! 
I'm thinking I'll use black for the sashing and have started to audition possibilities on the design wall.
What do you think? 
I'm still building the (itty, bitty) pineapple blocks -- 1" cut strips but so manageable with Marti's template set!!  They are the "leaders and enders" for all my studio work these days and I'm past the halfway point!! 
This week also saw the delivery of four large lap robes to a local mission team heading down into Kentucky to work with the Appalachia Service Project in July.  A second batch will head out in August with another group.  My quilting gang works hard on this project!!
How long do you it will take all of us to cover the world in quilts??
Enjoy your weekend!!
Mary


Monday, June 12, 2017

Really Old, Really Stuck

This UFQ dates to a happy event in 2004 -- the 25th Anniversary of my shop, Erie Street Quilts.
Forty 6" blocks made by customers and staff.
The blocks were part of a surprise cooked up by my staff.
They've all been carefully stored in a lovely box for 13 years.
After the success with The Lichen Tree, I feel like I've discovered a new strategy for working through my really old projects. 
Simmering!!

I put this one on my #APQresolution list back in January and it was the lucky winner for June.
It you aren't aware of All People Quilt's annual challenge, you can find the info HERE.
Up it went onto the design wall!
Each of the blocks is signed and many of them match the personalities of their makers triggering vivid recollections of their style and memories we share.

This is the most elaborate block.
It was made by Chris who worked at the shop for at least 15 years.  She taught classes in smocking and applique and backed me up skillfully with her ability to organize and her eye for detail.
The leaves are this size of my little fingernail!?!
This scrappy block is the main element of my popular pattern, Mississippi Mud.  It came out of a design challenge from Mary Ellen Hopkins in the late 1980's to simplify the piecing of a block and went on to become my most popular class.  I wonder if it would be an exaggeration to say that half of my thousand or so customers made this quilt at some point during the 26 years the shop was open?
For twenty years, I based my beginning classes on the book, It's Okay If You Sit on My Quilt by Mary Ellen Hopkins.  One of her popular mantras was to use "PPM's" -- personal private measurement. This was before 1/4" presser feet and templates so PPM's were often the easiest way to keep things sized (we NEVER trimmed HST's, but don't let me get started on that mini-rant)!
The classes were successful and lots of enduring friendships were born in them.
One of the common occurrences was to declare something a "PP_". 
Unfortunately I can't recall if all of these really mean something or are just some of our silliness.
And then there is the required "topiary".
Every significant event I've shared with my "inner circle" of quilting friends includes a reminder of the Legend of the Topiary.
Briefly, it was an ill-fated banquet centerpiece that has been passed around the group for lots of silly (and sometimes imaginary) reasons. 
It has been "won", "awarded", and "snuck" into many unsuspecting quilters lives.
It may still be lurking out there?!?
When it surfaces, it always produces lots of cheerful, eye-rolling laughter.
For the past week, I've been shifting the blocks around on the design wall.
There's a surprising amount of yellow and lots of star blocks.
I'm exploring Pinterest and Instagram keeping an eye out for setting ideas to audition. 
I'm enjoying the memories as they recur while waiting for the inspirations!
I know I won't finish the quilt during it's assigned month, so it appears on my list a second time. 
It will be interesting to see what the actual outcome is!
Hopefully, the end of 2017 will see a finished and treasured quilt in my home!

Here's to a good week!!
Mary


Monday, June 5, 2017

I'm baaaccckkkk . . . . .

. . . . . from Maine that is.  Had a great (though somewhat cool) birding adventure at the Hog Island Audubon Camp off the southern coast of Maine.  If you enjoy birding and haven't been to camp for a few years, this might just be the place for you.  Food was very good, staff friendly and supportive, scenery gorgeous!!  I wore this outfit so much that it almost didn't come home -- there's four layers under the two coats!?!  I'm not sure I would have survived as a pioneer woman!
This is the view from one of the small coves around the island.  The interior of the 300 acre island was lush like a northwest rain forest with mosses, lichen, and huge plants.
The "yard birds" around the lawn and the feeders included purple finches, winter wrens, Northern parula and yellow-rumped warblers with a pair of nesting ospreys keeping an eye on everything!!
See the osprey keeping an eye on my friend, Ann, who is peering through a scope trained on the nest.  You can check the ospreys out for yourself via a "nest cam" -- their chick hatched Monday!
Their spring is behind our spring and so the apple trees were in peak bloom and seemed to be hosting cedar waxwings almost constantly.  I missed the apple blossoms here in Ohio so it was lovely to experience them so closely. 
We had a couple boats trips to learn about the area -- Megan pulled up one of her "lobstah" traps for us and how they decide whether to keep or not -- one for the pot and one to grow some more.
This camp is the last surviving Audubon camp and began as a teaching camp for school teachers back in the late 1930's.  Dr. Steve Kress arrived in the 1970's and began to re-establish nesting colonies of Atlantic puffins on islands in the area.  His efforts paid off in spades as many other seabirds began to return to the islands to nest.

This was my target bird -- the Atlantic Puffin!
There are five colonies on the Maine Seacoast thanks to the dedication of lots of scientists -- here's a link to one of the "island cams" that is fun.  The other white birds on the cam are mostly common terns.
I'm not a bird photographer and most of the birds we saw were flying, these black guillemots were the only really cooperative birds for my limited skill.  These black and white birds have the brightest red feet -- check them out HERE.
I'm not sure there is another "lichen" quilt in me, but I sure got lots of inspiration between the stone walls and the rich variety of lichen.  That red is the fruiting bodies of British soldiers lichen!
Our day on the mainland produced these pink lady slipper orchids!! 
What a beautiful plant!
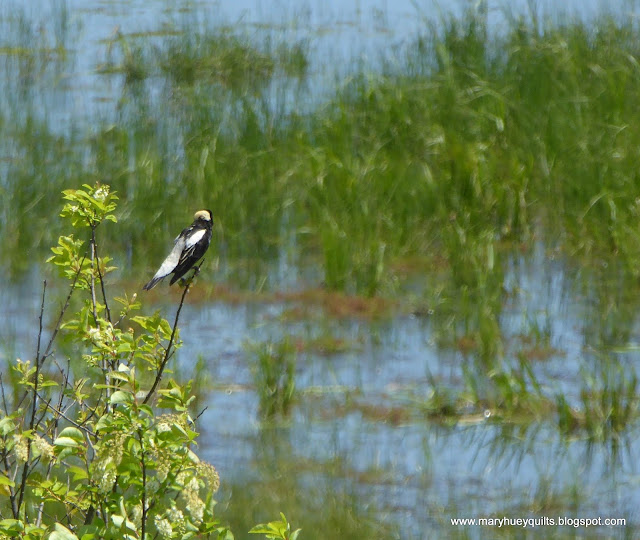
And we visited a large preserved teaching and organic farm that encourages bobolinks to settle in the hayfields for the summer by holding off cutting the hay until the nesting season is finished. There were at least a dozen male birds calling and displaying as we walked around the farm. The hayfields run down to a saltwater bay and as I walked back to the parking area, I wrote a Haiku.
Old stone walls ignored.
Hayfields running to the bay.
Bobolinks abound.

The camp was hosting an artist in residence who stayed in this rustic little cabin built in the early 1900's by the camp benefactor, Mabel Loomis Todd, for her writing retreat.  The visiting writer, Rachel Dickinson, did a presentation on writing and had each of us write a Haiku which she described as "an easy way to paint a word picture". 
I am surprised that I enjoy writing these little verses and have done one every day since!?!
It was a short visit and it would be good to go back and explore some more of Maine.
I certainly enjoyed the wild peacefulness!!
Next up -- the BIG 70!!

Have a good week!
Mary