Tuesday, February 26, 2019

A BIG Finish!!

It's been almost two years of off and on hand quilting, but it's finally finished!!
I'm currently stitching the binding!  
The quilt is headed with me to a weekend retreat and soon it will be ready for a bed . . . . somewhere.
I pieced the blocks along with a group of other English paper piecing addicts following the direction of Karen at Faeries & Fibres during 2015 -- you can visit her blog HERE and scroll down the page to link to all of the posts relevant to this follow along.

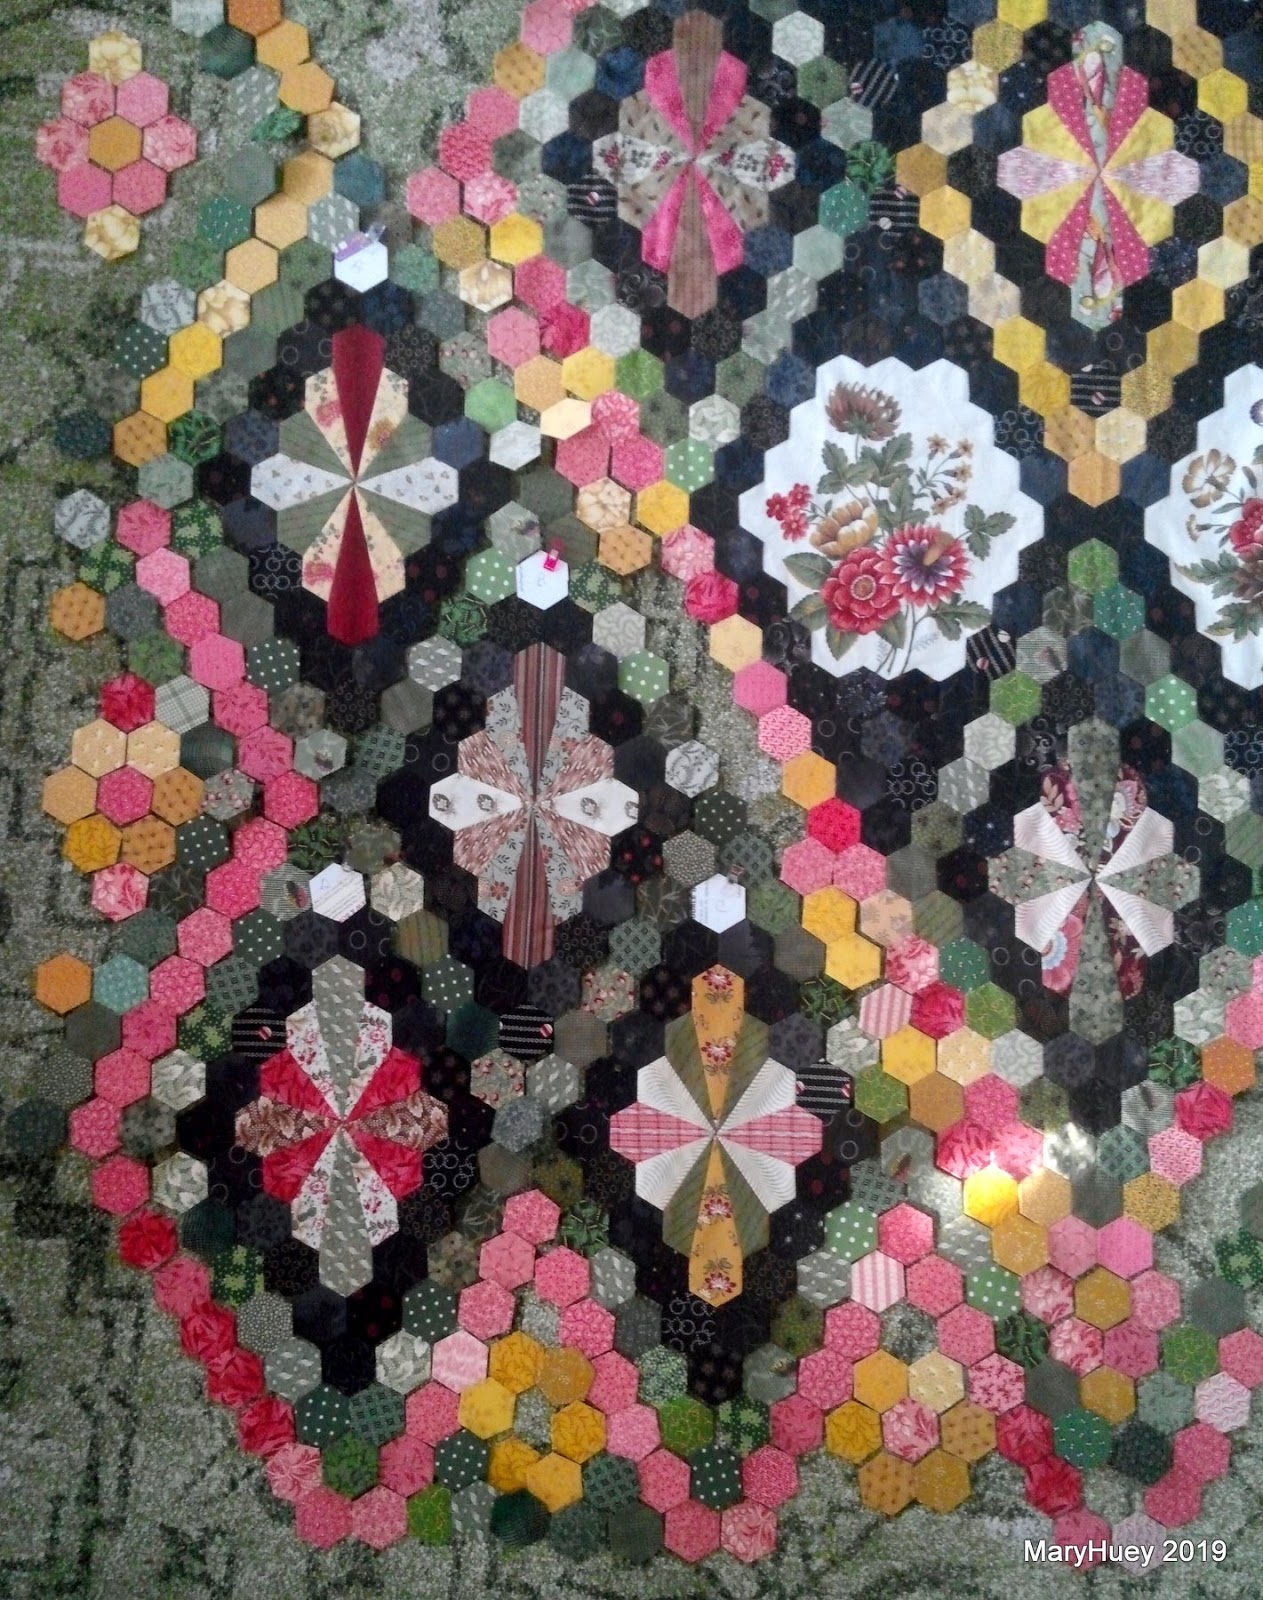
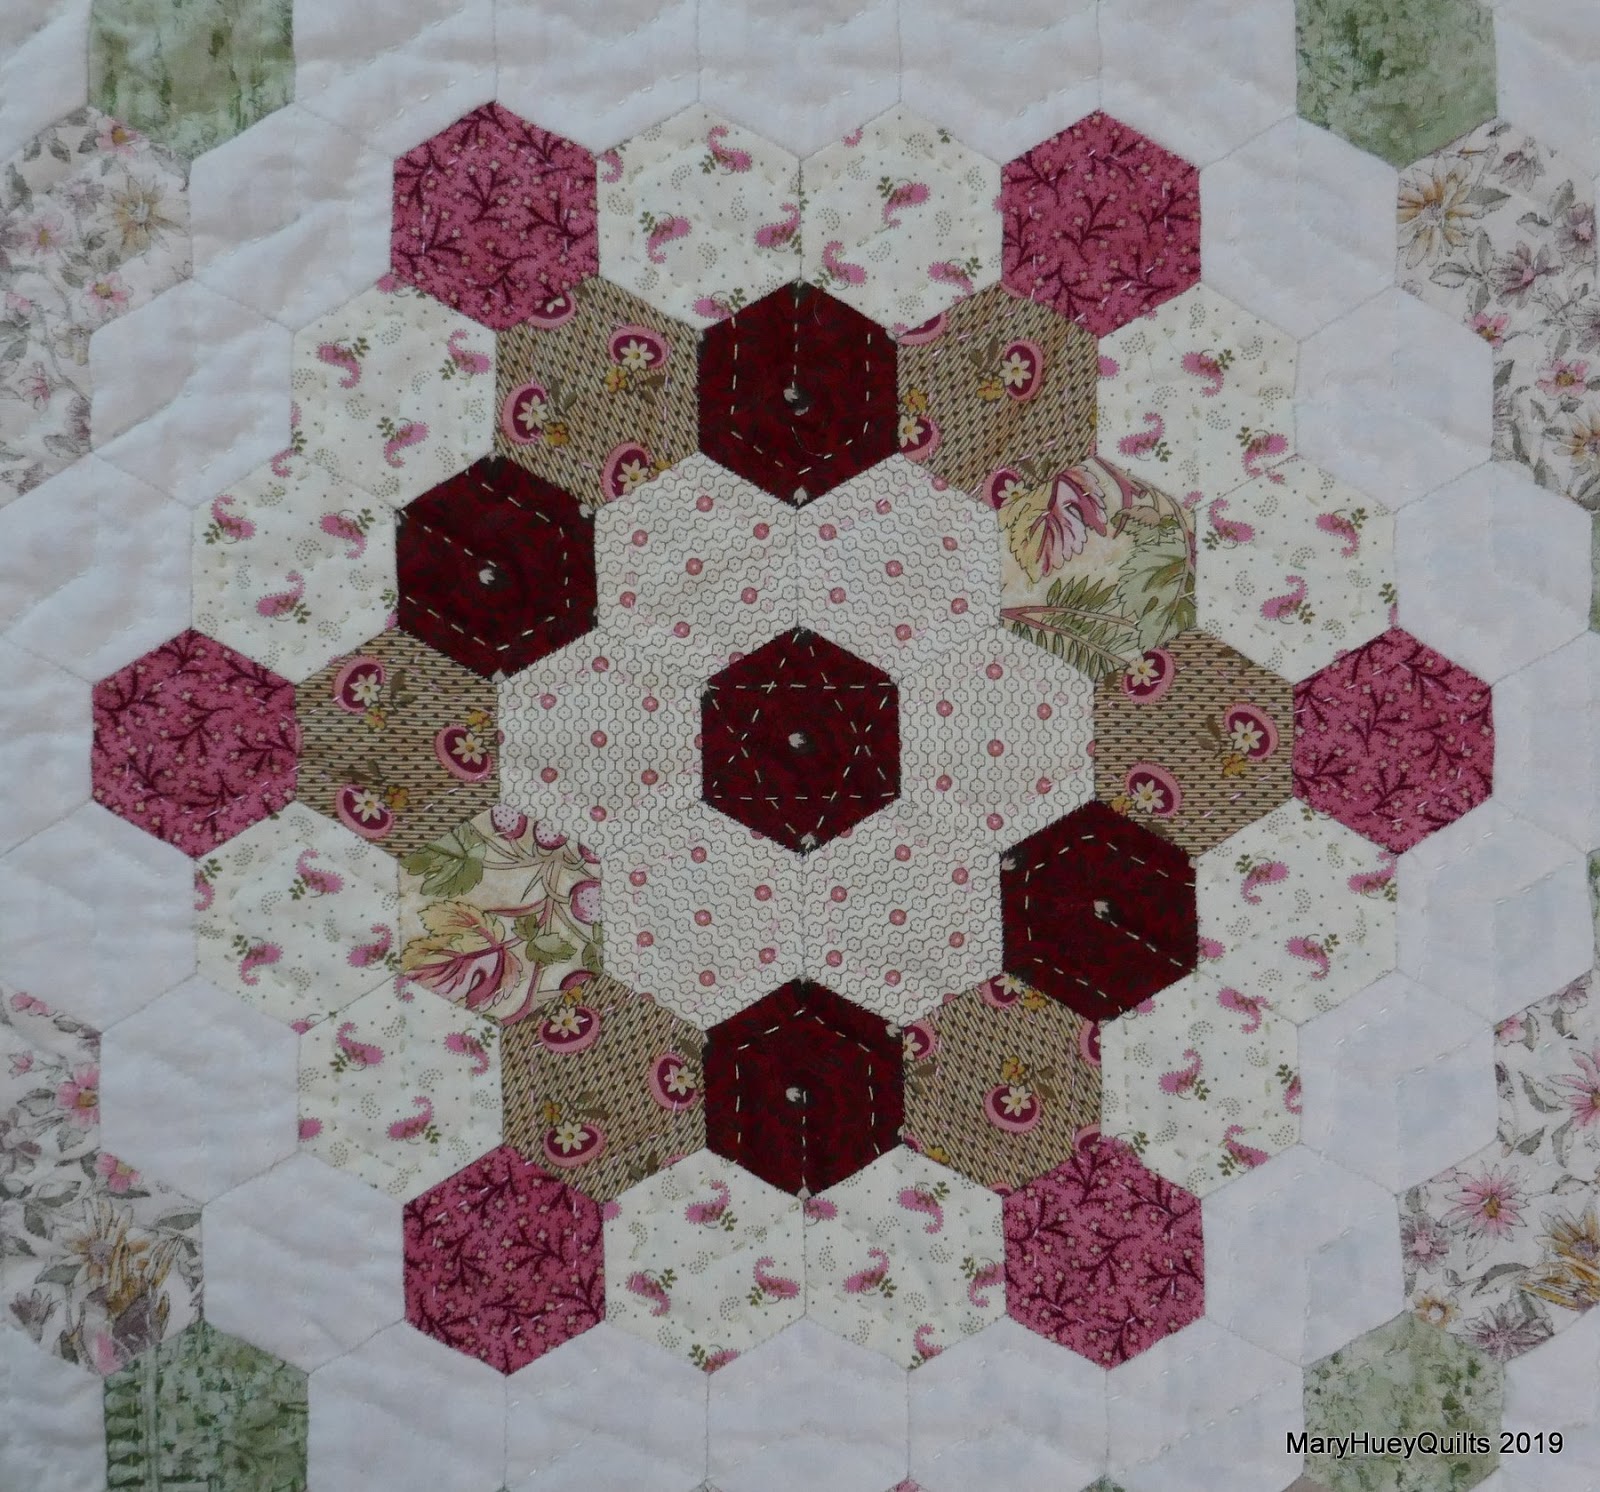
And now here are close-ups of all the full blocks -- basically, I'm going to let them speak for themselves with just a few remarks.
 If you focus in on the drab brown pairs of hexagons in the motif below, you can see the quilting motif I used quite a bit to "connect" three hexagons together.

I've fiddled around unsuccessfully with the photos to get better views of the quilting I did since it's not the traditional "outline the hexagon" without much success.  Sorry.
I did rather simple fussy cutting on this quilt -- basically centering motifs here and there.
 
All the fabric I used already lived in my stash and is a combination of several eras of reproduction prints that I accumulated during the final years of owning a quilt shop.


The block configurations were inspired by an antique quilt sold by Christie's auction house at some point.  I saved it in my "enormous" hexagon board on Pinterest -- HERE is a link.
I haven't looked at that board for quite a while and boy, do I have a lot of great ideas saved there!?! 

 I used Quilter's Dream Wool batting -- it's easy to needle and gives a bit of puff.

I recall some of the fabric choices taking quite a bit of time but once that was done, the stitching was easy. 

I used a big stitch quilting approach and worked with size 16 pearle cotton.  
That thread size was an accident -- I had picked up a spools of cream, pink, and soft green somewhere and the colors were perfect!
Trouble was I needed more than I had and could not figure out my original source.
Thank goodness for some nice quilter on Instagram who steered me to the Colonial Needle Company who stock a wide assortment of pearle cotton in size 16!! 

 Some of the motifs felt off balance and that made it challenging for me to chose fabrics.

As you can see, each motif is outlined with a row of background hexagons and then set with a path. When I realized I didn't have enough of the soft floral I chose for the path, I added "intersection" greens and tan.
The border fabric is a gorgeous piece I hoarded just before closing my shop for the backing of some quilt, probably started but still not finished.  
It surfaced during one of my stash hunts and is just perfect!!
I haven't tried the quilt out on my own bed yet, but when traveling in Michigan during the fall of 2017, I had it along to use in a trunk show and was quilting on it during the evenings.
I stayed in a charming bed and breakfast and there was this perfect bed!!
The room was even painted the perfect color!
It would have been a shame for this quilt to be left in the UFO stacks and risk the chance of it being sold for "nothing" at the Big Yard Sale.  
Now I'm pretty sure one of my children will be happy to have it when I'm done with it!

Finishing the quilting was my February One Monthly Goal and so having it completely finished is a bonus!!  Check out all the other finishes HERE.

Update -- February, 2020
I entered this quilt in our local regional show and it earned an Honorable Mention ribbon.  I haven't seen the judging sheet yet so don't know what the judges thought of it beyond that.  I was disappointed to find the quilt which is hand pieced and hand quilted had been lumped into a category with machine pieced and machine quilted pieces.  Apparently there weren't enough quilts entered to warrant a class for all hand work pieces.  I need to think this over before entering quilts in that show in the future.

Mary

Wednesday, February 20, 2019

More Isolette Plus Quilts

My loyal gang of quilters has been working since the first of the year on more of those isolette baby plus quilts I shared with you HERE in November.  At this point, most of the bundles that we collected together in this tub have been turned into quilts to be donated to the NICU at a Lexington, KY hospital.
We get together every couple weeks for an afternoon of stitching and in spite of the weather have managed to turn out a couple dozen quilts
It's interesting to listen to everyone as they lay out the pattern -- we run the gamit from "slap-dash" to "very particular". 
One of the gals is so in love with this simple make that she has made close to a dozen herself since the first of the year. 
Bright and cheery, 
or subtle and understated -- they all look great! 
I've started to add a little heart into the one's I'm piecing.  It's a simple block in a range of sizes from a tutorial by Cluck, Cluck, Sew.   The 5" finished size fits perfectly!
And look at this cute backing -- couldn't  cut it up, but it's perfect for this! 
I started on this one today -- smaller scale pluses for a twin size quilt that will be donated to a local men's transitional home -- manly fabric pull that uses a stack of aging solids from my stash!
One of my friends cut the entire stack into rectangles and squares this past week so I could get right into the layout and stitching!
Win, win!! 
If you'd like the pattern for the isolette cover (35" by 40"), send me an e-mail (maryhueyquilts at hotmail dot com) and I'll share the PDF with you!
It's a great beginner's project if you are teaching a non-sewer to piece -- very few seams to match!

Time for tea!!
Mary

Saturday, February 16, 2019

Hand Quilting Tips

One of the perks of being under the weather with bronchitis for most of the past three weeks has been lots of quiet time in my little stitching nest.  I've made terrific progress on the hand quilting of my huge reproduction English paper pieced hexagon quilt.  I pieced it during 2015(?) and I started the quilting early in 2017 and my goal is to finish by the end of this month!
Many years ago (1975) when I took my first quilt making course, the teacher taught us to hand quilt in a hoop.  Her name was Fran Soika and she is a legend in this area -- partially because of her distinct design style and skilled workmanship, but also because she was teaching quilt making when no one else was.  It would be interesting to take a survey of how many current quilters were impacted by Fran's teaching.
I invested in the best quality 14" hoop many years ago and use it to this day.  The one drawback of hoop quilting is managing the edges of the quilt.  I can't recall for sure that this is what Fran taught us to do, but I can't think who else would have shown this to me either -- so Fran gets the credit!

Easiest way is to baste a 6" wide strip of fabric (about 20" long) to the edge.  I baste it just to the quilt top, not the batting (which is usually wide enough).  If the backing is also too narrow, I baste a second strip to the backing.  And thread basting is the best solution -- I've tried pin basting (felt lazy that day) and that was inefficient to say the least.
Now I can work my way along the edges of the quilt and maintain the same smoothness and tension that I have throughout the center of the quilt.
I'm using a simple grid of straight lines on this border since the print is too busy to show off anything fancy.  I mark the lines as I go with a Clover Chaconer -- another tool I've had for years.  It's refillable and while I have several colors, the white gets used the most
I mark 6 to 8 lines at a time since they do rub off easily with all the handling. 
Another trick I learned from the gals at Old South Church in Kirtland to eliminate quilting thread knots has come in handy!  I start with a thread that is twice as long as I need for a line.
I take two stitches without a starting knot then stop and divide the length of the thread equally.
The two parallel lines from the center of the picture towards the left are my divided thread.
One half of the thread lays off to the side (the tangle in the picture) and I complete the first line (needle heading to the left) continuing until I get the waste fabric strip basted to the edge. 
I pull the needle off the thread and return to the starting point and repeat.
When a section is finished and I remove the basted strip of waste fabric, I have all these loose ends.
Now I rethread them on the needle, finish that line and take a few stitches parallel to the edge of the quilt securing them. 
The excess thread is snipped off and this edge is ready for the binding. 
It's a very elegant quilt and it doesn't fit any area of my home so not sure what it's destiny might be?
At the end of the month when the quilting is finished and the binding fabric chosen, I'll save a sunny day to take lots of good pictures to share it's beauty with you!

Mary


Saturday, February 9, 2019

Chair with a View

This is the chair (complete with heating pad and box of tissues).
And this has been my view now for going on 10 days!?!
I'm enjoying a bout of viral bronchitis!
I haven't been ill this long for years.
I haven't been confined to the house this long for years.
I haven't been this bored for quite some time!
Fortunately, I have hand-stitching in abundance.

I have the new block to organize and prep for stitching from the #sharksdinnerBOM.
I still have 300 or so 1"hexies to baste for my Dodecagon quilt.
One afternoon I laid out the finished part of this quilt on the floor, finalized my layout plan and calculated what is needed to finish.
My next step is to surround the dodecagon blocks with green hexies, so I've been stitching strips of 7 together to prepare for that step -- I hoped to have all of them ready by the end of February for a retreat I'm attending . . . . but guess what?  I have all I need!?!
That's fun!!
Edit September, 2019 -- Marge Sampson-George now has the Dodecagon pattern, templates, and papers available via this Etsy shop -- click HERE.

I cast on the green cardigan -- it's to replace my favorite sweater which I've worn out -- and am just about ready to split for the armholes.  Steady as she goes!
Since I'm not receiving visitors (?!?), it's okay to have current projects draped all over the living room.  That way they are handy and the boredom cycles easier to manage when I just need to go to the other side of the room to change projects.
Reaching the final corner of hand quilting the central part of this quilt is so exciting!!
Now I just have two borders left to go and I'm determined to finish that in February!
I used up my monthly Hoopla library loans quota for the first time ever -- two audio books and daily movies without leaving the chair!
Recovery is on the horizon but I'm definitely getting stir crazy (no birding or walking) so just need to be patient for a few more days.
What do people do that don't hand stitch when they are sick??

Mary