Showing posts with label charity quilts. Show all posts

Friday, July 19, 2019

Scrappy Triple Irish Chain with a Twist

Greetings from all of us in my backyard!!
When I said on June 13, I'd organize cutting instructions, I didn't mean to take so long to share the them.  Either I've had too many oars out of the boat this past month or I've lost my sense of urgency as I enjoy the lazy, hazy days of summer?
I finished piecing the top yesterday, organized the backing and I'm ready to hand it off for quilting. 
I've checked the math several times and am pretty sure I've got my counts correct.
If I don't, sorry -- just post a polite comment if you find an error.

As I explained in the original post, my goal was a twin size quilt using 14" blocks.  That meant that 4 blocks by 6 blocks would be the ideal size but an Irish Chain setting wants odd numbers of blocks to keep the corners identical -- 3 by 5, 5 by 7, etc.  Once I stumbled onto the idea of piecing "half blocks" for the outer rows, my problem was solved.

Since this is a charity quilt, my goal is to keep the quilting process simple and a big white empty space never brings "simple" to my mind.  So I started to try out ideas for filling the center of the alternate blocks and a "trip" variation was perfect since all the squares and strips needed could be cut using the same grid as the blocks -- 2 1/2" cut!

Ready?
Here are the statistics for my twin size quilt top.
I made seven of the basic 7 by 7 blocks using 2 1/2" cut squares (from my very scrappy basket).
For each block, I used thirteen assorted green squares, four white (background) squares, and thirty-two assorted squares.
I pieced the blocks in vertical rows and pressed every block exactly the same - alternating seams so they nest together.
The outer left and right sides rows are both pressed down (towards the bottom of the blocks).
Once the rows were pieced together, I pressed all the vertical seams to the right.
I made eight of the alternate blocks using the same 7 by 7 grid.
I wanted more green in the quilt and liked the unity of using just one other color with it through out the quilt but this block could be as scrappy as you wish.
Here's the block broken down so you can see the rectangles needed and their placement.
Each block used twelve scrappy 2 1/2" squares, nine assorted green squares, four assorted yellow squares, and four white (background) squares.
In addition to the squares, there are four 2 1/2" by 6 1/2" rectangles around the outside edges of this block plus four 2 1/2" by 4 1/2" rectangles in the second and sixth vertical rows.
To make it easy to set the finished blocks together, I pressed these blocks opposite of the first set of blocks.  The outer left and right edge row seams are pressed up (towards the top of the block) and the vertical seams are pressed to the left.
Time to make the half blocks!  Each one is a 4 by 7 grid of squares.
Ten of these blocks are needed for the twin size I made.
There are three white (background) squares, seven scrappy green squares, and eighteen scrappy squares.  I found it easiest to stay on track by laying out the green squares and the white squares in the correct positions, then filling in with the scrappy squares.
Looking at this photo, the left edge of the block will always be on the outside edge of the quilt so it must be rotated for each side of the quilt.  
For that reason, I found I had to press each one so it would nest together with the adjacent block rather than pressing all of them identically -- the left side blocks were pressed opposite of the right side blocks, etc.
I wasn't sure the half-alternate block would look good, but once I pieced one and added it to the design wall, it was fine.  Six of these blocks were needed for my size.
I used six scrappy 2 1/2" squares, six assorted green squares, three assorted yellow squares, two white (background) squares, four 2 1/2" by 4 1/2" rectangles, and one 2 1/2" by 6 1/2" rectangle for each block.  
Pressing is the same as above -- adjusting to nest with adjacent blocks. 
Finally, I made four corner blocks.  
Do these last so you can determine the best pressing directions more easily.
Each corner blocks uses three scrappy 2 1/2" squares, four assorted green squares, two assorted yellow squares, one white (background) square, and three 2 1/2" by 4 1/2" white rectangles. 

Here are my cutting totals for the complete quilt!

                          734 -- 2 1/2" assorted squares (that's 46 2 1/2" strips cut into squares)
                          161 -- 2 1/2" squares for central cross of main block (my greens) 
                                         To use one fabric for this, get 1 yard.
                          Background -- 2 3/4" yards (includes first border)
                                  Cut 4 lengthwise strips, 2 1/2" wide by 2 3/4" yards long for first border.
                                  From remainder of background fabric, cut
                                                    106 -- 2 1/2" squares
                                                     84 --  2 1/2" by 4 1/2" rectangles
                                                     38 --  2 1/2" by 6 1/2" rectangles
                           Border -- I cut mine 4 1/2" wide on the lengthwise grain and pieced strips end to                                          end to get the length needed so used about 1 1/2 yards.

Here it is!!  My finished top is 70" by 93".
I love how balanced and cheerful it looks!!
Using up 895 squares out of my "sourdough" basket is great, too!!
(The picture is a little lame but it's really HOT here and my daughter has short arms so we were working quickly to get back inside!!)
There might be another one of these in the future because the 2 1/2" strip box is pretty full and could use a good thinning out! If I were going to do anything different, I would use one really dark print (or solid) for the center chain -- my green chain disappears partially because there is so much variation in value -- mediums to darks instead of just darks.

Book mark or print out the text of this post so you can give it a try down the road with your scrappy stash.  If this inspires you to make your own version, post a photo on Instagram and tag me @hueymary - I want to see it!!

Mary


Wednesday, February 20, 2019

More Isolette Plus Quilts

My loyal gang of quilters has been working since the first of the year on more of those isolette baby plus quilts I shared with you HERE in November.  At this point, most of the bundles that we collected together in this tub have been turned into quilts to be donated to the NICU at a Lexington, KY hospital.
We get together every couple weeks for an afternoon of stitching and in spite of the weather have managed to turn out a couple dozen quilts
It's interesting to listen to everyone as they lay out the pattern -- we run the gamit from "slap-dash" to "very particular". 
One of the gals is so in love with this simple make that she has made close to a dozen herself since the first of the year. 
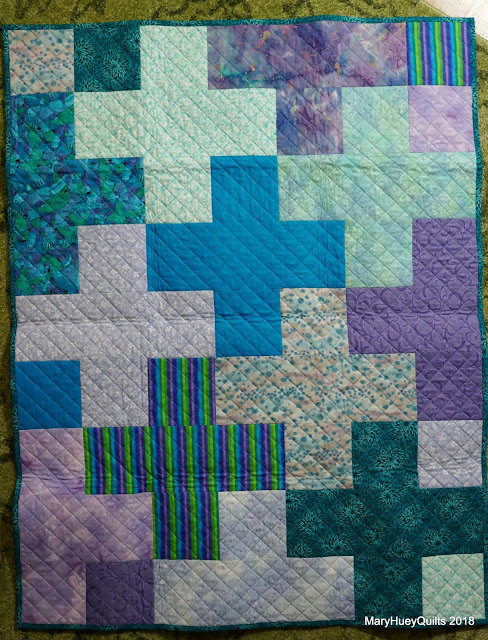
Bright and cheery, 
or subtle and understated -- they all look great! 
I've started to add a little heart into the one's I'm piecing.  It's a simple block in a range of sizes from a tutorial by Cluck, Cluck, Sew.   The 5" finished size fits perfectly!
And look at this cute backing -- couldn't  cut it up, but it's perfect for this! 
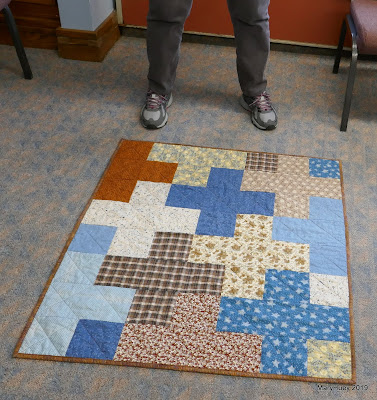
I started on this one today -- smaller scale pluses for a twin size quilt that will be donated to a local men's transitional home -- manly fabric pull that uses a stack of aging solids from my stash!
One of my friends cut the entire stack into rectangles and squares this past week so I could get right into the layout and stitching!
Win, win!! 
If you'd like the pattern for the isolette cover (35" by 40"), send me an e-mail (maryhueyquilts at hotmail dot com) and I'll share the PDF with you!
It's a great beginner's project if you are teaching a non-sewer to piece -- very few seams to match!

Time for tea!!
Mary

Tuesday, November 13, 2018

Why I Make Quilts to Share

I'm having fun this morning quilting another little plus quilt for my November #shareaquilt campaign.   George is helping on this one and we are making cascades of hearts raining down over the quilt.  It's such a quick and cute make that I've committed (outloud) to making one a week during November!
I've figured out that an hour or so for five days is all I need to complete one of these quilts so I'm feeling confident about reaching that goal.  As I've worked this morning, I've been thinking about why I do this.  My "way back" memory is a bit fuzzy but I can recall struggling with some guilt about having such an enjoyable career (owning a quilt shop and teaching quilt making) while participating in a long term Bible study group where several people were unhappy in their careers.  

I came through that personal struggle determined to use my skills as a quiltmaker to bless others.  As a result in the past 25 or so years, I've organized local events and groups to produce lots of quilts to share.  While I had the shop, I donated 500 yards of fabric annually to area quilt guilds to support their efforts to make quilts to share.  Since closing the shop, I've pushed and prodded a small dedicated group of friends to make 25 to 30 quilts annually that we give to three different groups in our area.  

Motivating a wider audience to participate in making isolette size quilts is a big step for me but the inspiration for the plus quilt came to me so quickly and so clearly that I have to believe I'm suppose to be doing it!  So, I hope you'll catch some of that desire to #shareaquilt and download the PDF for this simple make and share it with the NICU at Lexington, Kentucky's Baptist Health Hospital.
If the link doesn't work - just e-mail me and I'll send it -- maryhueyquilts at hotmail dot com)

If you follow me on Instagram, you might have seen a photo of an ugly stack of quilt blocks that were given to me.  My group has made a commitment to provide twin size quilts for a local transitional home.  We piece them, make the backing, and provide the batting for another friend who works them into her longarm schedule.  She called the other day to say she has one ready for us to bind so I set assembling this stack of blocks into a quilt top as my November One Monthly Goal so I could drop it off when I made the pick-up. 
I've had the blocks since March and a setting plan since June, so there wasn't much thinking to be done -- just some stitching!!

The setting plan is brilliant and a complete accident!
Wanna' see?
I decided the blocks needed to be sashed as the sizes were inconsistent and would need trimmed.
Using my Electric Quilt program to organize the plan, I had a lazy moment and instead of opening up a new file, used a layout for a plus quilt that was already up on the screen.
When I added sashing to the setting, this happened!!
(At this point, you can "role play" my reaction by "gasping".)
Of course, everything was dropped at once while I rushed to the living room (the only available empty flat space) and began to layout the blocks.  There were four blocks of each colorway.
Following the dark versus medium clues from the layout diagram, I organized the dark and light blocks to create the "arms" of the pluses and used the medium colors to fill in the centers of the pluses and the gaps around the outside edges.
I liked the green of my rug with the blocks (it's my main neutral these days) so cut the sashing from a pea-green solid with some raspberry scraps for the corner stones.
For a sashed setting, I usually add the sashing and cornerstones to every block so I can treat the complete unit as a block for the final assembly.  It also usually enables me to trim the unsashed edges to get uniformity without compromising the blocks too much.
I posted a tutorial several years ago of this approach HERE.
Last week, I worked for an hour every day, sashing the blocks and assembling the rows.
It was just as exciting to see the setting evolve on the studio floor as it was to see it pop up on my computer screen. 
Of course, I had to flap it across a bed to bask in the glow once the top was complete.
The big pluses are subtle and non-quilters might miss it altogether, but I love it!!
For the backing, I split a hunk of stripped fabric that was donated to our group and inserted a wide pieced band of color -- more donated fabric cut in odd sizes.
I've since handed the entire package -- top, backing, and batting -- off to our quilting partner.
The challenge of making these twin size quilts has been to produce "manly" color and fabric themes.  It's made me realize how "feminine" most of my quilt making tends to be.

So to #shareaquilt seems to be becoming my new purpose as I step away from teaching to keep me active as a quiltmaker. 
 I love using up the stuff. 
I love the challenges of transforming cast-offs into attractive quilts. 
 I love the machine quilting confidence I've gained as a result of finishing these projects. 
And then there's all the happy faces at the end of process!!

Why do you make quilts to share?

Mary

P.S.  Did you "gasp" when you saw that setting?  Feel free to copy the idea!!


Wednesday, November 7, 2018

Up For a Little Challenge?

A month or so ago, an Instagram post of mine sparked a conversation with an NICU nurse, Jeri in Lexington, Kentucky.  When she shared that her unit cares for an average of 20 patients every month I was inspired to plot out three sizes of small quilts using the popular PLUS pattern.  Marsha and Mary Ann (charity quilting sidekicks) joined me in stitching each size up and we sent them off to Jeri for a test run to see which size would be perfect!
Now I invite you to join together in a campaign to stock up the staff at Lexington, Kentucky's Baptist Health Hospital with quilts for the NICU department by making one of these little cuties and sending it off to them during November as a gesture of thankfulness and encouragement!
It's an easy make -- my second one from start to finish took under 6 hours!?!
I've written a guide for the size (35" by 40") that works best and you can download that PDF by clicking HERE
(If the link doesn't work - just e-mail me and I'll send it -- maryhueyquilts at hotmail dot com)

The rest of this post takes you along with me last week as I made a second one.

First, choose fabric -- that's fun!!
I started with this cute owl print and pulled greens and browns from my stash.
The minimum needed for each print is 6" by 35" so a quarter yard works.
I use 11 prints but repeating a couple prints works, too so if you can only get to 9, that's fine.
I lay them out in a rough draft by following the numbered diagram in the PDF to see how they might work. Once this draft arrangement is pleasing, I number each fabric before I start cutting.
When you print out the PDF, you'll see that it specifies the initial placement of lights, mediums, and darks.  The arrangement is an easy starting point and as you will see, it is flexible as you work on the layout.
Be sure to label each print with it's number as you cut -- easy cutting -- it's all rectangles and squares!!
This might be a good project to invite a new stitcher or wanna-be-quilter to join along!!
I hope to get my granddaughter on board -- what a great Advent project for the two of us!!
Once everything is cut, I lay out the pieces according to the numbered diagram with the PDF.
You'll notice that there are six squares on the diagram with a "?" -- use the extra 5 1/2" squares to fill in those blanks after all the pluses are in position. 
Once the layout is complete, feel free to move fabric around -- notice below, that I shifted three of the lights prints around a bit for better contrast.   
Ready to stitch!
The rows are assembled horizontally and I suggest alternating the pressing of the seams -- to the right in the first row, to the left in the second row and so on.  There aren't many seam junctions, but this pressing strategy assures you of opposing seams when there is a junction.
With so few seam junctions, a beginner won't get discouraged.
The piecing takes about an hour to an hour and a half so if you are using the project to introduce someone to piecing, they will be encouraged by the fast results!
Top done and ready to layer!
I pinned every 5" and I wish all my quilts were this quick to layer -- 15 minutes!?!
I kept my quilting simple -- used a walking foot -- ditched and stitched a 5" grid.
Then added a set of 3 parallel lines through the center of each 5" square. 
It took longer to quilt the piece than it did to cut, layout, and stitch the top together. 
Marsha quilted her version with a diagonal grid.
And Mary Ann used a straight grid of wavy lines.
My second one is already in service locally with a young friend and her first child who was born prematurely.
My living room floor is littered with "kits" for twelve more quilts because I'm hoping to organize a couple "sew-ins" locally -- perhaps as a "blow-off black Friday" gesture?!?
So what do you say?
Will you join me and #shareaquilt in November?
Mailing instructions are included in the PDF and my goal is to motivate 25 of you give up a couple yards of fabric and a few hours to send Jeri and her co-workers a quilt before the winter holidays!

For my local peeps (Northeast Ohio), watch my Instagram feed - @hueymary - for updates on when and where I'll be cutting and stitching.

Or how about organizing a few of your stitching friends and do your own local gathering?
How about a winter reunion for your 4-H club?

Don't want to send them to Lexington -- I'm sure there is a NICU near your hometown that would welcome the attention, too!

The pattern guide is my holiday gift to you and I hope it inspires your own commitment to spread loving kindness.

If you have questions, just leave a comment here and be sure I can reply to you!!
Or message me via Instragram.
Thanks for anything you can do to make this idea work!!

Mary