Showing posts with label #shareaquilt. Show all posts

Friday, July 19, 2019

Scrappy Triple Irish Chain with a Twist

Greetings from all of us in my backyard!!
When I said on June 13, I'd organize cutting instructions, I didn't mean to take so long to share the them.  Either I've had too many oars out of the boat this past month or I've lost my sense of urgency as I enjoy the lazy, hazy days of summer?
I finished piecing the top yesterday, organized the backing and I'm ready to hand it off for quilting. 
I've checked the math several times and am pretty sure I've got my counts correct.
If I don't, sorry -- just post a polite comment if you find an error.

As I explained in the original post, my goal was a twin size quilt using 14" blocks.  That meant that 4 blocks by 6 blocks would be the ideal size but an Irish Chain setting wants odd numbers of blocks to keep the corners identical -- 3 by 5, 5 by 7, etc.  Once I stumbled onto the idea of piecing "half blocks" for the outer rows, my problem was solved.

Since this is a charity quilt, my goal is to keep the quilting process simple and a big white empty space never brings "simple" to my mind.  So I started to try out ideas for filling the center of the alternate blocks and a "trip" variation was perfect since all the squares and strips needed could be cut using the same grid as the blocks -- 2 1/2" cut!

Ready?
Here are the statistics for my twin size quilt top.
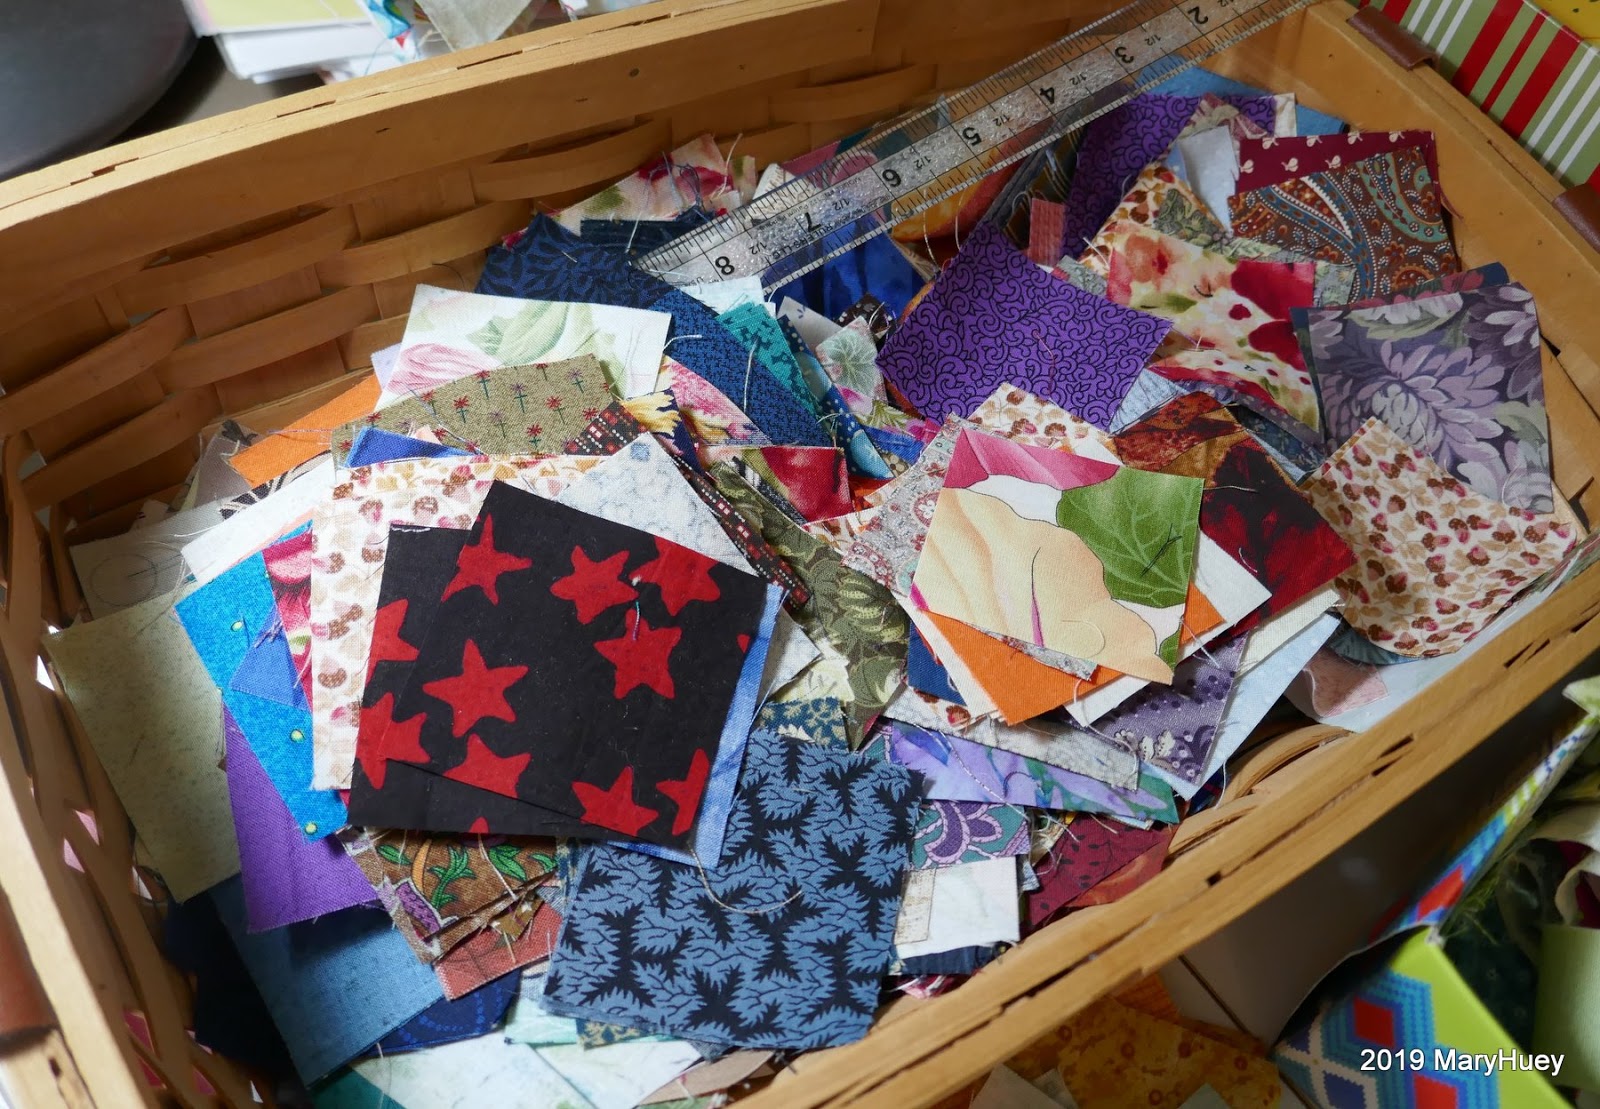
I made seven of the basic 7 by 7 blocks using 2 1/2" cut squares (from my very scrappy basket).
For each block, I used thirteen assorted green squares, four white (background) squares, and thirty-two assorted squares.
I pieced the blocks in vertical rows and pressed every block exactly the same - alternating seams so they nest together.
The outer left and right sides rows are both pressed down (towards the bottom of the blocks).
Once the rows were pieced together, I pressed all the vertical seams to the right.
I made eight of the alternate blocks using the same 7 by 7 grid.
I wanted more green in the quilt and liked the unity of using just one other color with it through out the quilt but this block could be as scrappy as you wish.
Here's the block broken down so you can see the rectangles needed and their placement.
Each block used twelve scrappy 2 1/2" squares, nine assorted green squares, four assorted yellow squares, and four white (background) squares.
In addition to the squares, there are four 2 1/2" by 6 1/2" rectangles around the outside edges of this block plus four 2 1/2" by 4 1/2" rectangles in the second and sixth vertical rows.
To make it easy to set the finished blocks together, I pressed these blocks opposite of the first set of blocks.  The outer left and right edge row seams are pressed up (towards the top of the block) and the vertical seams are pressed to the left.
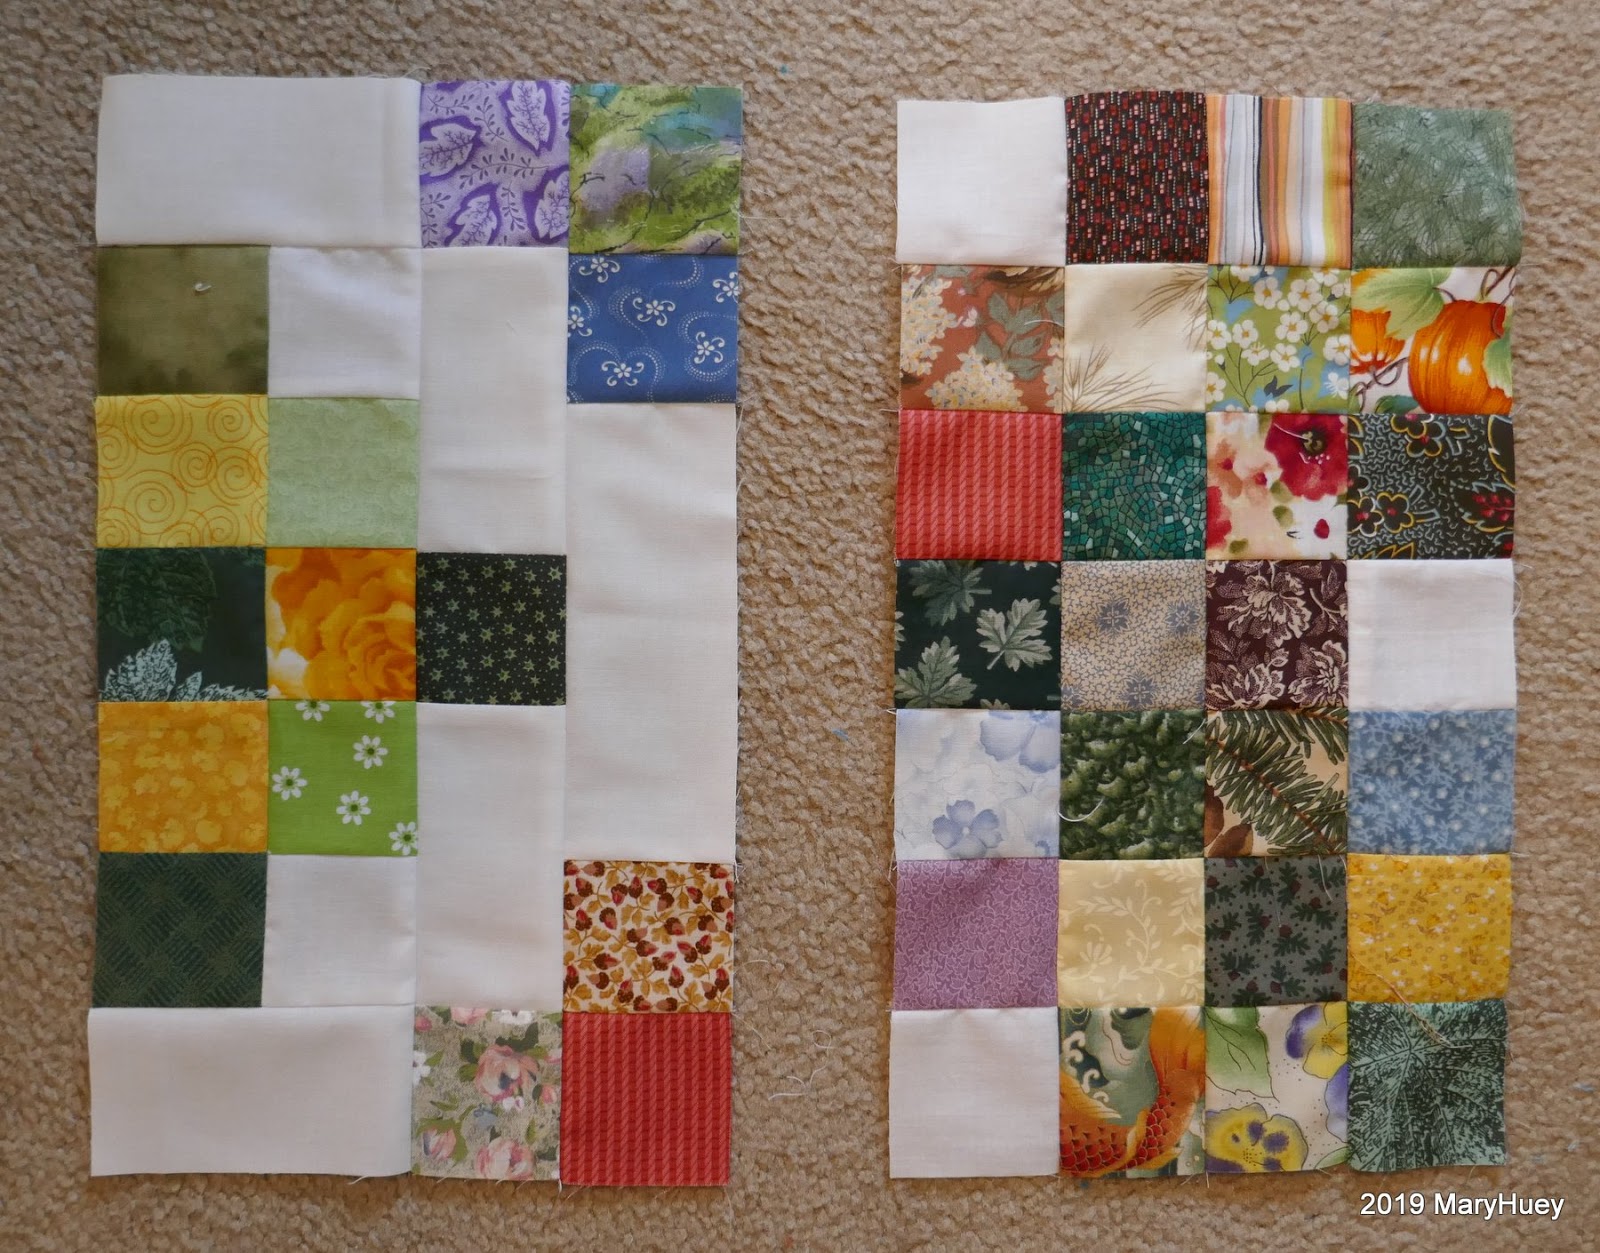
Time to make the half blocks!  Each one is a 4 by 7 grid of squares.
Ten of these blocks are needed for the twin size I made.
There are three white (background) squares, seven scrappy green squares, and eighteen scrappy squares.  I found it easiest to stay on track by laying out the green squares and the white squares in the correct positions, then filling in with the scrappy squares.
Looking at this photo, the left edge of the block will always be on the outside edge of the quilt so it must be rotated for each side of the quilt.  
For that reason, I found I had to press each one so it would nest together with the adjacent block rather than pressing all of them identically -- the left side blocks were pressed opposite of the right side blocks, etc.
I wasn't sure the half-alternate block would look good, but once I pieced one and added it to the design wall, it was fine.  Six of these blocks were needed for my size.
I used six scrappy 2 1/2" squares, six assorted green squares, three assorted yellow squares, two white (background) squares, four 2 1/2" by 4 1/2" rectangles, and one 2 1/2" by 6 1/2" rectangle for each block.  
Pressing is the same as above -- adjusting to nest with adjacent blocks. 
Finally, I made four corner blocks.  
Do these last so you can determine the best pressing directions more easily.
Each corner blocks uses three scrappy 2 1/2" squares, four assorted green squares, two assorted yellow squares, one white (background) square, and three 2 1/2" by 4 1/2" white rectangles. 

Here are my cutting totals for the complete quilt!

                          734 -- 2 1/2" assorted squares (that's 46 2 1/2" strips cut into squares)
                          161 -- 2 1/2" squares for central cross of main block (my greens) 
                                         To use one fabric for this, get 1 yard.
                          Background -- 2 3/4" yards (includes first border)
                                  Cut 4 lengthwise strips, 2 1/2" wide by 2 3/4" yards long for first border.
                                  From remainder of background fabric, cut
                                                    106 -- 2 1/2" squares
                                                     84 --  2 1/2" by 4 1/2" rectangles
                                                     38 --  2 1/2" by 6 1/2" rectangles
                           Border -- I cut mine 4 1/2" wide on the lengthwise grain and pieced strips end to                                          end to get the length needed so used about 1 1/2 yards.

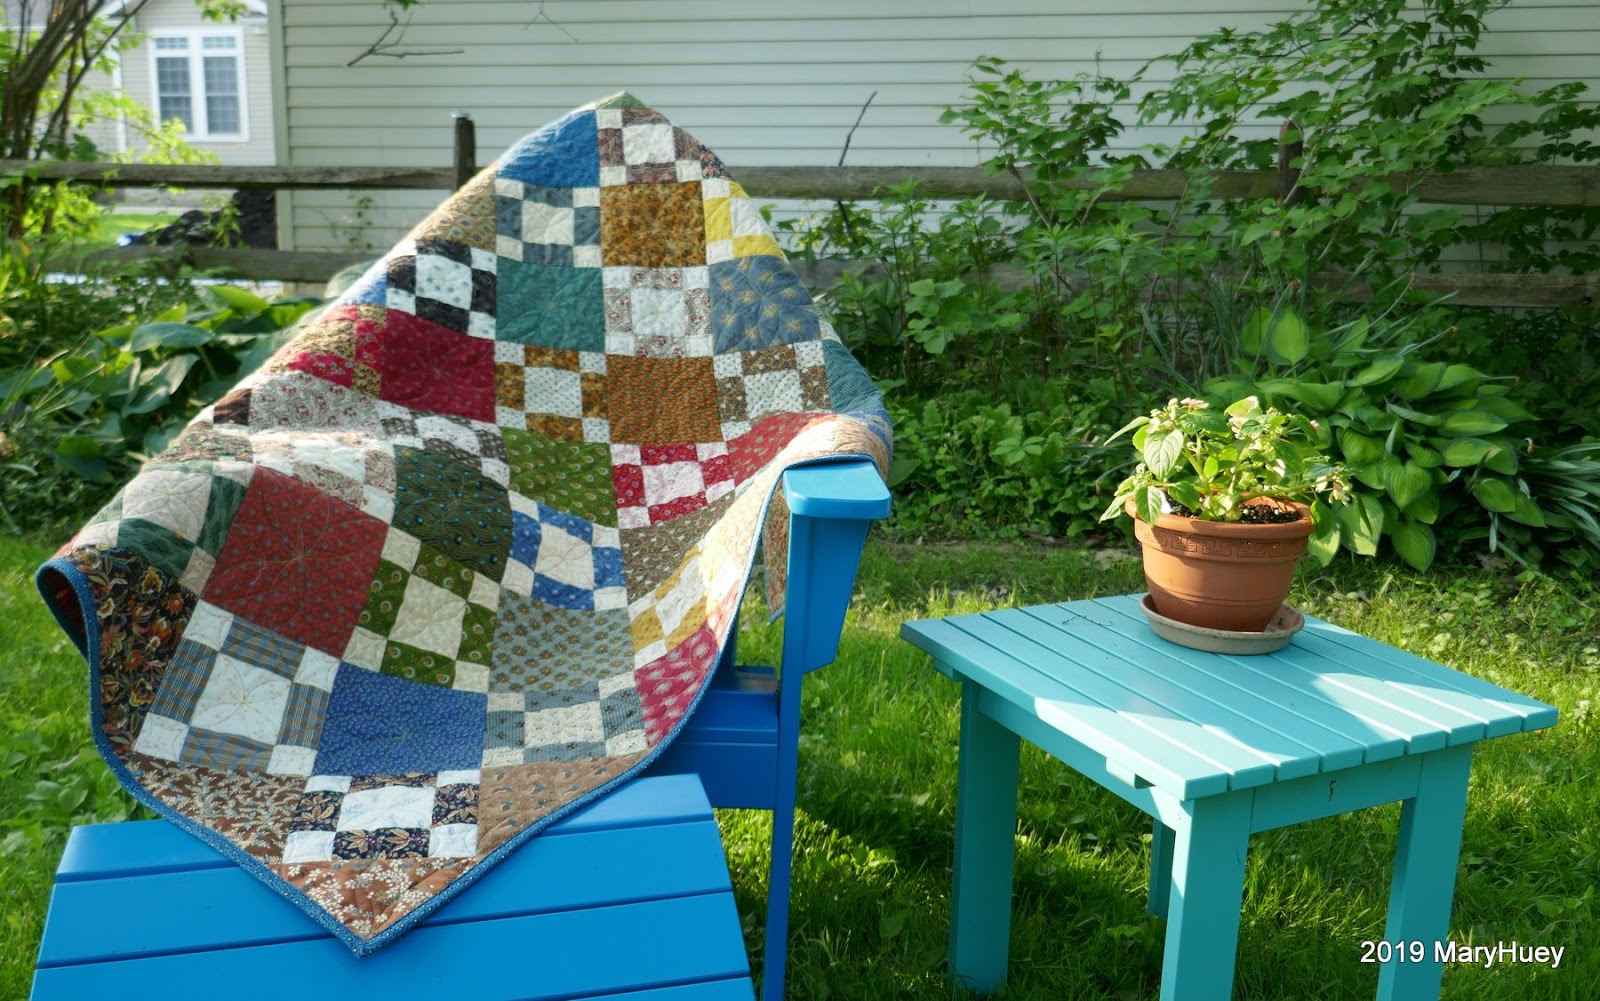
Here it is!!  My finished top is 70" by 93".
I love how balanced and cheerful it looks!!
Using up 895 squares out of my "sourdough" basket is great, too!!
(The picture is a little lame but it's really HOT here and my daughter has short arms so we were working quickly to get back inside!!)
There might be another one of these in the future because the 2 1/2" strip box is pretty full and could use a good thinning out! If I were going to do anything different, I would use one really dark print (or solid) for the center chain -- my green chain disappears partially because there is so much variation in value -- mediums to darks instead of just darks.

Book mark or print out the text of this post so you can give it a try down the road with your scrappy stash.  If this inspires you to make your own version, post a photo on Instagram and tag me @hueymary - I want to see it!!

Mary


Thursday, June 13, 2019

Scrappy Triple Irish Chain with a Twist

At the end of May, I shared the beginning of this new scrap quilt with you.
I'm making very good progress for gardening season (it's been raining quite a bit).
I will donate it to a local "recovery" home for women that will be opening at the end of 2019.
Wait until you see what I'm doing with the alternate blocks!!
The prospect of quilting the big alternate (14") mostly white blocks with a lovely design intimidates me.  I worry I'll "ruin" the quilt.  So I started to think about using a 6" "fussy cut" fabric square as the center of the alternate blocks to eliminate the issue but before I could even start to audition possible prints, I came up with a simpler (to me) idea.
A pieced block using the same 7 by 7 grid of 2 1/2" squares!!
I like the way yellow brightens up an ugly batch of scrappy squares so to add more of it to the quilt, I combined it with the green to pull the motley collection of fabric together.
I am using up lots of my basket of squares (yea!!!) -- so far I've only had to cut more green squares.
Here's my assembly breakdown for the alternate blocks -- more 2 1/2" squares and rectangles cut from 2 1/2" strips of white -- four 4 1/2" long and four 6 1/2" long rectangles for each block.
All alternate block settings need to use odd numbers of blocks to maintain their visual balance -- so 3 by 5 blocks or 5 by 7 blocks.  An even number results in different corner blocks.  
As I worked out the math, I decided 5 by 7 blocks was a bit too large and 3 by 5 too small.
4 blocks by 6 blocks would be the perfect size but the corners would not match and the quilt would look awkward to me.  I did audition it on the design wall just to confirm -- definitely awkward!!!

Then a Mary Ellen Hopkins design idea crept out of my sub-conscious cache of ideas.  Back in the mid 1980's, Mary Ellen taught her teacher trainees (I was one) to create borders by carrying the design of the patchwork out into the border in such a way as to create a balanced, finished design.

I shifted blocks around the design wall to a 3 by 5 setting with the alternate blocks in the corners rather than the main blocks.  Then by adding half blocks around the edges of the setting, I was able to get the perfect 4 by 6 blocks setting!!
I love it when old lessons inspire new ideas!!
This idea could be adapted to so many blocks!

This is my layout so far.  The blocks are easy to piece and I've streamlined my process so that it takes me about 45 minutes to make one -- just enough time to "rest" from all the other stuff that needs to be done!!
Here are the four units I'm piecing, separated so you can see how they connect together to create the overall design.
These are the two different "half blocks" used to make the "border"
and this is the corner block. 
I still have about ten of the "border" blocks to piece and when I get the top set together, I'll think about organizing a guide for making this top that will include yardages needed if one isn't chopping up scraps, and a cutting list for the twin size I'm making if anyone is interested.  I won't write instructions for piecing the blocks (remember, I'm retired) -- you already know how to do that, right?  Just leave a comment below.

To finish off today, here's a few of my favorite pictures from my walks this week.
This was the view at one of my creekside stops -- just two buddies hanging out at the beach -- Northern Cardinal on the left and an American Goldfinch on the right.
I'm trying to learn dragonfly identification -- it's a slow process.
I'm pretty sure this is a blue dasher.  Aren't those eyes gorgeous?!?
I'll submit the photo to the I-naturalist app and they'll confirm it or correct me.
It's hard to resist the male Ebony Jewelwing!!  They are about 2" long and so delicate looking.
So here's hoping those of us who are being overwhelmed with rain get none this weekend and those of you who need it get your fair share!!

Mary

and at Oh, Scrap linkies!


Friday, May 31, 2019

And I Finished a Quilt!!

What did you do today?
I watched my neighbor attempt to spread a huge pile of mulch around his yard . . . . 
. . . . . and I drank a lot of tea . . . .  
. . . . . . and I finished this quilt!
Finishing it was my #onemonthlygoal for May's Elm Street Quilts linkup and today is the last day to share the results for this month.
I layered it on May 1 and quickly stitched this first pattern row down the length of the quilt.
And then I got distracted or bored or disappointed with the design???
I don't know but there it sat until May 29 -- that was the day I cleared all the stuff off of it so I could get back to work on it.
I ditched between all the blocks hoping to for fresh inspiration as I engaged with the process of machine quilting.  

Quilting a top continues to be a "speed bump" for me but I do find that starting with the simplest approach (often stitch in the ditch) can break the creative jam for me.

I decided to continue with my original idea and finished the pieced blocks.
I've been doing so much straight line quilting for the past couple years that my free motion curves are a little rusty and that shows up with a variegated thread but . . . . must persist!!
Once they were all finished, it looked much better!
Now for the plain blocks -- at 6", they are too large to leave empty even if the batting is stable.
I decided to build on the design I used for the center square of the pieced blocks but my first experiment looked too empty so I added four more "petals" for a total of eight.
Much better!! 
Rather than mark them or use a ruler, I marked the center of each plain square 
and the center of each side of the plain squares.
I stitched "graceful arcs" from "dot-to-dot" -- this is where building muscle memory by doodling quilting designs pays off.  Happily I figured out how to start at one edge of the quilt and work across all the blocks in one continuous line.
Here I've stitched down the right side of the block continuing through all the blocks in that row until I reach the opposite side.  Then I stitched the left side as I came back across the quilt. 
After finishing the first row of plain blocks, I decided the pieced blocks looked too puffy, so I used my straight edge to add a box to those blocks to flatten them down a bit.
Happily, I was able to figure out how to do that as part of the plain square quilting lines by taking a short detour when I connected with the center of one of the rectangles and then come back into the plain square with no extra stops and starts. 
Moving from motif to motif smoothly is a great strategy because it cuts down on the "thread burying".  So the only threads I needed to bury were when the bobbin needed to be changed or the thread broke!!  Yea!!  Plus I do it at once because I hate spending an evening burying threads.
I spent most of the 31st quilting though I did take out time to do a few chores including mowing the back lawn.  Now my daughter and I can have a relaxing weekend outside!
The finished quilt is 42" by 60" and will be donated to one of my causes.
It's made completely from my reproduction stash and I estimated it used up about 4 1/4 yards of stash!!  That's a good thing because now I don't need to feel guilty about that layer cake I bought last week!!


Mary

(By the way, my neighbor did move a lot of mulch around but he didn't finish!!)


Tuesday, November 20, 2018

A Fun Make!

This Friday when I head over the the Kirtland Library's Community Room for the Blow-off Black Friday Stitching event I've organized, this fun #undercovermakermat will be going along!
I'm a fan of @lillyellasworld on Instagram and this is one of her free patterns.
During November, she has been hosting a "sew-along" on Instagram to make this and what fun I've had pulling it together.  I simplified it using only one pieced unit (the wonky bird) for the front pocket panel, but  her original version includes a paper pieced butterfly and selvedge pockets!

My color inspiration came from that fragment of Laurel Burch dogs and cats (second from the left).
That is literally all I have of it and rather than toss it into the scrap bag, I used it!!
Then of course, lots of bird stuff happened.  There's that wonky bird again
The black and white bird print wasn't quite enough for the width needed, so I used my new Small Flying Geese*** tool from Marti Michell to add a row of flying geese.
One of the benefits of cutting pieces with a template is that everything is the same size to begin and I never, ever, never have to trim triangles.
I know lots of you trim triangle units to "the perfect size" but I would have quit piecing a long time ago if that was necessary to get good results. 
The more 1/4" seams one stitches, the more accurate one becomes at it.
Truth!!
No points were harmed in the construction of this flock of geese!! 
It was fun to comb through my box of trims, looking for just the right touches.
Bonus -- I tidied the box up and culled a few things I'll never use at the same time!!
This six inch long piece of hand-loomed trim from South America has been malingering in that box for too long but I could never throw it away. 
Now it is a needle cushion on the front of one of the pocket sections -- since this will be a traveling mat, having a place to stick a self-threading needle for tie-offs is perfect!
And the green half pocket is just right for carrying along a few Clover clips!
I have a stash of machine quilting threads that my APQS George doesn't prefer. . . . . 
but since I did the quilting with the walking foot on my Bernina 1031, I got to use a happy multi-color thread!
The multi-color stripe is perfect for the binding and check out that ABC ribbon I used for the pocket divisions -- left over from when my kids were littles -- long time!
Since my "go-to" machine lives in a cabinet, the mat will be my travel companion.
It will keep all the most important supplies at my fingertips while creating a cheerful habitat when I'm away from my studio! 
The best part of this make (aside from the ease of construction) was the opportunity to let the fabric combination evolve as I went along -- being spontaneous is such a burst of joy!

If you live in Northeast Ohio and hate black Friday, think about joining us at the sew-in!
All the details of where and what to bring are in my post from last week -- just keep scrolling down.
And if you live too far away, grab a friend and have your own sew-in.
The pattern is a free download PDF -- if you haven't already grabbed it, here's the link again!
(If you can't get it to download and print, send me an e-mail -- maryhueyquilts at hotmail dot com -- and I'll send it directly to you).
Heck, grab the kids and get them involved!
It's an easy make and it will be appreciated by young parents in a difficult situation!

Happy Thanksgiving to everyone, even if you aren't eating turkey Thursday!

Mary

If you don't follow Nicole at @lillyellasworld -- you should!!
There's a new charm size set of moth blocks coming this Friday!!

***EDIT April 2025
Marti Michel closed her business in late in 2024 and while some shops may still have a stock of her templates, you can also find them on Ebay and Etsy.  


Thursday, November 15, 2018

Join Me at a Blow Off Black Friday Sew-In

Number three is finished!!
Our weather today is "home-confining", so I plan to cut out (and maybe stitch up) number four.

I'm organizing a "sew-in" on Friday afternoon, 11/23, from 1 to 4 p.m. to make more of these baby isolette Plus quilts to donate to the Baptist Health Hospital NICU in Lexington, KY.  Being the nearest large city to Appalachia region of Eastern Kentucky where I learned to be an enthusiastic mission worker, I have a heart for the people of that region and an Instagram conversation with a nurse has led me to work out a plan for using the popular PLUS quilt idea to make a simple and charming small quilt.  

It's easy to cut (based on 5 1/2" squares), simple to piece (under an hour with only 4 seam intersections that need to match), and with simple modern style machine quilting and machine binding, the complete make is under 6 hours!!  

I'm inviting my local followers (Lake, Geauga, Cuyahoga, and Ashtabula counties in Northeast Ohio) to dig out an assortment of quarter yards (12 to 14 prints) from your stash and join me for a friendly afternoon of piecing.  My  goal for each participant is to cut, piece, and layer a quilt (it's 35" by 40") to take home to machine quilt and send off to the nursing staff at the hospital during the coming month.  

Join me at Kirtland Library Community Room, 
9267 Chillicothe Rd. (Rt. 306), Kirtland, Ohio 44094.   

I have some kits available if you don't have enough in your stash, but pulling from your stash gives you a good color exercise and it is always feels good to use some of it up (as you know).  I'll also show you how to expand this quilt for larger sizes -- it's a great "show-off the fabric" project and if you are interested, at the end of the afternoon, I'll be prepared to do a demo how I do a 100% machine stitched binding.

Following is a supply list:

12 to 14 pieces of fabric (at least 6" by 35" in case you want to purge small bits) -- the quilt only uses 11, but as you know by now, more is easier and your extras might be the "perfect save" for someone else's project!! Pick out some from two color families or pick an assortment of lights, mediums, and darks -- I'll help you figure out placement!!
1 1/4 yard of fabric for backing
3/8 yard (12") of fabric for binding (might as well get that prepped while you are here!)
40" by 45" piece of cotton batting (it's okay to patch leftovers together -- I'll have fusible batting tape with me to help with that process) and 50 safety pins for basting the layers.
sewing machine and rotary cutting supplies (6" by 18" rotary ruler at least)


I'll have copies of the pattern for everyone and a couple ironing stations set up so you can leave that bag at home.  There will be light snacks and hot beverage makings.  
Please bring your travel mug as I won't provide throw away cups.

Finally, please press all your fabrics before coming so you can get a faster start!

If you have friends who might be interested, please share this invitation!  
Questions?  E-mail me at maryhueyquilts at hotmail dot com.

If you live too far away to make the commute -- you can download the instruction PDF from a link in the last two posts.  Then invite a friend to join you and sew along with us that afternoon -- post progress pics on Instagram with #shareaquilt #plusquilt and #quiltsforlexington


Mary