Showing posts with label scrappy quilt. Show all posts

Monday, May 25, 2020

Mississippi Mud Revisited

If you are familiar with my first pattern, Mississippi Mud (circa 1985), this new version breaks all of my old rules about the fabric selection!  
And how about that checkerboard border?!?
This design is a simplification of the traditional quilt block, Mississippi, which I found in Mary Ellen Hopkins' book, Even More Well Connected.  Mary Ellen introduced her teaching seminar students to a simple-to-piece "connector corner" in the mid 1980's.  It's a common technique today, but thirty-plus years ago, stitching a small square diagonally from corner-to-corner on top of a larger square to make a triangle was revolutionary!!
I eliminated some of the "connectors" in the original block because they bothered me visually and flipped the color values using lights for the star and darks for the background of the block.  The result was floating stars on a scrappy background that my students loved and they soon nicknamed it Mississippi Mud because of that jumbled assortment of prints used for the background of the first quilt.  It was such a popular workshop for me that I wrote a pattern and it has been a long-time best seller for me.
I've pieced this quilt at least a half dozen times over the years and between my versions and all the quilts my students have made, I know the larger the assortment of prints used, the better the quilt looks.  I would never use less than seventeen different prints.  
This "muckled up" (Mary Ellen's word) approach to the fabrics works best if you have a theme.  Examples include -- a mixture of batiks; or all 30's reproductions; or an analogous colors assortment (side by side colors on the color wheel - purple & blue, etc.); or a monochromatic color assortment (one color family).  I haven't tried using a designer's fat quarter assortment but I think it would work as long as any light background prints were left out.
I've always told students that medium to dark colors in small to medium scale prints make it easier to find a fabric for the stars that will pop against the muckled, scrappy background fabrics.
But when a student showed up with all the wrong fabrics several years ago during a workshop, I began to think differently.
She had lots of large scale prints which made it challenging to chose a fabric for the stars with a good contrast so the stars were obvious -- but after some experimenting, we came up with this effective solution!

At the time, it was just another opportunity to wrangle a contrary student who wasn't following my very clear instructions about fabric selection (are you smiling here?).   However, the seed of this successful variation has been germinating in my head for a while.

Another question that has surfaced on and off over the years is "can you use more than one fabric for the stars".  Well, it's easier if you don't (obviously).  I placated some of those contrarians by "allowing" them to use two different fabrics for the stars -- its easy to set that up so the two fabrics alternate in the finished quilt although I just looked through all my photos and apparently haven't actually done that myself.
So who knows what events led me to make this new version with a completely light background and thirty-two different star fabrics?  I think the "white with black" prints background idea started to develop while I was piecing Jen Kingwell's Long Time Gone sampler a couple years ago.  Then this past year, as I started working on the Kinship Sampler, since I was pulling out lots of prints from my stash, I started to cut pieces for two other scrappy quilts -- a multi-color stars version of Mississippi Mud being one of them.

As I started to piece the quilt top this winter, I had an idea to lead a sew-along with you to make your own version of this quilt.  It would require an edit of my pattern to update the suggested piecing tools and expand the layout options and I've done that!  My plan was to launch April 1 but the Covid19 shutdown interrupted that -- not because I wasn't ready, but everyone was organizing sew-alongs.  And then there is mask making?!?  I felt like launching one more sew-along would just contribute to everyone's state of "overwhelmed" -- I know I want to do them all and you probably do as well?

So here we are two months down the road we didn't know was ahead and I have a finished quilt top and a newly edited pattern uploaded in my Etsy shop HERE.
What shall I do?

Instead, I'm promoting the pattern today if you don't already own it.
(Sorry you missed the party with Mississippi Mud cake when I sold the 500th copy of the pattern.)
 
If you already own the pattern, the edit has been cosmetic for the most part so your copy is good.
The basics are the same -- cutting, assembly, all of it.

Then on Friday, May 29 I'll walk you through my piecing strategy for the blocks.
You can decide it you want to add this quilt to your "to-do" list.  But maybe the design variation ideas or my piecing strategy will give you ideas that relate to your own creative process?
So you decide and you benefit from it either way!
Then pick through your scrap basket over the next few days and cut enough pieces for four blocks so you are ready to follow along next weekend and piece a few blocks to get the feel of my piecing strategy.

If you don't enjoy the process or aren't totally happy with your fabric choices, those four blocks will make a 24" square -- big enough for a nice dog quilt!?!

Fabric advice?  I've simplified my "rules" -- whatever you choose is good just make sure the star fabric contrast suits your eye!

Questions?  Leave them in the comments because someone else wants to know, too!
See you on Friday!

Mary


Thursday, March 19, 2020

What a Difference a Week Makes!?!

Is your head spinning over every thing that has happened over the past week?
WOW, WOW, WOW!!!
A week ago, we were being "urged" to take precautions here in the USA and now we are being "ordered" to take precautions.  Today, I am suppose to be on the Platte River in Nebraska enjoying a "bucket list" birding experience but I'm home doing laundry, figuring out what to fix for supper, and puttering in my sewing studio.  Thank goodness I have a lifetime supply (really, maybe a couple lifetimes) of stuff!!

I finished and washed this little quilt to donate to a local veterans facility (though that may be delayed at this point).
I machine quilted this funky piece of scrappy patchwork I showed you last week. I am so surprised at the response it got on Instagram -- really, it's just leftovers?  
And I didn't even like it while it was happening.
I decided to finish it into a pillow cover and while I love the finished look of a piped edge, I hate the actual task of adding piping to anything.  It would be whimsical to use ball fringe -- but a bit too funky for me.  So as I was poking through the trimmings stash looking for inspiration (without leaving the house), this wide rick-rack caught my eye -- insert that in the edge seam???  
No, too much like adding piping. 
But (light bulb moment), what if I stitched it to the patchwork like a border.  
Perhaps it will distract the discerning eye from an easy (but common) knife-edge finish.
Yep!!  
That works!!
(Make a note if you also hate inserting stuff to make a pillow cover more whatever.) 
One pillow down!!

In January, I set a goal of "eliminating" 10 UFO's.  I "only" got to 7 in January but I have been continuing to reach for that goal.  I decided to finish this color exercise sample from an old teaching workshop into a large floor pillow.  So while the motivation from finishing one pillow was high, I set to machine quilting this piece.  It took two evenings, nothing fancy, a simple grid with fuchsia thread!! 
There was even a nice big piece of black and purple corduroy in the stash for the backing!
Ta-da -- UFO #9 eliminated!! 
But as if often the case, almost as soon as I eliminate one UFO, another appears to take it's place.
When I pulled out my "drunkard's path" teaching box to use a template to curve the corners of the pillow cover, this little block was lurking inside.
The greens were part of a 2 1/2" square charm pack.  I must have been bored and stuck with no sewing machine when vending with a friend at a quilt show because it's hand pieced.
Cute block -- the rest of the charm pack was there, too -- maybe I could make a few more of the blocks?!?

It took less than a minute to squelch that impulse because there wasn't enough of anything to do much except create a bigger UFO.  
MUST NOT DO THAT!!!
 I put the rest of the charm squares into my 2 1/2" squares scrap basket and decided to make the block into a potholder.

Well, this morning when I decided to stitch some of the leftover squares together to make a potholder back, this little block happened -- I may be intimidated by "improvisational" piecing but I am a master of "spontaneous" piecing.
It occurred to me that someone else might find this little block useful.
It uses sixteen (16) 2 1/2" squares.
Nine laid out in a 9-patch grid.
Six squares cut in half - 1 1/4" by 2 1/2" for the "sashing". 
One square cut into fourths -- 1 1/4" squares for the "cornerstones". 
All laid out and ready to stitch together!
And here's the back of the first block I made to show you how I pressed it.
Then while I was eating lunch, I sketched the block out in EQ7.  It finishes at about 8 1/2".  I also set it into a simple layout with sashing (cut 2 1/2" wide) for a small quilt that will finish about 32" by 42".
Since I always have a stash of 2 1/2" squares that need using up, I think I'll piece more of these blocks in bright colors for an easy, pleasing quilt to donate or give away.
No hurry -- just a quick little block to piece now and then until I have a dozen.
(Did I just create another UFO or is this a WIP?)

Those two blocks are still destined for potholders for my impromptu gift stash!!
Let me know if this block inspires you to use up some scraps!
Staying inspired and cheerful is the thing that is going to get each of us through this weird and scary time, isn't it?

Using up more stash for now, Mary


Friday, February 14, 2020

Working Quietly

 Greetings from the snow globe that is currently Northeast Ohio!
We haven't had much snow this winter (embarrassing when one lives in the "snow belt of Ohio",
but yesterday we were delighted with a few inches of soft wet snow that clung to everything. No matter where I went or who I talked with yesterday, everyone was exclaiming about how lovely our world looked frosted from top to bottom!
Delightful!!

As for me, I've been quietly absorbed in several projects -- not much finished, but progress just the same.  Those little 8-pointed stars I share in my last post have evolved into this bright cheery child's quilt!
I know strong colors aren't the current baby decor fashion but I hope this quilt will be a cheerful blessing to a new baby and their family someday soon.

One of the little laments that often is evoked by my scrappy use of fabric is "I don't understand how you do that" meaning how I can set two pieces of fabric side-by-side that don't match, that don't look pretty together, that in fact may look harsh together.  So today, I thought I'd share my simple piecing strategy with you.

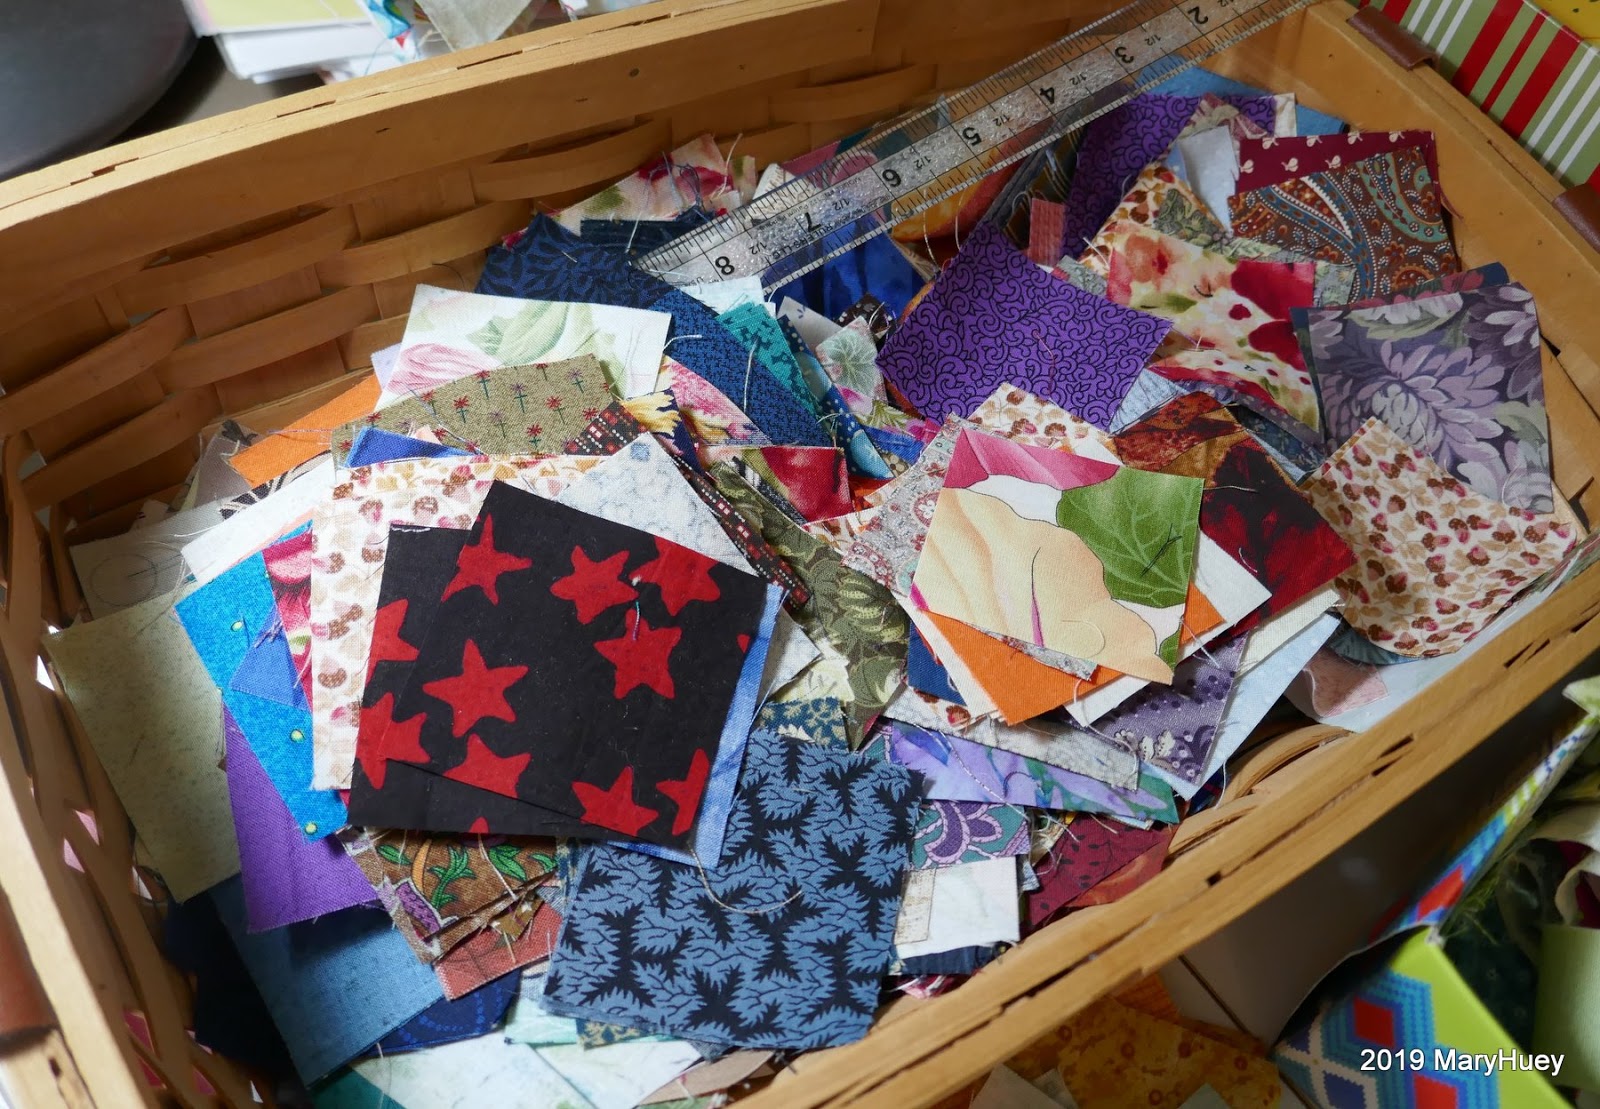
In my last post, I shared my scrappy pull from the yellow stash.  In the end I cut squares from nine prints.  
There are only four of the cute farm print (the last precious bits of it).  The other prints were selected because the shade of yellow blended with the farm print's yellow or they had a bit of red in the print or they just looked "right", i.e. the daisies!
Here they are sorted and stacked on my sewing table ready for piecing!
I started with the farm print and stitched it with four different yellows.
Then I worked down through each stack, one at a time - pairing each square with a square from every one of the other stacks until all the stacks were used up. 
No judgement made about matching or pretty or anything - just pick two up and sew together!
I didn't press the pairs at this point.
The next step is to sew the pairs together into groups of four squares -- only rule is not to repeat any print in each group of four! 
Still not pressing!
As I clipped the bands of four apart (chain piecing, of course), I laid each one open on the sewing table.  That way, as I joined the groups of four into groups of eight squares I could make sure two squares of the same print weren't too close to each other. 
Then groups of eight together and now I press the seams of the entire band in one direction.
As always, I'm anxious to see how it looks so up on the design wall they go.
I didn't do any math before cutting the squares so needed to cut more as the plan evolved.
Here's a trick I use when my math is a bit sloppy or non-existent!
I use a rectangle for the ends of the bands! 
Once the bands are stitched onto the quilt top, I can trim the ends and they "fit" perfectly.  
Honestly, no one has ever chided me for those corners not being perfect squares.
And I likely wouldn't care if they did because I have a finished quilt top!!
Do they??? 
I have shared this auditioning tip to eliminate frustration many times during my teaching career but it is always worth repeating.  
Stop auditioning one fabric at a time!
Lay up all the options you are considering at the same time.
Leave the room, go do something else for a few minutes and when you come back, pay attention to your first reactions when you look at the design wall.
Usually, my intuition tells me immediately what doesn't work and I can remove those.
Depending on how many options you have found in your stash, this process may have to be repeated until by process of elimination you arrive at the "best option available". 
"Best" and "available" are important words because they help me use up what I already own and they have helped me "stumble" onto new ideas and expand my flexibility.
In other words, it's a strategy that contributes greatly to my productivity because I don't have to stop and wait until I find the "perfect" fabric!!
Once I elongated the top with more bands of yellow squares and red sashing, I was ready to finish it up with cheery red print borders.
It ended up at 40" by 51".
One more UFO successfully managed!!
I'm hoping to be able to share photos next week of my huge English paper piecing Dodecagon quilt.  I'm currently working on it for a bit every day assembling the five large sections and it's so gorgeous.  My other project this week is the quilting of this twin size Sandstone quilt top (one of my patterns on Etsy) for one of my charity quilt group's projects.   It's slow going because of the size but a few lines every day will get me there by the end of February!
Now I'm off to spend the afternoon with this crew so their Dad and Mom can have a little Valentine's break!  Aren't they getting big?!?  And they are starting to move around!!
Oh boy!!

Have a pleasant weekend!
Mary

By the way, that quilt is not as crooked as it looks -- apparently, I don't hold my camera very level or straight or something?!? 
Promise, I'm working on that!


Friday, July 19, 2019

Scrappy Triple Irish Chain with a Twist

Greetings from all of us in my backyard!!
When I said on June 13, I'd organize cutting instructions, I didn't mean to take so long to share the them.  Either I've had too many oars out of the boat this past month or I've lost my sense of urgency as I enjoy the lazy, hazy days of summer?
I finished piecing the top yesterday, organized the backing and I'm ready to hand it off for quilting. 
I've checked the math several times and am pretty sure I've got my counts correct.
If I don't, sorry -- just post a polite comment if you find an error.

As I explained in the original post, my goal was a twin size quilt using 14" blocks.  That meant that 4 blocks by 6 blocks would be the ideal size but an Irish Chain setting wants odd numbers of blocks to keep the corners identical -- 3 by 5, 5 by 7, etc.  Once I stumbled onto the idea of piecing "half blocks" for the outer rows, my problem was solved.

Since this is a charity quilt, my goal is to keep the quilting process simple and a big white empty space never brings "simple" to my mind.  So I started to try out ideas for filling the center of the alternate blocks and a "trip" variation was perfect since all the squares and strips needed could be cut using the same grid as the blocks -- 2 1/2" cut!

Ready?
Here are the statistics for my twin size quilt top.
I made seven of the basic 7 by 7 blocks using 2 1/2" cut squares (from my very scrappy basket).
For each block, I used thirteen assorted green squares, four white (background) squares, and thirty-two assorted squares.
I pieced the blocks in vertical rows and pressed every block exactly the same - alternating seams so they nest together.
The outer left and right sides rows are both pressed down (towards the bottom of the blocks).
Once the rows were pieced together, I pressed all the vertical seams to the right.
I made eight of the alternate blocks using the same 7 by 7 grid.
I wanted more green in the quilt and liked the unity of using just one other color with it through out the quilt but this block could be as scrappy as you wish.
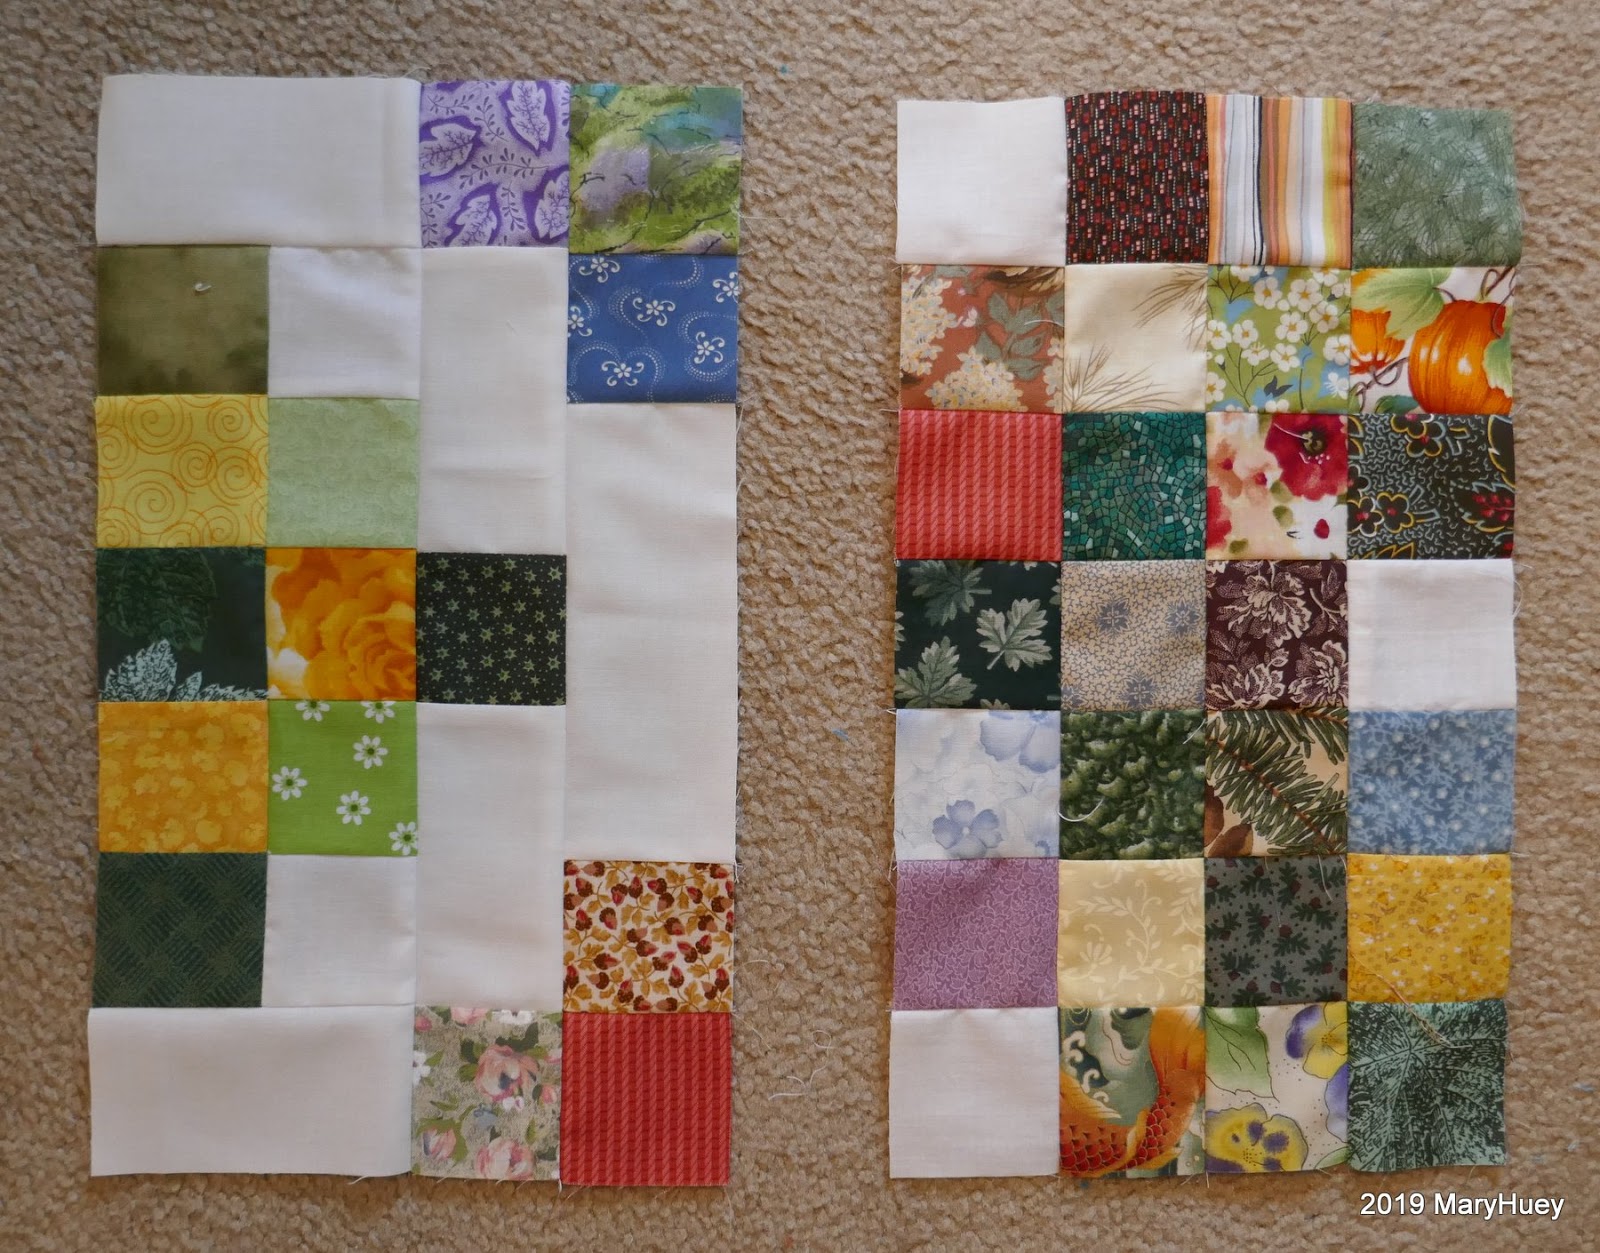
Here's the block broken down so you can see the rectangles needed and their placement.
Each block used twelve scrappy 2 1/2" squares, nine assorted green squares, four assorted yellow squares, and four white (background) squares.
In addition to the squares, there are four 2 1/2" by 6 1/2" rectangles around the outside edges of this block plus four 2 1/2" by 4 1/2" rectangles in the second and sixth vertical rows.
To make it easy to set the finished blocks together, I pressed these blocks opposite of the first set of blocks.  The outer left and right edge row seams are pressed up (towards the top of the block) and the vertical seams are pressed to the left.
Time to make the half blocks!  Each one is a 4 by 7 grid of squares.
Ten of these blocks are needed for the twin size I made.
There are three white (background) squares, seven scrappy green squares, and eighteen scrappy squares.  I found it easiest to stay on track by laying out the green squares and the white squares in the correct positions, then filling in with the scrappy squares.
Looking at this photo, the left edge of the block will always be on the outside edge of the quilt so it must be rotated for each side of the quilt.  
For that reason, I found I had to press each one so it would nest together with the adjacent block rather than pressing all of them identically -- the left side blocks were pressed opposite of the right side blocks, etc.
I wasn't sure the half-alternate block would look good, but once I pieced one and added it to the design wall, it was fine.  Six of these blocks were needed for my size.
I used six scrappy 2 1/2" squares, six assorted green squares, three assorted yellow squares, two white (background) squares, four 2 1/2" by 4 1/2" rectangles, and one 2 1/2" by 6 1/2" rectangle for each block.  
Pressing is the same as above -- adjusting to nest with adjacent blocks. 
Finally, I made four corner blocks.  
Do these last so you can determine the best pressing directions more easily.
Each corner blocks uses three scrappy 2 1/2" squares, four assorted green squares, two assorted yellow squares, one white (background) square, and three 2 1/2" by 4 1/2" white rectangles. 

Here are my cutting totals for the complete quilt!

                          734 -- 2 1/2" assorted squares (that's 46 2 1/2" strips cut into squares)
                          161 -- 2 1/2" squares for central cross of main block (my greens) 
                                         To use one fabric for this, get 1 yard.
                          Background -- 2 3/4" yards (includes first border)
                                  Cut 4 lengthwise strips, 2 1/2" wide by 2 3/4" yards long for first border.
                                  From remainder of background fabric, cut
                                                    106 -- 2 1/2" squares
                                                     84 --  2 1/2" by 4 1/2" rectangles
                                                     38 --  2 1/2" by 6 1/2" rectangles
                           Border -- I cut mine 4 1/2" wide on the lengthwise grain and pieced strips end to                                          end to get the length needed so used about 1 1/2 yards.

Here it is!!  My finished top is 70" by 93".
I love how balanced and cheerful it looks!!
Using up 895 squares out of my "sourdough" basket is great, too!!
(The picture is a little lame but it's really HOT here and my daughter has short arms so we were working quickly to get back inside!!)
There might be another one of these in the future because the 2 1/2" strip box is pretty full and could use a good thinning out! If I were going to do anything different, I would use one really dark print (or solid) for the center chain -- my green chain disappears partially because there is so much variation in value -- mediums to darks instead of just darks.

Book mark or print out the text of this post so you can give it a try down the road with your scrappy stash.  If this inspires you to make your own version, post a photo on Instagram and tag me @hueymary - I want to see it!!

Mary


Thursday, June 13, 2019

Scrappy Triple Irish Chain with a Twist

At the end of May, I shared the beginning of this new scrap quilt with you.
I'm making very good progress for gardening season (it's been raining quite a bit).
I will donate it to a local "recovery" home for women that will be opening at the end of 2019.
Wait until you see what I'm doing with the alternate blocks!!
The prospect of quilting the big alternate (14") mostly white blocks with a lovely design intimidates me.  I worry I'll "ruin" the quilt.  So I started to think about using a 6" "fussy cut" fabric square as the center of the alternate blocks to eliminate the issue but before I could even start to audition possible prints, I came up with a simpler (to me) idea.
A pieced block using the same 7 by 7 grid of 2 1/2" squares!!
I like the way yellow brightens up an ugly batch of scrappy squares so to add more of it to the quilt, I combined it with the green to pull the motley collection of fabric together.
I am using up lots of my basket of squares (yea!!!) -- so far I've only had to cut more green squares.
Here's my assembly breakdown for the alternate blocks -- more 2 1/2" squares and rectangles cut from 2 1/2" strips of white -- four 4 1/2" long and four 6 1/2" long rectangles for each block.
All alternate block settings need to use odd numbers of blocks to maintain their visual balance -- so 3 by 5 blocks or 5 by 7 blocks.  An even number results in different corner blocks.  
As I worked out the math, I decided 5 by 7 blocks was a bit too large and 3 by 5 too small.
4 blocks by 6 blocks would be the perfect size but the corners would not match and the quilt would look awkward to me.  I did audition it on the design wall just to confirm -- definitely awkward!!!

Then a Mary Ellen Hopkins design idea crept out of my sub-conscious cache of ideas.  Back in the mid 1980's, Mary Ellen taught her teacher trainees (I was one) to create borders by carrying the design of the patchwork out into the border in such a way as to create a balanced, finished design.

I shifted blocks around the design wall to a 3 by 5 setting with the alternate blocks in the corners rather than the main blocks.  Then by adding half blocks around the edges of the setting, I was able to get the perfect 4 by 6 blocks setting!!
I love it when old lessons inspire new ideas!!
This idea could be adapted to so many blocks!

This is my layout so far.  The blocks are easy to piece and I've streamlined my process so that it takes me about 45 minutes to make one -- just enough time to "rest" from all the other stuff that needs to be done!!
Here are the four units I'm piecing, separated so you can see how they connect together to create the overall design.
These are the two different "half blocks" used to make the "border"
and this is the corner block. 
I still have about ten of the "border" blocks to piece and when I get the top set together, I'll think about organizing a guide for making this top that will include yardages needed if one isn't chopping up scraps, and a cutting list for the twin size I'm making if anyone is interested.  I won't write instructions for piecing the blocks (remember, I'm retired) -- you already know how to do that, right?  Just leave a comment below.

To finish off today, here's a few of my favorite pictures from my walks this week.
This was the view at one of my creekside stops -- just two buddies hanging out at the beach -- Northern Cardinal on the left and an American Goldfinch on the right.
I'm trying to learn dragonfly identification -- it's a slow process.
I'm pretty sure this is a blue dasher.  Aren't those eyes gorgeous?!?
I'll submit the photo to the I-naturalist app and they'll confirm it or correct me.
It's hard to resist the male Ebony Jewelwing!!  They are about 2" long and so delicate looking.
So here's hoping those of us who are being overwhelmed with rain get none this weekend and those of you who need it get your fair share!!

Mary

and at Oh, Scrap linkies!