Showing posts with label stash busting. Show all posts

Thursday, January 11, 2024

Flourishes BOM Update

As promised, here are all twelve finished blocks from my 2023 year-long BOM project.
This was a stash-busting goal -- the patterns with fabric kits have been in my stash for over 10 years and before that, they were in my Mom's stash for about the same length of time!?!
The pattern is Flourishes, designed by the Piece O'Cake duo of Becky Goldsmith and Linda Jenkins.  They released it as a BOM with a fabric line at the same time with one of the original quilting cotton fabric vendors, P & B Fabrics.
I worked on one block each month and happily was able to finish each in about two weeks of evening hand stitching.  The pace kept me on track and a week or more break between blocks prevented boredom.
This was the last block I stitched -- #12 in the series and well-placed because by this time, my confidence was solid.  If I'd started with this block, I think all those little circles would have defeated me?!?
Hmmm, why is this picture sideways?
Well, I have no idea -- but I'm blaming Microsoft!  They seem to have intervened and "upgraded" the photo app I use (thanks, so much???) and I haven't figured out how to import my photos from my camera disk.
To get around this issue (which may stem from impatience on my part), I'm importing photos taken on my phone and automatically stored in my Google account.  Actually, it makes this step simpler but I didn't take the time to figure out how to edit them.  Apparently my phone turned some of the pictures sideways and I'm stumped.
But the pictures are clear and the colors accurate and since my mental energy is a bit low this morning, I'm going with it.   
Random thought -- will this make the post more memorable??
The sideways photos, I mean.
I grabbed a light table years ago and have rarely used it until this project.  Every morning, I would trace 4 to 5 pieces onto the prints using the light table.  Then aligning the background block on top of the full size pattern on the light table again, I would position and pin the pieces in place ready for an evening of stitching.
(Upside down, really??)
I used the needle-turned applique method, but one thing I do to make it easier is to finger press all the way around a piece on the (chalk) pencil lines because I find the needle-turning goes more smoothly.  Much to my surprise, I enjoyed not having to make any fabric decisions -- the fabrics in the kits matching the pattern cover exactly! Generally, I like to do my own thing -- picking fabrics that please me but it was a nice change.
Along about September, I began to think about assembling the quilt top and getting it quilted.  These are large blocks -- 20" and in the designers' layout, they are set edge-to-edge on the diagonal.  
We're talking BIG quilt.
So that creates a "quilting" challenge for me -- too big for me to machine quilt and perhaps too much for my hands to hand quilt?  To send it out will be expensive since the design would be "ruined" by an edge-to-edge pattern and would require "custom-quilting" which would be elegant but out of my budget.
Plus who gets the quilt down the road???
The solution I've come up with solves both issues -- make three smaller quilts!
Easier for me to quilt myself and I have three granddaughters, so . . . . 
After laying out four blocks for a smaller quilt, I decided to make three more blocks, so each quilt will have five blocks.  Towards that end, I've been saving all the leftover bits of fabric from the kits that came with each month's pattern.  I chose three of the patterns I enjoyed making for the "fifth" blocks.
This is the first duplicate block.  I've had to do a little stash-diving to substitute for fabrics I used up from the pattern kits but that's not really a problem -- deep, deep stash here!?!
I'm heading off for a few retreat days at the end of next week and the duplicate blocks will be my focus.  My prep work is to applique the stems of each block (my least favorite part) and cut all the applique pieces so I'm sure I have compatible fabrics.  It would be wonderful to come home with three completed blocks but even if I don't, I'll have made significant progress!

Other plans for the retreat include layering a couple large quilts (to take advantage of extra hands that will be available!) and prepping an antique quilt top for a little rework (dissembling and removing basting threads) and perhaps cutting a Moda BOM from the summer of 2022?   
And eating cookies?!?

Are you going to be able to enjoy a retreat this winter?  I enjoy them more now that I've stopped taking my sewing machine.  Focusing on hand-stitching and prep work (layering and cutting) makes the planning and packing easier plus I'm not "nose-down" at my machine for the weekend (i.e., more social time).  If you aren't part of group, organize a couple of your favorite stitching friends and rent a place -- quite a few small retreat venues have popped up in this region and if you have to cook for yourselves, indulge in a few days of eating badly to take the pressure off?!?

Mary


Friday, February 3, 2023

Quick(ish) Finish

TA-DA!!
Started December 31, 2022 -- finished February 1, 2023
Pieced, machine quilted, bound!
Ready to be washed.
And I love it (which means it will be so hard to part with it)!!

I gave you a glimpse of the top a couple weeks ago but I'll review what I did here today and how it achieved one of my goals for the year (already?).

On December 31, I spent an entire afternoon tidying up my very messy box of 
2 1/2" scrap strips sorting out strips that were less than 12" long to cut up into squares for the 2 1/2" scrap squares box.  Daydreaming along, I started to consider making a "jelly roll" quilt -- you know sew the strips together end-to-end for a couple miles and then -- just "google" it.  
 
Then I recalled a pattern -- Sakura Sun -- which has been on my "I want to make that" list for a couple years.  It's a free pattern on the RJR Fabrics website designed by Linda Fitch.
Upon reading through the pattern instructions, it calls for three different strip lengths all under 12" -- perfect use for that growing pile of short strips.

Time to make a color plan!
The aspect of the pattern that first caught my eye was the way the colors bled down the length of the quilt.  So to achieve that, I decided to use the warm colors down the middle of the quilt and the cool colors down each side.  When I sorted out cools and warms, there was twice as much green as blue or purple and lots more cool prints than warm prints. 

The resulting strategy was to "muckle up" (old Mary Ellen Hopkins term) the warm colors down the middle, with greens down both sides bleeding into blues on the right and purples on the left.  All the strips in each band are the same length and the pattern calls for ten sets of the three different bands.  So every set began with purple, then green, then warm colors, green again and ending with blue.  The sets with seven pieces have three warm color prints in the middle and the sets with six pieces have two warm color prints.
After setting the top together, I went back and added an eleventh set of bands.

I stacked the strips for each band from left to right without being fussy about "matching" or "coordinating" the prints -- the quicker this step is done, the more random the results! 
After piecing and pressing the bands, I put them on the design wall as they came off the ironing board -- no fiddling at this point.  When I walked away from the design wall and turned around to look at the layout, I gasped!!  This was so much better than I imagined!!
I did fiddle a bit to move the reds to the top and bottom of the quilt and concentrate the yellows in the middle but I didn't necessarily need to do that.

TIP: I forgot to do this until I realized the quilt top was skewing to one side --
I stitched the bands into pairs, pressed the seams to one side and then began to stitch the pairs into fours -- my mistake at this stage was I always started at the blue end.
To eliminate the skewing, I needed to switch and start at the purple end to join the rest of the bands.
Does that make sense?

Also, the bands are a bit random in their finished length -- part of the reason for that is there are varying numbers of seams.  So a band with seven strips will be shorted than a band with five strips because there are more seams -- not because you are a "bad" piecer!! 

Once the top was finished it was time to figure out a backing.  Of course, I didn't find any piece large enough so I pulled four colorful prints that have some common colors and were all florals.  Here they are laying on the quilt top (on the design wall) to make sure my calculations are good.
Nothing more frustrating than piecing a backing and having it short!!
As I layered it with batting (a Frankenbat made from three leftover pieces), I considered whether random lines zigzagging down the quilt would emphasize the color flow. It just took a few chalk lines drawn across the quilt to convince me it was a good idea.

I drew the first line down the length of the center of the quilt, stitched it and then used my straight line quilting guide tool to achieve the random spacing as I worked out to the sides from the center. 
It's not apparent in this photo, but I also changed thread colors as I progressed -- yellow down the middle, a variegated pink/red on either side of the center, then a variegated green down through the green prints, finishing up with a variegated blue thread on the right and variegated purple on the left. 
 I played two rounds of "thread chicken" running out of both the blue and the purple threads with just a few inches left to quilt.  After another cuppa' to calm me down, I was able to think and estimate how many more lines I could get from the remaining thread.  I spaced those lines further apart.  
Then I came back in and added lines with a thread color that blended with what I had already used.   Could you tell if I had not point it out?
As I finished the quilting, I started thinking about the binding.  All my auditioned ideas weren't working -- black, rainbow strip . . . .    But then I had a "clever" moment, dove back into the 2 1/2" strip box and made a scrappy binding that changed colors to (almost) match the edges of the quilt -- blue on the right, green and warm colors on the top and bottom, purple on the left!!
The "goals" reached?
I used a pattern from my "want to make" list!
I used about 6 yards of my stash, leftover batting, and thread I had on hand!
I finished the quilt in a timely fashion!
(My kids don't appreciate the favor I'm doing them using up some of the stash!?!)

My version is 53" by 66" -- did I say I love it!
An easy, cheerful, and quick make during the gray months of winter here in NE Ohio.
I have another simple quilt in the works using the shortest strips from the same stash box!
Hope you are able to do some satisfying stitching this weekend.
Mary

P.S. -- here's a link to a "jelly roll 1600" quilt I did out of my stash a few years ago that you might also find inspiring!  After re-reading it, I'm wondering if I followed through on making a charity quilt from every shelf of fabric in my stash that year -- guess I have to go back and read more posts?!?  Plus there's a great (I think) tip on managing the assembly of this style of quilt top.


Wednesday, January 11, 2023

It's been a GREAT day!!

The design wall is empty today!!  My version of Katja Marek's Homage to Grandmother's Flower Garden is completed -- well, the top is finished!!  
I've spent part of everyday since New Year's Day assembling the subsections into bigger sections until there were two diagonal halves.  All that was left to stitch were dozens of 3/4" seams -- stitch one, stitch a "sew-off", stitch another, and so on.

My goal was to finish the piecing by the time I leave for a retreat in a week where I started this project last winter.  Managing my neck arthritis is challenging.  It dictates how long I can sit at my sewing  machine, so I'm trying to develop a new habit of stopping before my neck starts to hurt.
The "set-in piecing simplified" technique I use to machine piece hexagons needs a "sew-off" at the end of every seam, so I've been going through dozens of them this week.  

On New Year's Eve day (itchy to start a new project), I sorted through my 2 1/2" strip stash and cut everything for a scrappy strip quilt that has been on my "want to piece" list for a while.  It is a take-off of a jelly roll quilt -- Sakura Sun (by Linda Fitch for RJR Fabrics).  Stitching the pieces into the bands was my first set of sew-offs.
Bonus -- getting up and down to press the bands as they were finished is a good mini-break from the machine and my neck appreciated that!!
165 sew-offs later and the bands were ready to put on the design wall -- well, that's exciting!!  
I spent an hour moving the bands around a bit to control some "hot-spots" --
like this hot pink/orange/red piece on the left that was screaming at me from the other side of the room.
Quick tip here -- I switched it with another more subtle "warm color" piece and settled it up against another red/orange piece to calm it down.
Much better!!
Of course, once the layout felt right I had to sew the bands together and finish the top immediately!?!
I added three more bands than the pattern specified to achieve a "tall" laprobe size. 
Time to hunt for some more sew-offs and get back to work on Homage!

It has been my habit for over a decade to use UFO's that have stalled out at the piecing stage as "sew-offs" -- two birds, one stone.  This piece surfaced sometime in November while I was hunting for something else so I laid out what was pieced on the floor and have been stepping over it for two months.  
No cutting needed as I had done that whenever I started it.
Sew-offs!!
And more set-in piecing -- so I was on a roll!
I see-sawed back and forth between the two projects 
adding the honeycombs to the layout.  I cut a few more of the hexa-poly shapes to finish the outer edges and . . . . . 
. . . . . then there it was, the very last 3/4" seam of Homage!!
And here it is in all it's glory!
All the fabric is from my stash.
Rotary cut with the little hexagon in Marti Michell's template Set N.***
It is completely machine pieced using the "set-in piecing simplified" technique that I taught.
The top is about 64" wide by 60" long and I won't add a border.
The backing is ready and I'll take it to the retreat next week to layer it (and show off)!
I even have ideas in mind for how I'll quilt it by machine!?!
My wheels will spin for a day or two now while I refocus and pick up the next project.
That's where all my lists come in handy -- minimizes the wheel spinning!

Keep stitching out there!!
Mary


***EDIT April 2025
Marti Michel closed her business in late in 2024 and while some shops may still have a stock of her templates, you can also find them on Ebay and Etsy. 


Wednesday, December 9, 2020

Inflating Flat Mary

 Even though I'm not a fan, it was encouraging to me that the Macy's Thanksgiving Day Parade figured out a way to happen this year!  If they can blow up those monster balloons to walk around the block, maybe I can inflate myself back into a daily machine piecing routine!?!

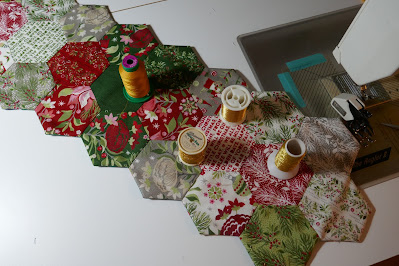
So for the past couple weeks, I've been finishing up a table runner I cut out late in October.  I used the large hexagon template in Marti Michell's Set G (template #42 - 2" finished on each edge) and a pack of 5" Moda holiday charm squares.  To piece it, of course, I used the Set-In Piecing Simplified technique from my teaching guide.  By assembling it in sections, I can employ the chain piecing strategy without any "leader or enders".  It's an easy project for practicing or refreshing this skill. 

As I get back to daily piecing, I've noticed I'm making more little mistakes than typical.  Each time I need to "undo", I'm trying to remind myself how lucky I am to have such excellent "ripping" skills.  My mom started me early and the sentence I remember clearly from those days -- "Mary, I think you better rip that out" -- so here I am, sixty years later, ripping out seams with professional skill!!

When I had this all assembled, I put it on the design wall to enjoy the surge of pride that comes with a finished piecing project.  "That's not right" -- sad face.  Leave the studio, come back later, take it down and start to rip out the seams to fix it. Fifteen minutes into it, I realize I'm ripping apart the wrong end of the runner -- arghhh.  I'll be back later.

It's all fixed now!!

 I'm so glad I wrote up a tutorial about finishing zigzag edges without binding several years ago so I could go back and see what I did!!

The complete process is HERE along with another link to how I set up the backing so I can stitch all the way around the piece with no stops!  If you don't have the 1" fusible batting tape available, you can cut strips of any lightweight fusible interfacing to use.  And definitely trim 3/8" from the edge of the batting instead of just a bit over 1/4"!

The plan for today is to quilt it with a simple grid and gold metallic thread!  
One more finish for the year!!
I made this one 9 hexagons long down the middle and it measures 10" by 30".
To keep the momentum going, I decided to follow along with the Moda Winter Frost sewalong -- here is a link to the startup post.  Their model quilt uses a palette of blues and the Bear Creek setting option just sucked me right in!!  I have a lot of blues plus that shelf is very tidy since using them for the finish of my Halo Quilt in the fall.  
And then my favorite blue winter quilt that hangs in the dining room is moving out this winter with it's owner, so . . . . . . . . totally justified that new project like a pro, didn't I?!?

The working pile on the floor next to my cutting table grows a bit every day.  I'm printing out the instructions in "black and white" making it easier to focus on the value placement rather than getting frustrated by not having "that specific print".   

 I've kept up with piecing the daily blocks (except for one which I don't like and might leave out).  I will confess to being a bit cranky about some of the instructions so if I have a different technique that I know gives me good results, I'm not above substituting that.
(Sorry, Moda designers.)
So I'm not pressing seams open -- doing that interferes with my ability to accurately line up seam intersections and it makes the pressing more time consuming.

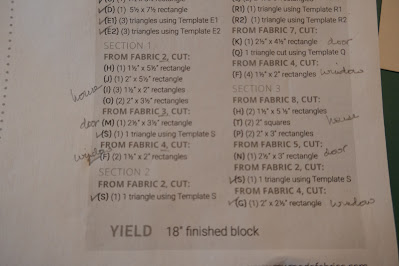
These cutting lists can look daunting so I taking time to analyze and add notations helps me to be efficient -- is there a common denominator for print A which means I can cut all the pieces needed from a 2" strip rather than cutting four 2" by 1 1/2" rectangles and then four 2" squares, etc.
There has only been one set of "templates", so I rough cut them from the paper pattern I printed, laid them on top of the fabric, and used a rotary ruler to guide my cutting -- quick and accurate.
I'm not a fan of making units bigger than necessary and then trimming them down to the correct size.  I know that's a popular teaching technique these days, but it only works on simple units. 
It does not work on this unit!
The principle only works when you can align a central point or line and trim evenly on all sides.
The instructions called for trimming this unit after all four pieces are assembled.
If you must trim it, it needs to be done before the center diagonal seam is stitched, not after!
Can you hear the cranky tone in my voice?
Trouble is that piecers will think they've done something wrong when the last diagonal seam misses the mark at the corner of the square but the error is the instruction, not the piecing. 
After the poor results of the first one, I rescued mine by trimming the large triangle to the correct size before stitching the diagonal seam, laying it on top of the pieced unit and measuring the seam allowance from the edge of the plain triangle -- better but not perfect.
The only way to make "trimming" work for this unit is to cut the corner square, 2 1/4" not 2", and then trim the pieced triangle unit and the large triangle to the correct size before stitching the diagonal seam.
That is easier with a tool like Marti Michell's Multi-size Half Square Triangle.

While I'm here, let me explain my experience as an instructor working with piecers who trim all their work to the "right" size.  Because they rely on trimming, they have not developed the skill of stitching consistently accurate 1/4" seams because they don't have to.  That's fine until they tackle complex units with irregular shapes some of which may require templates.  
Trimming doesn't build piecing skills.
End of rant!

So the view from the sewing machine is looking busy.
I'm pleased with the Winter Frost blocks (I love blue quilts!) -- check out my Instagram feed to see some of the other blocks I've pieced -- @hueymary
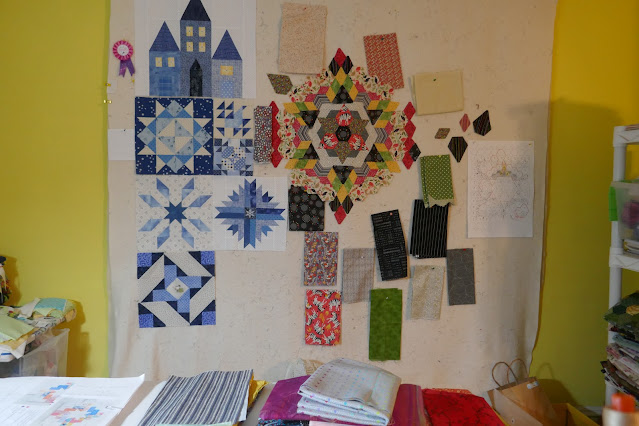
The hexagon piece on the right isn't growing very fast but looking at it every day will eventually pay off -- my subconscious is on the job and one day, I'll walk into the studio, look at the design wall and just know what to do!!
Almost all of us have some sort of holiday ahead of us this month and it won't be typical.
I'm trying to override "not typical" and make it "unique" instead.
Gift making and shopping needs to be done sooner.
Celebrations need to be smaller and simpler but more festive and more frequent --
(i.e., eating the Christmas baking now instead of saving it for the BIG day).

How about you?  Have a plan?
Stay well and strong!
Mary


Tuesday, December 1, 2015

Have you discovered Fat Quarter Placemats?

Back near the turn of the century, we (I owned a shop, Erie Street Quilts) received our first fat quarter stacks -- 8 color coordinated plaids! 
And they didn't sell -- )-:
Happily about the same time, I noticed a set of  placemats in a mail order catalog and was inspired to write a pattern for Fat Quarter Placemats. 
 
The pattern instructions use a strip piecing process that yields eight placemats approximately 12" by 17".  We included the pattern with those plaid stacks and the idea worked. 
We sold all those stacks and went on to make dozens more to sell for the placemats.
 
Earlier this year, I added the pattern to my Craftsy shop as a FREE download.  Since then over 500 folks have ordered the pattern (and so can you by going HERE!!)
 
My teaching trip  to New York and Pennsylvania last month included three fabric shopping stops and a darling winter print with chickadees came home with me.  I knew how I would use it before the salesgal had it cut -- napkins for a set of placemats!
 
When I returned to my studio, I pulled out my copy of the placemat pattern and began to cruise through my stash to put together an assortment of eight different fabrics that would give a subdued palette suitable for use all winter.  Most of the prints I chose are textured designs to set off the focus print.
 
Step one is to cut strips according to the charts in the pattern -- since I only wanted to make a set of four placemats, I cut half of the required strips.   
Once the strips are cut, they need to be arranged in a random order.  In the photo above, the first and third sets are the same fabrics in a different order.  Same follows for the second and fourth sets.
 
Here are the four strip sets pressed and ready to cross cut into rows.  If you are making a set of eight, you will have eight of these strip sets.
Each strip set is cut into four rows.  In the picture below, the top strip was short and so I added another print to the top of the last part of the set before trimming it to the needed size. 
When the cutting is finished there are four rows from each strip set.
While working on this set, it occurred to me that I could do a completely scrappy set using my stash of fruit and veggie prints by cutting just one strip from sixteen different prints.
It is such an efficient process, that I started the second set while I was still working on the first set!
Here's a photo of the sixteen strips in an auditioning layout before stitching the strip sets. 
Once I decided on the basic arrangement, I piled up the four sets and added them to my chain piecing work at the machine.
Here are my next four placemats ready to stitch the rows together -- one row from each strip set. 
I use plain flannel as the interlining of my table runners and placemats -- I like the flatness -- just be sure to preshrink it by washing the flannel in hot water and drying it on high before using it.
 I've discover another use for one of Marti Michell's templates!  Template A from the regular Drunkard's Path set is perfect for marking uniform rounded corners quickly.  A rounded corner is easier to turn and looks nicer in my opinion. 
The mass production continues!  I stitch around three and a half sides of each placemat sandwich with the flannel on the bottom, then the backing right side up, and the pieced top right side down, leaving a 4" opening to turn it through.
I trim the flannel right up to the stitching line, then trim the seam allowances down to 1/4" and they are ready to turn. 
Once I have them turned, it's time to press the edges and slip stitch the openings close.
I always edge stitch 1/4" from the outer edges but don't add any quilting.  No reason you couldn't, I just don't. 
 
 I always make a set of cloth napkins to match the placemats.  I use a 17" square -- four more fat quarters used up!!  I roll hem them with my serger -- have to keep justifying owning that machine and it's faster (for me) than hemming them with my sewing machine.
Here are my two (almost) finished sets -- the openings are still being stitched closed. 
Isn't this set fun!!  And it's three yards of stash off the shelves!!! 
I use the placemats sets as gifts, as donations to fund raisers, and to spruce up my dinner table.  Think about it, do you have a stack of fat quarters that would look wonderful in this simple project?
 
We want to keep using that stash!!
 
Mary Huey