Showing posts with label y-seam. Show all posts

Thursday, October 10, 2019

The Quilting Has Begun!!

The quilting of my scrappy blue hexagons quilt has begun!!
Found the perfect thread in my stash and revved up my APQS George for the first time all summer!?!
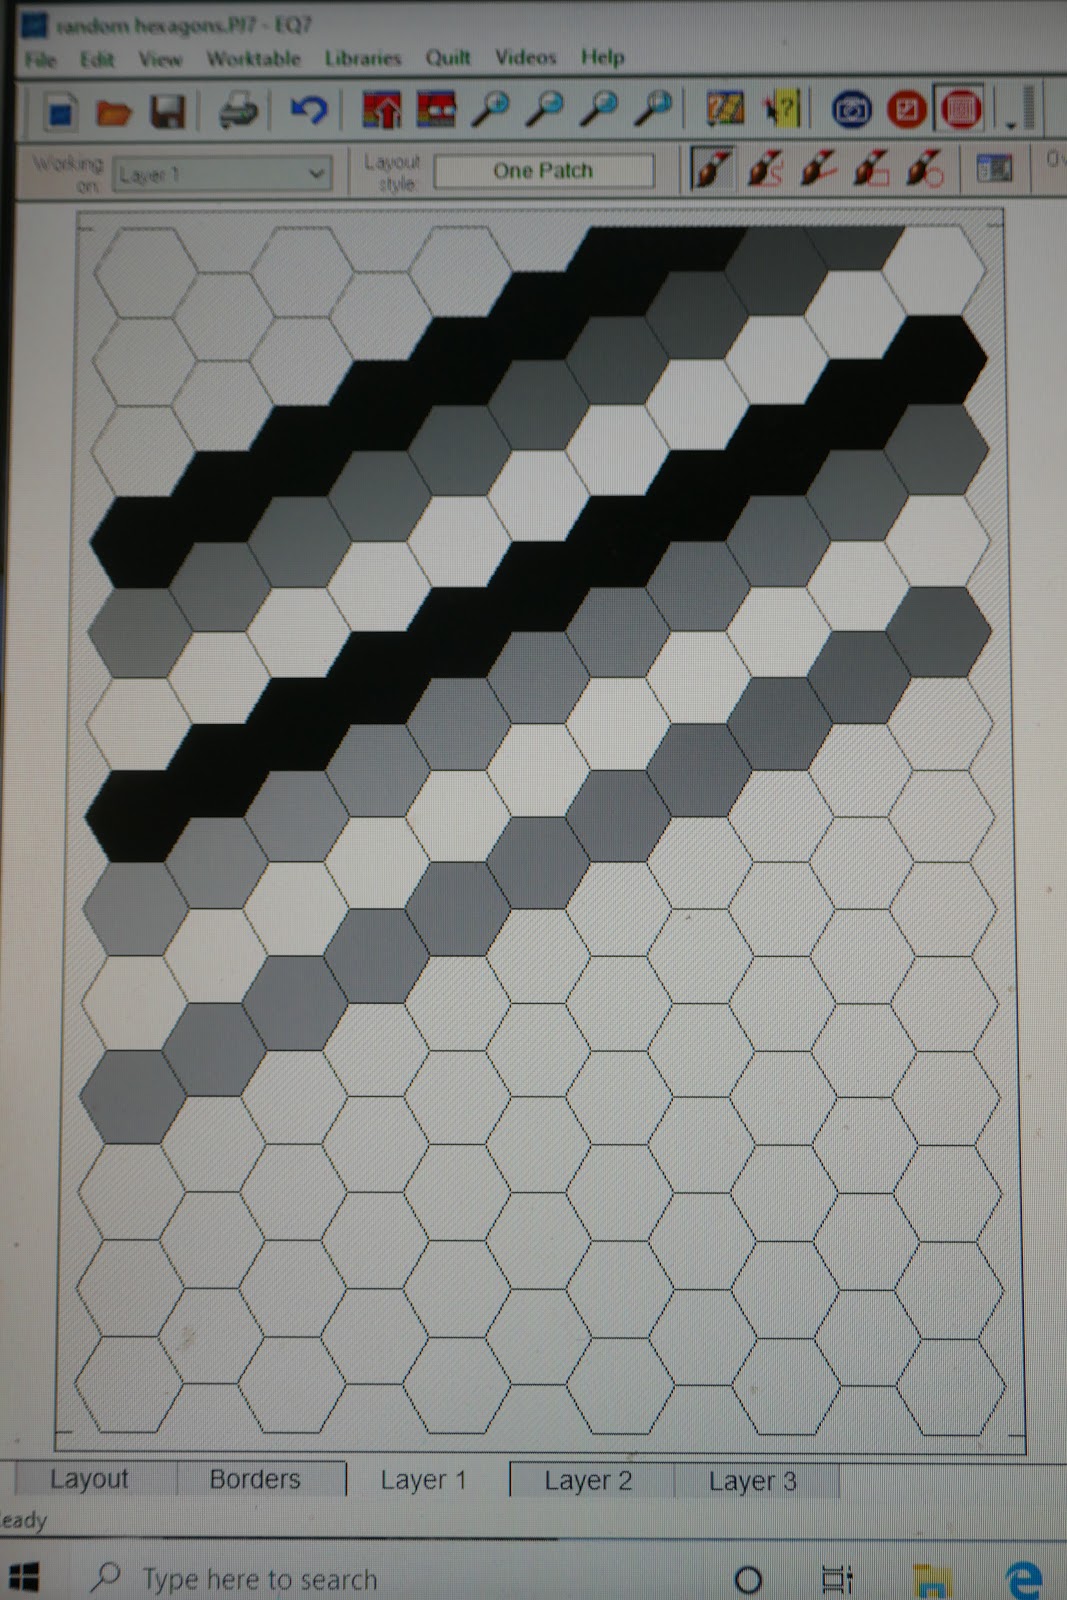
  I'm keeping to a simple grid that follows the ditch of the seams and crosses through the center of each hexagon.  
I've used this approach before and like the simplicity, the sturdiness and the effect.
I can come and go from the stitching over the next few days and hopefully be binding this sweet little quilt next week!!
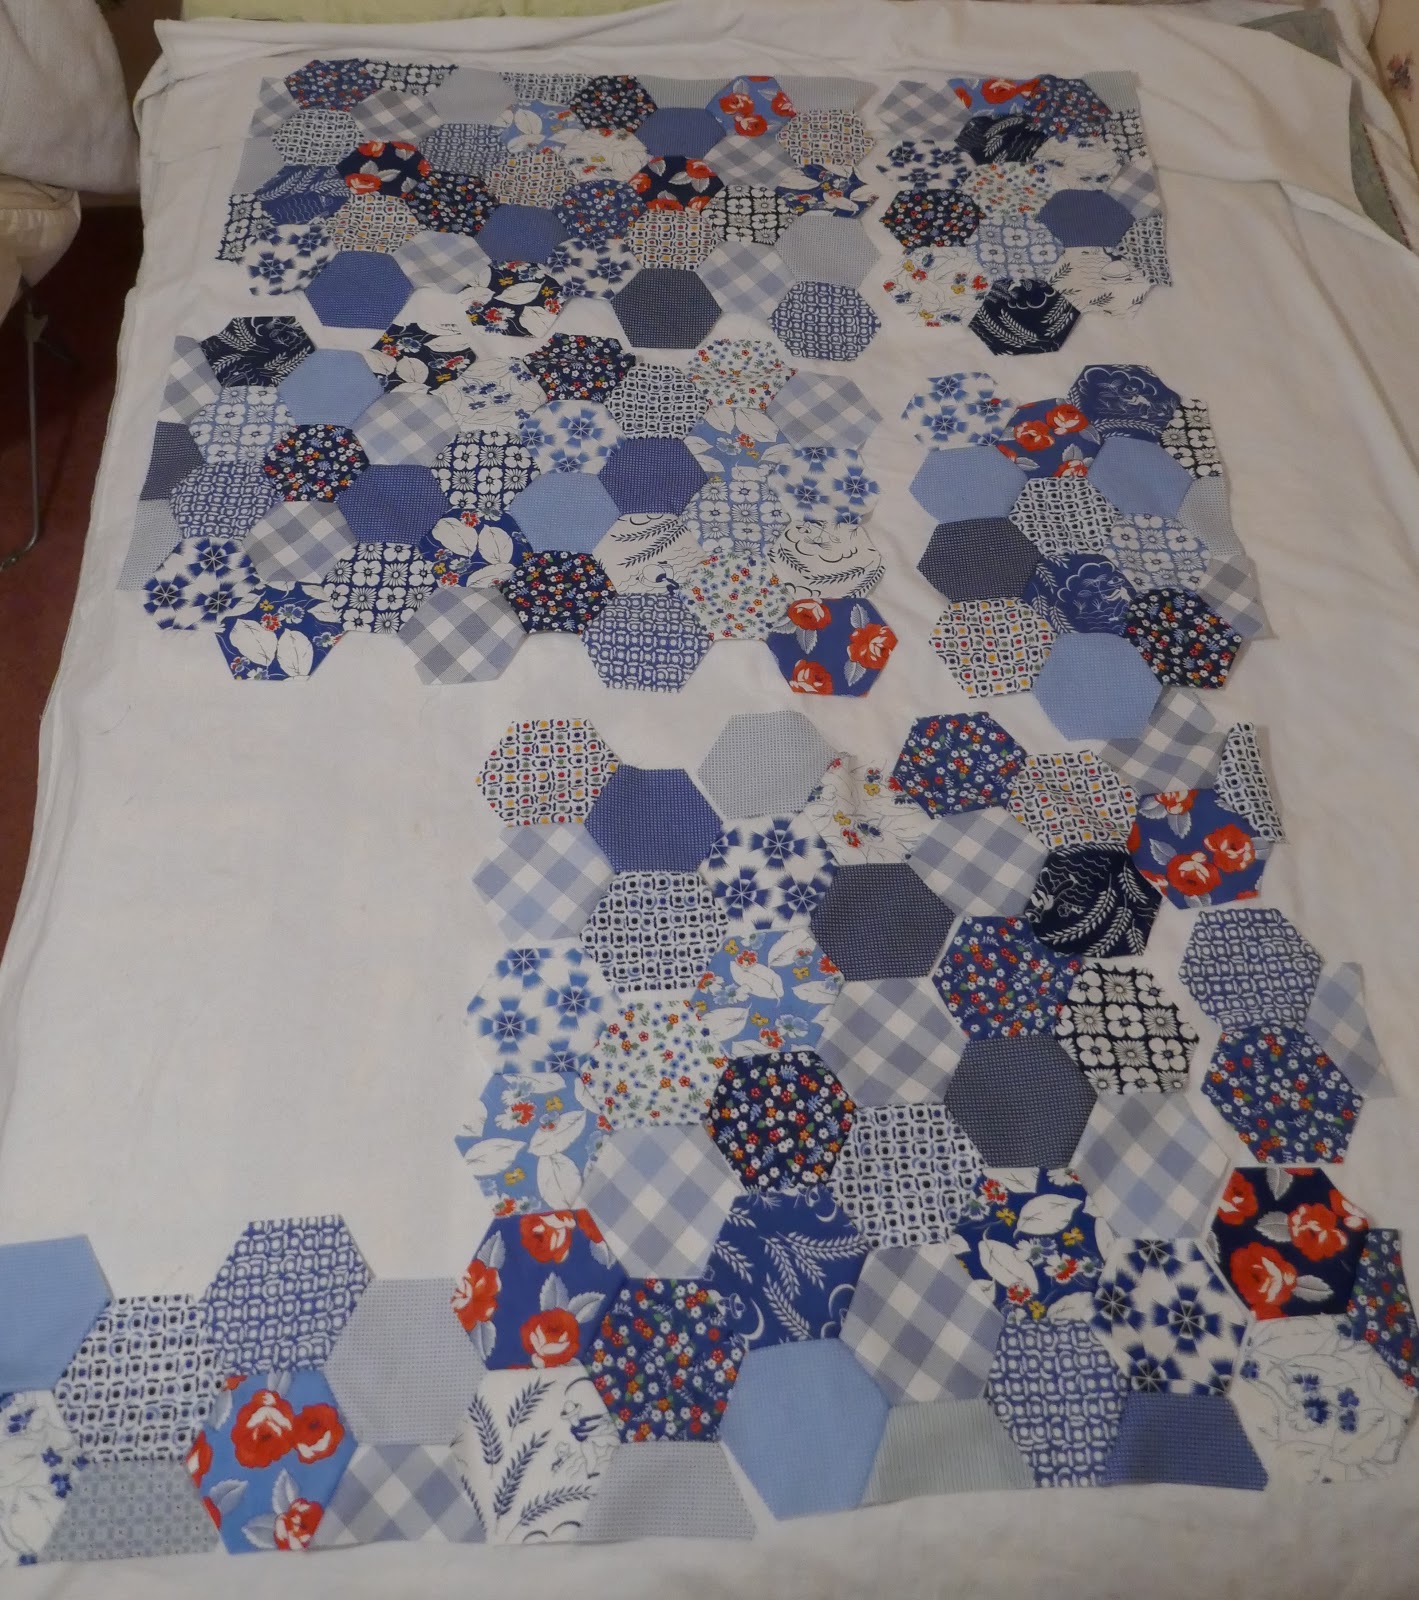
After a record fast trip to eastern Pennsylvania to watch my oldest grand-daughter play field hockey last week (soccer with sticks?), I was too tired to do much but sew over the weekend.  While I was finished assembling the scrappy hexagon quilt top, I thought of a few more things to share with you about the piecing process I used for this quilt along with some pressing tips.
  
My "go-to" Bernina 1031 had a weekend in the spa
and with the hexagons in four sections 
and all my #100blocks100days2019 block finished, it was easy to keep the chain piecing momentum going.  
The Bernina 180 which is my traveling machine, stepped into the void and we kept the flow going!
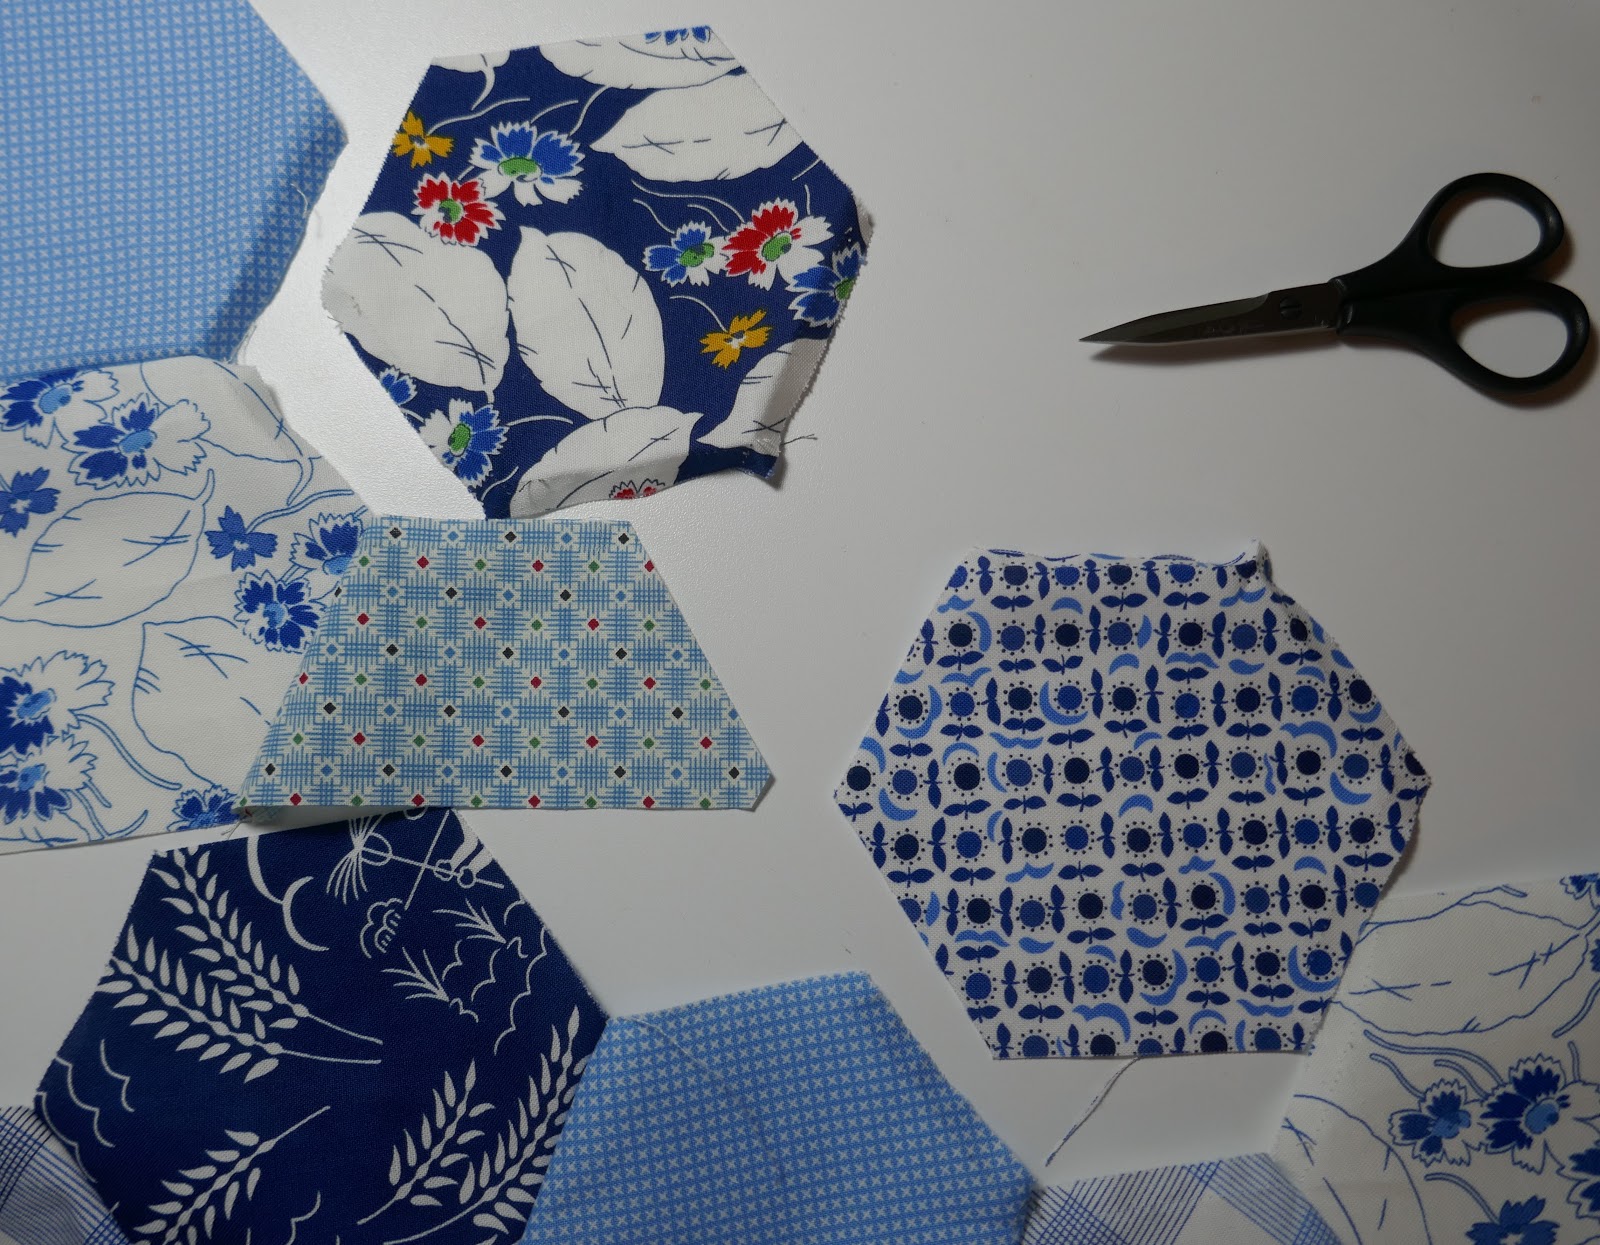
At this point, the piecing seems tedious -- so many short seams (only 2" at a time) and the stop and go work can be a turn-off for sure.  That's one of the aspects of Set-In Piecing Simplified that I really appreciate -- by bouncing back and forth between two projects to keep the chain piecing going, it reduces the tedium.  

Because the sections are getting larger and the rows of seams longer, I do more pinning at this stage to control the increasing bulk and prevent sewing the wrong two seams together.  (While that creates interesting two-dimensional surfaces, it does nothing to move me towards the finish line!?!)
I prefer to pin parallel to the seam
so I can leave the pin in place until the seam is stitched plus the pin is easy to pull out when in this position. 
It was a pleasant afternoon with lots accomplished -- two big sections joined and great progress on setting together the #100blocks!
With the completion of the piecing, it was time to press the seams.
Another (potentially) tedious task!
Here are a couple tips -- first, turn off the steam because there is lots of close to the fingers work.
When I'm working with smaller hexagons -- 1" or less -- I use my little travel iron. 
All the seams will swirl around the hexagon intersections.  If you don't get the cute little tumbling block on the back side, it could be that you didn't pivot far enough for the stitch off part of your seams.  But don't worry about it this time, just press for flatness now. 
The three seams coming into this intersection are swirling in a clockwise direction.
As you follow the lower left seam out of that intersection, it will set you up to swirl the seams counter-clockwise at the next intersection. 
I flatten the intersection (carefully) and then press the remaining two seams coming into that intersection.  
Then I work out of that intersection to the next one -- usually moving towards the left across the patchwork until everything on the surface of my ironing board is pressed.
It's beautiful when the pressing is finished!
Notice that all the horizontal seams are facing down.
If you trace your finger up the seams diagonally from the lower right to the upper left, you'll notice they all face the same direction. 
This uniform pressing means that as I stitch in the ditch, the ditch is always on the same side of the hexagons as I progress across the piece resulting in straighter lines and less jumping out of the ditch.
I have also seen quilters use a grid that avoids the ditches completely stitching across the hexagons at the center of each side.  The finished look is similar but I think my grid is easier to execute (no marking!!) especially if you are working with a ruler foot and edge guide like I do.

It seems like it might be good for me to stay in the quilting mode for the rest of the month!  I've gotten way ahead of myself with piecing over the summer and need to move some pieces off the "ready-to-quilt" shelf.

 But tomorrow is baby day!!
I'll be hanging with these three while their mom putters around in her garden for the afternoon.
The smiles are getting more regular and bigger!!
(Miss "middle" there already seems to know how to work the camera.)
So much fun!!

Have a good weekend!
Mary 


Tuesday, October 1, 2019

Scrappy Hexagons Progress

I'm still piecing hexagons -- how about you?
I had to stop stitching for a couple days last week to get ready for Auntie Alison's birthday dinner and the triplets first visit to Grandma's house!!
(it's a selfie)
They are getting cuter by the day and starting to smile!

Then I have to keep going to my favorite birding spots because it's fall migration and a new bird might have appeared over night!  If I had not been here at this exact moment, I would have missed the 22 turkey vultures sunbathing in the dead trees one morning last week!
I have made good progress on the sewing, too -- only about 65 short seams to go!!
But layering and quilting will have to wait until next week as I'm heading out for a quick 3-day trip to catch my oldest granddaughter's last field hockey game of the season!
It better not rain!!
So since I'm not at the stage I had hoped, I am going to share some "sketches" that I generated in  EQ7 for other setting ideas for a random assortment of hexagons.
They are draw in white, gray and black to represent light, medium and dark. 
I prefer to design in a monochromatic palette rather than colors.
If I don't chose a group of colors I like, it can ruin a potentially good design for me.

The first one was inspired by some vintage quilt photos.  I would divide all my scrappy hexagons either by value (light, medium, dark) or by color families for these layouts.  
I like the lattice look of this one and fabric selection could be simplified by choosing one fabric for all the light/white hexagons.
This layout would be good with a large assortment of colorful hexagons to create a rainbow. 
This simple arrangement of hexagons sorted by value could be a striking way to showcase a special collection of prints. 
As so often happens when I start puttering around in EQ7, designs get more and more complex especially when I'm working with hexagons.  It would be fun to set this star askew or off-center and play with the values of each ring to emphasis or minimize the contrast.
Or how about a large medallion?  Add some fussy cutting using modern prints and there's no limit to the possibilities with this idea. 
I also had a "finish" this week -- my Shetland Wool Week #roadsidebeanie!!
Once this is blocked, I'm ready for cooler weather!
I love the way the top star worked. 
The pattern was designed as a free pattern for knitters going to the annual Shetland Wool Week.  I'm not there but it is too cute not to knit.  If you need a smile, click HERE to see a sea of Roadside Beanies on the heads of knitters who are there!
And if you are curious about this festival, click HERE.
(This might be a "bucket list" idea.)

I hope we all have a productive week and hopefully I'll be ready to share my quilting ideas for the Scrappy Hexagons next time!

Mary


Monday, September 23, 2019

So Much Temptation!! So Much Stitching!!

The blue hexagon quilt is not ready to layer up and quilt because apparently, one of my retirement goals is to start as many projects as possible concurrently?!?
Not really, but I do have more "oars out of the boat" right now than might be a good idea.
  I did make good progress and am certain (?) I'll have it ready to quilt next week. 
There have been a few little hiccups as I discover two of the same print setting next to each other (the work of gremlins in the night), not just once, and if it bothers me now, it will always bother me.
So taking a deep breath and fixing them.  
Since I don't have any extra hexagons, it means I have to switch each one with a hexagon in another part of the quilt top.  Since I haven't joined all the units at this point, it is less work than it could be.  Because many of the seams are on the bias, I snip every fourth or fifth stitch . . . . . 
. . . . . flip it over and pull on the bobbin thread to remove all the stitches without stretching the edge.  One thing I have learned -- always do this "stitch-clipping" with the hexagon being removed on top!
If I don't do that, I sometimes undo the wrong seam.  
Grrrrr. 
Two hexagons out, switched and ready to stitch back in place! 
I've been in the studio quite a bit and am keeping up with my #100days100blocks blocks -- I pieced the 85th one today while switching the hexagons!
I tidied up the fabrics I'm using that have been living on the floor for the past 85 days
 and cut the next few days blocks this morning while waiting for my morning tea to kick my brain into gear.  Ahhh, the zen of rotary cutting!!
The quilt is looking great and I've started to stitch some of the blocks together into groups of four.
If you go onto my Instagram feed (@hueymary), you'll see some pretty cute hedgehog peek-a-boo happening!
During the past week, I also accomplished my #onemonthlygoal for September by assembling the upper left corner of my current masterpiece using Marge Sampson George's Dodecagon blocks.
Just two more corners to assemble!  My traveling stitching box is full of green, yellow, and pink basted hexagons to assemble into the various units needed for the next corner.
I'm continuing to assemble these large English paper pieced tiles from the #sharksdinnerBOM -- nine are ready for the background and I should finish basting the last few pieces for the tenth one this evening to assemble by the end of the month!
The challenge I set myself (using Kaffe collective fabrics with my stash) may be the undoing of me with this project as there's not as much cohesiveness as I'd had hoped.  The blocks are terrific individually but I may have either two quilts (a warm color palette and a cool color palette) or twelve large pillow covers if I can't resolve my frustration with the color palette as I add the background fabrics.   
I will say that my EPP skills have improved as a result of this project!!
And @lemonshark is a very creative designer!!
Because all that isn't enough to have going on -- this week, I started the #littlemisssawtoothqal!?!
I didn't have to leave the studio to find the fabrics and I have a purpose for the finished quilt.
Surely that is enough justification??
The layer cake I'm using has been on my shelves for at least three years (along with 1 1/2 yards of the polka dot background).  Plus my youngest grandson will need a big boy bed quilt (in a couple years) and his middle name is Fox and early indications are that might be his moniker, so . . . . .  I'm good, right?!?

So this morning's tea worked and it's been a good day!!
A morning in the studio followed by a tidy up in my office (even washed windows and changed the valances) and still hand stitching to look forward to this evening!!
I think I might go for a walk just in case I crash and burn tomorrow.

Mary


Tuesday, September 17, 2019

Assembling the Scrappy Hexagon Quilt Top

Don't you love to see pictures of other quilters' chaotic sewing areas?
This is the view at my machine Sunday afternoon as I hid from the world and pieced.
Can you tell I found another new sewalong?!?  
It's the #littlemisssawtoothqal -- you can explore the progress of others on Instagram by clicking HERE.  @southerncharmquilts is the hostess -- find her on Instagram.

After I finished a couple days of the #100days100blocks, I started working on the first step of the #littlemisssawtooth blocks (using a layer cake that has been on my shelf for about 4 years and planning it for my youngest grandson but we'll visit that another day).
 I've assembled all the hexagon units for the blue quilt and I've started setting them together into larger units as "leaders and enders" while piecing other projects.
I'm joining groups of four units together rather than working in rows of units.
Why, you ask?  
Probably partially because as a traditional block quilter, it's intuitive for me to work that way.
But more important, it allows me to work on more than one section at a time and maintain a chain-piecing strategy.
It also is more manageable at the sewing machine than working in long rows.
If I don't have any other piecing, I can easily work back and forth between these sets.
The picture above shows four units sewn into two units -- 95% of the seams are "dot-to-dot" as described in the Set-In Piecing Simplified guide so that's lots of short seams.  Steady as she goes!!  There are a few "edge-to-dot" seams when working with the outer edge units as below.
At this point, it's also easier to understand why I don't press as I go along.
The end of a seam (beyond the dot) needs to be easy to move aside . . . . 
. . . . . so I can match the next y-seam corners perfectly.  If a seam has already been pressed to one side, that is more difficult.  
Believe me on this, I have lots of experience!! 
Here is another view of me pulling one layer (the dark blue print) aside . . . . 
. . . . so I can see to line up the third hexagon in this y-seam intersection. 
Now here's a tip you'll appreciate!
I have discovered after piecing thousands of y-seams this way that stopping a bit before the "dot" is okay!
Once the seams are pressed in a swirl (see below) -- 
when you flip to the right side, there is NO HOLE! 
Bonus, the ends of the seam are more secure than any y-seam technique (without backstitching) because of the sew-off. 
And bonus, bonus -- with some experience, you may be able to stop marking all those dots!
(Don't rush that idea, you'll know when you are ready.)

If you are still thinking about investing in my teaching guide, results like this are a consistent experience as long as you are piecing with a consistent seam allowance.

This is the upper right corner after joining four units together.  
I have to add a side half-hexagon and a corner piece (made from the leftover strips)
I gave you better cutting instructions than I followed at first so I've had to find some scraps of other blues to make my corner pieces.  
Be aware there are rights and lefts for these pieces -- you need two rights and two lefts.
Inserted and ready to lay back out on the design bed. 
Here is the upper third of my quilt top.  Each of these large units was made by joining together four of the starter units described in the last post HERE.  My next step will be to join the three together .
 Once a large section is joined together, I will begin to press seams starting at the top edge and working down towards the lower edge of this section, but not all the way to the lowest hexagons.  
 If you have a small iron, it works great!  
Swirl the seams of the first intersection in a corner and that sets up the rest of the pressing -- alternating clockwise and then counter-clockwise.
Doing some of the pressing now will make it less overwhelming than waiting until the entire quilt top is assembled.
Once I move down into the central units, I need to put a pin at the top of the four hexagon units to help me remember which ones are up!
I'll spend the rest of this week and perhaps next week setting units together.

Once that is finished, I'll come back to show you my finished top and discuss quilting options!
I'm going all the way to the finish line with this project -- no "waiting to be quilted" for it!

As always, if you have questions, post them to the comments so everyone can benefit.
And if you haven't had the time (or courage) to start a "big" project, grab some scraps, cut a dozen large hexagons and go through the steps to break the ice.  
Your sample might become the beginning of a totebag?

Mary