Don't you love to see pictures of other quilters' chaotic sewing areas?
This is the view at my machine Sunday afternoon as I hid from the world and pieced.
Can you tell I found another new sewalong?!?
It's the #littlemisssawtoothqal -- you can explore the progress of others on Instagram by clicking HERE. @southerncharmquilts is the hostess -- find her on Instagram.
After I finished a couple days of the #100days100blocks, I started working on the first step of the #littlemisssawtooth blocks (using a layer cake that has been on my shelf for about 4 years and planning it for my youngest grandson but we'll visit that another day).
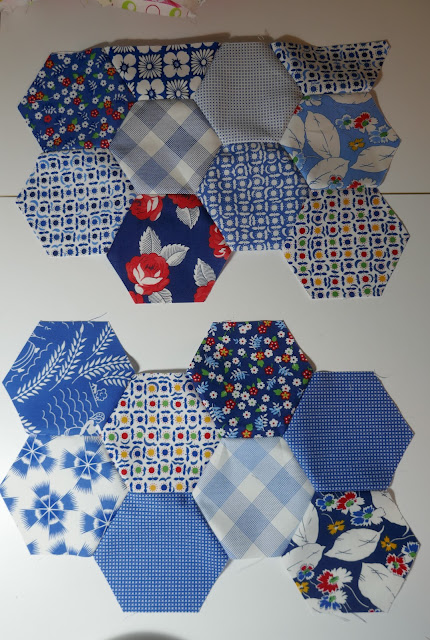
I've assembled all the hexagon units for the blue quilt and I've started setting them together into larger units as "leaders and enders" while piecing other projects.
I'm joining groups of four units together rather than working in rows of units.
Why, you ask?
Probably partially because as a traditional block quilter, it's intuitive for me to work that way.
But more important, it allows me to work on more than one section at a time and maintain a chain-piecing strategy.
It also is more manageable at the sewing machine than working in long rows.
If I don't have any other piecing, I can easily work back and forth between these sets.
The picture above shows four units sewn into two units -- 95% of the seams are "dot-to-dot" as described in the Set-In Piecing Simplified guide so that's lots of short seams. Steady as she goes!! There are a few "edge-to-dot" seams when working with the outer edge units as below.
At this point, it's also easier to understand why I don't press as I go along.
The end of a seam (beyond the dot) needs to be easy to move aside . . . .
. . . . . so I can match the next y-seam corners perfectly. If a seam has already been pressed to one side, that is more difficult.
Believe me on this, I have lots of experience!!
Here is another view of me pulling one layer (the dark blue print) aside . . . .
. . . . so I can see to line up the third hexagon in this y-seam intersection.
Now here's a tip you'll appreciate!
I have discovered after piecing thousands of y-seams this way that stopping a bit before the "dot" is okay!
Once the seams are pressed in a swirl (see below) --
when you flip to the right side, there is NO HOLE!
Bonus, the ends of the seam are more secure than any y-seam technique (without backstitching) because of the sew-off.
And bonus, bonus -- with some experience, you may be able to stop marking all those dots!
(Don't rush that idea, you'll know when you are ready.)
If you are still thinking about investing in my teaching guide, results like this are a consistent experience as long as you are piecing with a consistent seam allowance.
This is the upper right corner after joining four units together.
I have to add a side half-hexagon and a corner piece (made from the leftover strips)
I gave you better cutting instructions than I followed at first so I've had to find some scraps of other blues to make my corner pieces.
Be aware there are rights and lefts for these pieces -- you need two rights and two lefts.
Inserted and ready to lay back out on the design bed.
Here is the upper third of my quilt top. Each of these large units was made by joining together four of the starter units described in the last post HERE. My next step will be to join the three together .
Once a large section is joined together, I will begin to press seams starting at the top edge and working down towards the lower edge of this section, but not all the way to the lowest hexagons.
If you have a small iron, it works great!
Swirl the seams of the first intersection in a corner and that sets up the rest of the pressing -- alternating clockwise and then counter-clockwise.
Doing some of the pressing now will make it less overwhelming than waiting until the entire quilt top is assembled.
Once I move down into the central units, I need to put a pin at the top of the four hexagon units to help me remember which ones are up!
I'll spend the rest of this week and perhaps next week setting units together.
Once that is finished, I'll come back to show you my finished top and discuss quilting options!
I'm going all the way to the finish line with this project -- no "waiting to be quilted" for it!
As always, if you have questions, post them to the comments so everyone can benefit.
And if you haven't had the time (or courage) to start a "big" project, grab some scraps, cut a dozen large hexagons and go through the steps to break the ice.
Your sample might become the beginning of a totebag?
Mary


No comments:
Post a Comment
Note: Only a member of this blog may post a comment.