Showing posts with label Mary Ellen Hopkins. Show all posts

Friday, June 17, 2016

Hearts for Pulse

It was at least 15 years ago that I joined a group at the local community college to work through The Artist's Way by Julia Cameron about "unblocking creativity" that I first encountered the idea of not paying attention to "breaking news".  One of the chapters in the book urged us to go one week without reading or listening to the news.  It was a challenge at first but gradually it has become a habit for me.
 
I've discovered I feel calmer without the constant negative pounding of minor "news" and when there is really important news, it always comes to my attention.  So I wasn't the first to know about the massacre in Orlando this past weekend, but I knew about it by Monday morning via Instagram and a friend who shared the initiative of the Orlando Modern Quilt Guild.
 
Perhaps you are also aware of this initiative by now.  The guild is gathering quilts filled with hearts to comfort those who have been impacted by this tragedy.
My first eight were on the design wall Tuesday morning.
As I stitched, I thought of my long time teaching mentor, Mary Ellen Hopkins.  She introduced me and dozens of other teachers to this "stitch and flip" technique which she dubbed "connector corners" as a way to create snowball blocks.  Over the years, this idea has filtered out through the quilting world and most are no longer aware of it's origins.
 
Mary Ellen was so excited by the concept that it resulted in five books published between 1990 and 2000.  She would be so into this project!!
There are the first heart blocks, on page 41 of Connecting Up.  These original hearts have a diagonal orientation but they used those stitch and flip squares to create a rounded look.
I started in my scrap bag looking for mono-color prints in a rainbow of cheerful colors.
Construction of the blocks lends itself to chain piecing and once I've finished digging around for the fabric, I can cut and piece a half dozen in an hour.
The tutorial at cluckclucksew.com includes a chart of sizes from 4" to 10" so I made the largest heart I could from each scrap.
Once I had depleted the usable scraps, I turned to the stash and focused on the largest size hearts.
I had hoped to be farther this morning than a first layout draft but stuff happens (as you know).
One modification I made was to cut large triangles using my Marti Michell Multi-size Half-Square Triangle Ruler -- stretches small bits of background fabric and eliminates new scraps for the bag!!
Before I left the studio last evening, I did clump together the six smallest hearts which I will merge into three blocks. 
I pulled all the medium size hearts and will frame those with background strips so all the blocks are the same size.  The background fabrics are pulled and I spritzed them and left them hanging over the ironing board to shed wrinkles so the start-up ironing today will go more quickly!
 I did the math so that I don't have to think at the beginning of today's studio session -- just iron, cut, and start stitching!
I love that I can be part of this project even though I live 1045 miles away!
I love how quickly the quilting community has supported this project.  The Orlando Modern Quilt Guild initiated the first Instagram post on Monday and as of this moment (4 days later), there are 678 posts with the #quiltsforpulse hashtag. 
 
Not on Instagram? -- HERE is a link to the guild's blog and the information about the project or go to their FACEBOOK page to see this project come together day by day.
They are accepting blocks, quilt tops, and finished quilts so all of us that wish can easily participate.  Just another example of the good things we do with our stitching every chance we get!!
 
Bravo, quilters!!
 
Mary Huey


Saturday, January 10, 2015

What to do, what to do? 1st quarter 2015 goals!

If you read my posts regularly, you know I just achieved a highly successful run at quilting up a group of quilt tops -- I usually achieve goals that include deadline commitments made to other people.  That drive to give a quilt to all six of "my people" underscored the thrill of finishing is something I can achieve.  So I'm going to give it another go and I counting on all of you to hold me accountable!!

I'm going to quilt three of the tops myself currently living on the "to quilt" shelf.  There are so many choices (at least 30) . . . . so how about the oldest for starters?  That's good.  And then one that I've pieced for to donate to a good cause.  Okay!  And finally, one that I treasure and love!
 
I think this is the oldest, certainly it's one of the oldest!  It was a teaching sample back in the early 90's when I taught a series of classes based on the books of Mary Ellen Hopkins.  Connecting Up  was her first book using what most of you today call "flip and sew" or "snowball" corners.  I'm pretty sure Mary Ellen was the first to come up with this idea and because she had such a large following of teachers it spread around the states like wildfire and the credit to her has been lost.   The book is available through used book websites.
I love this setting of large and small bowtie blocks and the idea of two different background prints was "cutting" edge at the time.  I almost let this one go 10 years ago when I closed my shop but my oldest daughter expressed an interest in it -- I hope she still wants it!!
This crazy teacup quilt is made with blocks from friends as part of a block exchange group and it would be fun to hang it in my dining room where my teacup collection resides.
  The setting idea came from first Karla Alexander's first book, Stack the Deck -- it's still available on the used book sites but Karla has gone on to write several more books applying the concepts that were so new at that time.
I pieced this quilt top last year during Alison's QCQAL with the intention of donating it somewhere in the future.  Many of you followed my progress as I applied Marti Michell's templates to Alison's instructions.  Well, the future is here and I'm sure it will be easy to find a home for such a cheerful (finished) quilt!
I'm going to send one quilt top out to be quilted which is too big for me to handle with my increasing neck and shoulder issues.  It's a sampler of baskets with appliqued cluster of flowers.
 
With my typical winter teaching load, I think this is about all I can commit to -- so here I go!!
 
Mary Huey


Monday, October 27, 2014

My Tribute to Mary Ellen Hopkins!

This Sunday, 11/2, is a local guild's annual exhibit and sale.  The Wildwood Quilt of Mentor, Ohio has hosted this event for about 25 years I'm guessing.  This year, they are organizing a special tribute exhibit to Mary Ellen Hopkins.  I might be wrong, but I'm going to venture a guess that 75% of those gals took my It's Okay If You Sit On My Quilt beginners series based on Mary Ellen's ground breaking book by the same name.

If you haven't heard of Mary Ellen and that book, suffice it to say it was the first book to organize a large collection of blocks on graph paper and Mary Ellen's approach to teaching quilt making was to teach people how to make quilts easily (think strip piecing and half-square triangle sets in an era of hand traced templates) that people could use as they wished (her boys were reputed to have traded them for a ride to the mountains to ski).

So I spent some time this weekend digging through my piles of quilts and found three pieces from the 1980's and 90's that were samples for my classes.  Mary Ellen liked to use Double Irish Chain to introduce students to strip piecing for blocks, but I eventually settled on 9-patch blocks for their versatility and simplicity.   
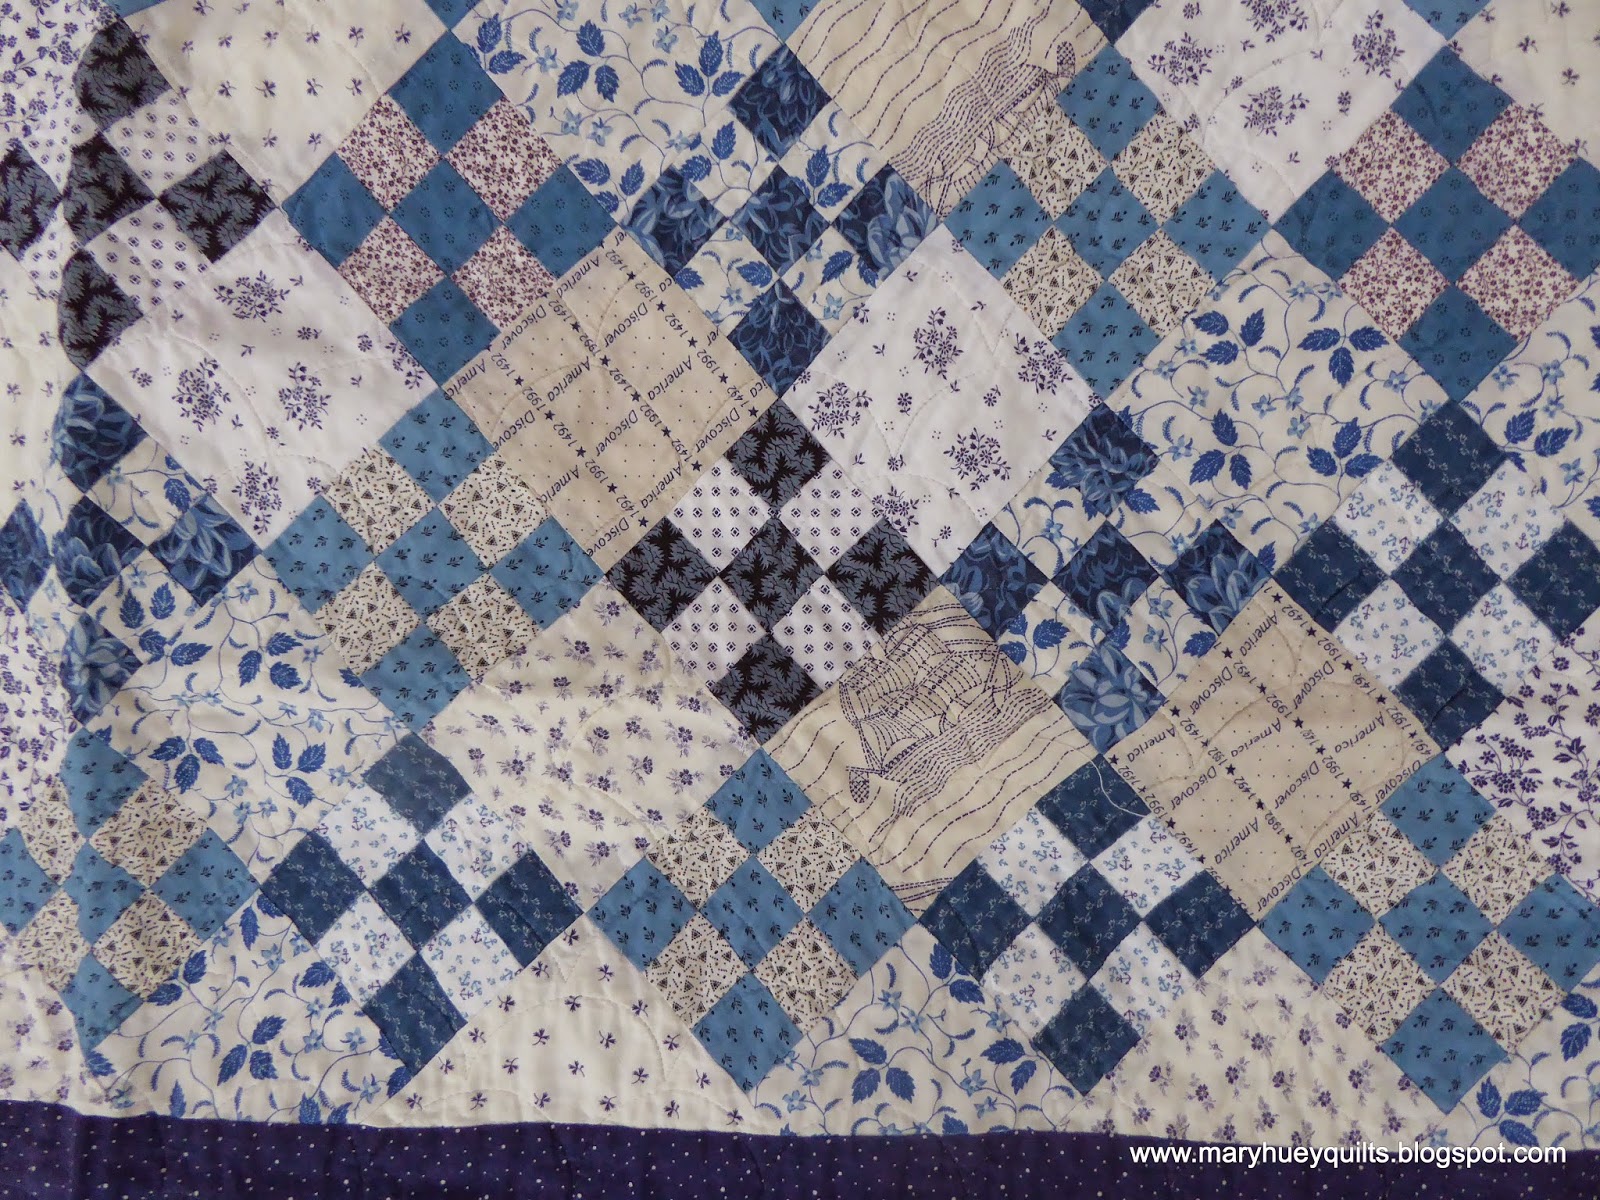
I produced this one after quite a long stint of fabric gathering (before reproduction prints were widely available) to get a classis blue and white look.  It's still one of my favorite quilts and spends every winter draped over a chair in the living room for cold winter evenings in front of the fireplace.   
There are several aspects of Mary Ellen's approach that would surprise quilters today who haven't encountered her.  She introduced me to the triangle grid -- at first it was an odious grid we drew on the wrong side of fabric but eventually one of her students translated it into Triangle Paper which was genius!!  I challenged my students to create this Scrappy Triangles piece based on a simplified Lady of the Lake block (where did it get that name?) in a small wallhanging I noticed in a decorating magazine.
As I'm writing this, I'm thinking I might still have the teaching handout for this.  Be right back.

Yes, I do!!   I wrote it using triangle paper -- if you've never tried it out, this would be an easy introduction to it!  I still own three samples of this quilt but this one is my favorite.  Since "collections" didn't exist in the 1980's, I taught my students to theme their scrappy quilts and this one is "plaids and stripes".  I love this one because my daughters (ages 10 and 12 perhaps) chose all the colors for me from my stash of plaids. 
Once you met Mary Ellen and learned her techniques, you wanted more and more.  So her publisher, Yours Truly (the first wholesale business of Richard and Marti Michell) offered "advanced" teaching seminars so we could go back to our shops and give our students more and more.   I'll always be grateful for those opportunities because not only did Mary Ellen give us lots of new ideas, she made us create our own ideas and encouraged us to share them with one another.

I have hung onto this "bricks and mortar" for all these years because it illustrates one of Mary Ellen's favorite "rules" -- all reds go together.  She also introduced us to large scale prints in an era of small calicos and urged us to put a dash of black into everything for sparkle.
This quilt is a great album of the brown prints that were available in the late 80's and early 90's -- no one prints browns like these anymore and you'll see them pop up in my quilts to this day -- that's one of the nice results of taking my "paycheck" in fabric in the early days of my shop when all the cash went back into the business. 
Mary Ellen passed away in July, 2013.  She left a rich heritage of quilters in her wake.  Teaching It's Okay for twenty years was a win, win job for me.  It kept my shop afloat.  I got to meet lots of quilters who are still friends and students to this day!!  I met my current mentor, Marti Michell who inspires me with her energy and all those templates!  I learned how to enjoy teaching adults (you can be quite challenging sometimes, you know).  And I've kept making quilts -- I was ready to quit when I met Mary Ellen in 1982.  Here it is, 32 years later and I still love to chop up a piece of fabric and sew it together with lots of other pieces of fabric!!

So if you are in Northeast Ohio, stop by the exhibit this weekend.  It will be fun to see what my students have found in their piles of quilts! 

The exhibit is at the Mentor Civic Center, 8484 Munson Rd (Rt. 615), Mentor, Ohio (north of Rt. 2 freeway) from 10 a.m. to 4 p.m.  There will also be vendors (including me with all Marti's templates -- I might even have the newest sets -- Crowns & Kites), handmade items to purchase, and a lovely cookie buffet!!  Admission is $3 maybe? 

Hope to see you there!
Mary Huey
http://maryhueyquilts.blogspot.com

Tuesday, July 8, 2014

The versatile Log Cabin Block and a FINISH!!!

As of 8 a.m. this morning, this quilt is on it's way!!  It is a gift for my youngest sister's 60th birthday.  In an effort to disperse some of my backlog of quilts, I started "gifting for 60th's" several years ago.  This one completes that goal -- all siblings gifted!! 
It began life as a teaching sample using log cabin blocks and an idea first shared with me by my very creative teaching mentor, Mary Ellen Hopkins.  She pointed out that basic log cabin blocks are two triangles of color.  Therefore any quilt block could be the setting for a group of log cabin blocks. 
I taught a beginning quilt making series called It's Okay To Sit on My Quilt (based on Mary Ellen's ground breaking book) for about 20 years.  This project was one of my challenges to my students -- pick any block in the book and interpret it using log cabin blocks. 
Do you recognize this block?

It's Martha Washington's Star -- if I add lines to create an 8 by 8 grid of half-square triangles and squares rather than the obvious 4 by 4 grid, I can see how to get that pinwheel at the center.  Now I make each "square" a log cabin block.
 
Some will be the traditional two-color blocks for the HST's and some will be all one color for the plain squares.   Can you see the individual log cabin blocks?  This is my layout guide from EQ and I'll work up a PDF for you to download with some basic info if you'd like to try it yourself.

It makes no difference what size the blocks are or how many logs are around the center or what size the center is or what size strips you use to build the blocks.  They just need to be log cabin blocks.  Obviously, the size of the log cabin blocks matters in terms of the finished size of the top.  Mine were 6" blocks so the top was 48" before borders.  But they could have just as easily been 12" blocks if I wanted a larger quilt. 

This is a close-up of one of the "points" of my star -- made of 4 log cabin blocks -- the upper right one uses only the red print, the lower left one uses an assortment of white-on-white prints, and the remaining two are half red and half whites.
This is a center section -- 4 blocks again -- can you decipher the combination?
I do advise stitching the log cabin blocks made with just one fabric where no one can see you working -- they already think we are a bit crazy to cut fabric up and sew it back together, but when you only use one print, that might be too much for them.  I have tried just using a plain square instead of going to the trouble of making a log cabin block, but it just doesn't look right.

Now with Marti Michell's terrific Log Cabin Rulers in my arsenal, I'm thinking I'll revisit this idea! 
If you haven't tried these tools, they have improved the accuracy of that block for me more than I expected.  The uniformity and consistency is remarkable.  I was a skeptic but it only took one small quilt to win me over.  There are four rulers at this point, each working with two strip sizes (ranging from 1/2" finished to 2" finished strips) and making multiple block sizes.  I own all of them and use them frequently -- the cutting takes a bit longer but the time saved during the piecing process is ample compensation!

If you can't find the rulers in your local shop, you can order them directly from her at http://frommarti.com and you might want to visit the cutting demo video on Marti's website.

So bring on the next UFQ!!  This reduces the pile of quilt tops to only 37!!

Mary Huey


Tuesday, April 29, 2014

Cutting Setting Triangles for On-point Quilt Blocks

With the end of the month looming, I'm organizing my head to set a few goals for next month and one of the finishes I'd like to accomplish is this basket sampler.  I made the 12" blocks a few years ago for a workshop with Marti Michell's Set M which can be used to make 12" 5-patch blocks.  Then when her Long Skinny Sashing Set came out early last year, I set the blocks together using that tool to make the sashed stars.  And since then, I've been hauling it around as a teaching sample for workshops based on her book, Machine Quilting in Sections.  But now it's time to finish it!
 
 Since I have it back out, I thought it would be a good time to talk about cutting the setting triangles for on-point settings.  I use two different approaches and I'll review each one for you.

In the first which I learned while taking teacher seminars with Mary Ellen Hopkins based on her classic book, It's Okay if You Sit on My Quilt, you need two measurements and plenty of fabric so you can cut big squares of the setting fabric to begin. 

For the edge triangles -- top, bottom, and sides -- you need to know the diagonal measurement.   A 12" square has a diagonal measurement of 17".

To this diagonal measurement, add 2 1/2"  to 3" -- so I need to cut mine 20".  Cut one square of the setting fabric for every 4 setting triangles needed.  Cut each of these squares on both diagonals as diagrammed below.  This keeps the straight of grain on the outside edges of the quilt making it more stable when it's time to add borders.  These triangles will be larger than necessary but I like having that extra "float" around the edges when lining up my border strips -- I can trim it down if need be though I seldom do.
The second measurement is the standard size of the block -- 12" in my case.   Add 2" to this measurement.  Again it's more than necessary but good insurance!  I always need two of these squares as each will be cut on just one diagonal to make 4 triangles for the 4 corners of the quilt.
The second approach is based on Marti Michell's tools.  Several years ago, she introduced Diagonal Set Triangle Rulers which allow you to cut setting triangles from strips.  The advantages of these tools is that you don't need to do any calculations and as long as you keep the straight of grain in the right place, you can cut your setting triangles from strips which sometimes is all one has left of the "perfect" fabric.
 
There are two styles -- this is the large size of the half triangle for cutting setting triangles for blocks that are from 6" to 16" square.  The card has complete instructions on how to cut with the ruler and if you undo the pink gizmo you see sticking out of the top of the card instead of cutting it off, you can re-attach the card to the tool so you'll know exactly where it is the next time you use the tool!!  The small size tool works for 3" to 9" blocks.  The corner triangles are cut with the same tool.  The ruler gets flipped in the cutting process -- once you've done it a couple times, you may not need to even read the instructions (though I always do just to be sure).
For those who don't want to "flip" the tool, there is now a pair of FULL Diagonal Set Rulers -- the large one is for blocks that are 5" to 16" and the small one is for 2 1/2" to 10" blocks.
To use the tools, you just need to know the finished size of the block!  You may not even need a ruler to get that number?  Each of the horizontal lines on the tools are labeled.  Here I'm cutting setting triangles for 7" blocks.  I start by cutting a strip of the setting fabric to match the line labeled 7" (though I usually bump it up a size just because I like that extra float). 
 
The first cut makes a triangle for one of the corners of the quilt -- no waste here!
This is the cut using the full size tool -- pretty simple!! 
With the half-triangle tool, it's the same approach -- cut the size strip listed on the tool.  Cut off the first corner triangle.  To align for the first side triangle, I flip the tool to this position and align the top corner to the existing diagonal cut and the top edge of the strip.
This is a close-up of that alignment!  Cut off the triangle along the edge of the tool.  And move down the strip cutting the number needed. 
 
The instructions that come with the tools are well illustrated and clear.  So look for these tools on your next shopping foray.  I have them here in my sales stock even though they aren't on the website so if you want one, contact me at maryhueyquilts@hotmail.com and I'll advise you of the cost and the shipping.

Back to searching for a couple more projects to finish in May!!

Mary Huey
www.maryhueyquilts.com


Tuesday, November 26, 2013

Adapting Quilt Patterns -- Part I

My day is off to a perky beginning.  It's only 10 a.m. and I've done my morning devotions, the dishwasher is hard at work in the kitchen and the bread machine is hopefully producing an excellent loaf of sourdough artisan bread for Thursday's turkey stuffing!  (Though I am still in my jammies.)

One of the lectures and a workshop that I've offered for the past few years is titled ADAPTING PATTERNS.  During it, listeners and students are guided through some steps to open up new options for using some of that pile of patterns and tabbed pages in our favorite magazines.  This series (I think there will be 4 parts) will share some of those ideas with you.

We'll start with the easiest way to adapt a pattern -- changing the color and/or fabric style.  And I'm going to use my pattern, MISSISSIPPI MUD, as an illustration.  That's it on the left in this booth photo from one of my road trips.  It's the oldest pattern in my line, Mary Huey Quilts.

 
Mississippi Mud came to life in the late 1980's (I think).  My teaching mentor, Mary Ellen Hopkins, of It's Okay To Sit On My Quilt fame shared a pattern called Mississippi Simplified that would make good use of what we called "connector corners".  Most gals call them "snowball corners" today.  When I began to putter with the block design, there were two triangles whose placement bothered me, so I eliminated them.  When I shared the design with my Quilt Sitters Circle group, they were excited enough about my modified design that I began to offer workshops. 
 
To say it was popular would be an understatement.  During the late 80's and early 90's, I taught it so often that I got tired of it.  I finally wrote the pattern so that when customers whined about my not offering the class, I could set them up with the pattern and they could make the quilt.  The photo on the front of the pattern is traditional reproduction style fabrics and frankly that is way many quilters organize their fabrics when making it.  Everyone sees it as a "traditional" quilt because of the cover photo. 
 
I've made at least a half dozen of them over the years from crib to queen size and my students are always amazed when they meet someone here in Northeast Ohio who hasn't made Mississippi Mud.
 
A student's signature version.
Over 25 years, it's an easy quilt for me to produce (I can knock out a crib size top in a day) and I like to make it for gifts since it's a "signature" Mary Huey design.
 
My granddaughter, Grace, with her big girl bed quilt.


As you look at the three versions of the pattern, which one catches your eye?  Most of us are more heavily influenced by the color and fabric style of a quilt than we realize.  To see a pattern in your preferred style is challenging until you manipulate your mind into thinking about it that way.  It's hard to subdue the instant "yuck" and look at the design for itself, but once you train yourself to take this deeper look, you will discover some wonderful patterns. 
 
Two weeks ago, I taught workshops for the Chambersburg Quilt Guild in Pennsylvania and the Towpath Quilt Guild near Syracuse, NY using this pattern.  I can't remember the last time I got to teach Mud -- it must have been quite a while because when it came time to send samples to each guild, there was nothing to send.  So I had to make two new ones.  When explaining to gals how to chose the fabric, I suggest that they "theme" it -- all one color family or all one print style -- and make certain the fabric chosen for the star contrasts strongly with the other fabrics. 


Both of these versions differ enough from the photo on the pattern cover plus I send out small scale mock-ups in two other color ways -- my goal is to help students see more possibilities.  But I have to tell you, what happened in those workshops was very exciting. 


Belinda arrived with this assortment of black and white prints -- it broke one of my cardinal rules for this design -- no light background prints.  But it works!!  I'm not sure it would work with other color families but who knows?  And that lime green star may not work for you, but how about orange or hot pink or turquoise?  Mmmmm!! 
 
Fran took one of the popular new Christmas collections and did this -- I never would have thought to do it in all pastels with a dark star.  You don't need to find this fabric collection -- you need to think about the effect of using a pastel group of a color family.


Bali's always work well with this pattern, but I've never had a student do it with the entire color palette and be able to find a batik that contrasts as well as these pink stars.  Generally, I suggest students use only a cool palette (greens, blues, purples) so they can chose a warm color (yellow or orange) for the stars (or vice versa).  But this works just fine!


Ann's assortment of large scale florals looked chaotic when she first pulled it out -- but I think I need some of this chaos myself.  What a great look!  This time the contrast of the star is established by the scale of the print, not the color. That's a new idea for me.  Do you think polka dots are the new neutral?

So take another look at that latest magazine today and explore the possibilities of the patterns you don't like in it.  Ask yourself "how would changing the color palette or the style of the fabrics effect this design?"  And then listen to your brain's answer.

Pull out some of your favorite patterns to revisit them by updating with a change of the color palette or fabric style.  I enjoy making patterns again -- it's easier the second time because I know the "in's and out's" of it. 

Let me know what discoveries you make -- as for me, I need to go now.  The dishwasher is finished and the loaf of bread is looking good.  But more important, there is another version of Mississippi Mud I need to make!!

Mary Huey
www.maryhueyquilts.com