Showing posts with label QCQAL from Little Bunny Quilts. Show all posts

Sunday, May 31, 2015

Really Finished!!

After a setback on Thursday and a conversation with an APQS technician, I headed for the old Bernina and finished this quilt up today!!
I had started a wonky diamond cable on George when it jammed up.  The first time I did this border design, I was still working on my Bernina with the walking foot so it was easy to go back to that equipment and not get out-of-control about George being jammed up.
The longer I machine quilt, the more I realize that very highly skilled machine quilters (regardless of what type of machine they use) are much more particular souls than I am.  I piece because I love to do it but I quilt because I have to do it.
 
So at this point, I've taken an adaptive attitude -- since I don't have the patience (?) to deal with fine detail, my quilting style is improvisational and whimsical! 
 
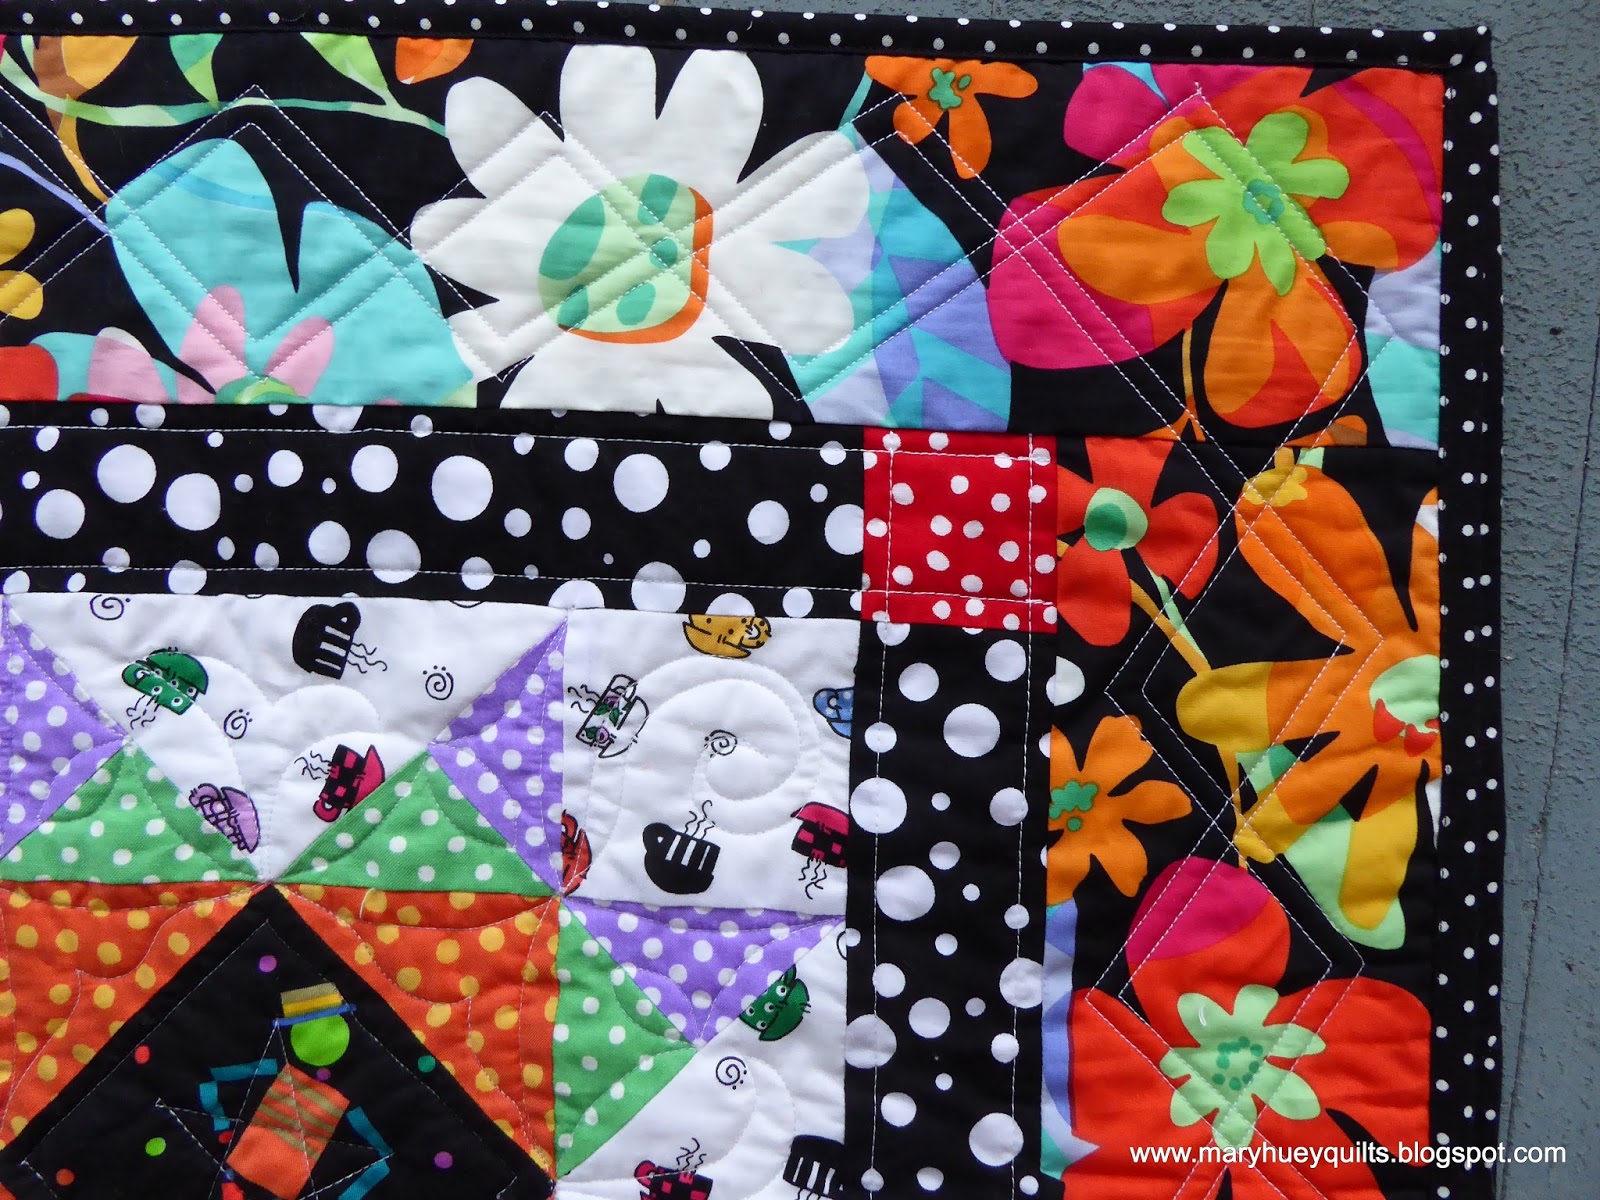
The wonky diamond cable!
I stitch across the border at an angle until I get within about 1" of the edge.
Pivot about 45 degrees more or less and head back across the border to the opposite side.
When I get to a corner, depending on where I land I execute a "box" in the corner or head directly across to the opposite edge.
I echo both lines to emphasize the diamonds.
It's a perfect border design for this assortment of fabrics -- just the right amount of whimsy!
As I was doing it this time, I thought it might be fun to add another pair of lines in a different thread color to make the design look like an argyle -- but that's for another quilt. 
I will sketch it out so I don't forget the idea and file it in my pile of quilting design inspirations.
 
Feels good to have another project crossed off the second quarter list for the 2015 Finish Along!!
Bring on the next deadline!!
 
Mary Huey
 
Linking up with all the other finishers at the


Friday, May 29, 2015

An Almost Finished Quilt

With the end of May starring me in the face and several still unfinished pieces on my second quarter list for the 2015 Finish-Along with Adrianne over at On the Windy Side, I've been focusing on quilting for the past week.  The goal has been to spend at least an hour every day hand quilting this masterpiece (hopefully, I'll be sharing it's finish by the end of June) and another hour machine quilting (there are four pieces in that queue?!). 
I'm happy to report that good progress is being made on both fronts . . . . well, it was good until last evening.  There I was moving smoothly through quilting the borders on my dotty sampler from Alison's QCQAL over at Little Bunny Quilts -- on the cusp of a finish!! 
 
WHAM!!  George stopped dead in his tracks.   The needle broke. 
 
I disassembled carefully looking for all the pieces of the needle (grateful for my days as a Bernina mechanic) and found the tip lodged in a very bad place.  Out of my depth!! 
So after I'm done writing today's post, I'll be talking to a technician at APQS. 
Grrrr.
 
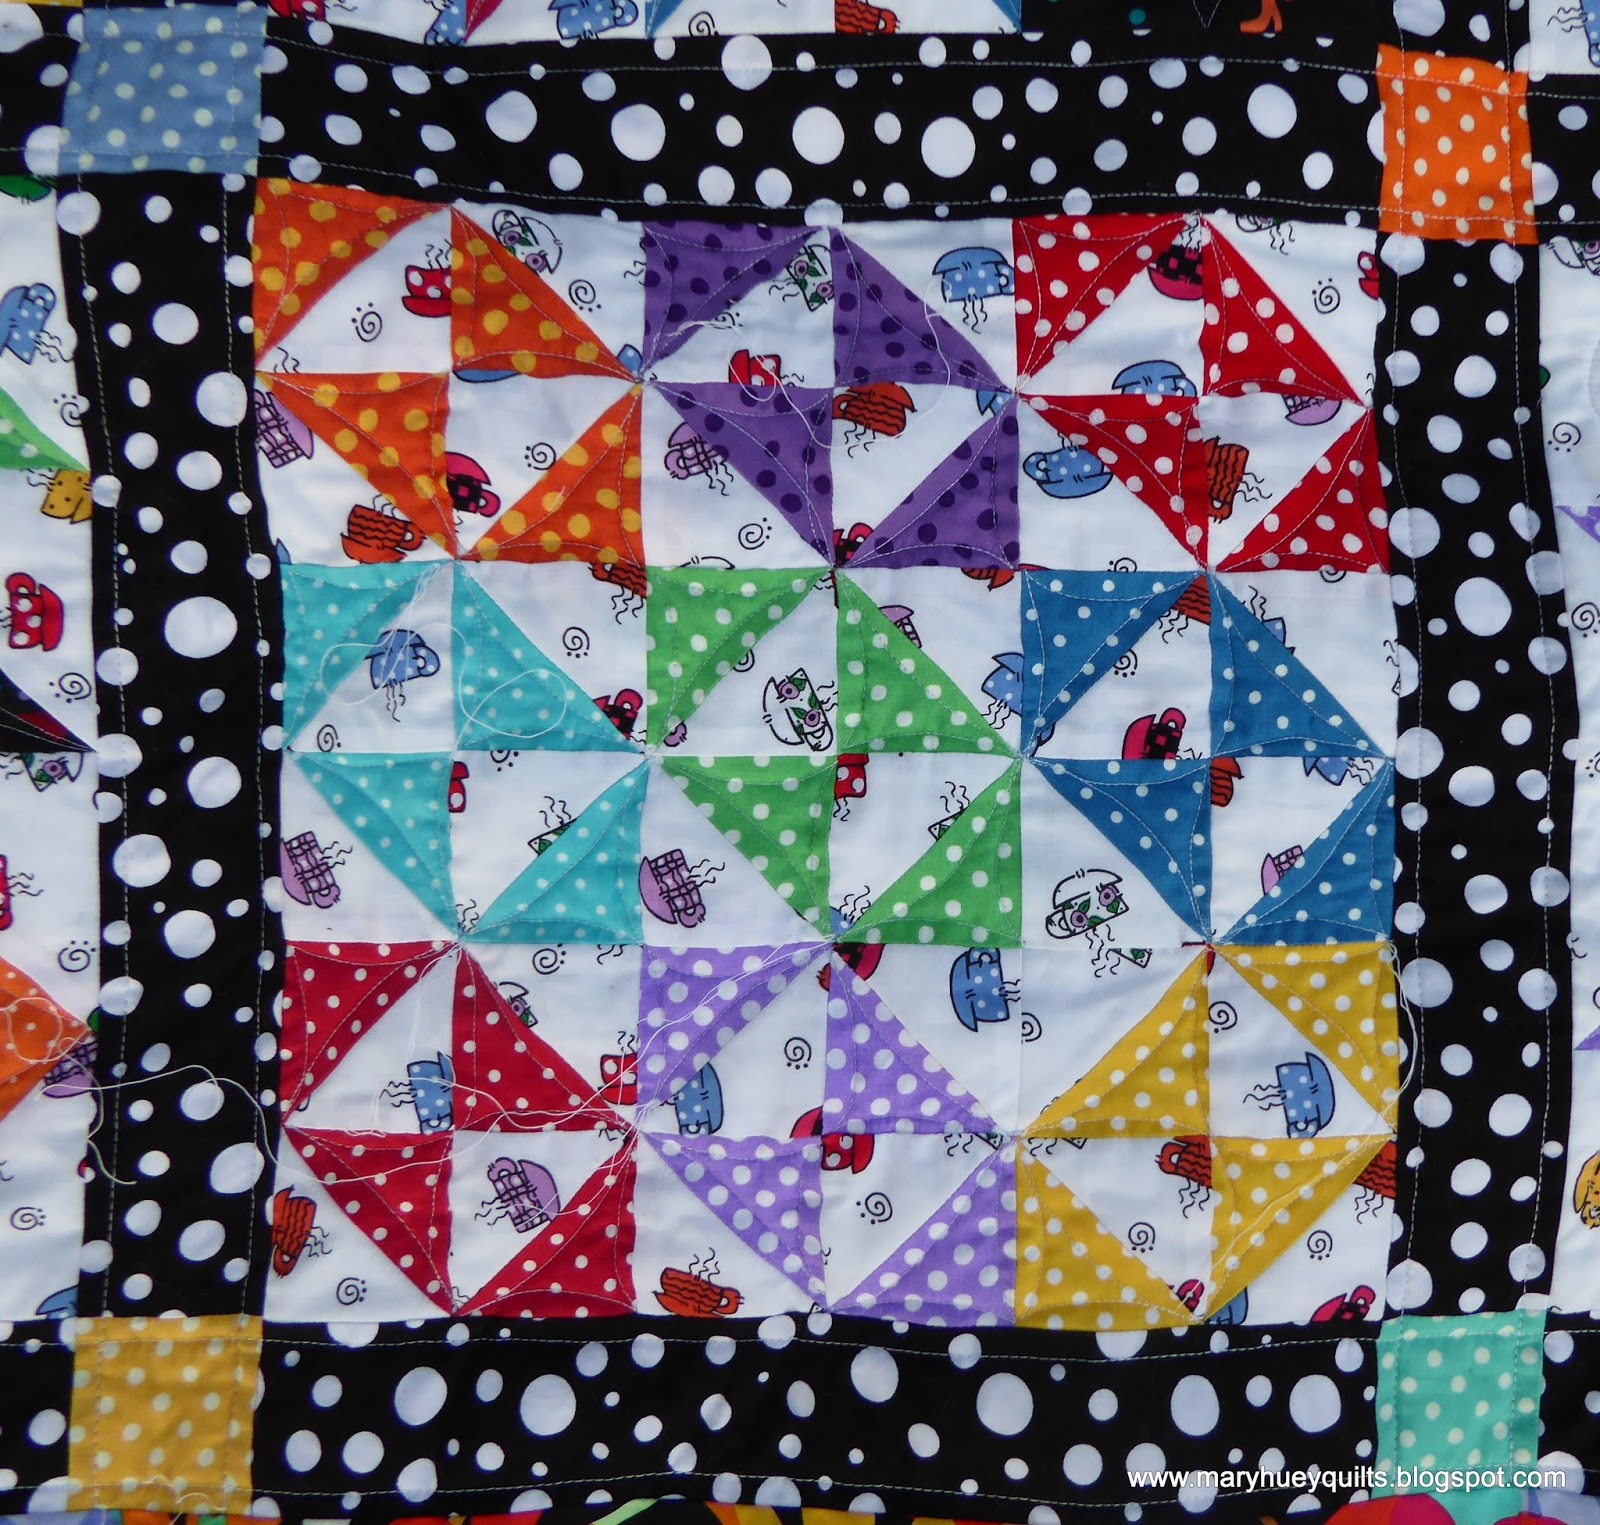
But I can still share with you what I planned for today.  I spread out the almost finished quilt on the lawn for some close-ups of my machine quilting experiments.  Warning -- there are threads exposed in the following pictures and if you find that offensive, I apologize.  Just needed to calm down and divert myself from the panic I was feeling. 
Continuous curve quilting is my happy place -- I've been using that "design" for years.
Sometimes I experiment with "line dancing" -- sometimes it works for me (visually) but most of the time I'm not crazy about the results.  This one is okay (apparently I didn't photograph the two blocks that didn't make me happy).
 At some point, since I wasn't totally satisfied with the results of my design efforts, I decided to experiment with some of the straight line ideas I find reading blogs and looking at Instagram.
I'm liking the results and with my straight ruler and the new ruler foot, it goes smoothly.  I need lots more practice on the balance of the spacing but that will come!
I like the results but I haven't completely figured out how to travel through the transitions and it feels like more starts and stops than I enjoy.   So I started to combine the continuous curve idea and the straight lines to help with that.  This block had one start point and one stop point!!  Yea!!  It also helps blend my experimenting in with the first four blocks I quilted. 
 I love "drawing" these crazy stars -- a little oops there, better the next time! 
This quilt is designated for donation and I use these quilts to accumulate machine quilting experience and to experiment with designs and ideas.  I prefer to quilt (rather than tie) these quilts so they are more durable (most of mine go to hard working underemployed or disabled people in Appalachia and my goal is that they will bring a useful element of beauty into their homes).  
And the quilt isn't as wobbly as it appears in this photo -- remember it's laying on the lawn.
 
Photographing and organizing my thoughts calmed me down.  I spent the rest of the evening burying the thread tails and I'll finish the border quilting today on my Bernina.  If I stay on task, the quilt will be finished this weekend and I'll share some pics early next week.
 
 I'll call APQS later this morning and get George fixed -- hopefully it will be painless for both of us!!
 
I hope you get to score a finish this weekend!!
 
Mary Huey 


Saturday, January 10, 2015

What to do, what to do? 1st quarter 2015 goals!

If you read my posts regularly, you know I just achieved a highly successful run at quilting up a group of quilt tops -- I usually achieve goals that include deadline commitments made to other people.  That drive to give a quilt to all six of "my people" underscored the thrill of finishing is something I can achieve.  So I'm going to give it another go and I counting on all of you to hold me accountable!!

I'm going to quilt three of the tops myself currently living on the "to quilt" shelf.  There are so many choices (at least 30) . . . . so how about the oldest for starters?  That's good.  And then one that I've pieced for to donate to a good cause.  Okay!  And finally, one that I treasure and love!
 
I think this is the oldest, certainly it's one of the oldest!  It was a teaching sample back in the early 90's when I taught a series of classes based on the books of Mary Ellen Hopkins.  Connecting Up  was her first book using what most of you today call "flip and sew" or "snowball" corners.  I'm pretty sure Mary Ellen was the first to come up with this idea and because she had such a large following of teachers it spread around the states like wildfire and the credit to her has been lost.   The book is available through used book websites.
I love this setting of large and small bowtie blocks and the idea of two different background prints was "cutting" edge at the time.  I almost let this one go 10 years ago when I closed my shop but my oldest daughter expressed an interest in it -- I hope she still wants it!!
This crazy teacup quilt is made with blocks from friends as part of a block exchange group and it would be fun to hang it in my dining room where my teacup collection resides.
  The setting idea came from first Karla Alexander's first book, Stack the Deck -- it's still available on the used book sites but Karla has gone on to write several more books applying the concepts that were so new at that time.
I pieced this quilt top last year during Alison's QCQAL with the intention of donating it somewhere in the future.  Many of you followed my progress as I applied Marti Michell's templates to Alison's instructions.  Well, the future is here and I'm sure it will be easy to find a home for such a cheerful (finished) quilt!
I'm going to send one quilt top out to be quilted which is too big for me to handle with my increasing neck and shoulder issues.  It's a sampler of baskets with appliqued cluster of flowers.
 
With my typical winter teaching load, I think this is about all I can commit to -- so here I go!!
 
Mary Huey


Wednesday, August 13, 2014

QCQAL Block #12 -- Wild Goose Chase

It's the last block -- sort of . . . . Alison has decided to post four bonus blocks this week for those of us who still have fabric left and want a slightly larger quilt.  I hope this series has helped you understand how to use your "perfect patchwork" templates more often.  Thanks to Alison at Little Bunny Quilts for letting me blog along beside her for this QAL.  I have a terrific set of blocks that will make a delightful child's quilt!

So to the block -- our goal is to make a 12" block.  12" divided by 4 equals 3" -- that means I need to use Marti Michell's Set A, the 3" basic group of templates. 
I cut the large center square with a rotary ruler.  Template A1 will work for the corner squares and templates A4 and A6 for the geese units.  I'm down to about an eighth yard of my background fabric, so I went through all the scrappy bits to cut the small triangles and got half of them before I needed to cut into the bigger piece. 
In the process, I was reminded why it is so important to close your rotary cutter EVERY time you finish a cut.  Mine was closed so no harm done.  Mine is always closed when it's not cutting.  But I'm consistently alarmed at how many of my students lay their cutters down without closing them!!
I hope you aren't one of those quilters!!
I'm all organized for stitching and I also had a chance to experience what a good job my new phone does on "speaker" -- I'm on hold with a large American corporation . . . . . . pieced half the flying geese units together before they "helped" me.
Actually, they didn't help me, they just aggravated me, but it's good to know that I can now multi-task during those interludes in my life.
I forgot to take a picture of my auditioning for placement of the geese -- repetitive or random.  But once you get to this stage of stitching the geese into rows, you need to be careful to maintain the order.  I did check to make sure of that at this point -- was not in mood to unstitch!!
The final layout and I'm always so pleased when the pieced units are the same size at this stage -- one would think that after 35 plus years of piecing, I'd be over that, but no -- always  lifts  my spirits!!
And here is the block -- ready to add to the rest of the group.  I didn't attempt a 6" block for this one since I'm so limited on background fabric at this point.
Here's Tuesday's bonus block, Empire Star -- it's a new one to me.
I have enough background to make two more blocks, so I'm waiting until all four are posted to decide which I will add. 


To the studio!

Mary Huey


Monday, August 4, 2014

QCQAL Block #11 -- Missouri Star

The Missouri Star is Block #11 for Little Bunny Quilts QCQAL -- I've never pieced this block before and I like Alison's instructions for making the star point units.  I've the "fast flying geese" method before but never with a split triangle.  I'd like to try it on a future quilt.

I can make this block using Marti Michell's Set A template set -- it's the 3" basic set.  My background fabric is almost gone and this week Alison announced that she'll be posting some bonus blocks so participants can make a bigger quilt.  My plan is to make blocks until I run out of background.
I'll use A2 for the center triangles and the "goose" triangle, A4 for the split triangle star points, and A1 for the corner squares. 
I started cutting with the center square -- it's 4 3/4" and came out of my "swiss cheese" focus fabric.
Then I auditioned for the triangles surrounding it.  I intuitively liked the effect of the focus fabric against the orange -- first picks are usually the right ones!
All the background pieces were cut from the same strip -- it's one of the advantages of the trimmed corner triangles!!
And to cut the "goose" units, I twisted the A2 template around, matched it to the first cut and then cut on the right side.  Marti includes instructions for doing these "plus" cuts in the leaflet that comes with the template set.   
The green and purple will be the split triangles and can be cut in pairs that are ready to stitch -- notice that the grainline arrow on the template is laid horizontally on the strips.  That keeps the stretchy bias away from the outside edge of this unit.
And that is the end of the green polka dot -- might have to put that on my shopping list to replenish!
I laid out the block and realized the split triangle units are "rights" and "lefts" before I started sewing!  Thank goodness, no ripping was necessary for a change!
These look the same, but they aren't!!
And I love, love, love how the trimmed triangle corners match up to the trimmed corners of the square perfectly -- means my 1/4" seam is accurate and the finished unit will be a true square.
I did one more audition once the units were assembled -- green in?  Lavender in?
Once again, it was an intuitive decision.  If you have trouble making that sort of decision, put up the alternatives and then leave the room for a few minutes.  When you come back and first look at the piece, listen to what your brain says in the first moment! 
That's your intuition and it's knows what it likes!
We just have to listen to it more often.
So here they are -- only 1 more (maybe) to go.  I haven't done a 6" one of this block yet -- maybe tomorrow?
I hope those of you who own templates from Marti Michell have found this series useful in learning more about applying Sets A and B to a wider variety of projects.  It just takes a glance at my blocks to see that despite being many different grids (6 by 6, 4 by 4, etc.) all of the blocks are uniform in size and that makes the final assembly of any quilt top so much easier!

Mary Huey


Tuesday, July 15, 2014

QCQAL Block #10 -- Martha Washington's Star!!

Again -- I just shared my log cabin version of Martha Washington's Star last week!!  And here it is again as Block #10 for Little Bunny Quilts QCQAL!?!    Alison uses a neat technique for piecing the "flying geese" units that become the star points.
But I'm going to use Marti Michell's rotary templates for the cutting process.  The block is a 4 by 4 grid -- can you see that?  4 divided into 12" (the target size of all the blocks in this QAL) equals 3" -- that means I need to use template Set A!
For the companion 6" block, I'm going to use Set B!
This is the end of this piece of fabric -- I'll be able to get the 8 star points using template A2 from it for the 12" block with just a scrap left over.
I'll be able to use the same strip (3 1/2" by the width of the fabric) to cut all the background pieces I need -- the corner squares with A1 and then I'll use A2 to cut the "flying geese" triangles for the star points. 
Start by trimming one end of the strip using the diagonal edge of the template.
Then rotate the template ninety degrees until a trimmed corner aligns with the top edge of the strips as show in the photo below.  The placement is correct as it eliminates the unnecessary seam allowance.
Now cut along the diagonal edge of the triangle.  Marti refers to this piece as a 2+2 -- template 2 used twice for the same shape.  She explains this in the instructional leaflet that is included with the template sets -- you just have to read it!! 
Now I just have to rotate the template again and line it up for the next diagonal cut!
This photo helps clarify why this cutting process works -- you can see that the star point triangle is positioned perfectly on the "goose" triangle.
The center background fabric triangles will be cut with the diagonal edge of the triangle on the straight grain because of the way they will be placed in the block.  This prevents stretching on an outer edge of a unit or block.  The straight line you see on the lower edge of this template reminds us of that -- once again, we just have to read.
I'm ready to lay the block out for sewing which is always a good idea -- remember the debacle during the construction of Block #9?  Every piece is present and accounted for -- I am ready to sew!!
Alison over at Little Bunny Quilts always organizes a Pinterest board with variations of the blocks to inspire the QAL followers.  When I looked at it, I was surprised to see several variations of the central unit.  I'd only seen this one.
But rotating all the center units gives several more options.  I like this one. 
I don't care for this one -- makes the center feel clunky to me. 
And this one's okay. 
I discovered through trial and error that the bulk of the seams in the central unit were easier to manage if I pressed the center diagonal seams as shown -- two toward the big triangles and the other two towards the pair of triangles.  That made the intersections at the outer corners match easier accurately!  I didn't lose the tips of those pieces.
In the end, I used the layout with which I'm most familiar -- guess I just wasn't feeling "edgy" today.
As I was finishing up the 6" version, I thought it would be fun to use a 6" star as the central unit of the 12" star -- easy enough to audition -- just lay the small one on top of the big one?
Except for the fact that I made an 8" small block . . . . . . Mary, Mary, Mary!?!
There is a calculator right next to the cutting mat for a reason!  Yes, it's simple math, but some days the brain cells malfunction -- measure twice, cut once?
Don't you love it when a "pro" messes up?  I guess I'll be making that block over.
I think I'll head out into the garden to clear my head -- nothing like weeding therapy!

Mary Huey