Showing posts with label unfinished quilts. Show all posts

Thursday, April 9, 2015

Trying Again!?! 2nd Quarter Finishing Goals!

As someone said to me last week, if we don't set goals, nothing gets done.
 I managed to avoid most of my "announced" goals during the first quarter of 2015, but I'm back to give it another try!!  Adrianne at On the Windy Side is combing through 549 finishes for the first quarter -- wow, that's a lot of finishing!!
I balk when it comes to "quilting" a top -- can't think what to do and just freeze up -- having a concrete deadline will break the freeze but just wanting to finish something isn't enough incentive as I proved during the past 3 months.   So I'm rolling over the two UFO's from last quarter to the top of this quarter's list and feeling very confident!!
The teacup quilt is about half quilted already and the "design" freeze is over.
The polka dot sampler is layered up and that's a good first step.
To that I'm adding the following.
I want to finish hand quilting a Baltimore Album sampler for my younger daughter.  I appliqued the blocks over 20 years ago and finally set them together a couple years ago.  There are 9 blocks and last fall I did get 3 of the blocks quilted -- then I got distracted by EPP and knitting during my daily hand stitching hour.  Too nice not to finish so back to it!!
Making the name pillows for Easter gave me the idea of making some "letter" pillow covers for my summer living room (the front porch).  And just for fun, I'm going to use my stash of fruit and veggie prints so they will go with the quilt I finished in February.  And while I've got that stack out, I'm going to make a set of 8 Fat Quarter Placemats for summer patio suppers!!  
I'm going to finish the "sunflower" quilt I started in January as part of Nathalie's "not a mystery" follow-along -- visit her blog HERE -- yes, it's in French but just tell your computer to translate it!!  It uses Marti Michell's 2" Kite and Crown template set and I'd like to offer it as a workshop during the summer, so a charming finished sample is needed!!
I participated in a round robin with 5 other gals during the winter -- I wrote about my starting block HERE!  It's back home and I'm sprucing it up with rickrack and more bugs for a mid-April group reveal.  It won't be completely finished by then but I'd like to be able to hang it during the summer, so I'm adding it to the list, too. 
(Check back next week for a full look at this quilt -- it is so stinking cute!!)
Finally, I have been making a charity quilt top each month to "sew my stash" -- i.e., thin it out a bit.
We make a donation of a dozen quilts mid-summer to a local mission team that participates annually in the Appalachia Service Project.  So the March quilt (about 9 yards off the green shelf) is going with them!!  It's layered up and ready to encounter me and George (my APQS quilting machine).  I'm doing it in two sections (ala Marti Michell's book, Machine Quilting in Sections).
It feels ambitious especially with spring birding (it's spring migration you know) and gardening starting to gear up in my life, but I'll get some of it done if not all of it and that will be more than might have happened otherwise!!

Are you making a list?

I'm headed over to On the Windy Side and see what everyone else is putting on their "to-finish" lists!!  Mine will be list #68?!?

Mary Huey


Saturday, January 10, 2015

What to do, what to do? 1st quarter 2015 goals!

If you read my posts regularly, you know I just achieved a highly successful run at quilting up a group of quilt tops -- I usually achieve goals that include deadline commitments made to other people.  That drive to give a quilt to all six of "my people" underscored the thrill of finishing is something I can achieve.  So I'm going to give it another go and I counting on all of you to hold me accountable!!

I'm going to quilt three of the tops myself currently living on the "to quilt" shelf.  There are so many choices (at least 30) . . . . so how about the oldest for starters?  That's good.  And then one that I've pieced for to donate to a good cause.  Okay!  And finally, one that I treasure and love!
 
I think this is the oldest, certainly it's one of the oldest!  It was a teaching sample back in the early 90's when I taught a series of classes based on the books of Mary Ellen Hopkins.  Connecting Up  was her first book using what most of you today call "flip and sew" or "snowball" corners.  I'm pretty sure Mary Ellen was the first to come up with this idea and because she had such a large following of teachers it spread around the states like wildfire and the credit to her has been lost.   The book is available through used book websites.
I love this setting of large and small bowtie blocks and the idea of two different background prints was "cutting" edge at the time.  I almost let this one go 10 years ago when I closed my shop but my oldest daughter expressed an interest in it -- I hope she still wants it!!
This crazy teacup quilt is made with blocks from friends as part of a block exchange group and it would be fun to hang it in my dining room where my teacup collection resides.
  The setting idea came from first Karla Alexander's first book, Stack the Deck -- it's still available on the used book sites but Karla has gone on to write several more books applying the concepts that were so new at that time.
I pieced this quilt top last year during Alison's QCQAL with the intention of donating it somewhere in the future.  Many of you followed my progress as I applied Marti Michell's templates to Alison's instructions.  Well, the future is here and I'm sure it will be easy to find a home for such a cheerful (finished) quilt!
I'm going to send one quilt top out to be quilted which is too big for me to handle with my increasing neck and shoulder issues.  It's a sampler of baskets with appliqued cluster of flowers.
 
With my typical winter teaching load, I think this is about all I can commit to -- so here I go!!
 
Mary Huey


Thursday, December 18, 2014

Delivery Day!!

Wednesday was the day to deliver 17 children's quilts to Laura's Home, a ministry of the Cleveland City Mission, for them to use as gifts for their current residents.   My little quilting group of friends has been working on these quilts since September and we were delightfully surprised at how many we finished once again.  It always seems as if we'll be lucky to get six finished!?! 
 
One of our members makes these wonderful tote bags "to wrap" the quilts.  Since the purpose of Laura's Home is to transition women and their children into a self-supporting life, they will be moving to permanent housing and so we hope having their own tote will lift their spirits. 
This year, we were given a bag full of Beany Babies and so those were also tucked down into each tote.  These cute little creatures always elicit delight, don't they?
So here is a look at the quilts we made this fall -- perhaps it will inspire your own charitable quiltmaking?!!  The pictures aren't my best -- taken in the evening and standing on a chair looking down on them -- so I apologize for that.
 
The scrappy bargello quilts we make (inspired by Bonnie Hunter's instructions) never cease to amaze me. 
This one is all flannels and uses a simple quilting strategy!
We start with this box of ugly strips and we make the strata with the help of elderly women with memory issues.  Every time we get these delightful results!!  (I wrote about it earlier this year.)   Actually, I believe they do a better job than we could because they are working from their intuition -- not out of worry about what someone will think. 
And if the quilt isn't quite as long as we want, we have adopted this habit of adding borders to the top and bottom only -- great way to use some of that stash of novelty prints. 
Some are retired teaching samples from my stash -- better to have them covering someone than wasting away in my stash.
When I give one of these away, it means I get to make another one!!  Love using this tool from Marti Michell, the Tessellating Windmill template. 
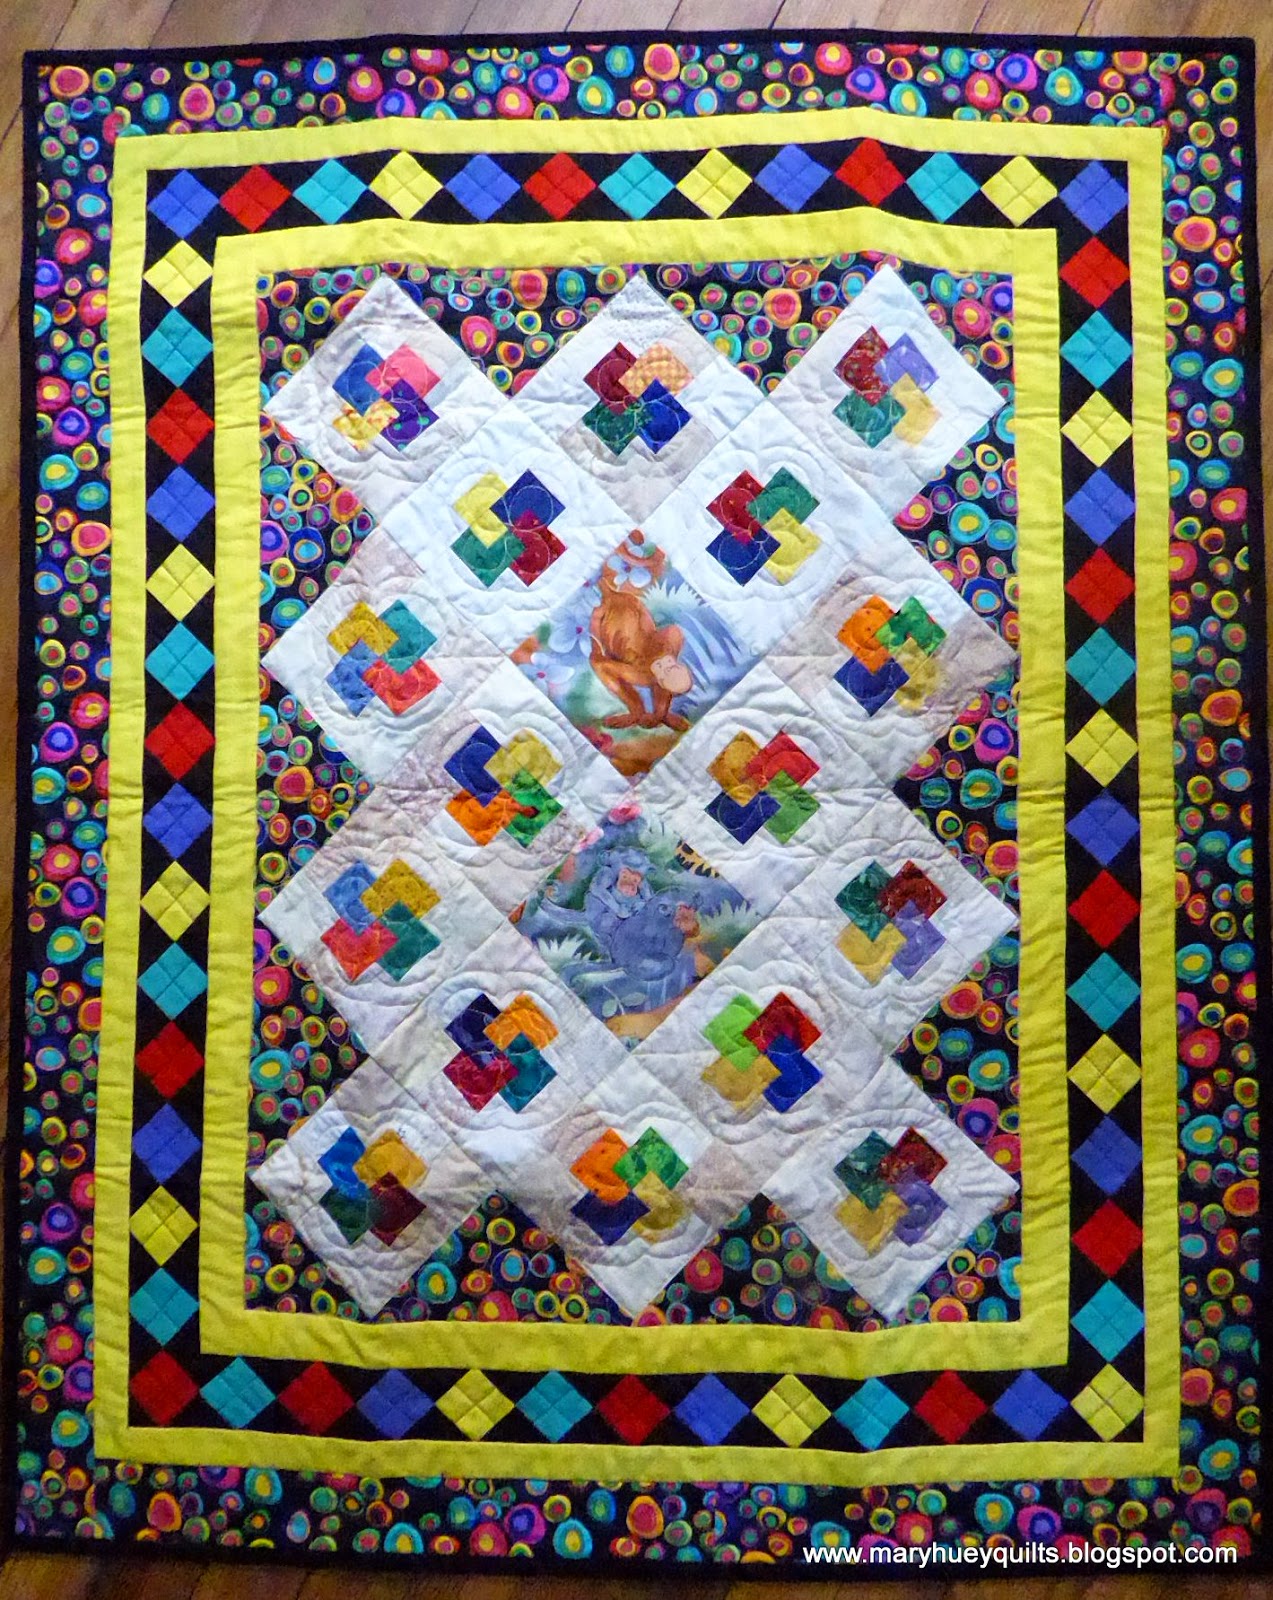
And some are old UFO's that we rescue and repurpose.  These little card trick blocks provided a perfect way for me to try out this diamond border idea again.
This twin size rail fence became three cozy quilts perfect for some lucky children -- I wonder if there is currently a set of triplets at Laura's Home? 
These basket blocks were cast-offs we rescued (rather nicely if I do say so).  Does anyone recognize them?
Here's a set of pillow panels I just had to have (twenty-five years ago).
And this top was made about 10 years ago because I just had to use that periwinkle floral.
I did one of those "1660" quilts -- jelly roll race -- didn't like the finished size of it -- and so it was split into half, trimmed a bit and became a couple little lap quilts.  Check out the fun quilting!
The next few were started from "scratch" -- leftover squares from someone, now working together! 
A little charm pak that became a wonky 4-patch! 
And the center of this was suppose to be a backing for another quilt, but we decided it was too much fun and converted it into a quilt top by adding borders.  Perfect for a boy! 
Sharing is one of the great blessings of the Christmas season.  Being able to use my skills (which sustain me so richly) to bless other people is important -- keeps me from becoming self-indulgent!!
 
Back to the cleaning and I hope a bit of baking this afternoon -- want to make biscotti!!
 
Merry Christmas!
Mary Huey


Saturday, November 29, 2014

Some thoughts on efficiency for stitchers!

With Thanksgiving past and marketing wizards trying to whip up the annual American Christmas shopping frenzy, I realize my plans for making Christmas gifts may have exceeded a realistic level.  To assure that I succeed, I rely on my daily habit of stitching every day!
 
And the most important key to being able to maintain that daily habit is to always leave something ready for my return the next day!!  I started this habit many years ago when I was still operating my quilt shop.  I discovered that taking a few minutes to set up the next day's work enabled me to come home and no matter how tired I was, it was easy to pick up something and begin to stitch. 
 
The hardest part of staying motivated for me is getting started when I'm tired.  If I don't have to think about "what to do", it's so much easier to start.  And once I start, the work calms and soothes me.  When it's time to stop, it's easy to decide what needs to be done next and lay it out for tomorrow.
 
I have three sewing areas (what a luxury!) and generally, there is something going on in each of them.  I invested in an APQS George quilting machine a year and a half ago.  It lives in my office adjacent to the kitchen.   I work there in 30 minute spurts to prevent neck and shoulder discomfort.  If I'm not working on one of my own pieces, there is usually a charity quilt on the table.  My machine quilting skill remains well honed if I quilt regularly so a bit every day is best.
Then there is my studio with my beloved and reliable Bernina 1031 - I've used it so much over the past 25 years that I wore out the feeddogs and had them replaced last year!  I never leave without setting up the next phase of the current project. And I never work on a project without something there on the right to use as "leaders and enders" (ala Bonnie Hunter). 
And finally there is my little cozy hole in the living room where I do all my hand stitching.  It is stocked with everything I might need -- fine scissors, a variety of hand sewing needles, basic threads, pincushions, and thimbles.  None of those items are allowed to leave there under any circumstances!!  If I'm traveling with hand stitching, there is a separate pouch with another set of those items.  Right now, I'm spending most evenings knitting for my family -- sweaters for the grands and socks for everyone who has ever said they "love them" to me.
So if you are under the gun to get too many Christmas gifts made in time, try this approach to keeping yourself motivated.  Let me know how it works for you!!
 
Must go piece!!
Mary Huey
www.maryhueyquilts.com


Monday, October 13, 2014

4th Quarter Finishing Goals

I have a dream!!  And it's to finish four quilts before Christmas!  I want to give my three children and my two grandchildren quilts this year.

I spent the past weekend at a retreat with gals from my guild -- Friday I started out with the usual question on my mind -- do I have enough to keep me busy all weekend?  (really?)
I did score one complete finish.  This set of two placemats has been patiently waiting for me to finish them for . . . mmmm, 10 years.  Needless to say, it's taken longer to start that process than it did to finish it.  Just needed a deadline -- sending them off to my grandchildren this weekend! 
So, the list . . . . I need five finished quilts by Christmas.  One is finished.  In fact it was my first finish for 2014!
One is layered -- did that over the weekend!  I even know how I'm going to quilt it -- Baptist fans!
Two tops are finished, backing are assembled, and they are ready to layer!!
Hey, those are the same quilts -- different borders!!  Short story about these 3 quilts.  In about 1981 (or 2), my husband's grandmother passed away and I had come to love her so the family gave me some mementos from her things including twelve large string-pieced quilt blocks.  For over thirty years, I waffled from one idea to another about what to do with the blocks.  Finally about three years ago, I settled on the idea of making three quilts using four blocks in each one for my three children.  I'll take you through the complete process another day, but for now, aren't they cheerful!!
 
The fifth quilt is for my grandson -- it will give him a second quilt for his other bunk.  It's cut and ready to piece.
So we'll see how it goes!!  Four finished quilts in a bit over two months?  Hopefully saying it out loud for the entire blogosphere to read will help keep my motivation high!! 
 Linking up over at Little Thistle!
 
To the studio!!
 
Mary Huey


Monday, September 29, 2014

Not enough border fabric -- no problem . . . . .

. . . all right so it is a problem but it doesn't need to be a BIG problem.  It could be a creative challenge. 

I hit a writing lull a couple weeks ago, so all has been quiet on my blog horizon.  However, I was not in a quilting lull!!  I finished one of my big UFQ's over the past 10 days.  The deadline for entering a local quilt show was looming and when I looked through my recently finished pieces for a possible entry -- nothing there.  So I looked through my UFQ's to see if there might be one that I could finish in time.  Sure enough, there was a lovely basket sampler -- about half quilted -- and I felt confident I could meet the deadline.  One of the good things about having to submit an entry form and fee ahead of time is that it galvanizes me into action!!

So began an all-consuming push began to finish!   The quilt started as a set of 12 pieced basket blocks made with Marti Michell's Set M (all the shapes needed to make 5-patch 12" blocks) from Volume 4 of her Encyclopedia of Patchwork Blocks.  That was perhaps eight years ago.  The plan was to lure students into a workshop where they would learn to plan their own unique setting for a group of blocks.   No one was interested, so the blocks and all the fabric went into a pile on the UFQ shelves

Fast forward to 2013.  I was on a quest to finish thirteen of my oldest UFQ's (that wasn't as successful as I had hoped) and a new tool set had arrived from Marti -- the Long Skinny Stars Sashing set.  I wanted a sample using the new set and went to the UFQ shelves first to see if I might already have a set of blocks that could be a starting point.  There were several choices, but the baskets caught my eye and I (mistakenly) thought they were one of my "oldest" UFQ's.   So I designed a setting in EQ5 (I need to update that one of these days) and set to work. 
While I was at it, I decided to quilt the piece "in sections" since I didn't have a current teaching sample for my workshops based on Marti's book, Machine Quilting in Sections.  It was a win, win idea.  I got an old project off the UFQ shelves and had an attractive sample with multiple workshop applications -- using one of the template sets, a new tool set, and quilting "in sections".  

To function as a teaching sample, I also only needed to go "so far" with it but now it's time to finish it!  I was confident that I could finish it in time.  I had left everything together with notes about what to do at each stage and it was easy to get back into the quilting.  I piled up some tissues (yep, a cold descended on me), a fall teacup full of warm liquid, and some munchies.
I set the timer for 32 minutes and went to work three or four times a day.  In a few days, the central section of the quilt was finished and it was time to add the borders. 
I had cut strips for an inner border of blue, 1 1/2" wide, and an outer border of the setting fabric 6" wide back in February, 2013 when I organized the quilt.  The blue strips had to be pieced together and once I did that I started to add them to the quilt -- oops, I was 14" short.  How did that happen?  Surely I figured out that I had enough before I cut it.  Measure twice, cut once?
Fortunately the leftover fabric is still together.  So I went through it -- none of that blue. 
Would one of the other blues blend in with it -- no?! 
Did I have enough of another blue -- no?! 
There is a lot of brown -- enough of any of those -- no!?   
How about a scrappy brown border or a scrappy blue border?  I didn't care for the look of that. 
I need a cookie!!   )-:
Because the fabric is older it's unlikely I'll find more and I really don't have the time to go on a big search among the stashes of my friends or shopping to find a completely new fabric. 
 
Actually a pause (and a cookie) in the face of a dilemma gives the brain a chance to contemplate all the (panicked) brainstorming.  It was a good pause because when I returned to the studio (the cookies were just the ticket), I decided to try one more idea.
I split the blue I had into four lengths and added a bit of brown to each end and laid them out for a visual audition.
Fortunately, Coal arrived just in the nick of time to help me maintain a positive perspective!! 
Once the four strips were laid out, it occurred to me that if I realigned the miters, it would look like those little black paper corners used in old picture albums.
 
Coal thought it was a good idea too and allowed me to continue in that vein.
All four border strips are ready to add to the quilt and lined up in the correct order. 
By the end of the afternoon, they had been added to the quilt and it was ready for the outer borders and the final hours of quilting!!
So while it is a problem to run out of border fabric, it's not a disaster -- it's a creative challenge and I think the solution is more interesting than the original idea.  I love it!!
 
Next stop -- my UFQ Journal -- I get to cross one off the list!!
 
Mary Huey
 
P.S.  When I sat down at my machine to start quilting the borders, I reached behind the machine and  pulled the pin basket closer and there was an 18" strip of the blue -- do I have a creative fairy messing with me?


Monday, May 5, 2014

UFQ's Assault Tactics

Welcome to my visitors from The Inbox Jaunt where Lori has been challenging us to use A Quilt Notebook to take control of our UFO's (or as I call them UFQ's) since the first of the year.   If you aren't aware of her series of "assignments", you can read all about them at The Inbox Jaunt as well as her wonderful FMQ (free motion quilting) tutorials which were what drew me to her blog originally.  She has graciously invited me to share some insight about UFQ's based on my experience (and I have lots of it!!)
Lori's assignment on Friday was to review our progress and she asked us how many UFQ’s we have – not sure I want to admit an exact number but it might convince you that when it comes to UFQ’s, I know my stuff?!?! 

Over the weekend I revisited my list, added a few more UFQ’s, and re-counted. . . . . . . (can you hear the quiet groaning . . . . it seems like I should be making more progress).  I’ve been dealing with UFQ’s since closing my shop, Erie Street Quilts in Willoughby, Ohio 9 years ago.  I’ve made steady progress as a once full shelf of the UFQ department in my sewing room has been given over to large fabric hunks because the UFQ's that lived there are finished (or gone)!!   One of the results of my progress has been to organize what I've learned about dealing with them into a four lesson home study course, UFQ ASSAULT TACTICS (and some pretty entertaining guild lecture programs).  This week, you have a chance to win a tuition free opportunity to participate in my program.  Read on!!
Hard to believe this is about 30 quilt tops -- the top shelf is big hunks of fabric -- the backing department!
Whenever I review my UFQ’s, I try to name the point at which I stopped working on a project – while I can’t always remember the “why” I can always see the stage at which I stopped.  I learned early on in my own quest that a list of these stopping points helps pinpoint recurring stumbling blocks giving one a better chance to gain control. 

Without a doubt, my biggest group of UFQ’s are tops ready to be quilted – and that in itself is a huge clue to my most common stumbling block.  As a teacher, I feel it’s important to do the majority of my own quilting so I can help my students with that aspect of making a quilt.  But for a long time I’ve justified not moving past this point of making a quilt because as a teacher, a quilt top is easier to haul around than a completed quilt.  (Two attitudes that don’t exactly complement each other, do they?)
Detail of a piece I finished with "big stitch" hand quilting -- now one of my favorite ways to "get it done".
There are 40 quilt tops on my list of tops ready to quilt (TRQ’s?) – really?  (But there were 72 in 2005.)  It was a productive exercise as I was able to thin out 5 tops to donate to charities – designating a reason to finish them will motivate me and some can be donated in an unfinished state.  37% of my TRQ’s have been made since I closed my shop in 2005 – I do much better these days at moving all the way through a quilt from beginning to end than I used to do.   I still have 17 tops that were made before 2005 – that’s getting pretty old. 
Lori’s advice in January to pull all our UFQ’s out and review them is a good suggestion but just getting them out isn’t enough.  To get fired up about old projects requires understanding why they aren’t finished already.  The reasons could be manifold – life interrupted your work flow, you didn’t enjoy the process as much as you thought you would, you hit a fabric blockade, you went back to work full-time, you got ill, and so on.

Finally off the shelf after about 25 years and proudly hanging by the back door!
 
If you make a comment on your list of UFQ’s about the point at which you stopped, it may reveal more than you expect.  Do you always seems to stop at the borders?  Are all the "clear color" projects finished tops or quilt and all the "muddy color" projects just heaps of pieces?  Both of those are true scenarios from my own experience and that of my students.  During the give and take of mentoring students through UFQ ASSAULT TACTICS, I can help quilters pick up on the subtle issues that keep us from finishing everything.

Here are some common issues (stumbling blocks) I’ve helped students through.
No time you say – 15 to 20 minutes a day of work amounts to 2 hours a week and that’s significant.
Not the skill you need – once again, 15 to 20 minutes a day of work on that skill specifically will yield marked results and in less time than you might think.  I machine quilt all my charity quilts because it improves my ability to design and execute machine quilting.  There’s more to developing skill than taking a class -- you have to do it often -- think practice the piano 30 minutes every day!!
Ran out of fabric – that is a creative challenge that will spur you on to step outside the box.  I ran out of fabric so many times in 2012 when I challenged myself to use a big hunk of my stash and still made some of the best quilts of my life (which I finished).  Now I look forward to running out of fabric!
I don’t like it anymore – then repurpose it.  Make it smaller – put an applique on it – chop it up and make a totebag or placemats.  Explore blogs and pinterest for fresh ideas. 
Not sure how to proceed -- asking questions of quilters who can do what you don’t seem to be able to do has been a good strategy for me.  I have a friend who moves through a quilt from start to finish most of the time.  She might have 3 or 4 unfinished projects at any one time (amazing?!).  Once I realized that the designing of the quilting was a stumbling block for me, I talked with her asking specific questions about how she approaches that part of the process.  Her answers gave me a completely different perspective and changed my approach completely to the design aspect of quilting a top.  Coupled with all the practice quilting I do on charity quilts, I now finish two dozen quilts a year. 

Detail of the BIG hand quilting project I finished this winter -- top made in early 1990's.  Yea!!!!
Knowing that a quilt with a purpose is more likely to get finished, I visit the “quilt top shelf” every time I want to give or donate a quilt before starting a new one.  Most of the time, there is a finished top sitting there waiting for a purpose and “ta-da” it gets finished.
Today my major goals as a quilt maker are to use all the best fabric in my stash (don’t want it to be a yard sale steal) and to have all the projects in my studio set into quilt tops with people’s names on them (so they aren’t yard sale steals either). 

I hope this helps you deal with some of the UFO's cluttering your life.

Mary Huey