Wednesday, August 6, 2014

I should be quilting, but . . . . . .

This afternoon, I had to make a stop at the research plot at Holden Arboretum in Kirtland, Ohio to check out a group of plants I help monitor.  It was a perfect day for a short walk and for a change I didn't have to hurry along.  There was a very vocal immature red-tailed hawk making sorties out over the field from the tree line -- practice flights no doubt.   The field is mowed once a month and the large red clover was in full bloom -- such a pretty sight.
As I walked through it, yellow swallowtail butterflies leaped up out of the flowers and as I looked around, there were four of this large beauties enjoying the sunshine and nectar.
There were lots of Bumble Bees -- my little guide tells me that Bumbles have hairy abdomens and Carpenter Bees have shiny, black, hairless abdomens.
I saw at least four other butterfly species -- summer azure, silver-spotted skipper, a fritillary and this clouded sulphur.
Since I had some extra time, I walked down towards the stream through a piece of woods (found a chickadee family and a male scarlet tanager on the way) and up into another large meadow which has not been mowed yet this summer.  There wasn't much in bloom and I was turning to go back when I spotted a small orange butterfly of the Crescent family.  It was low in the grass enjoying a daisy and I'd had such good luck taking photos with my new phone that I decided to try and get one of this sweet little thing.  But it wouldn't sit still -- grrrr!

And then I looked down and there were three of them sitting on my foot!!!
I started clicking away, hoping for open wings and sure enough one obliged!
And then another arrived and they all laid their wings open to enjoy the sunshine and settled into harvesting salts from my skin, I assume.
I was so excited!!  I'm calling them Northern Crescents.  Their larval food is Asters.  They seemed very content, so I leaned down for a closer look and . . . . . .
when I put my finger in front of one it walked right up onto my hand and soon I had three of them walking over the ends of my fingers enjoying themselves. 

The experience was delightful and it reminds me what fascinating treasures are waiting to be discovered when I slow down and take the time to look around!

Mary Huey


Monday, August 4, 2014

QCQAL Block #11 -- Missouri Star

The Missouri Star is Block #11 for Little Bunny Quilts QCQAL -- I've never pieced this block before and I like Alison's instructions for making the star point units.  I've the "fast flying geese" method before but never with a split triangle.  I'd like to try it on a future quilt.

I can make this block using Marti Michell's Set A template set -- it's the 3" basic set.  My background fabric is almost gone and this week Alison announced that she'll be posting some bonus blocks so participants can make a bigger quilt.  My plan is to make blocks until I run out of background.
I'll use A2 for the center triangles and the "goose" triangle, A4 for the split triangle star points, and A1 for the corner squares. 
I started cutting with the center square -- it's 4 3/4" and came out of my "swiss cheese" focus fabric.
Then I auditioned for the triangles surrounding it.  I intuitively liked the effect of the focus fabric against the orange -- first picks are usually the right ones!
All the background pieces were cut from the same strip -- it's one of the advantages of the trimmed corner triangles!!
And to cut the "goose" units, I twisted the A2 template around, matched it to the first cut and then cut on the right side.  Marti includes instructions for doing these "plus" cuts in the leaflet that comes with the template set.   
The green and purple will be the split triangles and can be cut in pairs that are ready to stitch -- notice that the grainline arrow on the template is laid horizontally on the strips.  That keeps the stretchy bias away from the outside edge of this unit.
And that is the end of the green polka dot -- might have to put that on my shopping list to replenish!
I laid out the block and realized the split triangle units are "rights" and "lefts" before I started sewing!  Thank goodness, no ripping was necessary for a change!
These look the same, but they aren't!!
And I love, love, love how the trimmed triangle corners match up to the trimmed corners of the square perfectly -- means my 1/4" seam is accurate and the finished unit will be a true square.
I did one more audition once the units were assembled -- green in?  Lavender in?
Once again, it was an intuitive decision.  If you have trouble making that sort of decision, put up the alternatives and then leave the room for a few minutes.  When you come back and first look at the piece, listen to what your brain says in the first moment! 
That's your intuition and it's knows what it likes!
We just have to listen to it more often.
So here they are -- only 1 more (maybe) to go.  I haven't done a 6" one of this block yet -- maybe tomorrow?
I hope those of you who own templates from Marti Michell have found this series useful in learning more about applying Sets A and B to a wider variety of projects.  It just takes a glance at my blocks to see that despite being many different grids (6 by 6, 4 by 4, etc.) all of the blocks are uniform in size and that makes the final assembly of any quilt top so much easier!

Mary Huey


Saturday, August 2, 2014

Monarch Butterfly Update


Our second Monarch butterfly emerged from it's chrysalis this morning!!
As I headed out the back door to hang out the laundry, I glanced at the enclosure and there was a shadow of a butterfly!!
I unzipped the side and thrust my camera inside for a view from below -- 5 chrysalis and 1 butterfly.
I carefully offered a finger to the butterfly to climb on and ride down to the opening, but she preferred to flutter down on her own.  I snapped a quick photo before she drifted out of the enclosure and off into the garden.  She will be mature enough in 4 to 5 days to begin to lay eggs.   
For a simple illustrated explanation of the life cycle of this insect and photos of the male and female, here's a link -- http://www.monarchwatch.org/biology/cycle1.htm

Seven more to go!!

Mary Huey


Friday, August 1, 2014

Stopping at the "DOT" for set-in piecing tip

As those of you who have taken a Set-in Piecing Simplified workshop with me or used the teaching guide, Set-In Piecing Simplified may already know, not every sewing machine presser foot makes it easy to "stop at the dot"!!   Since I piece on a Bernina 1031 most of the time and the quarter-inch foot, #37, makes it easy to see right into the needle, I didn't realize what a challenge this can be with other presser feet.
In my workshops, I usually encourage students to try several different presser foot until they find the easiest one to use and achieve the "stop" easily.  What I've discovered is that isn't always possible.   
When part of the foot obstructs your view of the fabric directly in front of the needle, it can be frustrating.  So I put a different foot on my machine and set to work to find a solution.  And I think I have it!!

It will take some practice to feel at ease with it but I feel it's worth the effort to master it.  And here it is in a nutshell!

When the "obstructing" part of the presser foot connects with the "stop-dot" -- where my scissor tip is pointing -- STOP.  Now move forward one stitch at a time and counting the stitches -- one, two, three, . . .  -- until the needle arrives at or just before the dot. 
I had to lift the presser foot and crane my head around to see if I was there yet -- took a couple trials, but I finally arrived! 
And now I know with that presser foot for that stitch length on my machine, it is 4 stitches from the beginning of the obstruction to the dot.  On your machine, with your presser foot, at your stitch length, it may be a stitch less or a stitch more -- 3, 4, or 5 stitches -- but once you've figured it out, it will smooth out the process of stopping at the dot for you.

The counting didn't seem cumbersome to me -- after all, you have to be focused anyway to execute set-in piecing, so counting 4 stitches as the dot passed under the bridge on the front of this presser foot didn't slow me down.  Try it and let me know what you think!

And here's a peek at what I'm working on these days.

I think this idea will work with any piecing technique where you need to stop at a dot, whether you are using the Set-In Simplified technique discovered by one of my students, Mary O'Keefe, or not.  If you are curious about the technique, order the teaching guide!!  It's opened up a whole new world of designs for me to have a simpler way to stitch through Y-seams!!

So go try it out while it's fresh in your mind -- right now -- and leave me a comment about how it works for you.  If my instructions need to be clearer, let me know that, too.  And I'll edit this post to clarify.

Really, it will only take 5 minutes to find a piece of fabric, put a dot on it, and try it out -- you don't have to start a new project!!

Mary Huey


Thursday, July 31, 2014

Sharing more quilts!


It's time to share a couple more quilts -- they are on their way to Quilts of Compassion to be part of their distribution to tornado victims in Nebraska, August 12 through 18.

I made this quilt during the "testing" phase while writing my pattern, Seasonal Medallion.  Stupid name, but cool design. 
This is the back -- it was made from one of those "sacred" stacks that was living on the top shelf of my fabric stash -- you know what those are, don't you?  "looking for the perfect pattern" stacks? 
This is a retired teaching sample made with Marti Michell's Multi-size Kite Ruler.  If you have the tool, the pattern for the block is included in the instruction leaflet that comes with the tool.
The color combination was inspired by the floral print seen here and it's very simply quilted. Keeping the quilting simple is one of my best strategies for getting quilts finished.  It really cuts down on the "intimidation" factor for me!
I only had one yard of the floral and you are seeing every bit of it in this overall picture!!  When I first laid out the finished blocks, I noticed the potential of creating a churn dash block by using a cornerstone in the sashing and extended it out into the border. 
It feels good to pass these quilts along to other folks -- they are too nice to live in a pile on my guest bed!!  They need to be snuggled!!

How do you share your quilts?  Leave me a comment and on Saturday, 8/9/2014, I'll give away a copy of the pattern -- Seasonal Medallion!

Mary Huey


Tuesday, July 29, 2014

Monarch Feeding Frenzy

Back in the fostering enclosure, the Monarch caterpillars are giving us a run for the money.  There are currently five feasting on the milkweed stalks and it doesn't take long for them to strip them clean!!
The feeding caterpillars I have right now all hatched the same day and you can see they are getting to a good size -- about 2" long.
Are these two arguing about who gets to finish off this leaf? 
Before lunch.
After lunch.
This morning, two more have moved up to the top to begin the transformation to a chrysalis -- it seems to take about 24 hours.  I expect the last 3 to follow suit by the end of the day.
Then the top of the enclosure will be bejeweled with 9 of these gems.
Out in the milkweed patch, I've been keeping an eye on the spider nest -- the babies are growing -- they are now twice the size they were when I first found them, but the adult is no longer on the same stalk.  Really, they are bigger.
And I discover this amorous pair -- Milkweed Longhorn Beetles.  There are 8 species of this beetle in North American.  According to my little guide book, they are just coming into their season -- being more prevalent in August.  The adults feed on the tips of the leaves -- just like the picture?!? 
And I think the lightening bugs are having a good summer -- cool and wet might be their favorite weather.  I found this one hanging out until dusk when lightening bugs come into their own.  Did you know the adults don't eat?
Thanks to my friend, Carol, who also fosters for helping my daughter Alison keep them fed while I was off teaching and relaxing last week.  Alison released our first one a week ago today -- hopefully he/she is off making more Monarchs who will be destined to make the big migration south.

If you are enjoying this series on fostering the Monarchs, I hope you will let a few more weeds grow in your yard to provide food for caterpillars of butterfly species.  It's all well and good to plant nectaring plants for butterflies, but those plants aren't necessarily caterpillar food -- each species has specific plants it needs.  I let the violets overrun some of my flower beds to provide food for fritillaries and I've just planted service berry which I hope will attract red-spotted purple.  There is fennel and dill for the swallowtails.  Wild cherry and tulip trees host other species.  Here is a link to a site that lists a number of host plants for caterpillars -- check it out and inventory your neighborhood.  Then add some plants to your garden to expand the potential!  There's more to loving butterflies than just admiring them.

I hope the sun is shining in your part of the world!

Mary Huey

Here are links to my previous two posts about this adventure!


Monday, July 28, 2014

Back to home base!

I'm back from a relaxing week at the Chautauqua Institution in western New York.  Most of today will be devoted to unpacking and putting everything away, doing the laundry and catching up on business.

I'll miss the lovely surroundings and the friendly people but most of all I will miss my class!  Each afternoon, I spent 2 hours working with a lovely group of fifteen women from all over the United States.  My class was titled Women and Quilts Moving Westward.  
During the class sessions we hand stitched a set of Album (or Chimney Sweep) blocks which were commonly used as signature blocks in Friendship Quilts during the mid-1800's.  In addition, I shared experiences gleaned from reading women's diaries and journals of that period which invariable led to discussions about what it must have been like to be a woman and a wife during an era when men's opinions and goals dominated American domestic life.  
We also tried our hands at creating an applique motif without someone else's pattern to copy.  These are my six blocks and my two attempts at freehand cutting.  It's easy to tell the lower one is a leaf (oak, perhaps), but not so easy to tell the upper one is a "tulip" tree leaf -- I'm thinking it looks more like a turtle?   Or a reject?
I also shared an antique top I own from the fourth quarter of the 1800's using the same block design.
I can't recall how I acquired it -- did someone give it to me or did I purchase it?  I should quilt it because it looks wonderful spread out on a bed.
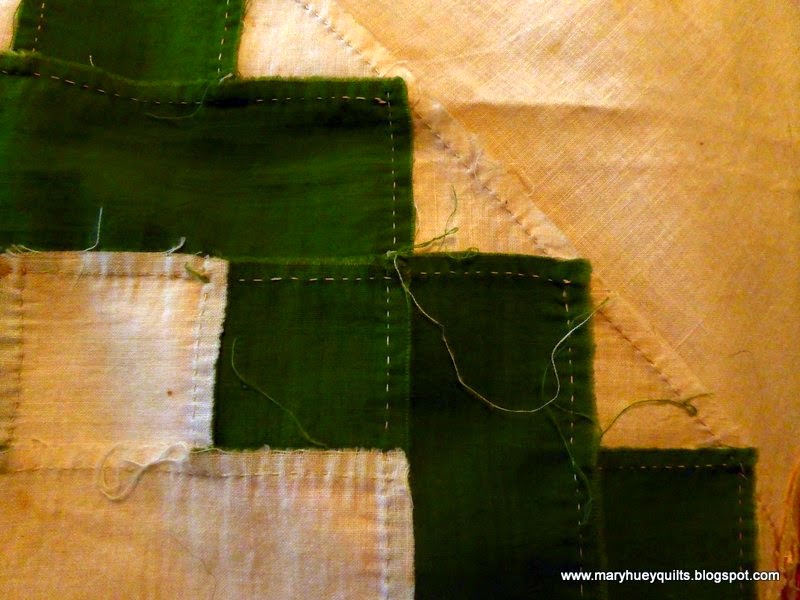
It is completely hand-pieced -- even the borders were added by hand though it does seem to be two or three batches of muslin and two different women's work.
And there are some terrific fabrics in this quilt top.  Just look!!


But this one was everyone's favorite without exception!

Last evening, we had the BIG SIREN alert for a tornado watch.  That was a new experience for me.  I don't recall ever hearing the sirens for anything other than the monthly test.  Tornados are rare in this region of Ohio.  Fortunately, we didn't experience more than wind and rain but it was truly unsettling.  I did find myself wondering if there was anything I should take to the basement with me other than my cat.  In the end I just took the cat, but this week I'll be packing up two quilts to send off to Quilts of Compassion for their trip to the Nebraska , 8/12 through 8/18 -- they still need 750 quilts!  If you have a UFO top that could be finished and sent off to them, they will be so grateful.  The easiest way to find all the pertinent information is their FACEBOOK page, Quilts of Compassion!  Remember, there's nothing like a deadline!!