Monday, May 12, 2014

QCQAL Block #5 with templates!!

I'm behind, no, I'm caught up!!  Intended to post this last week -- things got crazy and so it got delayed (along with a few other things).  The readers over at Little Bunny Quilts voted the most for Broken Dishes and not only is it a great scrap block, it's an easy block to cut and piece.
 
For a minute, I thought I would just do the 12" block.  But once I got started cutting, it wasn't going to take that much longer to make the 6" one, too -- though I did make it a slightly different layout as I didn't have the energy to cut 1" HST's.  Just needed one template for each block -- using Set B for the 12" block and Set A for the 6" block!
I layered 4 strips to cut 2 pairs of triangles -- bottom strip is right side up; second strip (background) is right side down; third strip (background) is right side up; and fourth strip is right side down. 
That way I don't have to match up anything -- just pick up a pair and stitch them together.
Soon they were stitched and pressed, ready to lay out for assembly.
I laid out the "4-patches" and then proceeded to chain piece them together.
By keeping the chain intact until after I've pressed, it save me some time getting the pairs to the next stitching step.
I only clip every other chain and keep the pairs attached -- helps me remember which side to stitch because I can stitch either side of the pairs, but only one side is right!!
Auditioning the final layout -- nope!! 
I like the balance of having the two warm colors (yellow & orange) in opposite corners of the blocks
I used Bonnie Hunter's little trick for pressing the center seams so no matter which way I turn a unit, the seams will be opposing where the units are joined.
And here's the 12" block -- once again I arranged the warm and cool colors to balance the block (in my opinion).  What's that?  The yellow got twisted -- good grief!  I'll probably fix it or it will make me crazy.
Working on this reminded me of a table runner I made years ago when teaching a color class.  It's one of my favorite pieces and is a permanent fixture on the side table in my dining room.  The objective of the exercise was to use as many prints as possible while maintaining a specific color scheme.  Can you tell what mine was?
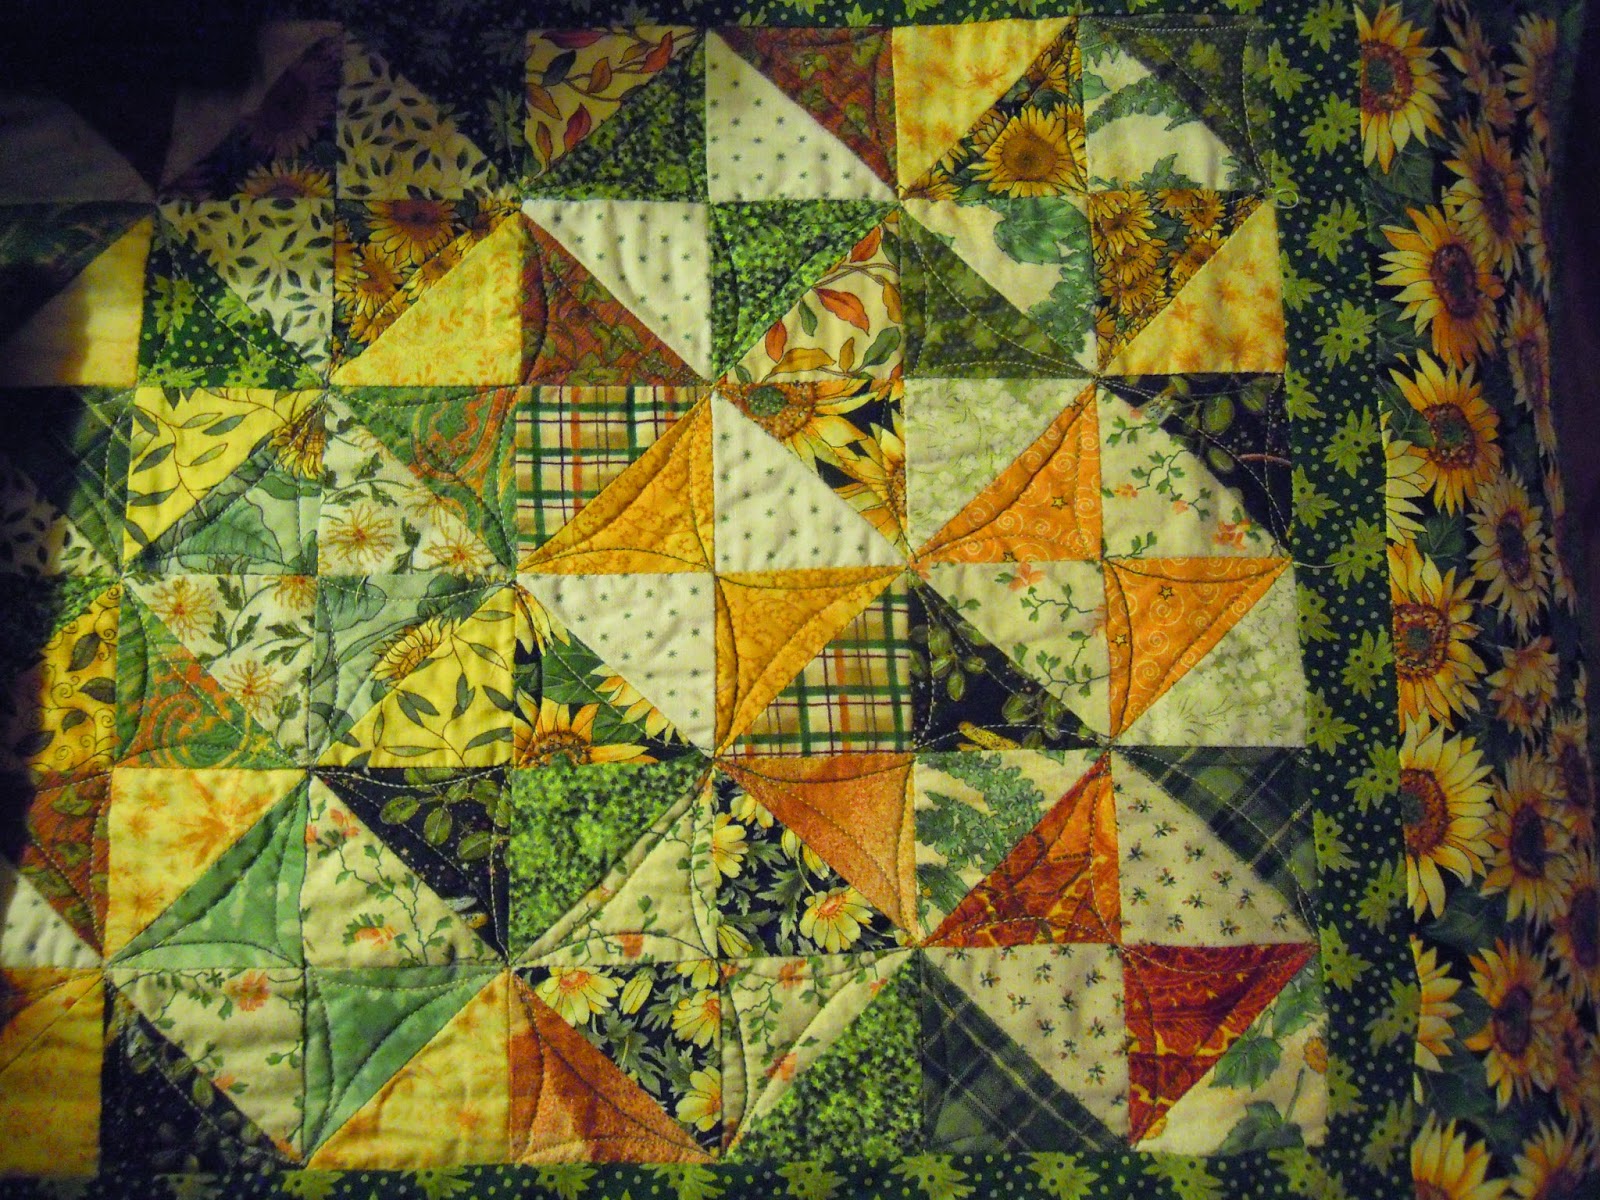
Now I can link up to the QCQAL Block Party #5 and see what everyone else made and cross of one of my little goals for May!!
 
If you are headed for Quilt Market in Pittsburgh this weekend, I'll giving a 30 minute presentation during Schoolhouse on Thursday (1:20 p.m.) about my DVD workshop, Set-In Piecing Simplified and I'll be hanging out in the Michell Marketing booth most of the day on Friday!  Stop by and say "hello"!
 
Mary Huey


Monday, May 5, 2014

UFQ's Assault Tactics

Welcome to my visitors from The Inbox Jaunt where Lori has been challenging us to use A Quilt Notebook to take control of our UFO's (or as I call them UFQ's) since the first of the year.   If you aren't aware of her series of "assignments", you can read all about them at The Inbox Jaunt as well as her wonderful FMQ (free motion quilting) tutorials which were what drew me to her blog originally.  She has graciously invited me to share some insight about UFQ's based on my experience (and I have lots of it!!)
Lori's assignment on Friday was to review our progress and she asked us how many UFQ’s we have – not sure I want to admit an exact number but it might convince you that when it comes to UFQ’s, I know my stuff?!?! 

Over the weekend I revisited my list, added a few more UFQ’s, and re-counted. . . . . . . (can you hear the quiet groaning . . . . it seems like I should be making more progress).  I’ve been dealing with UFQ’s since closing my shop, Erie Street Quilts in Willoughby, Ohio 9 years ago.  I’ve made steady progress as a once full shelf of the UFQ department in my sewing room has been given over to large fabric hunks because the UFQ's that lived there are finished (or gone)!!   One of the results of my progress has been to organize what I've learned about dealing with them into a four lesson home study course, UFQ ASSAULT TACTICS (and some pretty entertaining guild lecture programs).  This week, you have a chance to win a tuition free opportunity to participate in my program.  Read on!!
Hard to believe this is about 30 quilt tops -- the top shelf is big hunks of fabric -- the backing department!
Whenever I review my UFQ’s, I try to name the point at which I stopped working on a project – while I can’t always remember the “why” I can always see the stage at which I stopped.  I learned early on in my own quest that a list of these stopping points helps pinpoint recurring stumbling blocks giving one a better chance to gain control. 

Without a doubt, my biggest group of UFQ’s are tops ready to be quilted – and that in itself is a huge clue to my most common stumbling block.  As a teacher, I feel it’s important to do the majority of my own quilting so I can help my students with that aspect of making a quilt.  But for a long time I’ve justified not moving past this point of making a quilt because as a teacher, a quilt top is easier to haul around than a completed quilt.  (Two attitudes that don’t exactly complement each other, do they?)
Detail of a piece I finished with "big stitch" hand quilting -- now one of my favorite ways to "get it done".
There are 40 quilt tops on my list of tops ready to quilt (TRQ’s?) – really?  (But there were 72 in 2005.)  It was a productive exercise as I was able to thin out 5 tops to donate to charities – designating a reason to finish them will motivate me and some can be donated in an unfinished state.  37% of my TRQ’s have been made since I closed my shop in 2005 – I do much better these days at moving all the way through a quilt from beginning to end than I used to do.   I still have 17 tops that were made before 2005 – that’s getting pretty old. 
Lori’s advice in January to pull all our UFQ’s out and review them is a good suggestion but just getting them out isn’t enough.  To get fired up about old projects requires understanding why they aren’t finished already.  The reasons could be manifold – life interrupted your work flow, you didn’t enjoy the process as much as you thought you would, you hit a fabric blockade, you went back to work full-time, you got ill, and so on.

Finally off the shelf after about 25 years and proudly hanging by the back door!
 
If you make a comment on your list of UFQ’s about the point at which you stopped, it may reveal more than you expect.  Do you always seems to stop at the borders?  Are all the "clear color" projects finished tops or quilt and all the "muddy color" projects just heaps of pieces?  Both of those are true scenarios from my own experience and that of my students.  During the give and take of mentoring students through UFQ ASSAULT TACTICS, I can help quilters pick up on the subtle issues that keep us from finishing everything.

Here are some common issues (stumbling blocks) I’ve helped students through.
No time you say – 15 to 20 minutes a day of work amounts to 2 hours a week and that’s significant.
Not the skill you need – once again, 15 to 20 minutes a day of work on that skill specifically will yield marked results and in less time than you might think.  I machine quilt all my charity quilts because it improves my ability to design and execute machine quilting.  There’s more to developing skill than taking a class -- you have to do it often -- think practice the piano 30 minutes every day!!
Ran out of fabric – that is a creative challenge that will spur you on to step outside the box.  I ran out of fabric so many times in 2012 when I challenged myself to use a big hunk of my stash and still made some of the best quilts of my life (which I finished).  Now I look forward to running out of fabric!
I don’t like it anymore – then repurpose it.  Make it smaller – put an applique on it – chop it up and make a totebag or placemats.  Explore blogs and pinterest for fresh ideas. 
Not sure how to proceed -- asking questions of quilters who can do what you don’t seem to be able to do has been a good strategy for me.  I have a friend who moves through a quilt from start to finish most of the time.  She might have 3 or 4 unfinished projects at any one time (amazing?!).  Once I realized that the designing of the quilting was a stumbling block for me, I talked with her asking specific questions about how she approaches that part of the process.  Her answers gave me a completely different perspective and changed my approach completely to the design aspect of quilting a top.  Coupled with all the practice quilting I do on charity quilts, I now finish two dozen quilts a year. 

Detail of the BIG hand quilting project I finished this winter -- top made in early 1990's.  Yea!!!!
Knowing that a quilt with a purpose is more likely to get finished, I visit the “quilt top shelf” every time I want to give or donate a quilt before starting a new one.  Most of the time, there is a finished top sitting there waiting for a purpose and “ta-da” it gets finished.
Today my major goals as a quilt maker are to use all the best fabric in my stash (don’t want it to be a yard sale steal) and to have all the projects in my studio set into quilt tops with people’s names on them (so they aren’t yard sale steals either). 

I hope this helps you deal with some of the UFO's cluttering your life.

Mary Huey

Friday, May 2, 2014

Diamond Star Playtime Sew-Along - Step 6

How is your pile of stars growing?  I hope by now you have six to eight stars completed because it's time to put them up on your "work wall" and begin to make decisions about the direction your quilt is headed before doing more piecing.  You are going to become a designer!

There are two basic setting options for hexagonal blocks. 

The first group are "straight" settings where the star blocks only touch partially and there are open spaces that need to be filled in as you finish the top.  And I've been able to identify three variations -- there might be more. 

In the first one, the stars are stacked with the upper and lower edges touching.  On the right and left sides only the corners touch and there is a diamond shaped space to fill in.
In the second variation, the stars are oriented the same except that each row shifts to one side so the stars aren't stacked -- they are staggered.  There is still a space to be filled but now it is an equilateral triangle.
In the third variation, the stars are twisted so that instead of sitting on a flat side, they sit on a point.  The space that needs filled is a diamond but it lays horizontally rather than vertically.  As I look at this, we could also stagger this setting by shifting the center row up or down -- can you see that? 
And notice how different the stars look in the two orientations above -- that's one of the decisions you need to make -- which orientation do you prefer?

The other basic setting is a "honeycomb".  The hexagonal blocks are set edge-to-edge and staggered so there is no space between the blocks.  Each of the variations below represent a different orientation of the stars.  Can you see the difference?  Which do you prefer? 

Once you've chosen your preference for your blocks, we'll begin to discuss how to construct the fill-ins units needed and the fill-ins for the edges so they will be straight.

While you have your stars on the work wall, evaluate the colors you've used thus far.  I tend to keep repeating similar combinations so at this point I feel I need more green.  It's a gut feeling but since it's my feeling, I'm going with it!!  I plan to make at least two more blocks so I'll be able to accomplish that.  The mostly red/orange star really stands out, doesn't it?  It will be a natural focal point so I need to manage it's placement in the quilt top to control the focal point.  I'll move it around on the work wall until I'm happy with it's position. 
I really like the clean look of this group of stars so I'm leaning towards one of the honeycomb settings.  This color arrangement feels more balanced and I think that will be important to help maintain the clean look.  Notice that the stars with the gold print are opposite each other.  That loud red one is in the center.  If this is my final arrangement, I'll need two more stars for the upper right and lower left corners and they will need to complement one another. 

That's why I want you to get your stars up on the work wall.   If you leave them up for the coming week and look at them several times a day, the ideas will coalesce -- change what you don't like, emphasize what you do like.  Do you need to make a few more stars?
In my first 6-pointed star sampler (above), the edges of the blocks blur into the setting units and it's hard to see some of the stars -- that makes the piece interesting and it holds the attention of the viewer longer.

In the second one, I used the same background fabric for the first twelve stars.  When I put them up on my work wall, I loved the color palette, but it was too blah and choppy looking.  So I made more stars with different backgrounds to break things up a bit and create some interest.  The tumbling blocks floating through the quilt are part of the setting and I'll cover that along with other "filler" ideas in the next couple steps 
If you have a copy of Marti Michell's Volume 6, Six is for Hexagons -- look at some of the photos and ideas in that book.  And this is a link to my Pinterest board of ideas -- http://www.pinterest.com/huey0314/60-degree-diamonds/ -- check it out for inspiration, too!

So now it's your turn to experiment and audition.  Experiment with all the layouts covered above and see which one you like best.  Look at 6 pointed star quilts on Pinterest and Instagram for more ideas.  If I can be any help at this point, you can e-mail photos and questions directly to me as well -- maryhueyquilts@hotmail.com

Hope our weekend is pleasant everywhere and you can get out for a walk!!

Mary Huey

If you are having trouble finding the templates locally, you can order them directly from Marti!


Tuesday, April 29, 2014

Cutting Setting Triangles for On-point Quilt Blocks

With the end of the month looming, I'm organizing my head to set a few goals for next month and one of the finishes I'd like to accomplish is this basket sampler.  I made the 12" blocks a few years ago for a workshop with Marti Michell's Set M which can be used to make 12" 5-patch blocks.  Then when her Long Skinny Sashing Set came out early last year, I set the blocks together using that tool to make the sashed stars.  And since then, I've been hauling it around as a teaching sample for workshops based on her book, Machine Quilting in Sections.  But now it's time to finish it!
 
 Since I have it back out, I thought it would be a good time to talk about cutting the setting triangles for on-point settings.  I use two different approaches and I'll review each one for you.

In the first which I learned while taking teacher seminars with Mary Ellen Hopkins based on her classic book, It's Okay if You Sit on My Quilt, you need two measurements and plenty of fabric so you can cut big squares of the setting fabric to begin. 

For the edge triangles -- top, bottom, and sides -- you need to know the diagonal measurement.   A 12" square has a diagonal measurement of 17".

To this diagonal measurement, add 2 1/2"  to 3" -- so I need to cut mine 20".  Cut one square of the setting fabric for every 4 setting triangles needed.  Cut each of these squares on both diagonals as diagrammed below.  This keeps the straight of grain on the outside edges of the quilt making it more stable when it's time to add borders.  These triangles will be larger than necessary but I like having that extra "float" around the edges when lining up my border strips -- I can trim it down if need be though I seldom do.
The second measurement is the standard size of the block -- 12" in my case.   Add 2" to this measurement.  Again it's more than necessary but good insurance!  I always need two of these squares as each will be cut on just one diagonal to make 4 triangles for the 4 corners of the quilt.
The second approach is based on Marti Michell's tools.  Several years ago, she introduced Diagonal Set Triangle Rulers which allow you to cut setting triangles from strips.  The advantages of these tools is that you don't need to do any calculations and as long as you keep the straight of grain in the right place, you can cut your setting triangles from strips which sometimes is all one has left of the "perfect" fabric.
 
There are two styles -- this is the large size of the half triangle for cutting setting triangles for blocks that are from 6" to 16" square.  The card has complete instructions on how to cut with the ruler and if you undo the pink gizmo you see sticking out of the top of the card instead of cutting it off, you can re-attach the card to the tool so you'll know exactly where it is the next time you use the tool!!  The small size tool works for 3" to 9" blocks.  The corner triangles are cut with the same tool.  The ruler gets flipped in the cutting process -- once you've done it a couple times, you may not need to even read the instructions (though I always do just to be sure).
For those who don't want to "flip" the tool, there is now a pair of FULL Diagonal Set Rulers -- the large one is for blocks that are 5" to 16" and the small one is for 2 1/2" to 10" blocks.
To use the tools, you just need to know the finished size of the block!  You may not even need a ruler to get that number?  Each of the horizontal lines on the tools are labeled.  Here I'm cutting setting triangles for 7" blocks.  I start by cutting a strip of the setting fabric to match the line labeled 7" (though I usually bump it up a size just because I like that extra float). 
 
The first cut makes a triangle for one of the corners of the quilt -- no waste here!
This is the cut using the full size tool -- pretty simple!! 
With the half-triangle tool, it's the same approach -- cut the size strip listed on the tool.  Cut off the first corner triangle.  To align for the first side triangle, I flip the tool to this position and align the top corner to the existing diagonal cut and the top edge of the strip.
This is a close-up of that alignment!  Cut off the triangle along the edge of the tool.  And move down the strip cutting the number needed. 
 
The instructions that come with the tools are well illustrated and clear.  So look for these tools on your next shopping foray.  I have them here in my sales stock even though they aren't on the website so if you want one, contact me at maryhueyquilts@hotmail.com and I'll advise you of the cost and the shipping.

Back to searching for a couple more projects to finish in May!!

Mary Huey
www.maryhueyquilts.com


Friday, April 18, 2014

Diamond Star Playtime Sew-Along - Step 5

Welcome back!!  My collection of stars is growing -- how about yours?  While I intended to just make these stars for step photographing purposes, I seem to be building a new quilt.  The PDF for this step is here.  And if you are just discovering the Sew-Along, Step 1 is here, Step 2 is here, Step 3 is here and Step 4 is here.  It's not too late to join the adventure! 
Today, I'm going to share two star variations that bring hexagons into the mix.  This first one is very simple to piece -- no set-in seams again! 
If you are working with Set G, use these two templates. 
If you are working with Set H, use the large hexagon (#51) and the equilateral triangle (#52d)
Here's all the pieces cut and ready to assemble.  This big hexagon is ideal for a fussy cut. 
The piecing is all straight lines and I often make these as "leaders and enders" while piecing stars that require set-in seams.
The second star combines a hexagon for the center and the shape I call a "conehead" -- it's the 60 degree diamond with one point trimmed off.  Use these three templates if working with Set G
If you are working with Set H, all three of the shapes are combined on #52 -- you'll use #52a, the hexagon, #52c, the conehead, and #52 for the background diamonds. 
Study the "STRIP CUTTING CHART" included in the instruction sheet that came with your template set to determine the strip width needed and how to place the template on the strip.  That's a subtle way of forcing you to read some of the useful information that came with the templates so you'll be more comfortable with them in the future as you apply them to other projects.

This is one of my finished blocks -- you'll need one hexagon and six each of the coneheads and the background diamonds.  My coneheads are a set of "stack & whack" cut diamonds that I didn't yield an attractive center, so I trimmed them into coneheads.
You'll want to review the second half of the DVD workshop, Set-In Piecing Simplified to see how I work through dot-to-dot seams which is necessary at this stage.  So you'll need to chain piece into the first dot, pivot, stitch the seam to the second dot, pivot, and stitch off onto an "ender". 
Some instructions suggest you stitch every other conehead to the hexagon and then come back and insert the remaining three.  I prefer to work my way around the hexagon by adding a conehead, then the second adjacent conehead, and then attach the two coneheads together. 
Don't press any seams until the block is completely set together -- this makes it easier to keep seam bulk out of the way -- trust me on this one.
 Either approach is fine and has more to do with what you are comfortable doing.  So perhaps try both.  
The next few pictures will help you set-in the final conehead or if you are doing alternate ones.  I stitch the last conehead on one side first, remember it's DOT TO DOT.
Then I flip everything around and stitch the opposite "side" seam to the other conehead.  I have NOT joined the conehead to the hexagon yet. 
Then I come back and align the third edge of the conehead with the final edge of the hexagon. 

All the bulk shifts out of the way and you have a clear shot at the final seam -- DOT TO DOT!!  This is the same process I demonstrate on the DVD for setting rows of tumbling blocks together.
At this point, it only remains to add the six background diamonds and you have another finished star!!  To press this block, I alternate the swirls -- this is the center -- and press all the outside points towards the background diamonds.
 Here's a close-up of one of the conehead stars in my Pieceful Constellations quilt -- fussy cutting works very well with this design, too!
Time for you to try a couple stars of your own using these ideas! 

We'll take a two week break here and I want you to get the stars you have made so far all together and put them up on a work/design wall.  I'm not done with block ideas, but it's time to evaluate your progress so far and start to plan the setting of your sampler and decide what still needs to be added.  This is one of the sets I've been using as samples.  Putting them up will help me balance out the colors -- need to use more of the big floral and the greens.  And it gives me an idea of the scale of things thus far. 
 So next time, we'll look at setting options and decide on that before we move forward and learn to make a couple more stars and construct any fill-in blocks we might need.

As always if you have questions, post them below in the comments so everyone will learn along with you.  

Have a good day!

Mary Huey

All material Copyrighted by Mary Huey Quilts!

If you are having trouble finding the templates locally, you can order them directly from Marti!