Tuesday, April 5, 2016

First Quarter Finish #4

It's all finished and in it's new home.  I'm just home from a visit with my daughter and her family.  The piece was quilted when I left but I waited until I could try it out on the bed to be sure the size was okay before I did the binding. 
It looks a bit lumpy because the bed in the guest room has become a catch-all -- what a surprise?!?
My daughter is pleased with it and likes the simplicity of it and the fabrics I chose.  (Yea!!)
I took a number of pictures to share with you as I assembled it since I quilted it in three sections.
The quilting is simple and organic to enhance the overall design.
The leaves are in the lighter bands while randomly spaced lines that follow the zig-zag of the piecing fill the medium to dark value bands.
The large leaves were fun to stitch.  Each began with an arc from the pivot point.
Then back up the middle to the top adding three or four "veins" 
and an occasional "bite" before proceeding to the next pivot point. 
My sections were two sets of eight rows and a center set of six rows.  I quilted out to the outer edges of the eight  row sections and out to the final zig-zag seam of the edges to be joined to the center section which is seen below. 
I marked the center of the triangles along that edge to make alignment of the center section easier.
For the center section, I did not quilt the last row on both sides so that I could pull back the batting and lining during the joining of the sections as you see below.
This is a "four-layer" seam -- the backing and batting of the center section is pulled over to the left side and I'm stitching (with my walking foot) through four layers -- center section top (right side down), side section top (right side up), batting, and backing of the side section.
I did well with the alignment of the zig-zags and only nipped off a couple tips.
I find that working on my iron board for finishing the backing is best as the weight of the sections hanging down both sides keeps the layers spread open completely.
(The pieced section in the backing is made of the leftover pieces from the top.)
Before doing any trimming, I press the four-layer seam to one side and check the front to be sure there are no pleats or wrinkles.
I trimmed away the extra backing fabric (about 3/8" from the stitching line and smooth down the batting that is caught in the seam.
Now I smooth the other batting over being sure that it is laying flat and smooth.  Notice that the backing at the lower edge of the picture is still pulled aside.
Now I very carefully trim that batting to match the edge of the first piece.  This is the slowest part of the process as it's important to keep the cut smooth and not slice the quilt top.  I achieve a smooth invisible finish by moving the joining of the batting  about 1" away from the four-layer seam.  When I shared it with my quilting group after the three sections were together, none of them could find the joins -- no lumpy-ness!!
At this point, I can whip stitch the batting edges together or use a fusible batting tape -- Marti Michell makes both a 1" wide and 2" wide product.  I use the 2" wide in quilts.  Once again, slow and careful gives the best results to be sure the edges of the battings meet snuggly with no gaps. 
Finally, I'm ready to turn back the edge of the backing fabric and pin it in place for hand stitching.
Once that is finished, I headed back to "George" to quilt the joining area between the two sections, thankful that I haven't had to wrestle with all the bulk of the quilt for the entire process!!
And there it is -- finish #4 from my first quarter list for the 2016 Finish-A-Long over at SHE CAN QUILT.  The link-up for this quarter is pretty impressive with almost 600 finishes listed so far.
I'm pleased to have reached four out of six of my goals.  I did make progress on #5 (now a finished top instead of a pile of blocks) and #6 (in process but still 2/3 of the cutting and piecing to go).
I'm working on my second quarter list!!

Click HERE to see my original list for this quarter.

If you have any questions about this post, please let me know in the comments below.

If you need to muster up more courage to try this process yourself, remember that Marti Michell now offers a class on Craftsy to show you a variety of options for quilting in sections!!
Now through the end of April, Craftsy is offering a Pick-Your-Prize Giveaway -- the $100 value would cover a couple of classes!!

Mary Huey

** Some of my posts contain affiliate links and if you make a purchase via one of those links, I may get a small commission.  I only suggest products that I use and recommend based on my own experience.  Thank you for supporting my blog!


Friday, April 1, 2016

Selfish Sewing?!?

Over the past year or so, I've developed a blogger friendship with Australian quilt maker, Carla at Granny Maud's Girl.  Carla and I met during the 2015 Stash Bee and made blocks for one another.  For 2016, Carla decided to focus on a bit of "selfish sewing" and is doing a monthly feature, "Bee, Myself, and I" to share her selfish success -- you can read about it HERE.

Since most of my stitching this year has been focused on "goals" -- some for the 2016 Finish Along and some for the APQ 2016 Resolution challenge, I like the sound of Carla's idea!  So my selfish sewing this month has been to do something I really want to do with NO deadline!! 
And here it is!
I've been sitting on my hands about starting this project ever since I first saw it on Brigitte Giblin's website.  It's the Nundle Dilly-Bag (see it in glorious color HERE).  It's English paper pieced which I find relaxing and a good size bag at 22" across and 16" tall.  The hexagons are 1 1/2" so it will be a quick project.
My color inspiration came about while working through the blue shelves in my stash -- weeding out pieces, sorting what I keep back into stacks by value (light, medium, dark), and generally tidying the shelves up.  This morning glory print from Hoffman Fabrics surfaced with a bit of nostalgia about the old days when I owned a quilt shop.  As you can see, it's a subtle print -- the leaves are more gray than green and the ivory background keeps the contrast of the print soft. 
As I folded and sorted, I set aside any blue that looked good with the morning glories -- the darks were the most difficult to select since they look harsh but they might be needed so I pulled a few. 
I pulled some prints that will be interesting to fussy cut. 
And this "stripe" has possibilities suggested by Karen at Faeries and Fibres in recent post about using stripes in hexagons HERE.
This print is a charmer and there is a big hunk -- good addition -- lining perhaps? 
I want a bit of another color that will maintain the soft look -- I considered grays and greens -- greens won.  
This is one of my favorite prints from King's Road Imports back in the 90's -- I hope I can work it into my piece!  I hoarded a good size hunk of every color way they printed.
So here is the beginning of the base of the bag.  Not so sure about the dark hexies at this point, but the easiest way to be sure is to try.  You know that a basted hexie will never go to waste even if it doesn't make the cut!! 
I'm looking forward to hearing what Carla and her other friends have been up to for their selfish sewing during the month of March!!

To see what the other quilters have been doing for their "selfish" sewing, go HERE.

I hope your weekend has all the stitching time you want!

Mary Huey


** Some of my posts contain affiliate links and if you make a purchase via one of those links, I may get a small commission.  I only suggest products that I use and recommend based on my own experience.  Thank you for supporting my blog!

Tuesday, March 29, 2016

March Y-Seam Warrior Link-up!!

It's time to share your y-seam adventures again! 
 
 
I've been stitching up a set of seven posey blocks that I found while sorting through UFO's a couple weeks ago for the Orphan Adoption project hosted by Cynthia at Quilt Is More Fun Than Housework.  Who cuts out just eight blocks (one was finished)?
Since I chain piece through y-seams, I using them as sew-offs while working on other projects.
They are 6" finished and were probably a teaching sample at some point. 
 I could make a few more -- all the fabric is right there and they are very sweet. 
When they are finished, we'll see what they become!
I've followed Karen over at Faeries and Fibres for several years.  She is currently working towards a new EPP "follow along" for us called The Empire Quilt.  She's teasing us with peeks at sections of it. 
 Last week, she posted a detailed explanation of cutting stripes for hexagons.  When I asked her to share with the link-up today, she explained that she is coping with her own construction chaos and it has impeded her access to her computer.  So I offered to share it for her as part of my babble.
You can read her complete post by clicking HERE.
Even though she is speaking specifically about stripes and hexagons, her ideas apply to any directional fabric and other shapes.
 
My construction chaos is just about finished.  Now the painting fun begins?!?
I'm looking forward to seeing what everyone shares.  The link-up will be open for 5 days.
 
Mary Huey
 
P.S. Happily all my orphans were adopted!!
 
 
** Some of my posts contain affiliate links and if you make a purchase via one of those links, I may get a small commission.  I only suggest products that I use and recommend based on my own experience.  Thank you for supporting my blog!


Friday, March 25, 2016

Another deadline . . . .

I'm getting better at using self-imposed deadlines to motivate me to finish quilts.  I've been working on this quilt for my daughter's re-do of her guest room over the past couple months.  So I'm using the "deadline" of heading over there for a visit in a couple weeks to motivate it's finish.

I'm employing the techniques of breaking the quilt into sections which I learned from Marti Michell several years ago.  The quilt is in three sections at this point because it's easier for me to manage the bulk (the weight) of the quilt.  Section one is under the needle today.

Her book, Machine Quilting in Sections, was a ground breaker for me and I find when I'm showing folks quilts that I've finished this way, they realize they already own the book but have never had the courage to try the technique.  

Since it's nice here today, I dragged a few of the (monster) quilts I've finished using this approach outside for new pictures.  I did this Kaleidoscope in four sections.  Each was the size of a crib quilt!  Once I figured out the quilting design, each section only took one afternoon at the machine.
Zoom, zoom!!


I shared this basket sampler with you HERE -- my sections were more complex as I worked in diagonal  bands and added the border after the quilted center was finished.


This feathered star is without a doubt the biggest quilt I've tackled in sections.  All the borders you see at the "bottom" of the quilt are also above the feathered star center.  The quilt is Marti Michell's Feathered Star Medallion.  I quilted the center section -- feathered star with top and bottom pieced star bands.  Then the borders were added one at a time using a stitch and flip technique.
It's been a while since I quilted this one but I must have used tissue paper tracings to do that lovely leaf design in the kites -- it's too consistent!  I'll have to add this picture to my "quilting" ideas files for future reference!
It was interesting to read Lori Kennedy's post a couple days ago at The Inbox Jaunt -- she admitted to suffering from the same mental panic when starting a big quilting project that I experience.    She does such a consistent job of coming up with new free motion designs that I was surprised by her admission.  That makes me feel so normal.  
 
Those lines running down through the lightest zigzag were suppose to be interrupted with bubbles but when I got to the first one, I froze.  Change of plans!  Arcs are my comfort zone and so the bubble became a leaf -- arc down to the left, arc back up to the right and continue the straight line through the ellipse to the next spot -- leaves!!
The inspiration for the large leaves are my collection of Charley Harper posters which decorate my studio.  Holes in leaves are part of his art!
I need to quilt at least three bands each day to meet my deadline.  I'm excited enough about what is emerging at this point that I think it will happen more quickly!
 
Blessings to everyone for a peaceful Easter weekend!
 
Mary Huey
 
 
** Some of my posts contain affiliate links and if you make a purchase via one of those links, I may get a small commission.  I only suggest products that I use and recommend based on my own experience.  Thank you for supporting my blog!


Tuesday, March 22, 2016

Spring!!

Spring has arrived in Northeast Ohio and I took a break from so much stitching to go outside to enjoy some of it's sights.  I look forward to all these little experiences year after year in anticipation of living outdoors for the spring and summer.
 I have daffodils blooming about 3 weeks earlier than typical. 
They don't usually overlap with the Lenten roses but it's lovely to have so much color in the garden!
I even found a little clump of my early red violets -- not sure how they got here -- it's about 50 feet from where the original clump is planted.
I spent last Saturday getting my garden enthusiasm revved up at the local Master Gardener's annual spring workshop day.  This year they added a little vendors area and I scored these charming herb markers.  Fun, fun, fun!!
The garlic chives are already up, so I dressed them up with the butter knife.
I actually planted some peas on St. Patrick's Day (tradition says that's the right day for this).  The decomposed straw bales from last year were easy to prep -- now the waiting for the first green shoots begins.  I rigged up a wire cover to keep critters off the rows.
While wandering the yard collecting some pictures to share, I heard the red-bellied woodpecker calling from his tree.  It was fun to catch this picture of him surveying the yard after tossing out a beak full of wood chips from his excavations in preparation for the arrival of his lady.
And even a cool sunny day is perfect for drying the bedding outside!  Such a wonderful fragrance to cuddle down into a bed of sheets dried in the sunshine!!
And I can't resist pansies!  These are destined for the window box outside the dining room to be enjoyed from both the inside and outside (and hopefully out of the reach of browsing deer!).
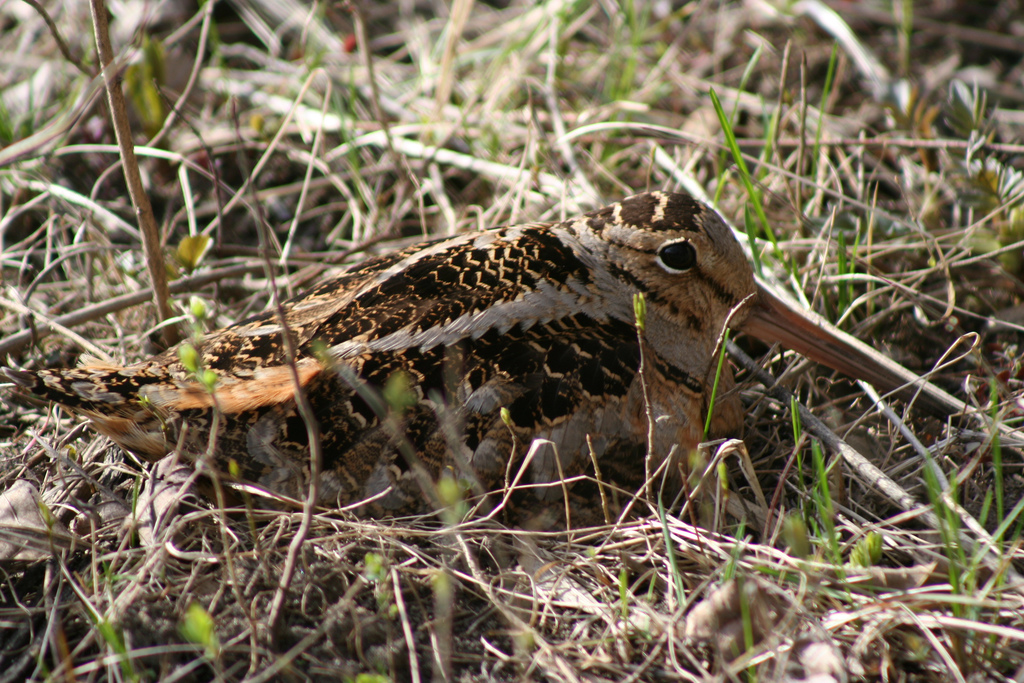
Last evening, I indulged in a whim to go looking for woodcocks courting!  During a walk in a nearby park early in the day, it occurred to me that one of the fields there might be good habitat for these elusive birds.  So at dusk, I returned to the park and within minutes I had found two of them calling and displaying!  Another spring ritual experienced!!
Do you have spring (or fall for my southern hemisphere friends) rituals that you look forward to experiencing?

Enjoy the week!
Mary Huey