Thursday, July 7, 2016

Nature in the Studio!!

How do you feel about spiders?  As one of the most numerous and varied species of creatures on the planet, I imagine we are never very far from one.  A quick Google search mentioned species numbers from 35,000 to 50,000 -- that's a lot of variety!  We tend to judge all of them based on the behavior of the scariest ones but I do find them interesting when viewed outside and when I know where they are.

Nicole of Lillyella Stitchery released this paper pieced pattern two weeks ago -- it has three block sizes and I was part of her test group.  I made the smallest block (8" more or less) and knew just what I was going to do with it from the beginning.
After tilting the block a bit and adding some more background, I began to build a habitat for this garden variety critter.
I used a blend of batiks and Kaffe Fassett florals.  While I didn't quilt it, I think the octagon shape of the finished block would be a great background for a web!!
At this point, the cherry tanager who has been waiting patiently for me to incorporate her into something got wind of what was going on and insisted on being part of the day's work.
So I started building a large block to make her the right size for the project.
More borders were needed and I worked in a splash of red with narrow strips.  The trick to making these narrow borders consistent in width is to measure the 1/4" from the previous stitching line (on the left) rather than the raw edge (on the right).  Works like a charm!
I added the red 3/4" strip to the black checkerboard, pressed the seams to the checkerboard print and then added the set to each side concentrically.  That meant leaving the end of the first border open (partial seam) until the fourth side was stitched and trimmed.
Then align the first border and stitch the rest of the seam.
It was a happy afternoon in the studio because I left with everything cut and ready to assemble two Easy Peasy Drawstring Back Packs when I returned.
The spider might be for my grandson, but the tanager is definitely for me!!
I even added a pocket inside of the lining for things that I don't want to fall clear to the bottom of the bag (like a pencil).
I've already taken the tanager out for a spin but I might need to do the same with the spider -- just want to see what sort of reaction I get from folks when they see a "spider on my back"!?!
You can find the Wicked Weaver Spider pattern HERE.
She also has a beautiful butterfly pattern for those of you who are spider-shy.
And the Easy Peasy Drawstring Back Pack HERE.
It's a good project for using up left over blocks and preprinted panels.
My grandkids love theirs.
These were the first two I made last summer -- check it out HERE.
Someone asked last week about the tools I use for paper piecing -- it's these three.
A wooden press, a small rotary mat, and the Add-A-Quarter tool which comes with an explanation of how to use it when paper piecing.
Paper piecing is not my favorite technique but these make it easier for sure and don't you know, I've been sucked into another project on Instagram with paper piecing but more about that next week.

Enjoy your weekend. 
If you need rain, I hope we get it.
And if you don't need rain, I hope you get sunshine!!

Mary Huey


Tuesday, July 5, 2016

Morris Hexathon Update

I added two more blocks to the Morris Hexathon line-up this weekend between watering and weeding.  This isn't one of the parts of the world that is experiencing too much rain.  Our average rainfall is 4" during June but this year, my primitive rain guage tells me we've had less than 3/4". 
 Not good at the beginning of the Ohio growing season.
 
#8 and #9 use just one template and for my smaller size blocks, that was H53 from Marti Michell's Template Set H for 1 1/2" and 3" hexagons.  If you are making the 4" blocks as directed in Barbara Brackman's instructions (HERE), then the 2" diamond from Set G will work -- no need to enlarge the patterns.
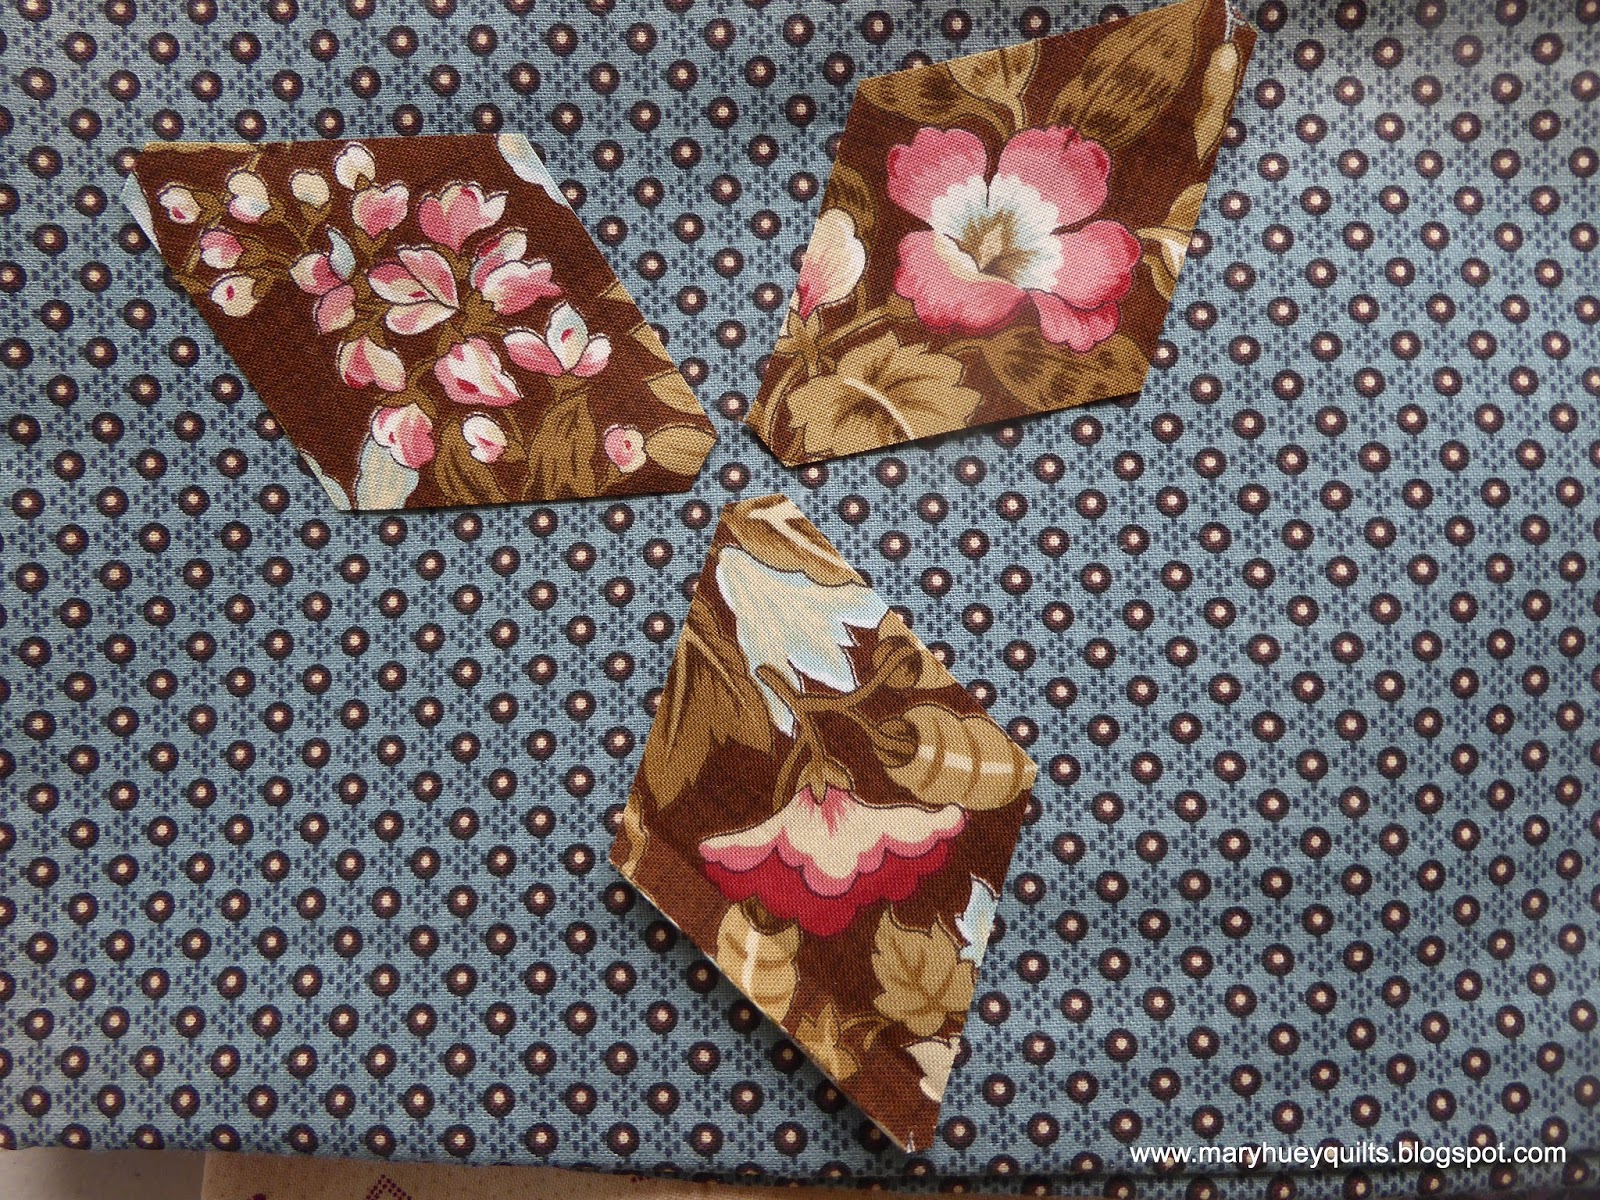
I had the idea I wanted to fussy cut three of the diamonds for the Greenwood block #8, but when I unfolded this piece of fabric, I discovered there weren't three repeats of any one motif.
Since I was cutting on the front porch and was loath to return to the studio to find a new fabric combination, I made do with what was at hand and cut three different motifs. 
 Lazy, yes! 
But a good strategy to use in a pinch.
To cut the blue diamonds, I used the "centering" lines on the template -- the dashed lines are the center of the piece and the solid lines enable you to use the template to cut half diamonds.
By aligning the dashed lines on the dots of the print, I maintained visual balance.  Sometimes I feel like a fussy quilter when I exert this sort of control, but I find these subtle visual imbalances disturbing so I control them as often as I can.
In the end, I recut one of the diamonds - to my eye, the upper left diamond (in the photo above) "stuck out" so I chose another single flower motif to blend in with the first two better.
There is a border of perennials across the front of the porch and the purple coneflower is just coming into bloom -- a fritillary butterfly was dancing from flower to flower while I worked and then suddenly there were two sharing this flower! 
I would have missed that if I was cutting in my studio!!
Barbara always shows several options for the color and value arrangement of the blocks which makes the posts interesting.  I was grateful for all the ideas and had to revisit #9, Red Lion Square, several times as I pulled fabrics.
 
This block illustrated the advantages of Marti's system of trimmed points -- no guess work needed to align the diamonds accurately!!
I started with four prints, but after several attempts to arrange them, I added two more and settled on this "tumbling blocks" arrangement of light, medium, dark. 
That way or this way? 
Once again, aligning the pieces is quick and accurate thanks to the trimmed points.  When I first started working with these templates 12 years ago, the trimming step aggravated me but once I realized how accurate my piecing became, I got over that!! 
Perfect!!  No pins. 
The only y-seams on this block were for the final assembly of the pieced diamonds. 
While I chained pieced through these two blocks, I made more "soap" bags for the garden using them as "sew-offs".  Slowly, I'm convincing some of you to try the "set-in piecing simplified" technique that is featured in my DVD and you are learning to embrace your y-seams!!
During my watering rounds, I discovered that the deer who has started to visit my garden too regularly had munched off most of the buds of the black-eye susan which are the foundation flower of my July garden.  I spent the evening planting "soap bags" in the hopes that he will leave the rest of them for me to enjoy.
Back in the studio, I added the two new blocks to the row that is growing around my design wall.
This past week, I began to plan my workshop for the regional quilt show in 2017 at Lake Farmpark in Kirtland, Ohio.  It's going to be a two-day workshop devoted to playing with hexagonal block variations and settings for them.  I've requested the dates of March 17 & 18, so if you live near Northeast Ohio and would like to join me for this workshop, let me know and I'll keep you posted!
 
If you don't live near, I do travel within the region and this two-day workshop will be ready to present in 2017.  If I can drive to you and you can arrange lodging, I'm game!
Ohio, Indiana, Michigan, Pennsylvania, New York, Kentucky, West Virginia.
Traditional quilters or modern quilters -- you'll all benefit from learning the easiest most accurate way to piece y-seams!
 
Mary Huey


Saturday, July 2, 2016

The Birds are Finished!!

Between the daily watering of my gardens to cope with the very dry weather here
and a week of happy days with my daughter and grandchildren visiting
I'm a bit off-schedule with this post but very happy with the results of the week!  We had a glorious week of fun and made some wonderful memories. 
 
This has to be my favorite -- a picnic supper with close friends and a "jam" session introducing my grandchildren to the joys of spontaneous music making!
My granddaughter has been studying the viola since September and the group ushered her into improvisation which was fun to watch.  My grandson is always up for re-enacting (they live on the edge of the Gettysburg Civil War battlefield) and got right into the singing along.
I still haven't stopped smiling!
 
Happily, parts of the garden are responding to my effort -- the cucumbers are quite happy.
The red currant bush is just about to overwhelm me with it's bounty yet again! 
And the black raspberries are going to be sweet if I win the competition with the birds to get there first! 
So to have finished my DREAM BIRDS quilt is a bonus!!
I hung it out on the clothesline this morning for some beauty shots! 
Most of the blocks were made by members of Hive #7 during the 2015 Stash Bee block exchange (read my original post HERE) organized by Alison over at Little Bunny Quilts using a pattern from Block Lotto -- HERE is a link to that pattern.
 
I shared the process for creating the setting of this quilt HERE.
 
The quilting is simple - a series of vertical graceful lines.  Every third line has a few of these bubbles inserted for visual interest.
I started at the center of the quilt and as I approached the side borders I decided to rotate the lines by 90 degrees for a faux piano key look.
I originally bought this cheerful bird fabric for borders but decided it would overwhelm. Instead I used half of it for the backing (leaving half of it for something else)!! 
This is the view from the patio of the quilt hanging at the back of the lawn -- made me think it would be fun to have a quilt hanging in the yard! 
 Nice backdrop for the quilt! 
Maybe I'll try that for my next garden stitching gathering? 
With this finish, I have managed to complete two of my six goal projects for the second quarter of the Finish Along 2016 -- I had hoped to do better, but the significant aspect of this finish (besides I love it) is that there was no date deadline -- that almost never happens.
 
Check out all the other FINISHES HERE -- very inspiring!!
 
It's Independence Weekend here in the USA -- I'm praying for a peaceful and quiet celebration for all of us.
 
Mary Huey


Tuesday, June 28, 2016

Fun Without Focus

As I've mentioned before, I'm easily distracted and it seems to be more prevalent during summer.
This weekend, I started quilting my wonderful bird quilt made with blocks from the creative member of the 2015 Stash Bee Hive #7.
I'm keeping it simple with wavy meandering parallel vertical lines.  I had hoped to be ready to bind by today, but . . . . . .
the milkweed outside the window at the quilting machine came into bloom.
That means butterflies!!  This fritillary was not easy to photograph.
But the yellow swallowtail was very accommodating.
I bounced back and forth between the machine quilting and organizing a border for the heart quilt to be donated to the Orlando MQG.  Have you checked out the #quiltsforpulse hashtag on Instagram yet?  Over 2000 posts and some very creative inspiring ideas!!
The top is set together and I've been piecing together a "piano-key" border.  Since I am using up scraps, I cut 6" strip rather than make long strip sets.  I laid out my stacks strips in an "opposites attract" order rather than a rainbow order.
The strips are random widths and a bit longer than needed to allow for trimming.
I like the way it's coming -- there will be a scrappy border of background fabric before the pieced border and I think some hearts in the corners for a simpler transition.
(Check out those Hexathon blocks in waiting down the left side of the design wall!!)
Then this arrived in my in-box -- I was part of Nicole's test group for her new pattern!!
Wicked Weaver!
Everything else stopped.  Since I had so much going on, I took the simple road with the fabric pull and used the texture from this Kaffe print for the body of a common garden spider.
I didn't take any progress pics but can report that I am pleased with the results.  This is the smallest of the three sizes included in the pattern.  I was impressed with the detail and accuracy of the design. 
Look at how those legs align?!?   
Check out the #wickedweaverpattern hashtag on Instagram -- you can do that from HERE on your computer!
I hadn't done paper piecing for quite a long time -- was delighted to find all my tools for it in the right place and to recall the "how-to's" from the past.  Want the pattern for yourself? 
Just go HERE!!  It's fun.
 
Back to the birds and the hearts!
 
Mary Huey