It turns out that a little production line stitching has been just the thing to perk me up over the past week!
 All those little tea wallets are finished!


It seems just as easy to make a half dozen as it is to make one and the positive vibes that come along with any finish is always good, right?
(I originally bought this pattern from Kindred Quilters via Craftsy but of course, that is all gone and my internet searches for the designer came up empty.)

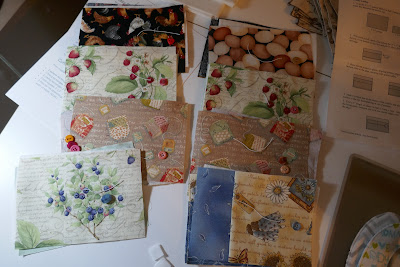
Since the energy was building, I tackled a stack of little (potential UFO) blocks that I made during the summer months as part of Kate Basti's #talltalesblockqal on Instagram.
She has designed these cute paper pieced blocks to look like a slightly open book. I started piecing the blocks with enthusiasm but after a half dozen fell into my usual cranky attitude about paper piecing.

Over the past week by setting daily goals, I turned the six blocks into Easy Peasy Drawstring Backpacks using a tutorial from the sewcanshe.com blog (HERE). I've used it to make bags for my grandchildren and daughters and myself - it truly is "easy peasy"!
First day, I pulled fabric to frame up each of the blocks and make the outside of the bags.
Second day, I pulled fabric to make the linings and cut all the pieces for each bag.

Third day, I added pockets to the linings, found matching threads, wound bobbins and
prepped all the tabs and casings.
Everything was sorted and stacked, ready for some production line work!
(The pocket is my add-on -- cut 5" by 6", clean finish the edges, press under 1/4" on sides and bottom edges, press down 1" on top edge, topstitch top hem, then stitch to back lining piece before assembling the bags.)

Days four and five, I assembled the bags and got them turned right sides out and pressed.

Day six -- time to face the music and make the straps -- never my favorite job but must soldier through and get it done or there would be six little UFO's still on my shelves!
Step 1- find my 1" Clover Bias Tape Make!
Thankfully, during one of my (rare) obsessed drives to organize the studio, I put all the handy but seldom used little tools in one drawer -- there it was -- waiting for me!

Time to dive back into the stash and pull fabric for the straps!

The straps have to be pieced and I know from previous experience to do a diagonal seam rather than a straight seam -- the straight seam does not pass through the tape maker easily if at all.

Of course, the instruction sheet for the tape maker is either gone or buried in that drawer but it just took one attempt to feed the fabric into the tool to remember that a point on the end of strip is necessary!!

Once I've started to slide the strip into the tool, I use a corsage pin to help it through the mid-section.

And here comes the pointed end!

Pull a couple inches through and get the folds straight and flat, then begin to press the folds.
Pull the tool away from the iron slowly following along with the iron.
It's magic!!

Soon, this pile of twelve strips . . . . .

. . . . . became this orderly pile of twelve straps!

Last step was to fold the strips in half and stitch along both edges!

It was so satisfying to stack up the bags and their straps as the afternoon wore on!

So the evening of Day 6 was spent feeding the straps into the casings and guides.
One done, two done . . . . six done!!
Their destiny is yet to be determined but I like having a drawer full of little gifts that I can use on a whim. Even grown-ups like these bags and as I was threading in the straps, I realized that if I skip the lower tabs and pull the straps up like drawstrings -- knitting bag!!

Not a bad week of stitching!
And that doesn't even include the socks that are on the needles!
One little pair finished and two big pair halfway down the first sock!

Do you need to see a baby picture again today?
Well I need to show you one!!

Hi, Grandma!!
The smiles and the gurgling are increasing every time I'm with them!
Hope you have a very stitchy week!!
Mary


