Tuesday, March 29, 2016

March Y-Seam Warrior Link-up!!

It's time to share your y-seam adventures again! 
 
 
I've been stitching up a set of seven posey blocks that I found while sorting through UFO's a couple weeks ago for the Orphan Adoption project hosted by Cynthia at Quilt Is More Fun Than Housework.  Who cuts out just eight blocks (one was finished)?
Since I chain piece through y-seams, I using them as sew-offs while working on other projects.
They are 6" finished and were probably a teaching sample at some point. 
 I could make a few more -- all the fabric is right there and they are very sweet. 
When they are finished, we'll see what they become!
I've followed Karen over at Faeries and Fibres for several years.  She is currently working towards a new EPP "follow along" for us called The Empire Quilt.  She's teasing us with peeks at sections of it. 
 Last week, she posted a detailed explanation of cutting stripes for hexagons.  When I asked her to share with the link-up today, she explained that she is coping with her own construction chaos and it has impeded her access to her computer.  So I offered to share it for her as part of my babble.
You can read her complete post by clicking HERE.
Even though she is speaking specifically about stripes and hexagons, her ideas apply to any directional fabric and other shapes.
 
My construction chaos is just about finished.  Now the painting fun begins?!?
I'm looking forward to seeing what everyone shares.  The link-up will be open for 5 days.
 
Mary Huey
 
P.S. Happily all my orphans were adopted!!
 
 
** Some of my posts contain affiliate links and if you make a purchase via one of those links, I may get a small commission.  I only suggest products that I use and recommend based on my own experience.  Thank you for supporting my blog!


Thursday, March 24, 2016

Another deadline . . . .

I'm getting better at using self-imposed deadlines to motivate me to finish quilts.  I've been working on this quilt for my daughter's re-do of her guest room over the past couple months.  So I'm using the "deadline" of heading over there for a visit in a couple weeks to motivate it's finish.

I'm employing the techniques of breaking the quilt into sections which I learned from Marti Michell several years ago.  The quilt is in three sections at this point because it's easier for me to manage the bulk (the weight) of the quilt.  Section one is under the needle today.

Her book, Machine Quilting in Sections, was a ground breaker for me and I find when I'm showing folks quilts that I've finished this way, they realize they already own the book but have never had the courage to try the technique.  

Since it's nice here today, I dragged a few of the (monster) quilts I've finished using this approach outside for new pictures.  I did this Kaleidoscope in four sections.  Each was the size of a crib quilt!  Once I figured out the quilting design, each section only took one afternoon at the machine.
Zoom, zoom!!


I shared this basket sampler with you HERE -- my sections were more complex as I worked in diagonal  bands and added the border after the quilted center was finished.


This feathered star is without a doubt the biggest quilt I've tackled in sections.  All the borders you see at the "bottom" of the quilt are also above the feathered star center.  The quilt is Marti Michell's Feathered Star Medallion.  I quilted the center section -- feathered star with top and bottom pieced star bands.  Then the borders were added one at a time using a stitch and flip technique.
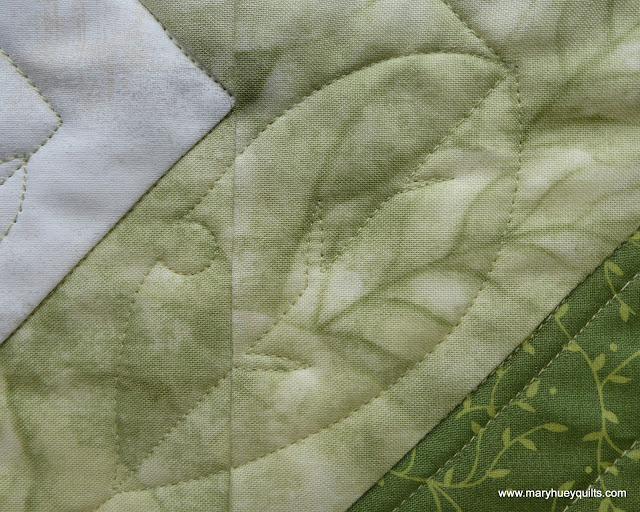
It's been a while since I quilted this one but I must have used tissue paper tracings to do that lovely leaf design in the kites -- it's too consistent!  I'll have to add this picture to my "quilting" ideas files for future reference!
It was interesting to read Lori Kennedy's post a couple days ago at The Inbox Jaunt -- she admitted to suffering from the same mental panic when starting a big quilting project that I experience.    She does such a consistent job of coming up with new free motion designs that I was surprised by her admission.  That makes me feel so normal.  
 
Those lines running down through the lightest zigzag were suppose to be interrupted with bubbles but when I got to the first one, I froze.  Change of plans!  Arcs are my comfort zone and so the bubble became a leaf -- arc down to the left, arc back up to the right and continue the straight line through the ellipse to the next spot -- leaves!!
The inspiration for the large leaves are my collection of Charley Harper posters which decorate my studio.  Holes in leaves are part of his art!
I need to quilt at least three bands each day to meet my deadline.  I'm excited enough about what is emerging at this point that I think it will happen more quickly!
 
Blessings to everyone for a peaceful Easter weekend!
 
Mary Huey
 
 
** Some of my posts contain affiliate links and if you make a purchase via one of those links, I may get a small commission.  I only suggest products that I use and recommend based on my own experience.  Thank you for supporting my blog!


Tuesday, March 22, 2016

Spring!!

Spring has arrived in Northeast Ohio and I took a break from so much stitching to go outside to enjoy some of it's sights.  I look forward to all these little experiences year after year in anticipation of living outdoors for the spring and summer.
 I have daffodils blooming about 3 weeks earlier than typical. 
They don't usually overlap with the Lenten roses but it's lovely to have so much color in the garden!
I even found a little clump of my early red violets -- not sure how they got here -- it's about 50 feet from where the original clump is planted.
I spent last Saturday getting my garden enthusiasm revved up at the local Master Gardener's annual spring workshop day.  This year they added a little vendors area and I scored these charming herb markers.  Fun, fun, fun!!
The garlic chives are already up, so I dressed them up with the butter knife.
I actually planted some peas on St. Patrick's Day (tradition says that's the right day for this).  The decomposed straw bales from last year were easy to prep -- now the waiting for the first green shoots begins.  I rigged up a wire cover to keep critters off the rows.
While wandering the yard collecting some pictures to share, I heard the red-bellied woodpecker calling from his tree.  It was fun to catch this picture of him surveying the yard after tossing out a beak full of wood chips from his excavations in preparation for the arrival of his lady.
And even a cool sunny day is perfect for drying the bedding outside!  Such a wonderful fragrance to cuddle down into a bed of sheets dried in the sunshine!!
And I can't resist pansies!  These are destined for the window box outside the dining room to be enjoyed from both the inside and outside (and hopefully out of the reach of browsing deer!).
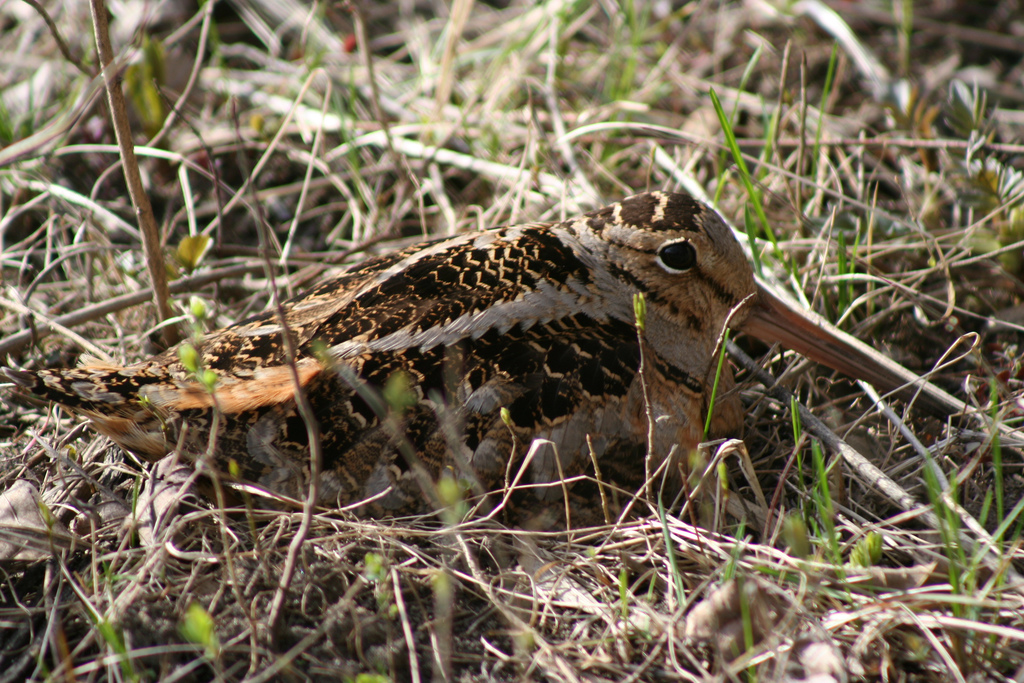
Last evening, I indulged in a whim to go looking for woodcocks courting!  During a walk in a nearby park early in the day, it occurred to me that one of the fields there might be good habitat for these elusive birds.  So at dusk, I returned to the park and within minutes I had found two of them calling and displaying!  Another spring ritual experienced!!
Do you have spring (or fall for my southern hemisphere friends) rituals that you look forward to experiencing?

Enjoy the week!
Mary Huey


Friday, March 18, 2016

Calling all "Orphans" and "UFQ's" -- it's adoption weekend!

The link-up is live now over at Quilting is More Fun than Housework!!
Quilting is more fun than Housework
The new windows are installed and so I can begin to put the studio back together.  Part of that process has uncovered some more UFQ's and I challenged myself to let go of at least 10% (or 4).
I turned four over to my charity quilt making gang!
And I have four (small) projects to give away!

The first is a pair of charming prints -- I think they are hankies.  They were suppose to be pillows for my little girls' beds.  My little girls are now 43 and 40, so I'm thinking it's time to pass these along to someone who has little girls.  The prints are 9" square and there are borders on them which could be removed easily.  First person to ask gets them -- leave a comment below!
The second one is a set of blocks with some extra fabric.  The framed center block is 18" square and there is a batch of heart blocks (4 1/4") and a batch of rail fence blocks (3 1/2").  Let's just say this project ran amuck a long time ago and I'm tired of being reminded about that so it needs to go.  There are 8 pieces of fabrics from 1/4 yard to 3/4 yard.  It would be lovely if someone could repurpose this into a small quilt that will be donated to a fund raising event.
Are you up to the challenge? 
Leave me a comment and it's yours! 
Here's another item that needs to be re-homed.  As you can see it's a Baltimore Album block with a ruched flower -- hand appliqued.  It was rejected from my daughter's heirloom quilt (finally finished) but I can't just throw it away.  It's 16" square and the background is unbleached muslin.
Can you use this in one of your quilts?
Let me know and it's yours! 
My final item is a hoard of placemats.  I worked part time at SurLaTable after I closed my quilt shop and collected these to use for purse projects.  While I did use many of them I discovered during the pre-window installation tidy-up, that I didn't use all of them.
They could be yours to do something clever with!!
Just leave me a comment and I'll send them off to you!
So there we go!  I'm eight UFQ's lighter thanks to Cynthia's Orphan Adoption Link-Up!!
Click HERE to get over to her blog and see what else is up for adoption.

Have a piece filled weekend!

Mary Huey


Tuesday, March 15, 2016

Some Template Tips

The construction continues around my house but it's out of my studio and focused in the living room at the moment.  A new mantel piece has been added and a unsound wall above it has been repaired.  Interesting that light brown outline around the drywall patch is the "shadow" of the woodwork  that must have been around the window that was there when the house was new -- no fireplace, it's an add-on!?!
Always fun to discover more of the house's history.
That gave me time to finish my preparations for the Glitter workshop I'm teaching on Thursday.
I usually spend a few days before teaching a workshop actually working on the pattern and skills being taught to get my brain totally engaged with the topic.  I also decided to demonstrate a second block from Jen Kingwell's book, Quilt Lovely since everyone had to buy the book for the workshop.
Mrs. Bannister's Stars is another y-seam pattern and it's presented as a pillow (cushion) cover -- aka, small project, less likely to become a UFQ!! 
I don't usually make samples in the same fabric palette as a book or pattern photo, but it was the easiest way to go this time. 
I did make a diversion by using a single color group for the very pointy diamonds.  This assortment of grays spans 25 years so the variation in the tones is extensive.  It will be okay since none of them will touch each other in the finished piece.
There are beginning to be templates for Jen's designs in this book if you piece in Australia but all the pattern pieces needed are included on a large foldout in the book.  1/4" seam allowances need to be added if you are making templates for rotary cutting (that would be me!).
The first step is to trace the pattern pieces onto template plastic and you can see that I use a straight edge to do that.  My pencil lines are EXACTLY on the pattern lines.
I also extend them beyond the ends of the piece like this -- so helpful is you want to add holes for marking dots later.
Be sure to leave plenty of space between for adding the 1/4" seams as you cut the templates.
Here's a tip from Denise at Mercantile on Main in Coshocton, Ohio!
Glue this sheet of plastic to a second sheet of plastic.  An ordinary glue stick works fine.
I cover the entire pattern shape out beyond the lines to get good adhesion.
This builds up enough thickness of the template to guide the cutter blade more accurately and has eliminated ruining the templates sliver by sliver for me.
Once the glue is dry, you are ready to cut the templates out.  I use a rotary cutter that is set aside for paper and plastic (aka, old blade).  I find that putting a sheet of scrap paper under the template plastic makes it easier for me to see my lines when cutting the templates.
I lay a rotary ruler on top with the 1/4" line just inside the edge of my pencil line.  This give me the most accurate results as I use the templates.  Turn off all distractions and focus on what you are doing.  This is important so that you DON'T FORGET TO ADD the 1/4" seam allowance.
Here's a cutting tip because two layers of template plastic can be hard to manage. 
Typically, the angle of your cutter will be about 45 degrees as illustrated below.
But I found that by lifting the cutter to more like a 80 degree angle, I had more control of the cutter as it moved across the template plastic and keeping my index finger directly above the blade, it exerted enough pressure to cut through both layers the first time.
If you hold the cutter too flat and don't use your index finger to exert pressure where the blade make contact, it will take multiple passes of the blade and it will be difficult to achieve smooth edges.
Since I've worked for so many years with Marti Michell's templates, I have become accustomed to the "engineered" trimmed corners -- they really help with the alignment of pieces!!
So when I can figure it out, I trim the corners of the templates before using them to cut fabric.
Lay the templates out with the edges that will be sewn together matching.
Then flip them together as if you are putting right sides together for stitching and trim off the template corners that stick out.  The lines extended beyond the corners help me align the pieces properly.
Time to cut the fabric!!  I used another Marti Michell trick here -- use the template to measure the width of the strip.  I needed three of these black strips for four blocks.
And how cool is it that when the template is twisted around, it butts right up to the last cut!?!
I've only stitched enough together to be sure my templates were accurate.
Wahoo, success! 
Okay to go ahead and cut the rest of the pieces.
Those grays are going to be just fine.
 
Mary Huey
 
**There are affiliate links on my blog so I may get a commission when you use them to purchase an item that I recommend.  Thanks for your support!!


Friday, March 11, 2016

A little Chaos

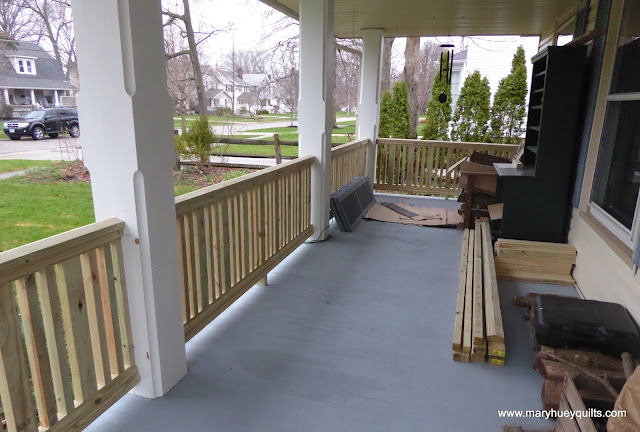
There is a little chaos in my house at the moment -- it's the good sort of chaos even though I'm no enjoying it!!  I've hired a carpentry crew to do some small repairs and upgrades around my home.  They are moving through my list in good order -- some of it will be apparent but most of it is part of the joy of owning a cozy old house.  The challenge for me is to stay out of the way so they can work and still be available for consultations.  Not surprisingly my stitching for the week feels disjointed.  At the moment, my studio is covered in plastic ready to receive two new windows while the sun is shining Friday!   
One of my students suggested to me recently that I share how I shop and it seems like a good topic for today.  I suspect I shop differently than many quilters since I owned a quilt shop for 26 years.   When I began collecting cotton fabric, it was not as abundant or diverse as it is today so it sometimes became more hoarding than thoughtful shopping.  Yellows were so scarce that I bought every one I encountered.  Backgrounds prints -- mainly white and beiges -- were another item that never seemed to be abundant. 

Today, the volume of fabric being produced is overwhelming and there's always something new on the horizon.  Certainly the color palettes and the print styles have expanded and evolved but that's always going to be the case.  So in my mind, the answers to a few specific questions can tell you a great deal about the best shopping approach for you.  So here are the questions and my answers.  Then I'll share what I believe that means for me.

How much fabric do you own? 
 A LOT!!!  I know a couple people who have more, but I estimate my stash to be somewhere in the vicinity of 2500 yards.  A good way to understand that quantity is to determine how many full size quilts could be made with my stash -- if a full size quilt uses 17 1/2 yards (top and backing) of fabric, I have enough to make 142.85 quilts.  Whoa?!?!  That's intimidating but I'll never run out of the stuff so that's good!!
 
What size quilts do you make? 
At this point, over half the quilts I make fall into the large laprobe/twin size range.  There are only a couple full size quilts in the course of an average year and the rest are small projects like pillowcases, tablerunner, bags, placemats, etc.

What is your work style? 
I use a large variety of fabrics in each piece I make -- generally 25 or more.  I work with a variety of fabric styles but there are some which I ignore completely -- batiks for example.  As a result of my quest during 2012 to use 212 yards of my stash, I developed lots of flexibility, tolerance, and some creative strategies for using what I already own.  I continue to shop first in my stash.  If I have one weak area, it's feeling comfortable with many of the modern prints -- sometimes they feel too busy for me though I suspect it has more to do with the limited range of values available. 

So how do I see those three answers impact my shopping strategies? 
 As a shop owner (with a budget that could not be ignored if I wanted to maintain a profitable business), I shopped first to fill the gaps in the shop's color and value palette.  That's the way I manage my personal stash, too.  For example, I love blue and hoarded lots of it while I had the shop -- as a result, I don't need it so generally I ignore blues (unless it is absolutely fabulous).  I think it's a good strategy and I'm able to pull a good range of any color from my stash.  As a color begins to dwindle, it comes back onto the shopping list -- currently that is green -- I use it a lot and my assortment has gaps in value.  This quilt for my daughter is 70% from my stash and because she had very specific guidelines for me, I bought more than I generally do for one project.
Second on my shopping lists are new color palettes and design styles.  Two areas where I have been building my stash are grays and text prints.  Adding these two groups to my stash has enabled me to update the look of my work by blending them into the fabric assortments I already own. 

 I use a wide variety of fabrics in every quilt I make and since most of my quilts are not large, I tend to buy fat quarters and half yards.  If it's a print that I like but don't see it being very flexible, I get a fat quarter.  If it looks like something that will work with lots of my other prints, then I get a half yard.  If it's fabulous, I'll buy a larger piece but at this stage of my quilting career, I try to have a "purpose" in mind for those -- after all, there will soon be something else that is just as fabulous!!

Since I already own so much fabric, I never buy kits (though I could make quite a few from my stash!!) and I rarely buy entire collections. When I do buy a collection (usually a layer cake or a fat quarter stack), I have something specific in mind and use it soon!! 

Everyone is going to have a different shopping approach.   The most important aspect of your approach is that it satisfies the needs you have when you start a quilt!
So, Erin -- there it is.
Hope it helps!!
 
Mary Huey