Friday, June 10, 2016

My Morris Hexathon Blocks -- Piecing Update

Have you succumbed to the Morris Hexathon?
Yesterday, Barbara Brackman wrote a very interesting piece on her BLOG (HERE) about the fussy cutting one of her followers is doing for the Morris Hexathon blocks plus sharing insights about the unifying aspects of Morris' designs.
Earlier this week, I spent an afternoon getting caught up with my versions of the first five blocks.  I had to rework a couple of them because I was having some (self-inflicted) size consistency issues.  By the end of the afternoon, I had all five blocks pieced and on the design wall so I'm ready for #6 this Saturday.
There are two reasons I'm having size issues.  The first stems from my wanting to machine piece the blocks using my Marti Michell templates (Sets G, H, and N) instead of making templates.  The second issue is because I am technically challenged and can't understand the instructions for copying/translating/enlarging the patterns from the blog post to a printable file.  So I am printing out the patterns at the size they "copy-and-paste" from the blog post which is 3" finished rather than the 4" intended size.
So for those who I might have led down a "primrose path", here is how I've resolved my issues using the templates. The quickest way to determine which template to use is lay a template on top of the pattern.
So H52d worked for Block #2, Crystal Palace.
Template 52 also worked for Block #5, Upton -- 52a for the hexagon
and 52e for the half-hexagon.
I showed you how I used this little combination template from Set N to make Block #3, the Camelot Star -- you can revisit that post HERE -- you recall that my first one was too big for the others I'd made.  It's now in the orphan block stash and this is a second one in the same fabrics -- smaller and the correct size!
#4 had the most pieces and I used G48 -- my post about this one is HERE.  Once I made this one, I realized I needed to go back and re-do Camelot Star and #1, Westminster Star.
I don't have a template that matches the diamonds and half diamonds needed for Westminster Star.  I had "too small" and "too big".
I do have the skill to rotary cut 60-degree diamonds though!!  I began by measuring the distance between the parallel (opposite) lines of the diamond and adding 1/4" seams to both sides -- 2" in this case.  That is the cut width of the strip needed.
Now I used the 60-degree line on my rotary ruler
aligning it with the raw edge of a 2" strip (as below).
The end of the strip is trimmed off to set up the correct angle.
Now I twisted my mat around and measured 2" down the strip from the angled cut. 
Perfect 60-degree diamond! 
I used one of my 60-degree diamond templates to trim the points of the pieces.
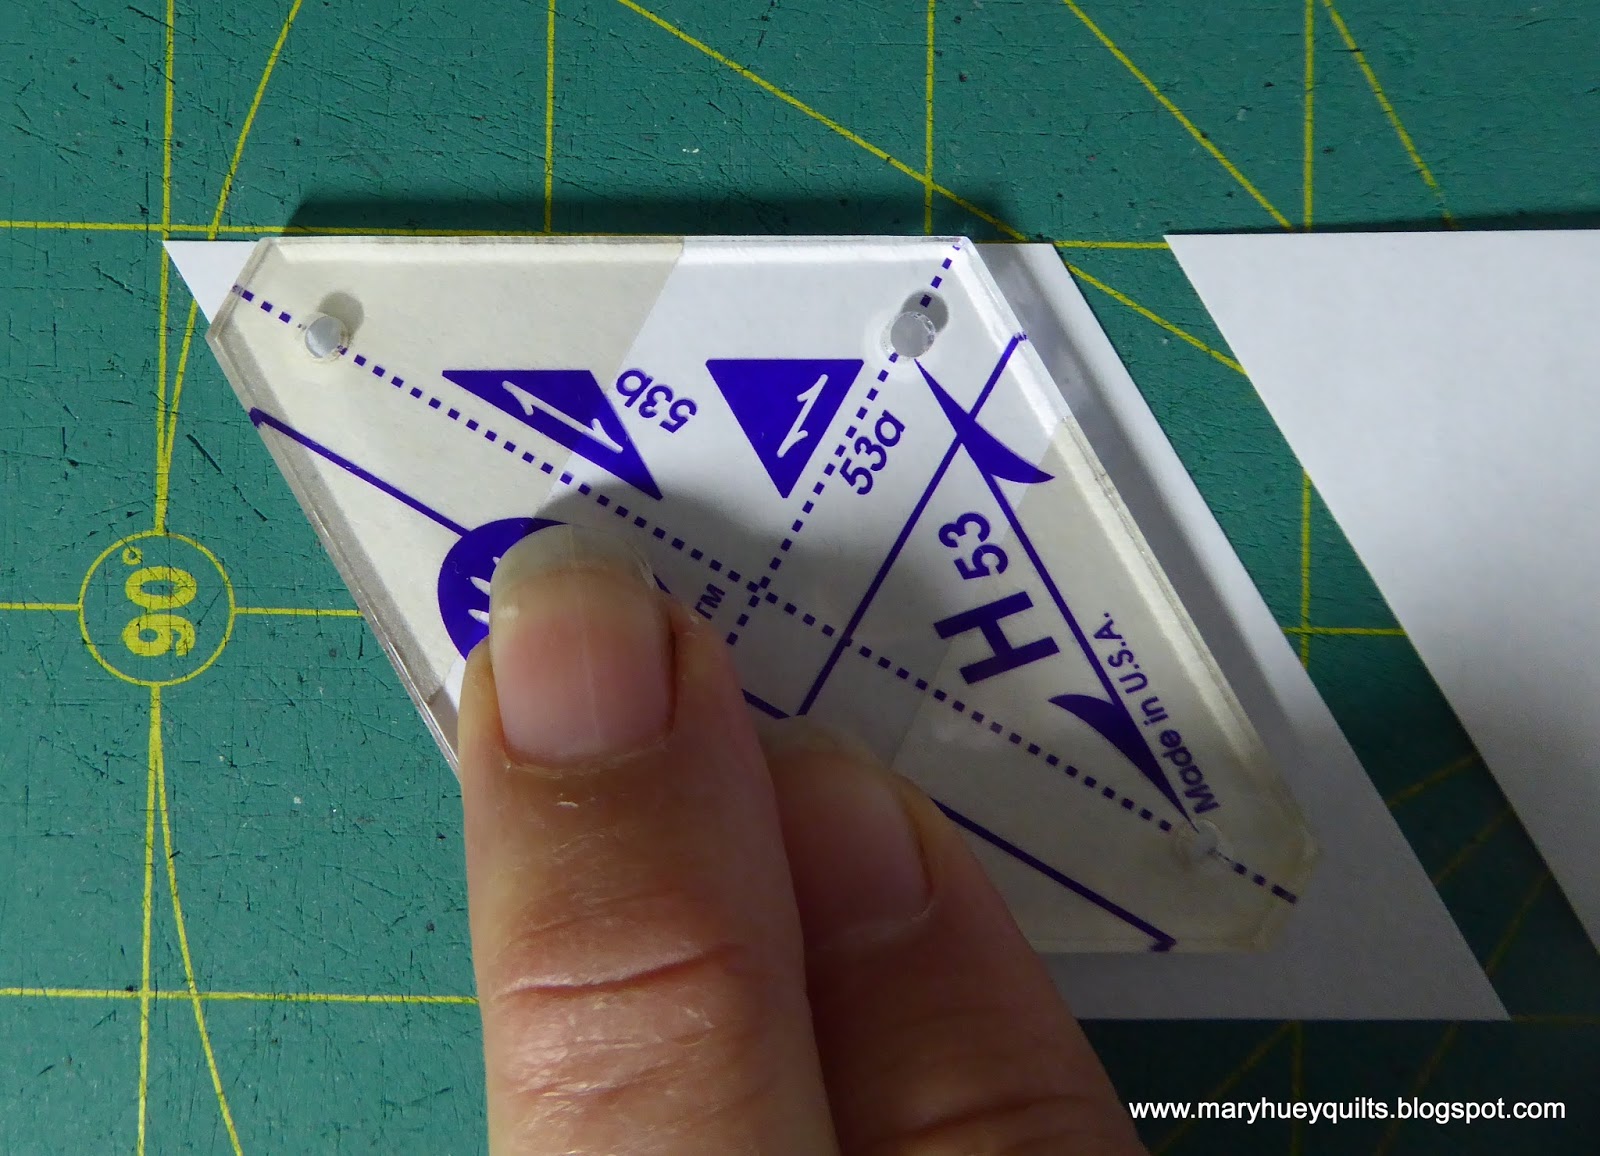
This eliminates unnecessary bulk and improves alignment as I piece the block. 
I can also use the 1/4" dot holes to mark the needed dots so I know where to stop stitching for the y-seams. 
And here is what the diamond looks like ready to be stitched. 
I made a temporary template for the half-diamonds.  To start, I marked dots at the pointy ends -- orange in this photo and used those to align a ruler with 1/4" grid lines.  This adds the 1/4" seam to the center of the original diamond -- slicing it down the middle doesn't work but you can see that? 
I sliced off the unneeded portion
and once again used a template to trim the tip for easier piecing. 
Here are the two templates needed and the finished Westminster Star! 
Barbara promised last Saturday that there are harder blocks coming so we'll see how I fare with those.  In the meantime, I'm happy to be enjoying y-seam piecing.

Here's to a stitching weekend!!

Tuesday, June 7, 2016

A New EPP Workshop Project

Last week, I scheduled an EPP (English Paper Piecing) Workshop at The Sew'n Place in Fayetteville, PA during my August visit with my grandchildren.  I wanted to have a small project that gives students a chance to try the technique for the first time without overwhelming themselves.
My inspiration was these darling Jelly Clips by Lecien which I hoarded on a recent shopping trip.  Have you seen them?  They come in three sizes and a delightful array of summer colors!
I have seen a few finished projects on Instagram using patchwork covers.  I used the largest clip for my sample and made pieced fabric with thirty-five 1" hexagons.  The pattern which is included with the jelly clip was my guide for the patchwork.
Instructions are included with each clip however they are in Japanese but that is not a problem.  Happily Lecien provides English instructions for the jelly clip purses on their website HERE.  There is an appropriate sheet for each size of clip.  Notice that I pulled the seam allowance of the hexagons loose and pressed them out before adding the fusible interfacing to the wrong side of each layer.
The assembly is simple -- there are a couple darts on each piece to contour the base of the bag.
The outside and the lining are stitched together and then turned right sides out.
But then, the final assembly requires G-L-U-E?!?!?!?
I am not a fan of glue -- don't like messy fingers -- but I did have the good sense to look on-line first and see if anyone has created video instructions for this stage.  What a relief and bless this gal's heart!!  I watch this video (HERE) how to twice and then waited (okay, procrastinated) a few hours before mustering the courage.  She demonstrates the complete process and includes supply suggestions.
I did the back side first and it went okay.   It was actually easier than I expected!!
So I forged ahead and did the front.  The glue did not dry instantly and allowed me to push things around to make adjustments -- not like working with a super glue.
I used a heavy duty jewelry finding to attach the strap to the purse which measures about 7 1/2" deep and 8" wide.
A 2" strip of coordinating fabric folded twice to make a 4-layer strap went together quickly.  I almost forgot to fold in the ends for a finished look.
Now to edit the workshop description, finalize the supply list, and everything is ready to send off.
I took it along to show my Wednesday afternoon sewing buddies and they pronounced it to be "cuter in person"!!

If you are one of my followers in southeastern Pennsylvania, this hand-stitching workshop will be Monday, August 8 from 1 to 4 p.m.  We won't get the purse finished, but I'll include a demonstration of the final assembly.  I'm also working on a pillow project option and will share that with you later this week.

Mary Huey

** There are Affiliate Links in this post -- using them results in a small commission for me -- thanks!! 


Friday, June 3, 2016

Morris Hexathon Block #4

It's been a week of enjoyable projects here but none of them have involved stitching so I haven't finished block #4, Box Hill for my Morris Hexathon (go HERE to read Barbara Brackman's post) but I want to share what I've done so far.

Box Hill is a scenic view in Surrey, England -- if you are a Jane Austen fan, it's where Emma speaks rudely to Miss Bates and is called out by Mr. Knightley -- "badly done, Emma, badly done".
As I said in my first post about this project, I'm using Marti Michell's Set G -- the templates are smaller so my blocks are smaller.  There are two reasons I've taken this approach -- I don't want to make templates and I can't figure out the instructions for translating the patterns from the blogpost into the right size -- don't have in-house tech support?!? 
(Erin, if you are reading this, I need you!!)
So for this block it's G48, the 1" finished 60-degree diamond.
I took the totally "scrappy" approach and pulled 7 lights, 7 mediums, and 7 darks from my reproduction fabric collection.
I cut a 2" by 2 1/2" rectangle of each print, stacked all 7 and cut them out -- quick!! 
I laid them out randomly, like dealing out the card deck for solitaire and then made a couple changes so the same color family wasn't in any unit.
The value positions seemed good, but I checked by looking at the photo with the B&W option on my tablet -- we had lots of fun using this feature on our phones and tablets when I taught the value workshop in South Carolina last month!  It's an easy way to build your confidence about value choices!
Time to stitch -- yup, I'm machine piecing these little buggers.
For those of you who have already learned the Set-In Piecing Simplified technique or have taken one of my workshops, you already know the value of doing the pivot before moving to the next pair -- prevents getting lost!!
It's easy to keep things in order if you piece the same pair for all the units and leave the resulting chain attached.
Then when you are ready to add the third diamond, remove the first pair from the chain, add the third diamond.  Now clip off the second pair and add it's third diamond, working through the laid out pieces in the same (personal) logical order -- for my experienced Mary Ellen Hopkins groupies, that is PLO.  One thing I've learned from teaching widely is that everyone's "logical order" is personal!!
Soon all the units were together with only the third seam to close it up and it's ready to press.
It took about 30 minutes to cut and piece up to this point!!
I'm never without something to use as a sew-off and right now I'm still getting the units of this tumbling block set together.
It also provides a "leg-stretch" since I have to get up and walk over to the design wall.
Here's all the little tumbling block units stitched and pressed (identically) ready to assemble the Box Hill block.  Once again I laid them out randomly (and wrong side up), then made a couple shifts to separate similar colors.
 Even though these are y-seams, it's okay at this point to stitch down the previous seam allowances making it easier to get as close to the dot as possible.  One of the bonuses of the Set-In Piecing Simplified technique that I teach is you can actually be a little sloppy and stop before the dot with excellent results.
It will take twelve "dot to dot" seams to assemble these seven units. That means I'll also complete twelve seams on the design wall quilt -- excellent progress!!  I haven't picked a fabric for the six diamonds that will outline this block -- will audition for that when I get this completely assembled.
Adding the background diamonds mean twelve more seams and twelve more seams finished on the larger quilt top -- that will bring me very close to a finished quilt top!!

But now it's time to tackle today's big project.  Everything in this photo of my back garden -- table, chairs, pots -- needs to be moved to the far end of the lawn . . .
. . . . so when the tree trimmers arrive, they have access to my beloved white oak.  This tree attracts so much life -- squirrels, insects, birds -- and I work hard at keeping it healthy.

One final note today -- if you own an older OTT Light that uses this bulb --  Type Z bulb, 18W, spiral with 4 metal prongs at the base -- you need to know replacement bulbs are hard to find.  So I called the company earlier this week when one of mine died and discovered that they are on backorder until August!
Happily, they offered to notify me when they are in stock and I'll be able to order directly from them.
The phone number (USA) is 800-842-8848.

Have a lovely weekend and be sure to work in some stitching time!!

Mary Huey

** There are Affiliate Links in this post -- using them results in a small commission for me -- thanks!! 

Linking up to MOVING IT FORWARD MONDAY and