Friday, May 15, 2015

Quandries?

Do you suffer from quandaries?
  I do!! 
 It's the result of having "too many oars out of the boat" most of the time. 
There are so many opportunities everyday and deciding on one or two to occupy me is a real challenge on the days I don't have deadlines looming. 
Today was one of those days.  The morning rain and the middle of May found me debating whether to start the May SewMyStash charity quilt top and tidy up the blue shelf . . . . .
. . . . . or at least finish the top for the April SewMyStash charity quilt.  After all almost everything is cut and sorted and the piecing goes quickly. 
Finishing the top would enable me to put the fabric away I've been using. 
Aaaannnnnddddd, it's my game with my rules, so I could skip the May quilt and catch up with myself. 
The morning was wasting and the fact that I have too many ideas for the blue quilt pushed me to sit down and work on the April quilt (you can see the beginning of it HERE).  Plus I'm pretty anxious to see how this updated fabric version of my pattern, Courthouse Stars, looks!!

I have quite a few flying geese to make in two sizes and so I started with one of the four sets.  I use the "fast and easy" technique.  I love Joan Hawley's Flying Geese X 4 tool because I don't have to do any math.  I've used it in my patterns for over ten years -- if you know the finished size of the unit you need to make, the tool gives you the cutting sizes for the squares needed.

At this point, there are quite a few tutorials for the technique floating around so I won't bore you with that, but I want to share some tips that I've found help my students when using this technique.

When marking the diagonal lines on the small squares, work on a "sticky" surface like your rotary cutting mat or a sandpaper board to prevent the corners from stretching when you draw the lines.
Any ruler works to set up the line. 
But be sure to back it up just a smidge from the corner so that your marking pencil begins the line in the exact corner.  If I had kept the ruler in the position shown above, the line would have been off-center and that sets you up for problems from the start. 
When I work with directional prints, I draw two lines from the upper left to the lower right and the other two are vice versa. 
My finished results are better if I draw the lines on the small squares first and then position them on the large square.  I tried putting the small squares down on the large square and then drawing the line but I soon discovered that the finished flying geese units are askew when I do it that way.  It's important for the corner of the top small square to be aligned perfectly on the small square underneath and the only way to accomplish that is to draw the lines first. 
When I stitch the first set of small directional print squares to the large one , I use two with a line going the same direction.   
This enables me to manage the direction of the print so that both of the small triangles are the same. 
That's a center square that disappeared while I was mass producing the twelve sets I needed -- grrrr!!  But I'm glad I discovered it before I cut down the middle!!! 
By the time my session was over, I had the first step completed for all twelve sets and they are waiting for my return later this afternoon.  No need to think, just sit down and stitch!! 
I find that's an important strategy for me to maintain momentum -- leaving everything ready for the next stitching session whether it's at my sewing machine or on the couch in the living room enables me to sit and stitch without dealing with yet another quandary!!

How do you push through your quandaries?

Mary Huey


Wednesday, May 13, 2015

The Teacup Quilt is FINISHED!!

BIG finish this week!!  The Teacup Quilt is bound and done, done, done!! 
It's a reflection of my devotion to a "proper cuppa" and my fascination with English bone china teacups.  My son helped me covert this vintage glass door bookcase to display my collection.
It's filled to capacity so these days if I find an irresistible set, I have to give up a set -- that self-imposed rule always slows me down!!  There are special pieces like the sugar and creamer set at the center of this shelf which came to me from my husband's grandmother's collection.
These little crystal glasses were brought back from Germany by my father after WWII and the little candle holder was a Mother's Day gift from my 30-something son. 
I found these spectacles in my parent's things and I surmise they are from one of my great-grandparents out in Spokane. 
These little glass dishes came from a dear friend who passed last year and I'm sure they were originally pieces from her mother or an aunt. 
I have tea parties every now and then and get out the entire menagerie and let friends enjoy them.  I've collected orphan dessert forks, butter spreaders and tiny spoons to dress up the occasions.
There have been lots of starts and stops on this project over the years.  The blocks were pieced by a friendship swap group in the 90's.  I think the original block pattern came from the classic book, Quilts, Quilts, Quilts.
The setting was inspired by Karla Alexander in her first book, Stack the Deck.  I substituted my tea cup blocks where she used preprinted panels.  The configuration of the blue border is a wonderful idea!
The backing is the last bit of a lovely sweet pea floral design in my stash.  When I can't bear to cut up a beautiful print I use it for a backing.  I certainly don't want it to be in the "BIG" yard sale and leave it for someone else to get to use!!
The quilting doesn't show up a great deal.  There are wreaths of "tea leaves" in the crazy pieced blocks that begin as a spiral at the center.  Each tea cup has a bouquet of three leaves and interestingly the simple straight line quilting on the border shows up the most.  I need to remember that!!
I had quite a time making the binding decision -- the ideal would have been the blue in the border, but that piece is long gone.  I finally settled uneasily on this soft green which looked perfect with the backing, but was just okay with the front.
In the end, it looks fine and it means another 5/8 yard out of the stash!!  Plus I can cross it off the list of goals for the second quarter -- one down, seven to go!?!
 
Take time to stitch today -- it's important!!
 
Mary Huey 
 
Linking up today over at FRESHLY PIECED WIP.
 
Linking up with all the other finishers at the


Friday, May 8, 2015

Distractions and Concentration!?!

It's so hard to focus on my machine quilting goals for the month when things like this appear at the feeder outside the window!?! 
Male Rose-breasted Grosbeak from the rear
 And the 500 toad eggs have hatched and the tadpoles need to be checked regularly?!?
American Toad tadpoles that hatched 4 days ago!!
 The fragrance of the viburnums need to be enjoyed hourly.
Viburnium carliesi -- oh so fragrant!
 And every primrose needs to be cooed over and photographed.
Primula belarina
 
But really I do need to finish this quilt!!  I was making great progress, got through all the design decisions except for the border.  So I went back at it in snatches between all the running in and out to check on the progress of spring.  Soon the last few blocks were finished and I decided to rambled through the borders repeating the "tea leaf" motif I used in the blocks.
I began with a wandering "stem" to give me a guideline adding leaves to the left side to create a spontaneous vine effect.  It barely shows up -- grrr.  Time to make an adjustment!
I've been using channel style quilting successfully recently and decided to try finishing out the border with that between the "vine" and the edge of the quilt.  First attempt looked good and it was a go!!
At this point, I heard the mailman on the front porch and decided it was a good time to take a break and make a cup of tea.  Turn on the kettle, go to the front door -- A BOX!!!!
It's the new presser foot for my APQS George!! 
The platform foot to use with acrylic pattern guides!  Now I'm excited!! 
So I finished the free motion work on all four borders and installed the new foot.
Look how high it is?!?
It only took one pass to fall in love!!  No wiggles from the foot jumping onto the guide!!
So this weekend I'll get the quilting finished and put on the binding and then I'll share my first finish for the second quarter from my list for the 2015 Finish-Along at On The Windy Side.  I need to get one done before we hit the mid-point of the quarter!
 
And if you are as distracted by your spring time as I am, take your stitching outside!!
 
Mary Huey


Tuesday, May 5, 2015

Antique Rose Star Cutting Strategy

After several months of cutting and piecing the Rose Star block and several workshops helping students through the process, I decided to try a new strategy for the cutting.  It was apparent that the fabric decisions for this block are the real challenge and it's not unusual to re-cut some or all of the pieces several times before settling on a combination that I like.
 
Last week, I followed through with a scheduled workshop even though it was below my minimum number of students so I could test a new approach to the cutting.  I joined with my students in the cutting process and am happy to share the results with you today!
 
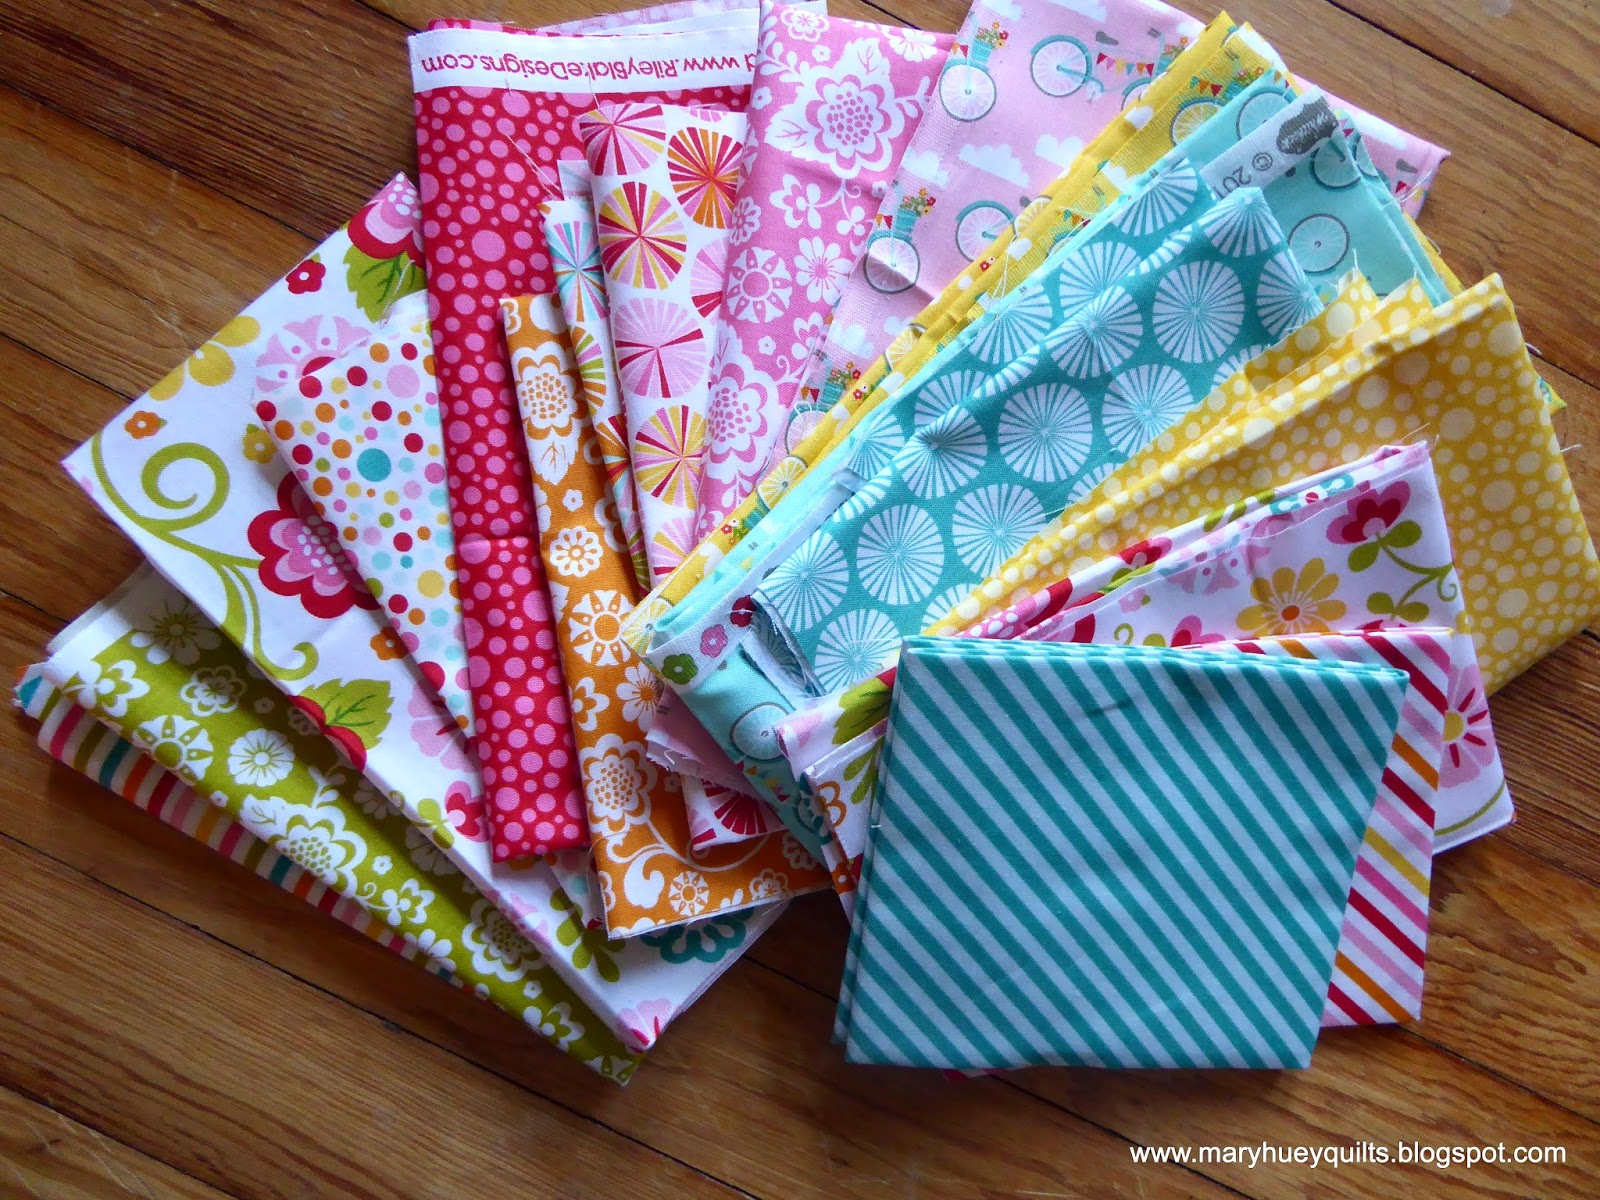
I've had a fat quarter stack from Riley Blake on my "sacred" shelf for about a year.  On the way out the door I grabbed it for my first trial run of the idea.
Each of us began by cutting six kites and six crowns from most of the fabrics we brought.  We used Marti Michell's new Kite and Crown Template sets.
 I set aside the directional prints and stripes.
These are the two basic shapes used in this block and at least six of each are needed in every block.  As the block layout process begins, you might need more kites but it's easy to cut those as needed. 
The center of each block can start with a hexagon, three crowns, or six kites.  I used one of the directional prints in the assortment to cut three crowns for each center -- looks like a bicycle-go-round doesn't it?
The second round (my turquoise pieces above) can be six crowns or twelve kites.
The final round is a combination of kites to make equilateral (60 degree) triangles that alternate with crowns.  Here you see my two auditioning options.
The yellow green sits back and the turquoise print comes forward.  With them laid in both positions, it easier to decide which I like better.  Do I want the points of the star to stand out (on the left side) and the crowns to site back or vice versa (on the right side)?
 
It's almost like playing cards -- just deal out the pieces and change what you don't like and keep what you do.  Be ready for the happy accidents and cut a few more pieces when needed.
And so I played with combinations, moving pieces around, taking photos (gotta love that phone!!) until I was happy with each combination.
 No right or wrong -- just personal preference!!
As we worked, one of the gals remarked while it felt random at first, it helped her get a better feel for how to proceed and I would echo that.  I began by laying out three blocks -- once I was happy with those, I turned to the leftover kites and crowns and began to add the stripes.
 
I forgot to bring my auditioning set of mirrors but I know that laying the kite template on a stripe this way gives good results.  There are two layers of the stripe, wrong sides together in this photo.  Since it's an uneven stripe (in the way the colors appear), cutting this way gives me "rights" and "lefts" and make it easier to manage the designs created with it.
Pairing the kites together creates a crown and won't this be a great star around the center hexagon?
Because I cut to manage the uneven stripe, I know I'll get perfect chevrons wherever I use the kites.  And if they don't work in one of these two positions, they can be used as the points of the star.
I didn't stitch any of them together yet (need to cut the background pieces), but I left with six stars designed and ready.  The students left with a block pieced and 3 to 5 more planned.  I noticed they were a lot less exhausted at the end of class, too.  I think it's because, we took a playful, intuitive approach to the fabric rather than trying to "visual" how each piece would look cut for a specific fabric, cutting it, laying it out, not liking it, having to cut some more. . . .
 
This idea can be applied to any multi-fabric set of blocks, not just Rose Star, but it feels like a  winning approach to me and so this will be my strategy in the future (I think).  I'm teaching the workshop again at the end of the week, so will test it and then decide for sure. 
What do you think?
 
Mary Huey


Thursday, April 30, 2015

A Round Robin (almost) Finish!!

I've been looking forward to sharing the results of this round robin group for several weeks now.  It all started last fall when 5 of us (Carol, Kathy, Allison, Julianne, and myself) joined together with Bea at Beaquilter to begin a round robin adventure that Bea organized.  The parameters were based on the size of each "round".  Everyone began with a 12" block and this free form Bug Hut was my starting point.  I wrote about how I created it HERE.
 
At the end of October, it went into the wild unknown to visit the other five gals!
I added the first border around Kathy's bear -- my first reaction when I opened her package was "oh, my" -- the imaginative color selection startled me at first but very quickly I decided to surround it with 3" bear paw blocks and shared some of what I was doing in November (HERE).  At this point, I don't know if I didn't take a picture of it with the border or if I just can't find it, but you'll see it in her post.
No sooner had I sent the bear off to the next stop than Julianne's piece arrived.  Wow, look at all this color!!  My addition is the scrappy 8-pointed stars -- it was easy to get them perfect using Marti Michell's Set E templates for 12" and 6" stars!!
Allison's birthday cake arrived next -- her inspiration was a significant birthday.  I searched around for compatible birthday party treats -- ice cream cones, poppers, candles and finally settled on cupcakes!!  And since I didn't want her to overindulge in cake, I added some complementary 9-patchs and fussy cut squares from a cheerful print in my stash! 
Everyone got really stoked up around the beginning of the year and at one point I had two of the traveling packages in my studio at the same time.  No pressure?!?  Bea's patriotic theme arrived about the same time a new tool arrived from Marti Michell -- the Peaky and Spike Multi-size Ruler.  So I tried it out and shared my experience HERE without revealing the true purpose of the blocks I made.
 I had quite a time deciding whether to hang the "pendants" down or up across the top but in the end you can see I went for down.
Last but not least was Carol's piece.  It is so colorful and I think I heard something about it becoming a picnic quilt?  I probably did the most auditioning with this one for both a block and color.  I chose the simple square in a square blocks and repeated the blue to keep the focus on the center of the piece. 
While I worked on Carol's piece, my piece arrived -- it returned home 3 weeks early and I decided not to open it until I had finished Carol's and sent it off. 
 
When I opened my box, I was stunned!!  
Wow, wow, wow!!!
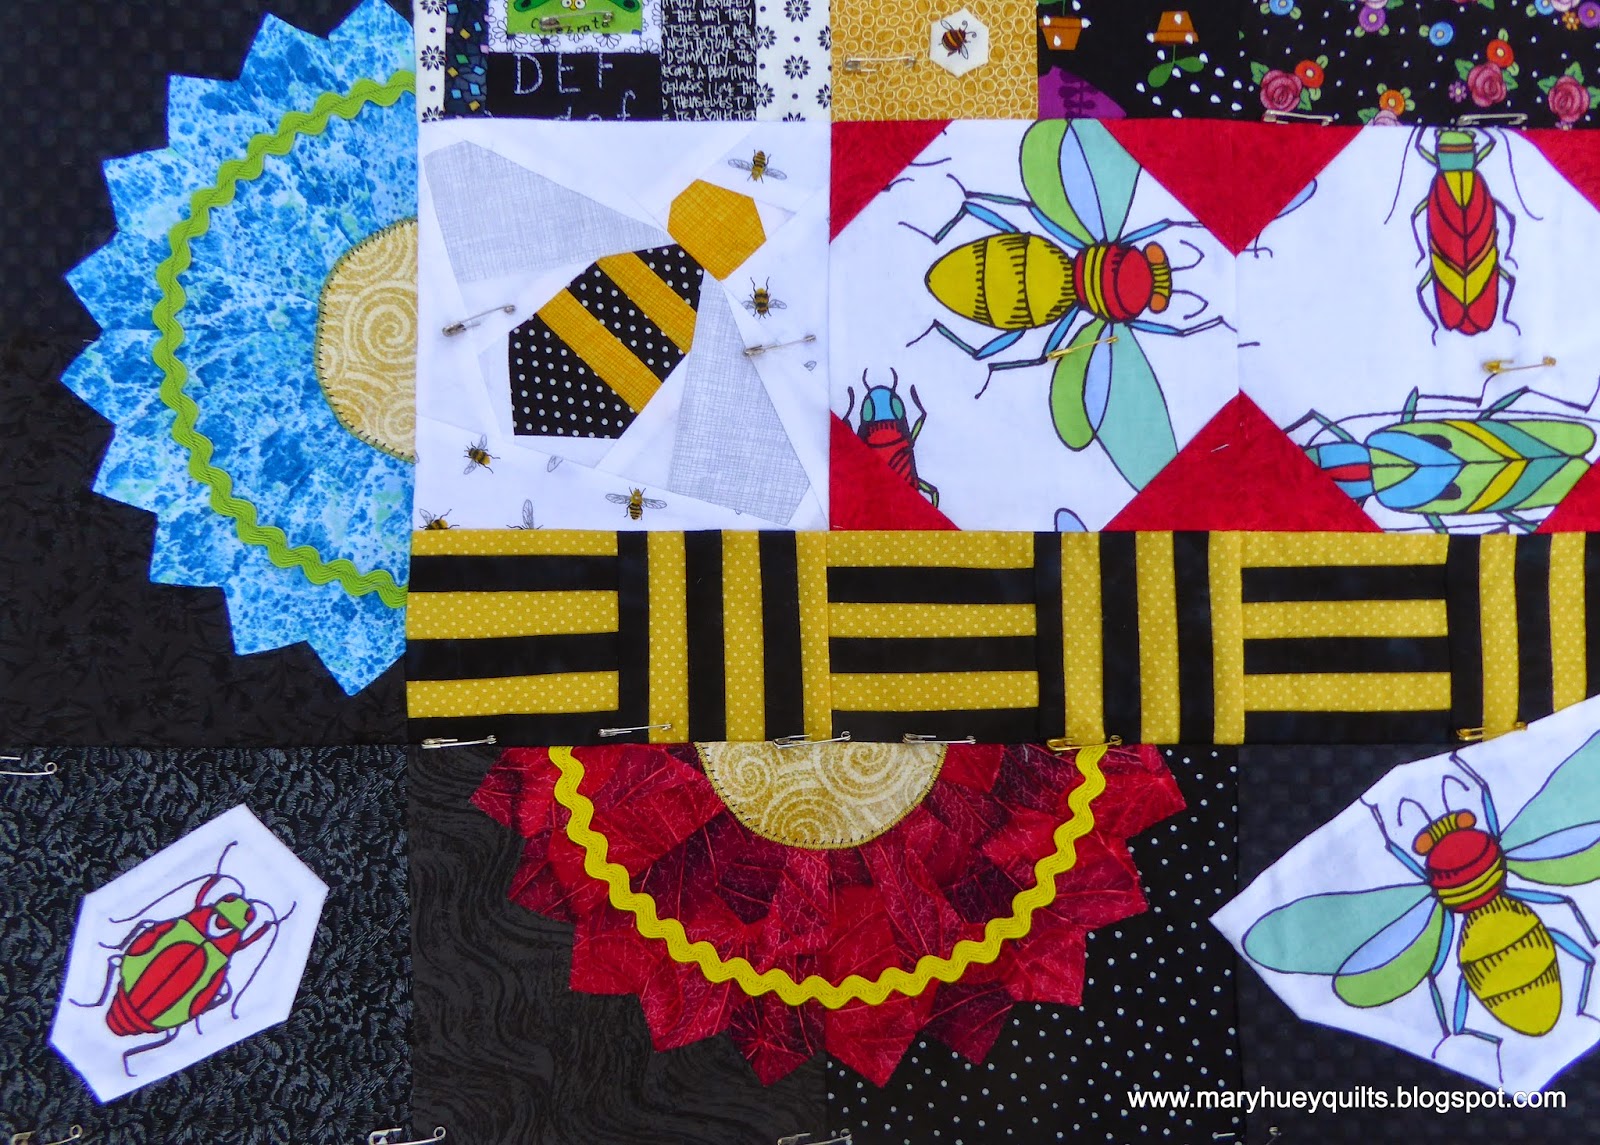
I've spent the past month adding rick-rack and appliqueing down more bugs.
It's layered up, but as I was doing that I started waffling about machine quilting it or doing "big stitch" hand quilting with pearle cotton.   
This paper-pieced bee block has been on my "to-do" list for months so I was thrilled to find it included in my quilt, not just once, but four times!!  Thanks Kathy for crossing that off my list for me!!
 I had lots of fun adding the rick-rack even though it is totally not my style to embellish at all!! 
I found a sweet little bee fabric in my stash and made a dozen 3/4" hexagons which are spotted all over the piece -- I may add a few more while I decide about the quilting process. 
The backing has a label to remember all the quilters who shared their talents and inspiration with me!   This quilt will hang in my bedroom I think -- it's such a cheerful piece to contemplate!!
Bea is recruiting for another group -- the details and links to the other gals finished pieces are at her blog HERE.   It was fun and if you've never participated in a round robin, I encourage you to think about joining.  It will challenge you to go places you didn't know you could go!!
 
Mary Huey