Showing posts with label Beaquilter's planned round robin. Show all posts

Tuesday, September 20, 2016

The Bug Hut is FINISHED!!

It's been almost a year and a half since I showed this quilt top from a round robin group -- pieced, embellished and ready to quilt!  You can see my original post HERE.
Over the weekend, I finished the binding and added a casing -- now to figure out where to hang it!
While it does look great out in the middle of the yard, it will need to come inside!
And happily, it's finished just in time to enter into the Blogger's Quilt Festival over at Amy's Creative Side -- entering it into the Small Quilts Category!!
I've been hand quilting it with big stitch in pearl cotton all summer.  Just having fun and being spontaneous on how to quilt each section.  I started in the center with the "hut" and did more embroidery than big stitch. 
Experimenting with ideas, not worrying about what it looks like on the back. 
Then I moved through the six mini-huts surrounding the center.  It's easier to see the outlining I did from the back.
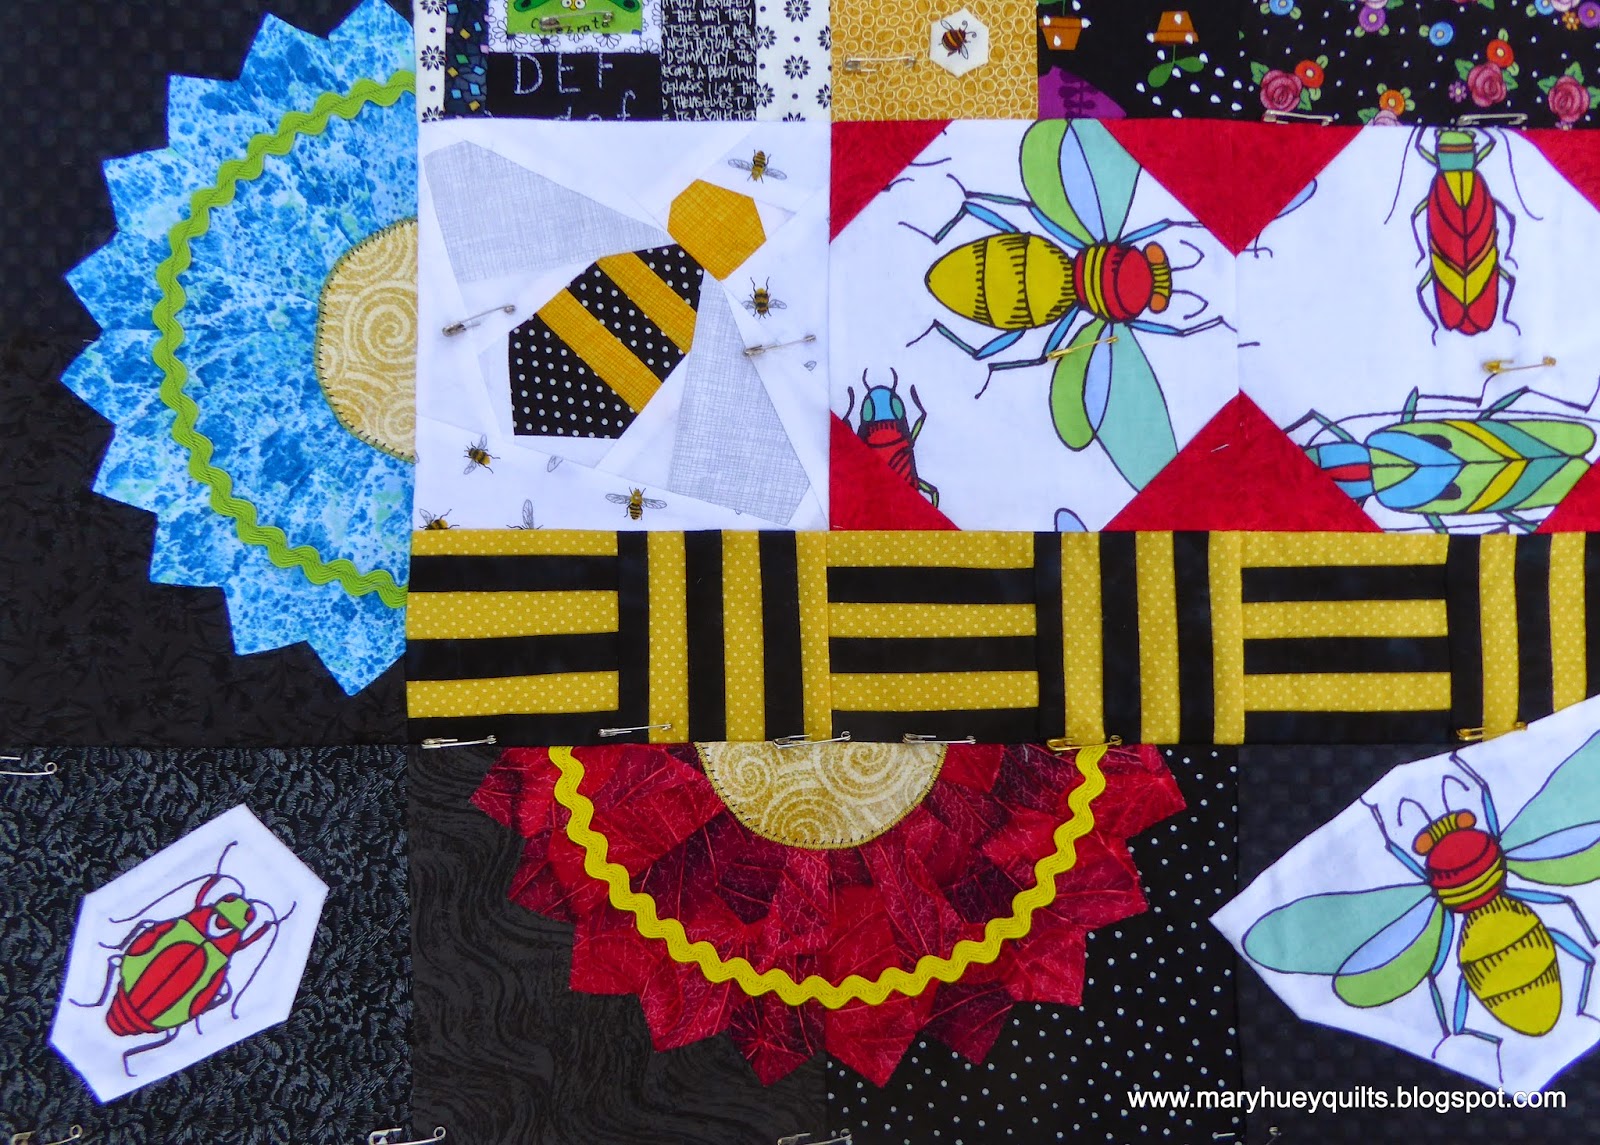
These big "polka dots" seemed perfect for the sashing frame around the center hut.
I got a little carried away with this big bug and jazzed up his wings with embroidery.
My favorite blocks in this quilt are the bees -- the quilting I added defined the wings and made the strips stand out more.
The quilting I added to the fans make them look more like sunbursts -- bugs love sunshine!!
Have you noticed you rarely see pollinators on cloudy days?
Inspired by the spiders who live by my backdoor every summer, I captured the four bugs in the corners of the outer borders in webs.
I also used webs to fill the blank area in the upper and lower borders. 
This is the label that traveled around with the quilt as it was being constructed -- nice to have it incorporated right into the backing!
I love that I was able to finish this quilt.  It will be a "summer" quilt in one of the groups that I rotate on the walls in my home. 
There is so much about this quilt that makes me smile, I know I'll always enjoy looking at it!
And it makes the third finish for the third quarter from my 2016 Finish Along goals!!
You can explore the growing group of third quarter finishes HERE and explore the tutorials!
Yea!!

The Bug Hut
42" by 48"
My Round Robin quilt from a group organized by Bea at http://www.beaquilter.com/

Mary

Be sure to click through to the Blogger's Quilt Festival next week to drool over lots of great quilts and vote for your favorites!!


Thursday, April 30, 2015

A Round Robin (almost) Finish!!

I've been looking forward to sharing the results of this round robin group for several weeks now.  It all started last fall when 5 of us (Carol, Kathy, Allison, Julianne, and myself) joined together with Bea at Beaquilter to begin a round robin adventure that Bea organized.  The parameters were based on the size of each "round".  Everyone began with a 12" block and this free form Bug Hut was my starting point.  I wrote about how I created it HERE.
 
At the end of October, it went into the wild unknown to visit the other five gals!
I added the first border around Kathy's bear -- my first reaction when I opened her package was "oh, my" -- the imaginative color selection startled me at first but very quickly I decided to surround it with 3" bear paw blocks and shared some of what I was doing in November (HERE).  At this point, I don't know if I didn't take a picture of it with the border or if I just can't find it, but you'll see it in her post.
No sooner had I sent the bear off to the next stop than Julianne's piece arrived.  Wow, look at all this color!!  My addition is the scrappy 8-pointed stars -- it was easy to get them perfect using Marti Michell's Set E templates for 12" and 6" stars!!
Allison's birthday cake arrived next -- her inspiration was a significant birthday.  I searched around for compatible birthday party treats -- ice cream cones, poppers, candles and finally settled on cupcakes!!  And since I didn't want her to overindulge in cake, I added some complementary 9-patchs and fussy cut squares from a cheerful print in my stash! 
Everyone got really stoked up around the beginning of the year and at one point I had two of the traveling packages in my studio at the same time.  No pressure?!?  Bea's patriotic theme arrived about the same time a new tool arrived from Marti Michell -- the Peaky and Spike Multi-size Ruler.  So I tried it out and shared my experience HERE without revealing the true purpose of the blocks I made.
 I had quite a time deciding whether to hang the "pendants" down or up across the top but in the end you can see I went for down.
Last but not least was Carol's piece.  It is so colorful and I think I heard something about it becoming a picnic quilt?  I probably did the most auditioning with this one for both a block and color.  I chose the simple square in a square blocks and repeated the blue to keep the focus on the center of the piece. 
While I worked on Carol's piece, my piece arrived -- it returned home 3 weeks early and I decided not to open it until I had finished Carol's and sent it off. 
 
When I opened my box, I was stunned!!  
Wow, wow, wow!!!
I've spent the past month adding rick-rack and appliqueing down more bugs.
It's layered up, but as I was doing that I started waffling about machine quilting it or doing "big stitch" hand quilting with pearle cotton.   
This paper-pieced bee block has been on my "to-do" list for months so I was thrilled to find it included in my quilt, not just once, but four times!!  Thanks Kathy for crossing that off my list for me!!
 I had lots of fun adding the rick-rack even though it is totally not my style to embellish at all!! 
I found a sweet little bee fabric in my stash and made a dozen 3/4" hexagons which are spotted all over the piece -- I may add a few more while I decide about the quilting process. 
The backing has a label to remember all the quilters who shared their talents and inspiration with me!   This quilt will hang in my bedroom I think -- it's such a cheerful piece to contemplate!!
Bea is recruiting for another group -- the details and links to the other gals finished pieces are at her blog HERE.   It was fun and if you've never participated in a round robin, I encourage you to think about joining.  It will challenge you to go places you didn't know you could go!!
 
Mary Huey


Monday, November 17, 2014

First Robin Round!

A couple weeks ago, I received a package in the mail with this cool fellow as the start-up for a round robin with five other quilters!  It's the first round robin I've done in about five years and my first long distance one!!
I pinned him up to my work wall and spread out the fabrics that Kathy sent along with him and waited for inspiration for the border of 3" blocks as the first round. 
Hmmmmm . . . . . . ???????
 
Aha!!!  I can't tell you what my idea was but I can show you a little bit of what I did!  It involves triangles and so I revisited using triangle paper instead of templates.  I still have a good supply of the various sizes of paper and because you stitch before you cut, it is a quick process. 
 
I prefer Mimi Shimp's Quiltime Triangle Paper -- the configuration of the sewing lines makes for  quick tidy stitching and the paper she prints on is easier to remove. 
You also don't have to worry about your seam allowance!!  If you can follow the line, it's perfect.  If you haven't used it, there are two layers of fabric right sides together under that paper.  Using a rotary ruler as my guide, I trim around the outside edges of the cluster I've stitched.
Then I cut the squares apart and finally the triangles. 
I take the time to pull the paper back and crease it along the stitch as it makes the paper easier to remove. 
Over the years, I've discovered if I start to pull the paper away at the center of the seam, it goes faster and the paper comes away cleaner.  
In no time, I have the HST's ready to trim and press. 
I take the corners off before pressing -- that eliminates bulk! 
Match the HST's up to a third print and a little more cutting!
Ready to stitch!! 
And that's all I can show you!  It's on it's way to Bea for the next round!!  The quilts will be traveling through the winter and will come back home in April.  I'm looking forward to seeing what everyone else's pieces and the challenge of creating the perfect next step!!
 
Bea over at Beaquilter is our leader and she has dubbed this a "planned" round robin in that the size and placement of each rounds blocks is dictated from the start.  This time is 3" blocks all around the 12" starter block.  December will be 6" blocks top and bottom.
 
Linking up over at Quilt Story's Fabric Tuesday!!
 
 
Mary Huey


Friday, October 17, 2014

Joining a Round Robin!!

Have you ever participated in a "round robin"?  Over the years, I can think of a half-dozen that I've joined -- several that I ran while I had my quilt shop and several in my quilt guild.  A week ago, I took the plunge and joined a new one proposed by Bea at www.beaquilter.com.  I started following Bea last month for her EQ7 tutorials (growing my EQ skills!). 

At the retreat I attended last week, a gal was piecing a quilt designed by Elizabeth Hartman from her book Modern Patchwork.  There were birds in the windows of each house block -- something with birds always gets my attention.  I came home and borrowed that book from the library thinking that her house block would be a perfect starter block for my round robin.

Last evening I headed up to the studio to pin Bea's e-mail with the round robin schedule on my bulletin board.  I intended to pull out my stack of "bird" fabric and start organizing a color scheme for the round robin. 

The first thing that caught my eye (easily distracted) was this piece of fabric laying on the cutting table.  It arrived in the mail last week and hasn't been put away (can you imagine that) ?! Love the simplified bugs, love the size of them and love the color scheme!!
So I'm thinking about a house block for the center of my quilt, this wonderful bug fabric is in my face, and Elizabeth's house blocks are inspiring me.  Have you read anything about "insect" houses/ hotels/huts that are becoming popular with gardeners? 
 
Take a little break here, go to Pinterest and search for "insect hotel".   You'll quickly understand my block!  Not only are these little structures good for the insects, they are charming additions to a garden!
 
I'm inspired (or perhaps I've had too much caffeine today) and so I sketched out a rough block idea. 
Then I head over to my stack of "landscape" fabric thinking it will be a perfect stack to pull some textured pieces for my "bug hut" -- but it's all beige and brown and green -- doesn't really do anything for the bug fabric.
Black and white!?!  Not sure where that inspiration came from but it worked because there in that stack were quite a few pieces that reminded me of some of the visual "texture" that makes the insect hotels so appealing to me.  What do you think?
The white with the dragonflies will make a perfect "sky" and the white with the grid of black dots can be the dividers.  This is going to be great!  And this was as far as I intended to go since it was getting late.  But I decided to just cut out the "bug" that would be occupying the block and then just frame it up and soon I was lost to the idea of going to bed.
 
He was suppose to be a square and then I was inspired to make him a hexagon (though somehow, I've achieved seven sides?). 
The narrow divider strips are 3/4" cut and when I stitch the second seam of these, I measure the 1/4" seam allowance from the first line of stitching rather than the raw edge.  So I'm watching the left edge of my presser foot rather the right side -- this gives me a uniform skinny piece.
 
Here's how I cut the pieces for the roof unit.  I cut a 4" by 13" rectangle of the black and then trimmed the right and left angles -- just laid the ruler down and cut -- no measuring.  Then I laid the roof piece on a large rectangle of the sky fabric.
I positioned the edge of my ruler parallel to the upper left side of the roof and about 1/4" away and cut off a triangle of the sky fabric.
I repeated that on the right side. 
Now I had two triangles with the same angles as the roof triangle.
 
I removed the triangle of sky fabric laying under the roof fabric and I'm ready to stitch -- right side sky piece first, press and then the left side. 
Here's the finished block, ready to trim to 12 1/2" for the start of my round robin. 
The lower and upper halves of the "hotel" were the same measurement, but when I trimmed it, I reduced the size of the lower half because I felt it gave it better visual balance.
I have a string of fairly empty days on my calendar that will be devoted to studio time (and some house cleaning), so this weekend, I'll create a little journal to travel with the project and find a box to accompany it as it travels around the USA for the next six months.  All ready to go next week!!
 
I hope everything thing on my current "to-do" list is dispatched with as much inspiration and delight!!
 
Mary Huey