Tuesday, September 17, 2019

Assembling the Scrappy Hexagon Quilt Top

Don't you love to see pictures of other quilters' chaotic sewing areas?
This is the view at my machine Sunday afternoon as I hid from the world and pieced.
Can you tell I found another new sewalong?!?  
It's the #littlemisssawtoothqal -- you can explore the progress of others on Instagram by clicking HERE.  @southerncharmquilts is the hostess -- find her on Instagram.

After I finished a couple days of the #100days100blocks, I started working on the first step of the #littlemisssawtooth blocks (using a layer cake that has been on my shelf for about 4 years and planning it for my youngest grandson but we'll visit that another day).
 I've assembled all the hexagon units for the blue quilt and I've started setting them together into larger units as "leaders and enders" while piecing other projects.
I'm joining groups of four units together rather than working in rows of units.
Why, you ask?  
Probably partially because as a traditional block quilter, it's intuitive for me to work that way.
But more important, it allows me to work on more than one section at a time and maintain a chain-piecing strategy.
It also is more manageable at the sewing machine than working in long rows.
If I don't have any other piecing, I can easily work back and forth between these sets.
The picture above shows four units sewn into two units -- 95% of the seams are "dot-to-dot" as described in the Set-In Piecing Simplified guide so that's lots of short seams.  Steady as she goes!!  There are a few "edge-to-dot" seams when working with the outer edge units as below.
At this point, it's also easier to understand why I don't press as I go along.
The end of a seam (beyond the dot) needs to be easy to move aside . . . . 
. . . . . so I can match the next y-seam corners perfectly.  If a seam has already been pressed to one side, that is more difficult.  
Believe me on this, I have lots of experience!! 
Here is another view of me pulling one layer (the dark blue print) aside . . . . 
. . . . so I can see to line up the third hexagon in this y-seam intersection. 
Now here's a tip you'll appreciate!
I have discovered after piecing thousands of y-seams this way that stopping a bit before the "dot" is okay!
Once the seams are pressed in a swirl (see below) -- 
when you flip to the right side, there is NO HOLE! 
Bonus, the ends of the seam are more secure than any y-seam technique (without backstitching) because of the sew-off. 
And bonus, bonus -- with some experience, you may be able to stop marking all those dots!
(Don't rush that idea, you'll know when you are ready.)

If you are still thinking about investing in my teaching guide, results like this are a consistent experience as long as you are piecing with a consistent seam allowance.

This is the upper right corner after joining four units together.  
I have to add a side half-hexagon and a corner piece (made from the leftover strips)
I gave you better cutting instructions than I followed at first so I've had to find some scraps of other blues to make my corner pieces.  
Be aware there are rights and lefts for these pieces -- you need two rights and two lefts.
Inserted and ready to lay back out on the design bed. 
Here is the upper third of my quilt top.  Each of these large units was made by joining together four of the starter units described in the last post HERE.  My next step will be to join the three together .
 Once a large section is joined together, I will begin to press seams starting at the top edge and working down towards the lower edge of this section, but not all the way to the lowest hexagons.  
 If you have a small iron, it works great!  
Swirl the seams of the first intersection in a corner and that sets up the rest of the pressing -- alternating clockwise and then counter-clockwise.
Doing some of the pressing now will make it less overwhelming than waiting until the entire quilt top is assembled.
Once I move down into the central units, I need to put a pin at the top of the four hexagon units to help me remember which ones are up!
I'll spend the rest of this week and perhaps next week setting units together.

Once that is finished, I'll come back to show you my finished top and discuss quilting options!
I'm going all the way to the finish line with this project -- no "waiting to be quilted" for it!

As always, if you have questions, post them to the comments so everyone can benefit.
And if you haven't had the time (or courage) to start a "big" project, grab some scraps, cut a dozen large hexagons and go through the steps to break the ice.  
Your sample might become the beginning of a totebag?

Mary


Tuesday, September 10, 2019

Laying Out the Quilt Top

How are doing with the y-seam chain piecing?  
If you feel a bit frustrated, remember this is a new technique for you.  With some consistent practice, you'll find a rhythm and it will feel more natural -- I promise!!

I finished all 42 of my assorted units and laid them out on the design bed.
Good thing the guest bed is clear as the design wall in my studio is clogged up with #100days100blocks!?!
Working with the thirty 4-hexagon units, lay out 5 across and 6 rows down. 
Lay them out as they come off the top of the stack.
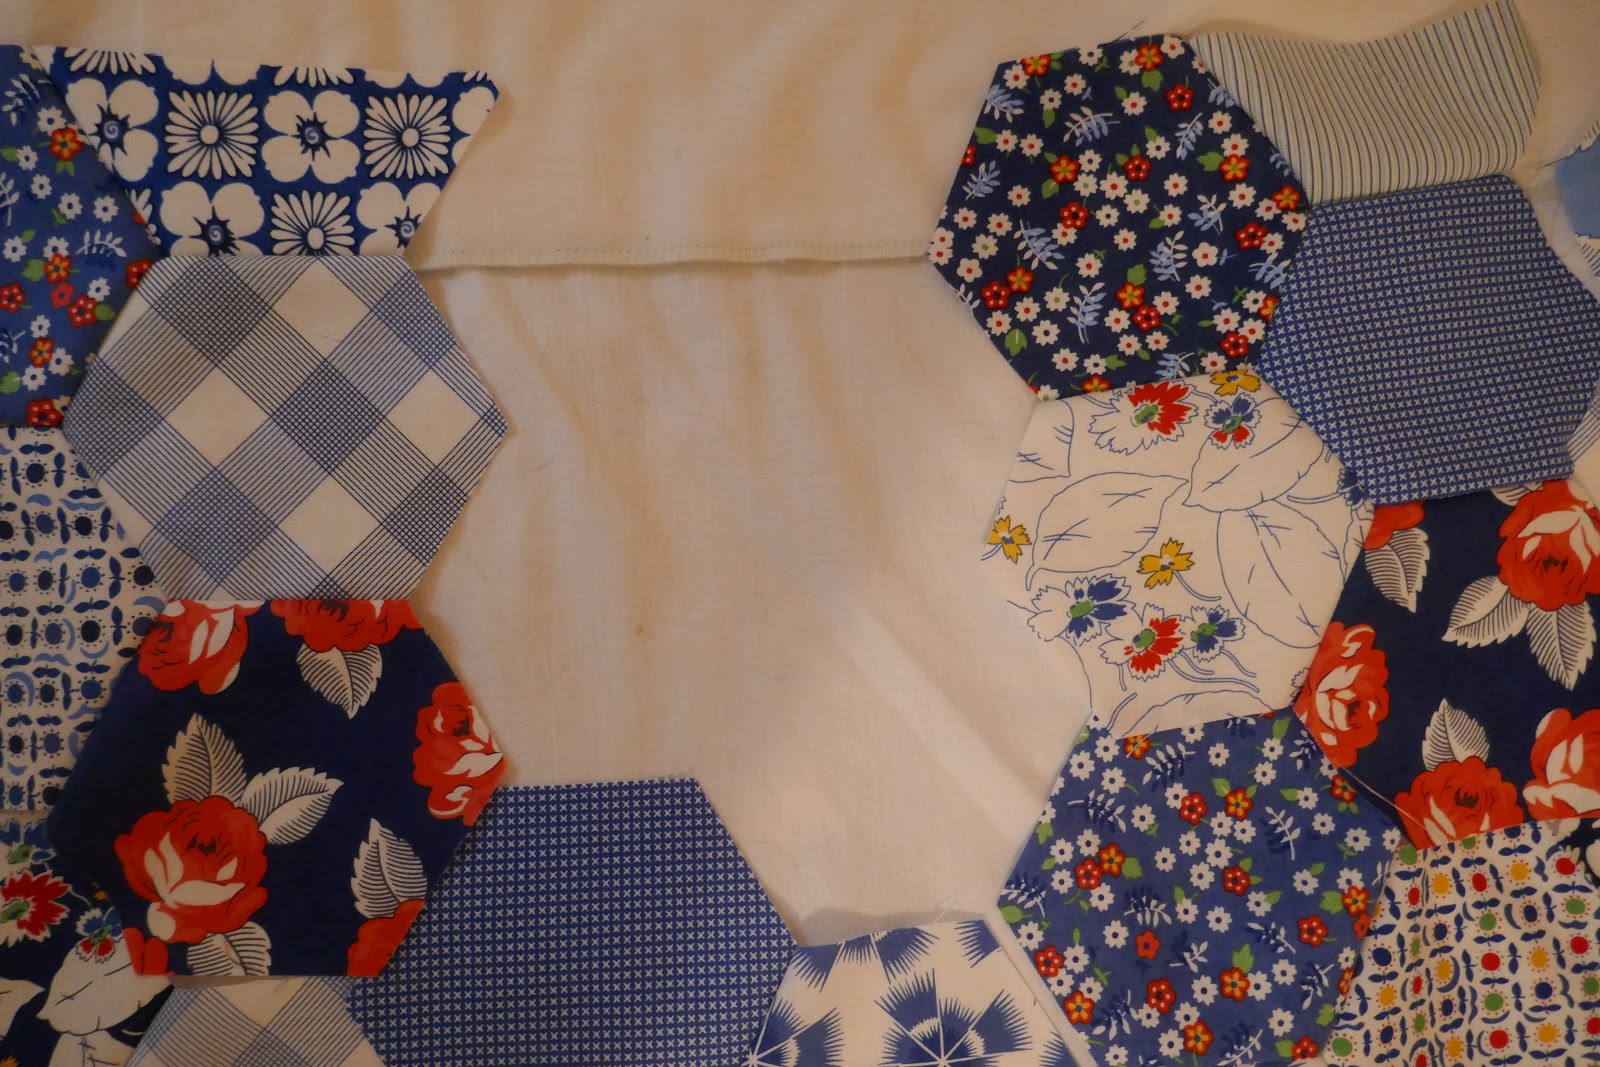
Below is a close up with the units spread apart so you can see how they mesh together.
Then fiddle with placement until the layout suits you.
I tried to spread the dark hexagons around a bit and worked to avoid two of the same print setting next to each other.
Of course, you know no matter how hard one tries, "complete perfection" is not possible, but keep in mind it's also not necessary. I'm giving this to a young friend who can't use scissors, so she'll be delighted regardless of whether there are too many darks in the lower right corner.
Now we need to cut some half hexagons to fill in the blank spaces around the outside edges of the quilt top.   
If you are using Marti Michell's templates or rulers***, find the half hexagon template that matches the size you are using -- for me that's G43.

This is the half hexagon needed for the top and bottom edges of the quilt.
Use five (5) of the strips set aside when you were cutting hexagons. Trim the strip to the correct size for the template and cut ten (10) half hexagons
 
Here is a mock-up of a 10" long strip -- if you start cutting the half hexagons at the left end of two strips as illustrated below and at the right end of the remaining three strips, you can use the leftovers for the corners of the quilt top! 
The remaining strips that were set aside will be used to cut a different shape half hexagon for the side edges of the quilt top.  I put a piece of tape on my G42*** template to cut these -- it's 1/4" to the left of the vertical center (can't forget the seam allowance!).
Here's a mock-up of a 10" strip -- it will yield three of these pieces and twenty-four (24) are needed.
You should have one "set-aside" strip left -- just in case!
I straighten one end of the strip, line up my tape with that end, cut a half-hexagon - then straighten the end of the strip again and repeat.  Does that make sense?
Using the first set of half-hexagons, add one to each of the five 4-hexagons units across the top of the quilt.
To add these, you will do one "edge to dot" seam (steps 3 through 6 of the teaching guide) and one "dot to dot" seam.
Do this to the five units setting across the top of your layout!
Set them back into place on your design wall/bed/floor.
Repeat this process for the five (5) 3-hexagon units across the lower edge of the quilt top.
One more edge unit to make -- to use down the right edge of the quilt top.
These are made with the remaining two-hexagon units and one of the vertical cut half-hexagons
The reason I go to all this trouble is to have straight of grain on all four edges of the quilt top.
It makes adding borders or binding the quilt so much easier!!
Make seven (7).
Here's one corner of my lay out with all the edge units in place.
There are gaps along the right side where more vertical half-hexagons are needed.  Those and the ones needed down the left edge can be added as the units are assembled.
That's as far as I am at this point. 
As the week goes on, I'll start to join the hexagon units and be back next week to guide you through that stage of making this scrappy hexagon quilt.

I hope you are pleased with your progress.
If you have questions, leave them in the comments so everyone benefits from the answers


Mary

***EDIT April 2025
Marti Michel closed her business in late in 2024 and while some shops may still have a stock of her templates, you can also find them on Ebay and Etsy. 


Tuesday, September 3, 2019

Let's Start Piecing!!

Last week, I invited all of you to join me in making a scrappy hexagon quilt.
If you didn't see the first post, it's HERE.
Are you ready to do some piecing? 
Even if you don't have everything cut, you can still start piecing.
Take another look at Marti's template.  See the holes drilled in each of the six corners?
If this is your first y-seam piecing, I encourage you to set the template on the wrong sides of the hexagons and mark a dot through each of those holes.

A bit tedious?
Yes, but it will make your work easier and more accurate at the machine!
(I'm currently listening to knitting podcasts while I do this.)
One of the aspects of a hexagon quilt that can be puzzling is determining where to begin.
As a machine piecer, I like to start with a basic unit that I can repeat over and over again to maximize my efficiency.
Illustrated below are the three basic units and the quantities of each needed to get started. 
Begin by piecing seventy-one (71) pairs of hexagons.  Keep it random.  I don't pay attention to much except whether or not I like those two sitting next to each other.
I find that trying to manage value or color just leads to frustration as things progress so stay loose!! 
Layer two hexagons right sides together and stitch together along a straight grain edge. 
If you are following along with the Set-In Piecing Simplified PDF, focus on Steps 21 through 24 at the end of your print out.

Stitch into the dot at the left end of the straight edge,


pivot, stitch down the seam to the dot at the opposite end,
pivot again and stitch off that set of hexagons and onto the next set.
   Repeat, repeat, repeat.

 Don't press anything just yet -- I've learned that pressing this early makes seam control more difficult in the long run!

Set aside eleven (11) pairs of hexagons at this point -- six to be used for the two piece units and five for the three piece units (see the photo above). 

Now begin to assemble pairs of hexagons into units of four hexagons until you have thirty (30).  Try not to repeat a fabric in a set of four and again, just go with the flow!

The top and bottom edges of each of these hexagons as they are setting here is a straight grain edge and the four side edges are bias.  Try to maintain this orientation as it will make the quilting process go more smoothly (I call it "stretch-control".)
Don't make this mistake (photo below)!  
The unit on the right with the opposite orientation will mess you up so be sure all the four-hexagon units are positioned exactly the same.  
I took this one apart and fixed it!!
Assembling the four hexagon units will require three separate dot-to-dot seams.
First one.
Do the lower one second
leaving the center to last. 
because now you can fold the entire unit in half and do the third one in a snap! 
Because I'm chain piecing all the time, I do the first seam of several sets and then come back around and do the second seam of those sets and finish up with the third seam.

Once those are finished, use five (5) more of the hexagons pairs and five (5) of the remaining single hexagons to make the three piece units.
Keep working on assembling these three units and next week, we'll start to layout everything to begin assembly.  We'll also cut the partial hexagons to use along the edges so they are straight!
Now I have to get back to piecing!!

Here's the link again for a coupon for 25% OFF if you missed in the first post.
Click HERE to go to my Etsy Shop and purchase the downloadable PDF!
(If the link doesn't apply the discount automatically, use the EASYPIECING in the "coupon" box.)
Offer is good through the end of September, 2019.


If you have questions, leave them below in the comments section so everyone can benefit.  
If you are a "no-reply commentor", be sure to come back to the post to see my answer since I won't be able to e-mail you directly.

I've decided this is going to be a baby quilt gift -- there has been an explosion of pregnant couples in my circle this year!!

Mary

and

Tuesday, August 20, 2019

Upcycling Fun!

I've been AWOL from the blogosphere for a month at this point.  First there were two mini-vacations with my older grandchildren. I took each of them on a different Road Scholar Grandparent/grandchild adventure.  My grandson and I went to Vermont for some nature adventures and I took my granddaughter to Chincoteague Island where we learned about the tidal habitats and did a bit of crabbing!!

Then these three came home from the hospital -- born June 2, they are my newest grands!!
Throw in a trip to the spa for my computer and July was shot!!  

Of course, I've managed to stitch through all that -- mostly handwork -- English paper piecing and knitting.  I also have been working on the #100days100blocks2019 project -- simple blocks and my fabric palette is a cheerful one that I've managed to pull together out of my stash!  You can check out my progress over on Instagram -- I'm @hueymary 

This week I upcycled a garment for a friend into a fun cushion for her living room.  She has traveled to Costa Rica many times and on one of those trips she bought this dress with a handpainted panel.  When she offered it to my stash earlier this summer, I offered to make her a cushion instead.  The panel is too nice to be stuck in my stash.  
It's always scary to begin a project when the first step involves cutting something finished apart.
But it has to be done! 
My first thought was a band or two of flying geese (she goes to Central America to bird).
But in the end, I used fabric from the skirt to set the panel a bit askew.

While I was doing that, I had a quilting inspiration (thank goodness!!) to use several colors of thread and create a "pic-up-stix" style design on the black.  Another quick stash dive uncovered enough black Dream Poly batting which I always use for dark quilted projects.
I quilted with my walking foot and just let the design evolve adding random lines focused on framing the panel. 
I wasn't planning to quilt the panel but as the black flattened down, the panel started to puff up and so I echo quilted some of the details to flatten the panel without taking away from the artist's work.
The finished quilting is subtle. It breaks up the solid black while framing the painted design. 
I revisited my idea to bind the edges of the cushion cover rather than turning it and chose a bright green that will also act as a "piping" accent on the finished cover.
You can revisit my blogpost HERE when I did this (lazy) finish the first time!
So close, so close.  
Back to the cutting mat for six more inches. 
Here's the finished cushion (it's 22" square) snuggled into the corner of my couch for a quick photo shoot before I deliver it to my friend.  I love being able to share my skill with my non-sewing friends like this! 
One more thing to share with you -- a couple days ago, I listened to a podcast by Marie Greene of Olive Knits -- she is such a positive person!!  The title of it is "8 things that are more important than talent"!  I have practiced and preached that "work is more important than talent" for a long time so it was great to hear someone else advocate this concept.  I love the way she broke it down and wrote down her list to keep on my desk. 
She mentioned a few of my strengths and a few of my weaknesses!  Lots of food for thought!! 
If you want to give it a listen (even her voice is cheerful), click HERE.

Hope your summer is still pleasant.  Even though the kids here went back to school this week, we still have a good month of summer weather left and sitting out in shade in my back garden with some hand stitching is a very peaceful place to be right now!

Mary