Tuesday, April 12, 2016

My Plus Quilt Piecing Strategy!

 If you follow me on Instagram (@hueymary), you already know this is what I woke up to on Saturday morning (April 9 - third week of spring?).  This is the view (through the screen) from the ironing board in my studio. 
The upside of the 5" of the lovely fresh snow was that it erased any desire to work in the garden and enabled me to focus on painting the new woodwork around the new windows in my studio.
Of course, as is true with any "simple" remodeling/construction job, one thing leads to another and it seemed pointless to paint the new window trim and not re-paint all the baseboard trim.  And as long as I was going to do that, I might as well re-paint the walls since everything has to moved away from them to paint the baseboards.  Definitely more work than I intended to create!!

So the work wall had to come down.  
First, I had to finish piecing my blue scrappy plus quilt top . . . . . right?!?
And as long as I was doing that, I may as well take some photos and walk you through the process I used to do this efficiently.  There are lots of tutorials on cutting and piecing this appealing modern block (just google "modern plus quilt pattern") to see for yourself.

My first amazing quilting teacher, Mary Ellen Hopkins, taught me to eliminate seams whenever possible to stream line the piecing process.  So I chose to use 2 squares and 1 rectangle for each plus and construct the quilt top in rows.  I used 3" cut strips -- cutting two 3" squares and one 3" by 8" rectangle. 
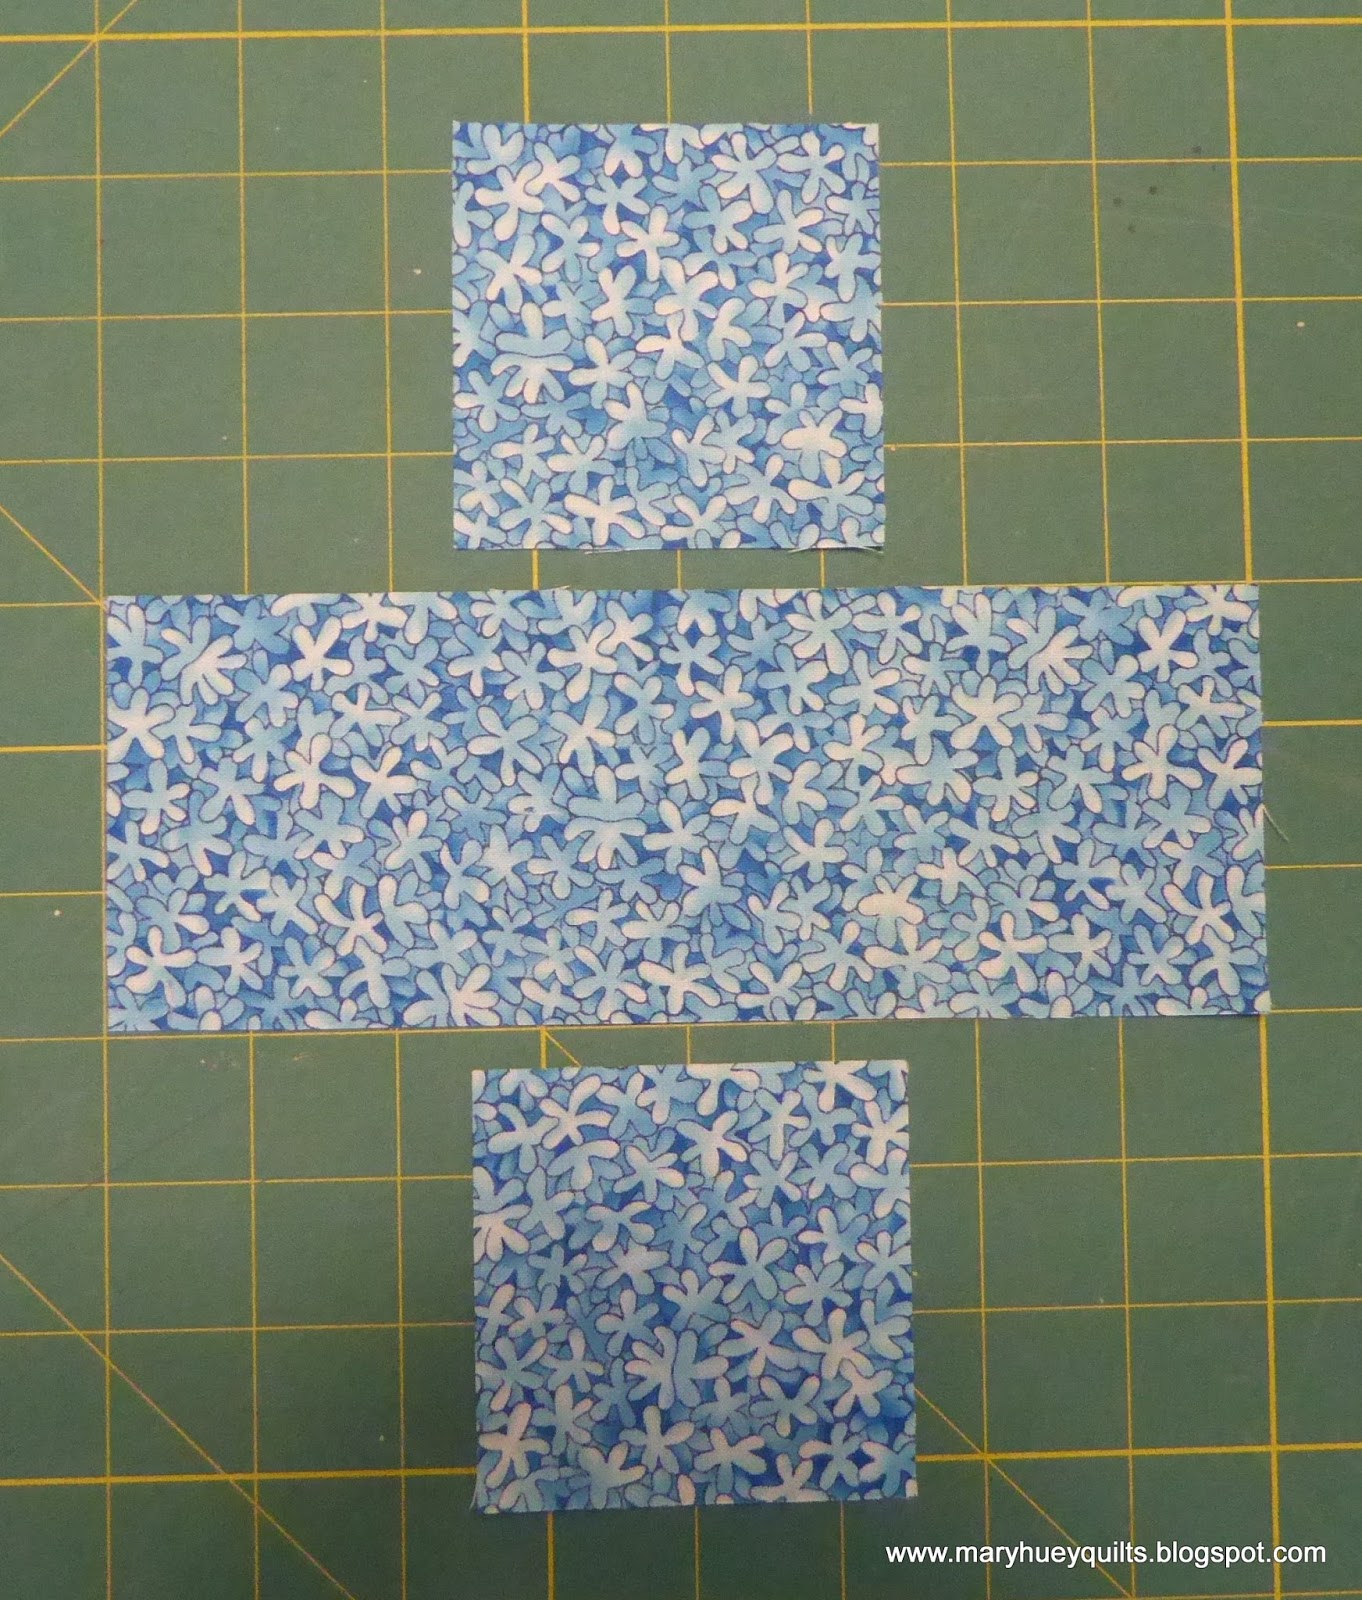
The size of the plus can be customized easily. Start by deciding on the finished size of one of the squares -- say 4 1/2".  The rectangle is 3 times that length, so it would be 13 1/2".  Now add the seam allowances.  Cutting sizes will be 5" strips cut into two 5" squares and one 5" by 14" rectangle.  Generally, the larger the quilt you want to make, the larger "plus" block you can use.

When working in rows rather than blocks, one needs to lay out the quilt -- I had about half of it on the work wall before I started stitching the rows together.  I liked the results of using a wide assortment of lights, mediums, and darks and scattering them in a random order.
It only took a couple rows to realize I needed to add numbers to each row to stay organized.
The first few rows were accomplished with many trips back and forth between the work wall and the sewing machine.  Finally, I found a system that allowed me to take a complete row off the work wall and to the machine in one trip.  I realized that by starting at the top of the work wall and keeping the first piece on top of the stack and ending with the last piece on the bottom of the stack with all the pieces "right side up", I was able to stitch each row efficiently and without mistakes.
I worked down the stack, chain piecing pairs -- the number pinned to the first piece was a big help!  Here is one row still linked with the chain stitching - the seam allowances are to the right.
To get them back into a stack for the next step without going to the work wall, I discovered than if I flipped each pair over . . . . seams on the left side of each pair . . . .
. . . . then snipped the thread chains . . .    
and stacked them up from the bottom pair to the top pair, it kept everything in perfect order.
Then back to chain piecing!  The first pair is opened up . . .   
and the second pair right side down added and so on. 
At the end of the row, sometimes there is an odd piece/pair -- no worries.  It becomes the bottom of the stack for the next stage of the process. 
Flipping the pairs over before restacking was the key to this process working smoothly!
Row-by-row, I worked across the quilt during the morning. There are very few seam intersections between the rows and I found that ironing the seams in the odd rows up and the even rows down worked well.
Did you notice these y-seam blocks being used as my sew-offs at the end of each stage?  I'm making steady progress on getting these blocks together and you will see them before the month is out!
By lunch time, the top was together and off the work wall.   Now all I need to do is make a backing, layer it, and quilt it to cross off one of my 2016 Finish-A-Long goals for this quarter!! 
No more procrastinating the painting preparations!?! 
The work wall came down, I sanded the baseboards and washed everything down  -- the painting has begun!

Don't let the other stuff stop you from stitching!!

Mary Huey


** Some of my posts contain affiliate links and if you make a purchase via one of those links, I may get a small commission.  I only suggest products that I use and recommend based on my own experience.  Thank you for supporting my blog!


Friday, April 8, 2016

New Quarter -- New Stitching Goals!!

I'm finding the challenge of setting finishing goals "out loud" very motivating! 
How about you?
For the first quarter of 2016, I finished four of my six target projects so for the second quarter, I'm rolling over the two unfinished ones.

I made progress on this scrappy blue Crosses quilt.  I decided who is it for (a graduation quilt for my neighbor yard helper) so that increased the motivation.  I'm ahead of schedule since he doesn't graduate until 2017, but there are two of them, twins, so there will need to be a second quilt as well.  I'm still waffling about the size -- if I stay at the current 45" by 60", the left half is completely pieced and the right half is cut and laid up on the work wall.
It's also serving as a vehicle for the tidying and thinning out of the abundant blue stash I own.
(Can she reduce it by 25%?)
The other roll-over is my funky bird quilt.  I got it completely pieced and the backing prepped during the first quarter so now it's ready for some quilting!  Can't wait to finish this one! 
My Bug Hut medallion from a round robin bee has been laying in the "layered and ready to quilt" stack for a year.  I have been undecided about whether to machine quilt it or hand quilt it with pearle cotton using a "big stitch".  The real road block though is that I'm not sure I like the appliques I added at the end - some or all of them may come off.
Nathalie, my cohort in Paris, led this sew-along over a year ago.  Recently, I've been watching her on Instagram burn through a group of quilt tops that needed quilting and I was reminded that I have this little beauty all ready to layer and quilt. 
I think I might even have a little person in mind to receive it!
This quilt top has been intimidating my quilting muse for quilt a while now.  It's in two halves so it will be easier for me to manipulate at the machine.  The backing fabrics and batting are decided, but I know it's going to be the hardest of this group of finishes to get moving.  There are so many little details to the piecing and so many colors!! 
It might be good to tackle this one first?
Finally, I'd love to finish this twin size quilt and pass it along to a friend who is redoing a bedroom in which this will be perfect! 
It took me forever to embroidery/applique the 12 blocks which were given to me when I was in high school by a friend whose mother had made her start the project when Gretta was in high school.  The blocks are at least 70 years old at this point. 
I'm looking forward to seeing your second quarter goals for the 2016 Finish-A-Long in the link-up which runs from April 8 through 16.  If you haven't joined the challenge yet, give it a try.  You can participate via Flickr or Instagram if you don't have a blog. 
All the information and a list of sponsors (there are prizes at the end of each quarter) are HERE!

Between blogging and Instagram, I am filled with inspiration and excitement about my quilt making these days.  Today is my 296th post!!  I appreciate your interest and encouragement so much! Writing my bi-weekly posts motivates my work and I'm currently organizing a celebratory post with some giveaways for the 300th which will be April 22 (if I stay on track)!

I'm stitching (yea) and painting (yuk) this weekend in NE Ohio, USA because the weather is going to be stinky -- yes, I know April showers bring May flowers but snow is not rain!!

Mary Huey


** Some of my posts contain affiliate links and if you make a purchase via one of those links, I may get a small commission.  I only suggest products that I use and recommend based on my own experience.  Thank you for supporting my blog!

Tuesday, April 5, 2016

First Quarter Finish #4

It's all finished and in it's new home.  I'm just home from a visit with my daughter and her family.  The piece was quilted when I left but I waited until I could try it out on the bed to be sure the size was okay before I did the binding. 
It looks a bit lumpy because the bed in the guest room has become a catch-all -- what a surprise?!?
My daughter is pleased with it and likes the simplicity of it and the fabrics I chose.  (Yea!!)
I took a number of pictures to share with you as I assembled it since I quilted it in three sections.
The quilting is simple and organic to enhance the overall design.
The leaves are in the lighter bands while randomly spaced lines that follow the zig-zag of the piecing fill the medium to dark value bands.
The large leaves were fun to stitch.  Each began with an arc from the pivot point.
Then back up the middle to the top adding three or four "veins" 
and an occasional "bite" before proceeding to the next pivot point. 
My sections were two sets of eight rows and a center set of six rows.  I quilted out to the outer edges of the eight  row sections and out to the final zig-zag seam of the edges to be joined to the center section which is seen below. 
I marked the center of the triangles along that edge to make alignment of the center section easier.
For the center section, I did not quilt the last row on both sides so that I could pull back the batting and lining during the joining of the sections as you see below.
This is a "four-layer" seam -- the backing and batting of the center section is pulled over to the left side and I'm stitching (with my walking foot) through four layers -- center section top (right side down), side section top (right side up), batting, and backing of the side section.
I did well with the alignment of the zig-zags and only nipped off a couple tips.
I find that working on my iron board for finishing the backing is best as the weight of the sections hanging down both sides keeps the layers spread open completely.
(The pieced section in the backing is made of the leftover pieces from the top.)
Before doing any trimming, I press the four-layer seam to one side and check the front to be sure there are no pleats or wrinkles.
I trimmed away the extra backing fabric (about 3/8" from the stitching line and smooth down the batting that is caught in the seam.
Now I smooth the other batting over being sure that it is laying flat and smooth.  Notice that the backing at the lower edge of the picture is still pulled aside.
Now I very carefully trim that batting to match the edge of the first piece.  This is the slowest part of the process as it's important to keep the cut smooth and not slice the quilt top.  I achieve a smooth invisible finish by moving the joining of the batting  about 1" away from the four-layer seam.  When I shared it with my quilting group after the three sections were together, none of them could find the joins -- no lumpy-ness!!
At this point, I can whip stitch the batting edges together or use a fusible batting tape -- Marti Michell makes both a 1" wide and 2" wide product.  I use the 2" wide in quilts.  Once again, slow and careful gives the best results to be sure the edges of the battings meet snuggly with no gaps. 
Finally, I'm ready to turn back the edge of the backing fabric and pin it in place for hand stitching.
Once that is finished, I headed back to "George" to quilt the joining area between the two sections, thankful that I haven't had to wrestle with all the bulk of the quilt for the entire process!!
And there it is -- finish #4 from my first quarter list for the 2016 Finish-A-Long over at SHE CAN QUILT.  The link-up for this quarter is pretty impressive with almost 600 finishes listed so far.
I'm pleased to have reached four out of six of my goals.  I did make progress on #5 (now a finished top instead of a pile of blocks) and #6 (in process but still 2/3 of the cutting and piecing to go).
I'm working on my second quarter list!!

Click HERE to see my original list for this quarter.

If you have any questions about this post, please let me know in the comments below.

If you need to muster up more courage to try this process yourself, remember that Marti Michell now offers a class on Craftsy to show you a variety of options for quilting in sections!!
Now through the end of April, Craftsy is offering a Pick-Your-Prize Giveaway -- the $100 value would cover a couple of classes!!

Mary Huey

** Some of my posts contain affiliate links and if you make a purchase via one of those links, I may get a small commission.  I only suggest products that I use and recommend based on my own experience.  Thank you for supporting my blog!


Friday, April 1, 2016

Selfish Sewing?!?

Over the past year or so, I've developed a blogger friendship with Australian quilt maker, Carla at Granny Maud's Girl.  Carla and I met during the 2015 Stash Bee and made blocks for one another.  For 2016, Carla decided to focus on a bit of "selfish sewing" and is doing a monthly feature, "Bee, Myself, and I" to share her selfish success -- you can read about it HERE.

Since most of my stitching this year has been focused on "goals" -- some for the 2016 Finish Along and some for the APQ 2016 Resolution challenge, I like the sound of Carla's idea!  So my selfish sewing this month has been to do something I really want to do with NO deadline!! 
And here it is!
I've been sitting on my hands about starting this project ever since I first saw it on Brigitte Giblin's website.  It's the Nundle Dilly-Bag (see it in glorious color HERE).  It's English paper pieced which I find relaxing and a good size bag at 22" across and 16" tall.  The hexagons are 1 1/2" so it will be a quick project.
My color inspiration came about while working through the blue shelves in my stash -- weeding out pieces, sorting what I keep back into stacks by value (light, medium, dark), and generally tidying the shelves up.  This morning glory print from Hoffman Fabrics surfaced with a bit of nostalgia about the old days when I owned a quilt shop.  As you can see, it's a subtle print -- the leaves are more gray than green and the ivory background keeps the contrast of the print soft. 
As I folded and sorted, I set aside any blue that looked good with the morning glories -- the darks were the most difficult to select since they look harsh but they might be needed so I pulled a few. 
I pulled some prints that will be interesting to fussy cut. 
And this "stripe" has possibilities suggested by Karen at Faeries and Fibres in recent post about using stripes in hexagons HERE.
This print is a charmer and there is a big hunk -- good addition -- lining perhaps? 
I want a bit of another color that will maintain the soft look -- I considered grays and greens -- greens won.  
This is one of my favorite prints from King's Road Imports back in the 90's -- I hope I can work it into my piece!  I hoarded a good size hunk of every color way they printed.
So here is the beginning of the base of the bag.  Not so sure about the dark hexies at this point, but the easiest way to be sure is to try.  You know that a basted hexie will never go to waste even if it doesn't make the cut!! 
I'm looking forward to hearing what Carla and her other friends have been up to for their selfish sewing during the month of March!!

To see what the other quilters have been doing for their "selfish" sewing, go HERE.

I hope your weekend has all the stitching time you want!

Mary Huey


** Some of my posts contain affiliate links and if you make a purchase via one of those links, I may get a small commission.  I only suggest products that I use and recommend based on my own experience.  Thank you for supporting my blog!