Showing posts with label de-stashing. Show all posts

Tuesday, September 1, 2015

Conclusion of August -- Tidy Up Month

Ahhh, September at last!!  
I can quit tidying up my studio (I gave it a pretty good month) and stitch guilt-free! 
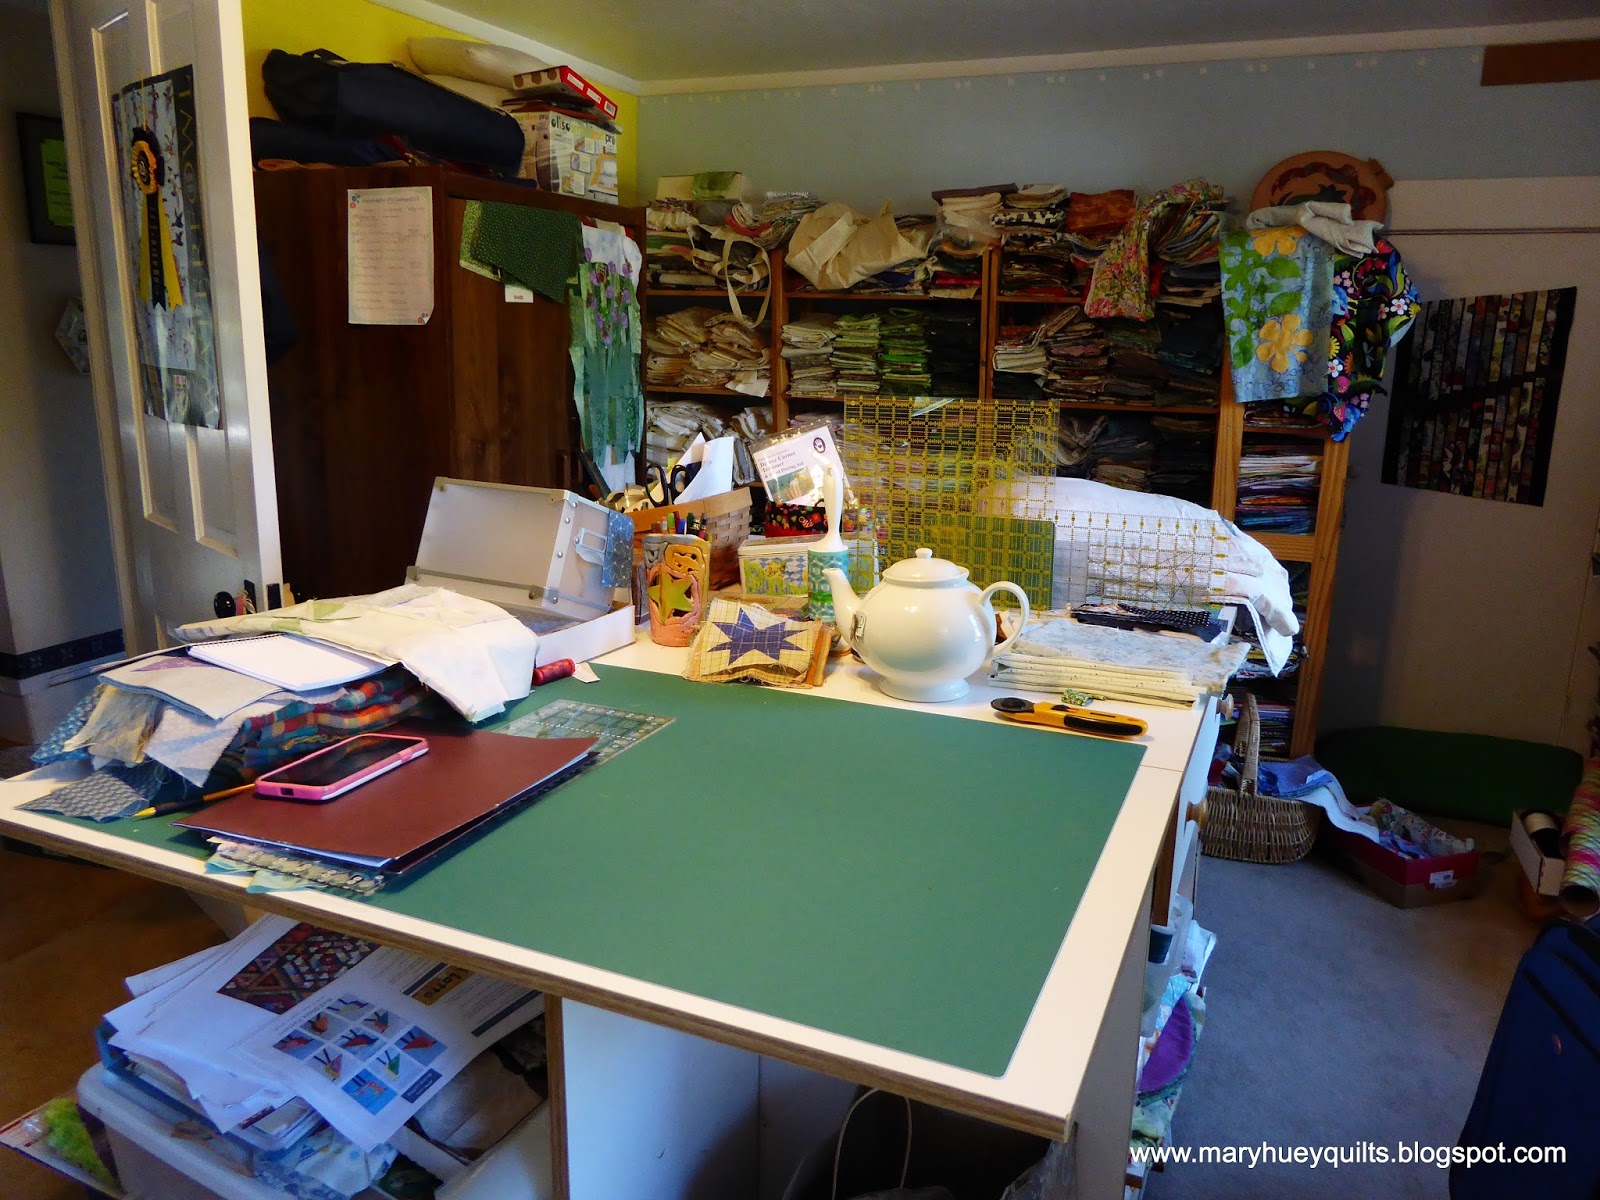
There has been progress!  I can now walk up to the color palette without tripping over piles of fabric.  That's good!! 
And the "sacred stacks" that live across the top shelf have had a straighten up and a bit of culling to eliminate some of the visual clutter at that end of the room. 
Now I want to attack getting my show ribbons hung back up across the top of this wall -- they were up for a time, but my hanging technique turned out to be inadequate. 
This is one of the piles of fabric I thinned out of the shelves -- I'll sell off some and donate some -- I'll begin de-stashing on my Instagram feed tomorrow -- it's @hueymary if you want to do a bit of armchair shopping!!
Two weeks ago, I couldn't walk around this side of the room -- my box stash was piled at the end of the cutting table.
Today it's stacked neatly and tucked into a corner.  Don't you just hate to let go of a sturdy box that might be a storage space for something?!? 
Once the cutting table was somewhat clear . . . .
I caved into several small stitching projects.  Nothing big, just a little stress release. 
I did get the work wall clear of papers -- the bulletin board on the left will work out well!
And I designated this small foam core board for "storage" of projects I don't want to put away quite yet.  It will be like a fermenting space.
We had our annual house guest over the weekend, so the pile of quilts that lives on the guest bed was rolled up and moved into the studio -- must get it back out of there tomorrow.
The sewing machine table has stayed fairly clear -- the only thing wrong with that is it encourages stitching over tidying?!?
One major decision has emerged -- the "tub" storage system for my style groups of fabric needs to be modified.  I stack all the fabric neatly in them, sorted by colors -- this is the polka dot/plaid/funky brights tub -- when I work from one, I pull it all apart but don't put it back together because it's time consuming to do.  Next thing I know there are piles of fabric all over the floor that just need to be put away. 
Must think about this -- can I pack the fabric into them in such a way to avoid the searching chaos or do I replace them with more shelving?  Not sure.
 
In the meantime, I hope to continue to improve the studio's appearance by letting go of some of the excess and finishing up more UFO's. 
It's definitely much more pleasant to work in there when it's tidier.
 
Let's stitch!!!
 
Mary Huey


Friday, March 6, 2015

To chop or not to chop?

Today's short essay is a response to Kathy's question to me earlier this week as a result of my post about de-stashing the green shelf -- "I keep intending to cut up my stash that is less than a yard into strips, 5" charms and layer cake squares, so I will be more likely to use it instead of having to plow through the bulk each time I get the bug to make something. I have the wire basket system of storing fabrics, 1 color for about every 1 1/2 deep basket section. Too over whelming to dig through each project, press, and cut. I need something much more user friendly! In your opinion, would I regret cutting it all up?"
 
It set me to thinking and I decided to respond via today's post as it might be helpful to some others.
 
I had a brief romance with chopping small amounts of fabric up into "pre-cut" strips many years ago at the urging of a favorite teacher.  I know this works for some quilters, but in general it didn't work for me. 
 
And the reason it didn't work for the most part was that I was creating pre-cuts that didn't fit into my style of quiltmaking. 
It turns out that her pre-cuts weren't my pre-cuts.
 
 That being said, I do have a 2 1/2" strip stash that has been a continuous source of quilts and inspiration for over 20 years. 
 
It began with the leftovers from this quilt -- I made enough HST's for a twin size quilt, got bored, and made a lap size instead.  I was able to use up some of those HST's for block swaps in a group that I belonged to for 10 years, so soon strips were added as well.
It was the starting point for my wonderful scrappy tumbling blocks quilt (and there is a second one all pieced that I use for class demos on setting the units together).
It is my go-to source for scrappy checkerboard quilts as you saw in the Economy Star quilts I finished this winter.
That spawned the advent of this sidekick basket of 2 1/2" squares -- got a little carried away cutting squares so they need their own space.
For years, the 2 1/2" strips have lived in a shoebox with strips coming and going at a steady pace but recently I moved to a slightly larger box -- it was just gushing -- no doubt, the result of my de-stashing efforts over the past year.
As I write, I keep thinking of more and more quilts that began in this box -- there was the EPP Grandmother's Flower Garden -- all the floral hexies are from it.
When the box gets too full, I cull it for 18" long strips to use in my charity quilting group's scrappy bargello quilt tops.
My conclusion?  Personally, between not finding cutting up stuff without knowing how it will be used that interesting and not wanting the pressure of trying to figure out how to use all those 5" squares, I wouldn't start cutting up too much of my stash.
 
One's pre-cuts need to be an inspiring starting point for them to be useful to you.  Perhaps looking back through some of your recent quilts will provide some clues about what pre-cuts will be useful.  With my current de-stashing, I'm modifying the "storage" of my small pieces (under 1/4 yard) because this doesn't work for me -- bits dropped into a basket in the corner.  
The right hand stack is pinks and green that are very small pieces -- most 1/8 yard or less.  I hope that now when I begin a quilt, it will be easier to lift out that stack and start with those pieces -- we'll see?
So how do you feel about it -- I'm sure Kathy would love to know if you "chop or not".
Share your thoughts in the comments for all of us to learn!!
 
Mary Huey
 
You can read about my other de-stashing exploits by clicking on the "de-stashing" tag below!
 

Tuesday, March 3, 2015

Working the "greens"

Today, I'm working the "greens" . . . . the green shelf in my stash that is.  I've decided to make my "charity quilt top of the month" from this shelf for March.  Green seems to be a March color -- St. Patrick's and all that, but those of us in the snow belt are beginning to yearn for more green.  Actually, I would take any sign of green at this point!!
It's easiest to just pull it all down onto the floor and start from scratch.  I'm sorting the true greens from the yellow-greens and the blue-greens.  Then I'll restack them from light to dark for each of the three green groups as that is the easiest way for me to access them quickly,
I've chosen a pattern for this month's charity quilt -- the Moda Love Layer Cake Quilt which was the feature pattern during the Moda Love Blog Tour in September, 2014 --
you can find the pattern PDF HERE
It's includes 3 different sizes determined by the size pre-cut stack you chose. 
 I did the 32" size using a 5" charm pak last fall for a baby quilt -- can't find a picture of it -- maybe I didn't take a picture of it?
So this time, I'm going for the 72" square quilt and I'm making my own layer cake by cutting 10" squares from my green stash as I tidy the shelf up!!
So far, I've only cut a few and no lights yet -- I'm hoping I'll find a hunk of 3 yards of a background rather than doing a scrappy background -- we'll see?
At the same time, I'm working on my bird wall quilt which will premier during the Tree Bird Blog Hop!!  This is a sneak peak and I'm excited about the results so far!!
My day to post during the Hop (March 13 through March 23) is Thursday, March  19. 
This panel is the starting point but I'll also share how to adapt my design to any focus print/panel.
If I counted right, there are 56 bloggers participating and it will be fun to see everyone's projects!!
The complete schedule for the tour is available HERE.
 
Back to the greens!!
 
Mary Huey


Friday, February 20, 2015

4 X 7 Week 3 -- still going strong!!

Greetings from a very cold Northeast Ohio this morning!!  As I begin today's post it's up to -5 degrees F  -- yes I said "up".  It was -18 at 6 a.m. and a friend about 30 miles from here was saying it was -25 out in the country.  But the sun is shining and there's not a cloud in the very blue sky so at least it looks cheerful out my office window!!
 
The colder than usual weather this week has kept me close to home and made it easy to achieve more than 30 minutes of stitching every day.  I'd say I've averaged about 3 hours a day in my studio in addition to my daily evening hand work session.  I wish every week was so focused and productive!!
 
I took the week off from my hexagon push and focused on my monthly charity quilt goal -- you can read about the January one HERE.  My idea for February was triggered by Nathalie at Les Ouvrages de Nat -- she shared her Fat Quarter Log Cabin project earlier in the month and I recalled that I had cut two sets in pinks a couple years ago.  Pink seems to be a good focus color for February and so I tidied up the pink shelf pulling fabric for four more sets of blocks for this month's quilt.
 
The pattern comes from Marti Michell's Log Cabin ABC's but is also a separate pattern (which you can find at Marti & Me Club shops).
Marti's cutting formula for this quilt uses her Log Cabin Ruler #8038 for 1" or 2" finished strips.  I spent a happy afternoon in my studio, cutting and watching an old movie. 
If you aren't familiar with Marti's Log Cabin rulers and you are thinking, why do I need a special ruler? -- I can relate -- it was exactly my reaction when the tools were first introduced. 
BUT, being able to cut everything for 24 blocks in two hours is wonderful!!  I even cut the "leftovers" at the ends of the strip into little squares which are becoming 4-patches for something in the future. 
So here's my stacks for 6 sets of log cabin blocks -- 4 blocks will come from each stack.
Do you notice anything that might be a problem?
Yep, it's the two stacks on the right -- those are the ones I cut two years ago and apparently I was cutting with wider strips. 
This calls for a "cuppa tea" and one of those scones that I hoarded in the freezer. 
A decision needed to be made. 
Do I make the blocks as they are cut and hope no one notices that 8 of them use different size strips (the finished blocks would all be 13")?
Do I make two smaller quilts?
Do I pull out two more sets of fabrics and cut from scratch?
Do I trim down the wider sets?
Which would you have done?
 
Well, I trimmed the strips down and had to rummage around to add a few strips since the newly cut sets used more strips.  In the end, I had my piecing tray all set up with the strips ready to stitch the blocks.  I chain piece my way through one stack making four blocks at a time.  Because all the strips have been precut to the exact length needed, the finished blocks are very consistent in size.  I also don't have to trim or square up the blocks as I go.  Two more reasons to love this tool!! 
The first two sets are on the work wall - looks pretty good, doesn't it?
The plan is for a twin size quilt and it's going to be charming.  It will reduce my stash by 12 yards by the time I get the top and back organized - a very good thing! 
 Two months and two shelves down -- ten to go!?! 
I also had a finish this week -- this is a new sample for a Rose Star Workshop that I'll be teaching at Mercantile on Main in Coshocton, Ohio on Friday, March 20, 2015.  It took a couple sessions to get the fabrics arranged but once that hurdle was cleared, the piecing took just 90 minutes.  The chain-piecing technique from my DVD, Set-In Piecing Simplified really streamlines those y-seams!!
And it's on sale through 2/28/2015!!
I love the mixture of batiks and prints that I finally achieved!  And this will be a lovely gift for someone in the future.  It's cut with Marti Michell's new 3" Kite and Crown template set.
If you can't find this tool set locally, I usually have some in stock -- e-mail me at maryhueyquilts@hotmail.com
 
Yesterday brought a large squishy envelope in the mail -- it is the selvedge zipper bag I won from Julie at www.pinkdoxies.blogspot.com during the Grow Your Blog Hop -- what fun!!
I hope you are coming off a productive week, too!!  It's feel so good!
More sunshine and cold on tap here, so I'm confident I'll be in the studio a lot again in the coming week!!
 
Mary Huey


Tuesday, January 27, 2015

My 2015 Charity Quilt Goal

Several years ago, I started to set annual quilting goals motivated by the volume of unfinished projects and fabric that I own (owning a quilt shop for 26 years will do that to you). 
 
This year, I want to create a new quilt top each month from one of my shelves of fabric.  The quilt tops will be used as donation quilts to the various causes that I support.  Since I store the bulk of my fabric by color groups, that means it will be a year of (generally) monochromatic quilts. 

Happily, once I got the idea, an inspiration perfectly suited to January appeared!!  Winter here in Northeast Ohio (USA) is a brown and (if we are lucky) white time of the year. 

The cardinals that come to my feeder are a reliable spot of color in the bland landscape.  This series of photos I took gave me the idea!  The males are a striking red but the females have a subtle beauty that I admire.


We keep a small pump going all winter in our little garden pond and on this 21 degree (F) morning, it provided just enough open water for  her to get a drink and take a bath. 

And so the color scheme idea was born -- lots of background fabrics with sparks of golden brown and red. 

The pattern?  2 1/2" strips cut from "all" the fabrics on that shelf and worked into a Jelly Roll 1600 roll quilt -- quick to stitch and easy to quilt plus it will be a relaxing break from all my hexagon piecing work!

I spent some time every evening before the annual January sewing retreat with my quilting friends cutting the strips and tidying up the background shelf.  It provided a good opportunity to sort out the small pieces (under 1/4 yard) for quick access next time I need a scrappy assortment of backgrounds and to get the duplicate cuts of a print back together (why do we do that -- buy the same print two or three times?).  The shelf looks very tidy!!

Once I arrived at the retreat, I laid out my stack of strips and stack of squares and used them as leaders and enders while adding the background hexies to my "masterpiece".
During the evenings, when my eyes were tired, I stitched the strips end to end so there is a square of color between every strip. 
I did some calculations to make a larger quilt than is typical with a jelly roll -- my goal was a twin size and I had about 2500 inches of length when I got everything stitched together. 
Pressing is not nearly so tedious when you are at a retreat -- there is always someone available to distract you with some goofy conversation!  My sidekick here couldn't resist indulging in an opportunity to ham it up for the group with an improv "info-mmercial" about one of my upcoming workshops!
Here's a quick tip on minimizing the twisting that can occur when stitching a seam that is 1250 inches long.   I accordion pleat the strip into a tidy stack. 
 The end of the strip is on the left side of this picture.
  I split the stack in half and bring the bottom half of the stack over to my left with the other end of the strip on top of that half of the stack.
Now I lay these two stacks on the floor under my sewing machine table.
 I bring the two ends up and merge them together as I stitch down the seam.  The strip feeds up smoothly with no twisting.  I can even leave and come back without a problem.  Of course, I'm doing this away from my (helpful) cats!! 
You'll notice that I pressed the seam once I have stitched the first pass but after that I don't press again until I have the piece finished. 
 
As I progressed from a band of two strips to four strips to eight strips to sixteen strips, each seam gets shorter.  Fortunately I realized at sixteen strips that to continue the doubling would not get the results I wanted.  If I doubled to thirty-two and then doubled that to sixty-four, my quilt top would have been too narrow and too long. 
 
So when I had sixteen strips sewn together, I divided it into three equal sections.  I stitched those three sections together for a top that is 66" by 96".  Most of my strips were approximately 40" long, but there were shorter strips.  That helped achieve the staggered placement of the squares of color.  I'm very pleased with the result and it used up over 5 yards of fabric from my hoard!!
As I folded the top in half to pack it up for the trip home, I thought to myself this is going to be hard to give away?!  So I might unstitch the center seam and finish it as two laprobes (48" by 66") -- one to donate and one for me?
 If you've never done a Jelly Roll 1600 quilt, you can go HERE to watch a video on how to make one.  If you are on Pinterest, do a search for "Jelly Roll 1600" ideas to get inspired.  Then give it a try with that Jelly Roll that is taking up space on your shelves or better yet, cut your own 2 1/2" strips from your stash of fabric and thin out a bit!! 
 
That gives me another idea -- my 2 1/2" strip box is overflowing -- I could clear it out with a scrappy strippy quilt top!!
 
 If you are visiting from the GROW YOUR BLOG link, thanks for taking the time to stop by!  Be sure to read my post from 1/25 (HERE) and enter my giveaway by leaving a comment at the end of that post!
 
To the studio!!
Mary Huey