Time to talk about fussy cutting with the diamonds.
I've been playing with a couple different fabric pulls so hope it's not too distracting when I jump back and forth between them.
You can also download a PDF of it by clicking here.
Many of you have fussy cut motifs out of a print for a special effect or made a "stack & whack" style quilt. We'll use some of those same techniques. The fabric you are working with will dictate what you can do to some extent. A symmetrical print like the one below is the easiest to anticipate results -- when you set down a pair of mirrors at a 60 degree angle, what you see is pretty much what you will get (minus the seams).


But a print with a scattered, directional or asymmetrical design can't be auditioned as easily because you will never be able to reproduce what you see in the mirror.

And it might just be ugly!!

What you get from prints like that are swirls of design motifs so you have to be open to a little surprise.

There are two ways to cut these pieces. The diamonds for this star (above) were cut using Bethany Reynolds "stack and whack" approach of layering up 6 pieces of fabric, matched identically, and then cutting all six diamonds at the same time. The fun of these is that you always have two options.

The hardest part of fussy cutting is making the decision to chop a beautiful piece of fabric up like a slice of Swiss cheese. But that's the only way to get beautiful stars like this one in my quilt, Pieceful Constellations!

I play with the mirrors to get a rough idea of what a motif will look like in a swirl of six. Then I rough cut the motif staying about 1/4" outside the template.

I use that first rough cut piece to search out and rough cut five more pieces.

When doing the final cut, I work on a small mat or my rotating mat so I can cut all the way around the template easily and safely -- twist and cut, twist and cut.

On this template, I used the intersection of two lines near the center of the template (where the pencil is pointing) as my register mark to cut each diamond.
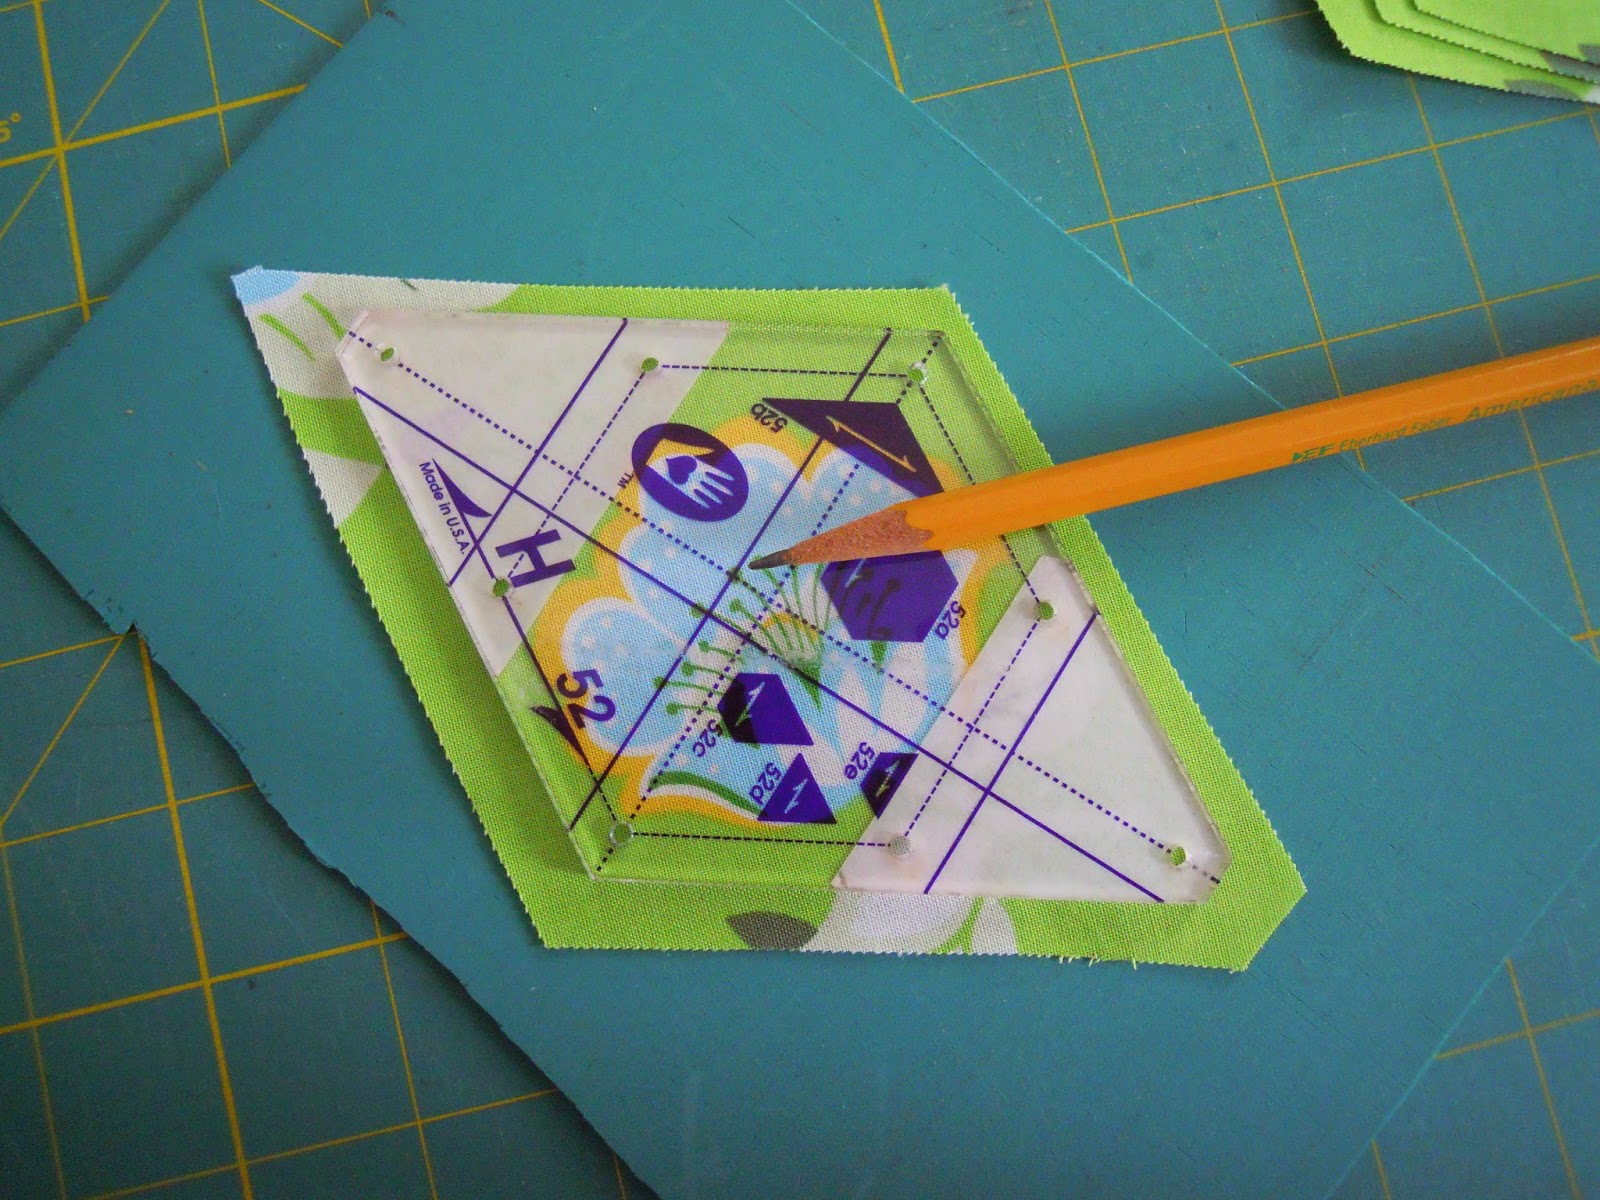
I centered that register mark
on the same small dot near the center of the flower (where the pencil is pointing) for each piece. Since the right and left sides of this motif are different, good placement works fine. For a symmetrical repeat, setting up several register marks on the template might be necessary for better alignment.
Here's the finished block for that set of diamonds!

I had planned to talk about working with stripes today also, but it's long enough. Next Friday, 3/28, I post a tutorial on several ways to cut stripes for interesting effects. If you have a print that calls for some fussy cutting, make a couple stars this week.
If you are looking for Step 1, it's here!
Mary Huey
All material Copyrighted by Mary Huey Quilts!
If you are having trouble finding Marti's templates locally, you can order them directly from her at
Hi Mary - I've done loads of fussy cutting over the years but never thought about starting with a rough cut. Brilliant idea! I am about to start a new hexagon project so that tip will come in handy. Thanks for sharing!
ReplyDeleteGlad my idea will be helpful to you, Karen! Thanks for visiting again!!
DeleteWhat an interesting and helpful tutorial, Mary! I'm bookmarking it. I invite you to share this by linking to Hexie Weekend. Off to find some fabric to play with stars.
ReplyDeleteokay, I will! Thanks!
DeleteI bookmarked this one too. Thanks for sharing under our Tuesday Archives "Fussy Cut" theme.
ReplyDelete