Tuesday, August 8, 2017

A Full Moon Means Focus on Finishing!!

I'm not really superstitious but I do believe that the full moon agitates my insides more than I like,
So several years ago I developed a "full moon strategy" to combat the negative impact I feel for the few days surrounding this monthly cycle.  One aspect of it is to finish projects rather than start projects.   I get such a positive vibe from finishing something that it just makes sense to manufacture good vibrations to counteract the turbulence of the full moon.

So I dedicated this past weekend to finishing!!

Finished the Meteor Shower wall hanging the I made for Emily Breclaw's Adventures in Hexagon blog tour -- yea!!!  (Read about that finish HERE).

Then I turned to the two twin size quilts that came back from Sarah at Quilting by the Mill the end of May and the binding that was already cut -- been setting right there for two months patiently waiting!
 Got those bound -- yea!!!
Took all of three hours and now they are ready to put up for sale in my Etsy shop!!
Go HERE to look at them!
I think they will look charming in a young girl's bedroom -- soft blue walls, white furniture!!
Plus getting them finished is another goal reached on my third quarter 2017 Finish A-Long list!!
While I'm (smugly) crossing that off the list, I realize that one third of the quarter is gone and I still have four quilts to quilt and bind on that list?!?
(The LIST with full frontal pics of the quilts!)
So Monday (sturgeon moon day) was all about layering and basting!

Number one.
A scrappy "many trips" for my nephew-in-law.
Done!

Number two.
A charming crib quilt that is destined for the Etsy shop.
Done!!

Number three.
My Smorgasblocks top from last summer -- destined for a niece-in-law.
Done!!!

Wow, I'm so impressed with my stick-to-it attitude.
I even know exactly how I'm going to quilt one of them and the other two are beginning to make suggestions -- love it when the quilt talks to me like that!!

Next challenge?
Quilt them of course!
I hope that stacking them up next to George will be a nagging reminder to "come quilt us".

I can't believe I did that -- layered three quilts in one day?!?
Whew?!?

Mary

9/26/2017 -- linking up for the 3rd quarter 2017 Finish A Long!!


Friday, August 4, 2017

Another Look at Meteor Shower

It's not often that I push all the way through a project from beginning to end but apparently having a quilting design idea was enough motivation to keep me moving on this piece!
Sometime in the past couple years, I came across a quilt on Pinterest quilted in concentric circles like a huge target and it inspired me.  The swirling design of Meteor Shower called out for concentric circles as soon as I started the final stages of piecing! 
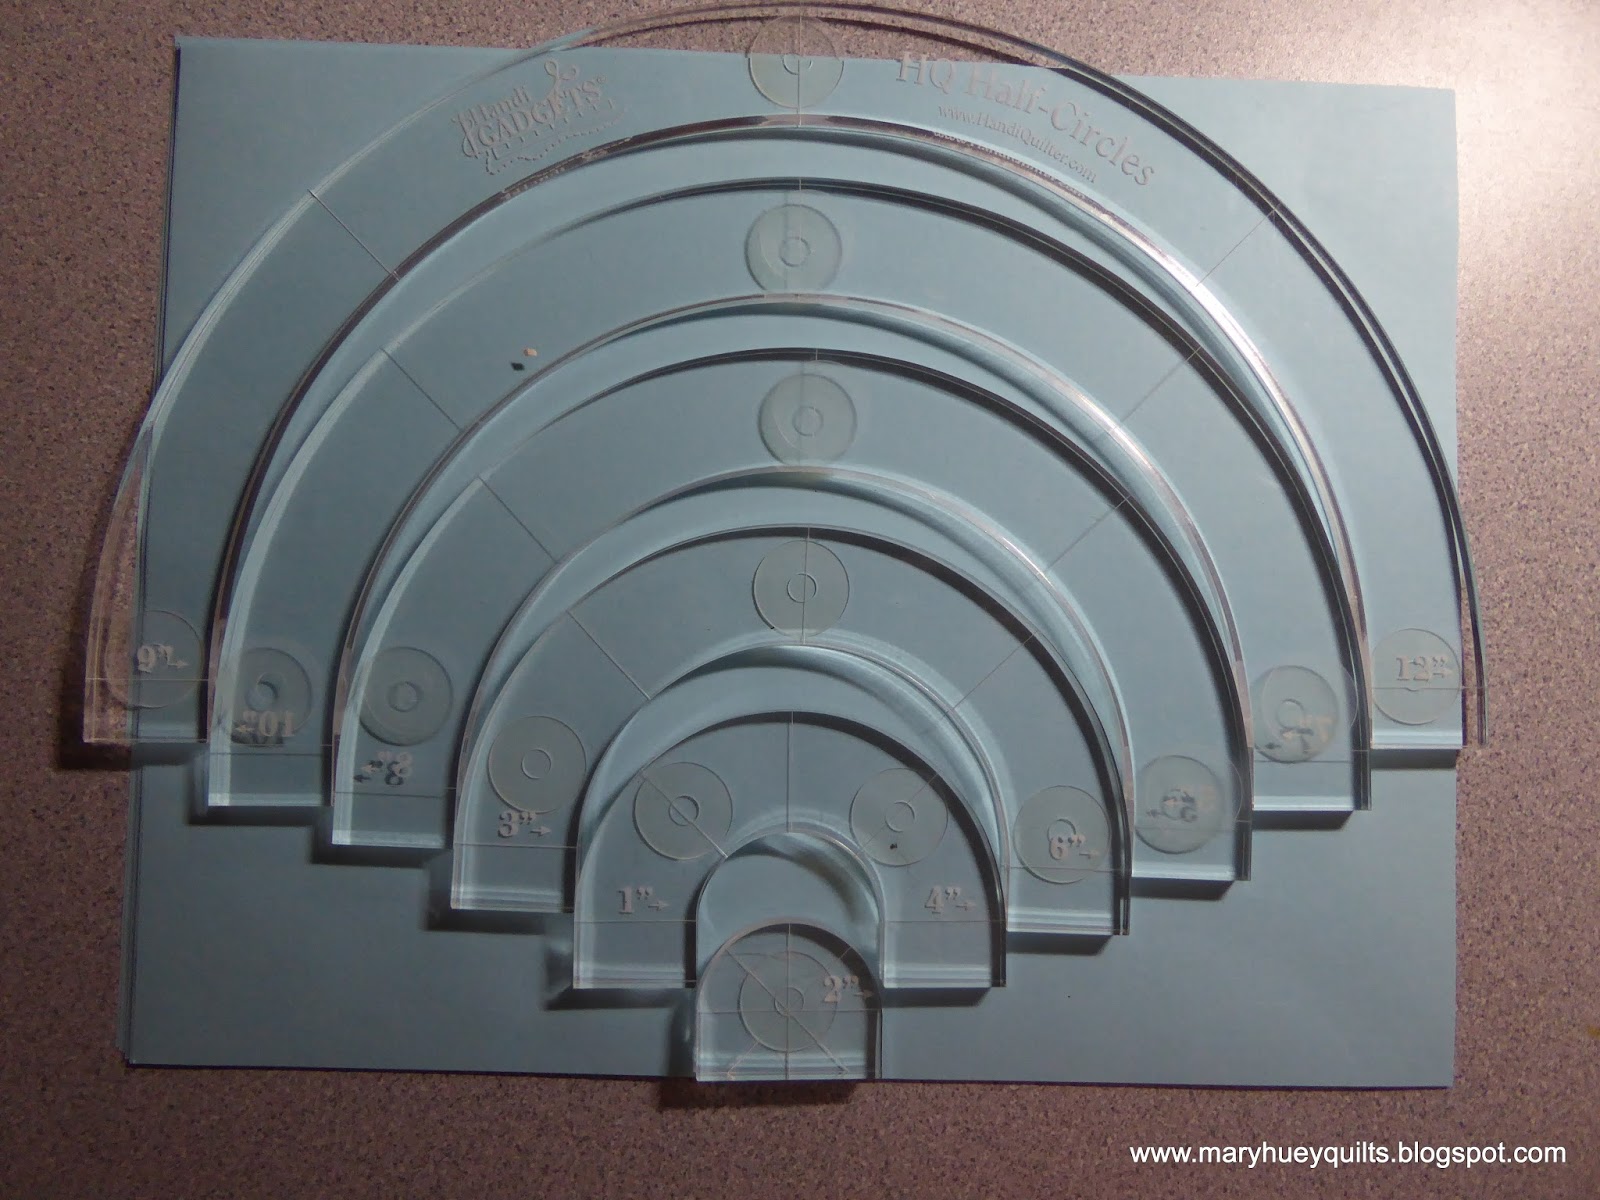
Eager to try it out, I fiddled with my set of Handi Gadgets Half Circles.  
The first circle fit right inside the center hexagon!
Once I had finished the 12" circle, it was obvious I would need a new strategy.
In the spring, I watched a gal demonstrate the Westalee Ruler Foot Echo Guides for Cindy's Sew Easy Shop here in Cleveland (Ohio) during a local show.  The tools are distributed in the USA by Sew Steady and HERE is a little video about the echo guides.  I was very impressed so I bought a set and hoped that my APQS ruler foot would work with them.  It didn't, but happily, APQS introduced a new ruler foot -- exactly 1/4" from the needle to the outer edge and with a new shank design (look back up at the first picture) that accommodates rulers all the way around the foot -- and the guides do fit on that foot!!
I experimented with drawing circles -- that didn't work.
So I used my Fine Line arc ruler to keep my stitching (fairly) steady and on track.
The key lies in stopping every 3" or so and adjusting the ruler to line up with the next section of the previous circle.  I'm not going to share close-up pictures of the stitching -- you'll see all the hic-cups.
As I neared the point at which the ever larger circles would intersect the edges of the quilt, I decided to stop the circles once I was past the last group of teal diamonds and finish the corners with straight lines to create the appearance of a burst of light.
A sheet of paper laid on the quilt helped me experiment with how that might look and how to proceed with the stitching order.
I switched to the straight ruler and zigzagged around the center creating a series of points.
After the first complete pass around the quilt, it did not lay completely flat outside the circle.
I needed to add more quilting to match the density of the center of the quilt. 
A second trip around the entire quilt with zigzags that overlapped the first round and were shorter took care of that.  As I was finishing the second round, I thought it would have added some more interest to have changed colors of thread and perhaps add a third row with a third thread color.
Next time?
Or you could do that and let me know how it looks!
Here's a close-up of one corner so you can get a better idea of how it looks.
The edges were not quite as flat as I want for a wall hanging so I spread the quilt out and laid a soaking wet towel over top for a couple hours -- that flattened it out nicely.
It's laying out on the porch drying overnight -- thought I would get it bound today, too.
But there is no point rushing it -- it will be good and dry by morning and tomorrow, I'll have a FINISH!!!
I love the movement the concentric circles create!
I'm not sure I would do a big quilt with this design and I think most quilters who do circles use a walking foot and a guide, but George doesn't walk, he only runs!!

If you missed leaving a comment on my last post to enter my Adventures In Hexagons giveaways,  keep going down the page and read Tuesday's post.
Winners will be picked on Saturday evening, 8/5/2017.

Enjoy your weekend!!
Mary


Friday, July 28, 2017

Long Time Gone -- the Top is Finished!!

All the boxes are checked!
The bits and pieces have been cut up for the final borders!
The background text prints have been folded up and put back on the shelf!
The "project" basket is empty and ready for the next one!!
The piles of strips have become borders.
The borders have been stitched in place.
I found enough of this print for a backing!!
And there it is!! 
Ready to layer and quilt.
I've decided to quilt it with the Baptist fan design and perhaps bind it with black.
These little church dashes are my favorite blocks in the quilt -- so much fun to hide little secrets in the center squares.
Love the plus panel with the star hidden in it -- think I'd like to expand that idea into a larger piece.
The book is on it's way to a new home -- yep, sold it!
And I've started cutting a new project!?!
Be sure to come back on Tuesday, August 1 to see the full reveal of the piece below as part of the Emily Breclaw's Adventures in Hexagons Book Blog Tour going on now! 
I'll have giveaways, too so get you "commenting hat" on and make sure you are NOT a "no-reply" commenter -- you can't win that way!!
Yesterday's stop was at Marti Michell's blog (HERE) and she has a great giveaway so you might want to pop over there for a read and to make a comment!

Enjoy the weekend!
Mary


Tuesday, July 25, 2017

The Maker's Tote -- Part Two

It's finished -- my version of Anna Graham of Noodlehead Patterns' Maker's Tote!!
And it's the first project to be crossed off my third quarter list for the 2017 Finish-A-Long!!
Hopefully, it won't be the only one!!
It's the only stitching I did last week so it's fun that it is a FINISH!!
Six of the past seven days have been crowded with people and activities including a visit to my friend's prairie in central Ohio (I shared lots of pictures last year HERE)
as well as a visit to The Kingwood Center in Mansfield, Ohio -- one of our great treasures I think!
This bed was filled with every color of coneflower currently available and it was stunning.
You know I left with two pots for my own garden!
Back to the tote -- the detailed instructions require careful study but every step was completely covered.  I spent a free afternoon cutting out everything needed for the body of the tote and organized it by steps on the studio floor.  While that's not a typical strategy for me, it was a good one and I need to make it a regular habit going forward!
I found a couple episodes of Vera on Hoopla to entertain me while working through all the steps. 
I decided not to learn a new skill and use a button instead of a snap but the search for buttons in my stash was futile.  It was fun to poke through the box and rediscover some little gems -- I need to find a use for more of these to keep them out of the "big yard sale"!! 
In the end, I opted for a Velcro closure on the pieced pocket. 
The thick foam interlining was intimidating to me, but my Bernina wasn't not phased by it.
There are two zipper installations in this tote and one of them uses an application from my tailoring past -- don't think I've done one of these since college?
Instructions were good and so I moved through it well if somewhat hesitant. 
The combination of foam interfacing and my coarse outer fabric made pressing this edge impossible. 
Thank goodness for basting!  
That did the trick allowing me to insert the zipper behind the opening and stitch it in place. 
The inner pockets are applied to the lining and are very roomy!
I adjusted the size of one of the pockets to accommodate the notebook that is always with me so I don't lose track of notes and ideas for the blog!
Once the lining was ready, it was time to layer it with the outside shell and insert the side gussets.
This is definitely the most challenging part of making this tote.  Anna advises going slowly and carefully so I (wisely) did this step at the beginning of one of my work sessions to avoid being impatient because I was tired.  These clips are becoming a favorite notion -- there was no way I could have pinned through all the layers successfully at this point.
I was disappointed when I looked down into the tote after inserting the side gussets -- you can see the excess fabric at the bottom.
Because the Ghana fabric doesn't handle de-stitching well, I fudged a bit and took a pleat in the bottom to remove most of the excess fabric.
I looked at all the photos I could find on Instagram and elsewhere of the inside of others' totes and couldn't tell much -- did I make a mistake?  I went back over all the measurements to see if I made a cutting error.  In the end, I think the pleat is the result of the lining being the same length as the outside of the bag -- because of the thickness of the foam interfacing used to give the tote such a nice shape, I think the lining should be a little shorter so it lays smoothly inside the tote.  
Therefore I've made a note on my pattern to take a 3/4" seam when stitching the two lining pieces together next time I make the tote.  

Time for the main zipper!
  Once again, basting was the easiest way for me to keep it in place.
 Anna's instructions for inserting this zipper are clear so my results are good.
The edges are finished with bias binding and really give the tote a professional look.
I'm so glad I bought one of these Clover bias tape makers years ago and almost as glad that I've learned to put it in the same drawer every time I use it!
It makes the task of preparing the strips so easy!
In no time, I had 2 1/2 yards of bias tape ready to stitch onto the tote! 
Loving these clips!!
Last step was making the handles -- I added extra stitching for texture since it's plain black fabric.
Anna designed it to have four layers of fabric and interfacing so it's quite sturdy.
It's a bit wide for my small hands, so I made a note to cut the piece an inch narrower next time.
Here's a peak inside!
It's very roomy and will be especially nice for my hand stitching or knitting when I'm traveling.
My only other small modification would be to place the front pocket up 1" higher on the front of the bag.  I may still move it but it will have to be hand stitched in place if I do that.
If you are tempted to make this bag, I encourage you to go for it!
It was a good experience and I'm pleased with the results.
This one is definitely for me but it will be a good gift make in the future!!

Now if you'll excuse me, I need to go find a project to put inside the tote!!

Mary

9/25/2017 -- linking up to 3rd quarter 2017 Finish-A-Long HERE