Friday, February 19, 2016

Simple and Subtle -- out of my comfort zone!

Last summer, my youngest daughter requested a "simple" quilt in muted greens for their redecorated guest room bed.  "Muted" isn't my comfort zone so it's taken longer to get a fabric assortment pulled that fulfills that requirement.

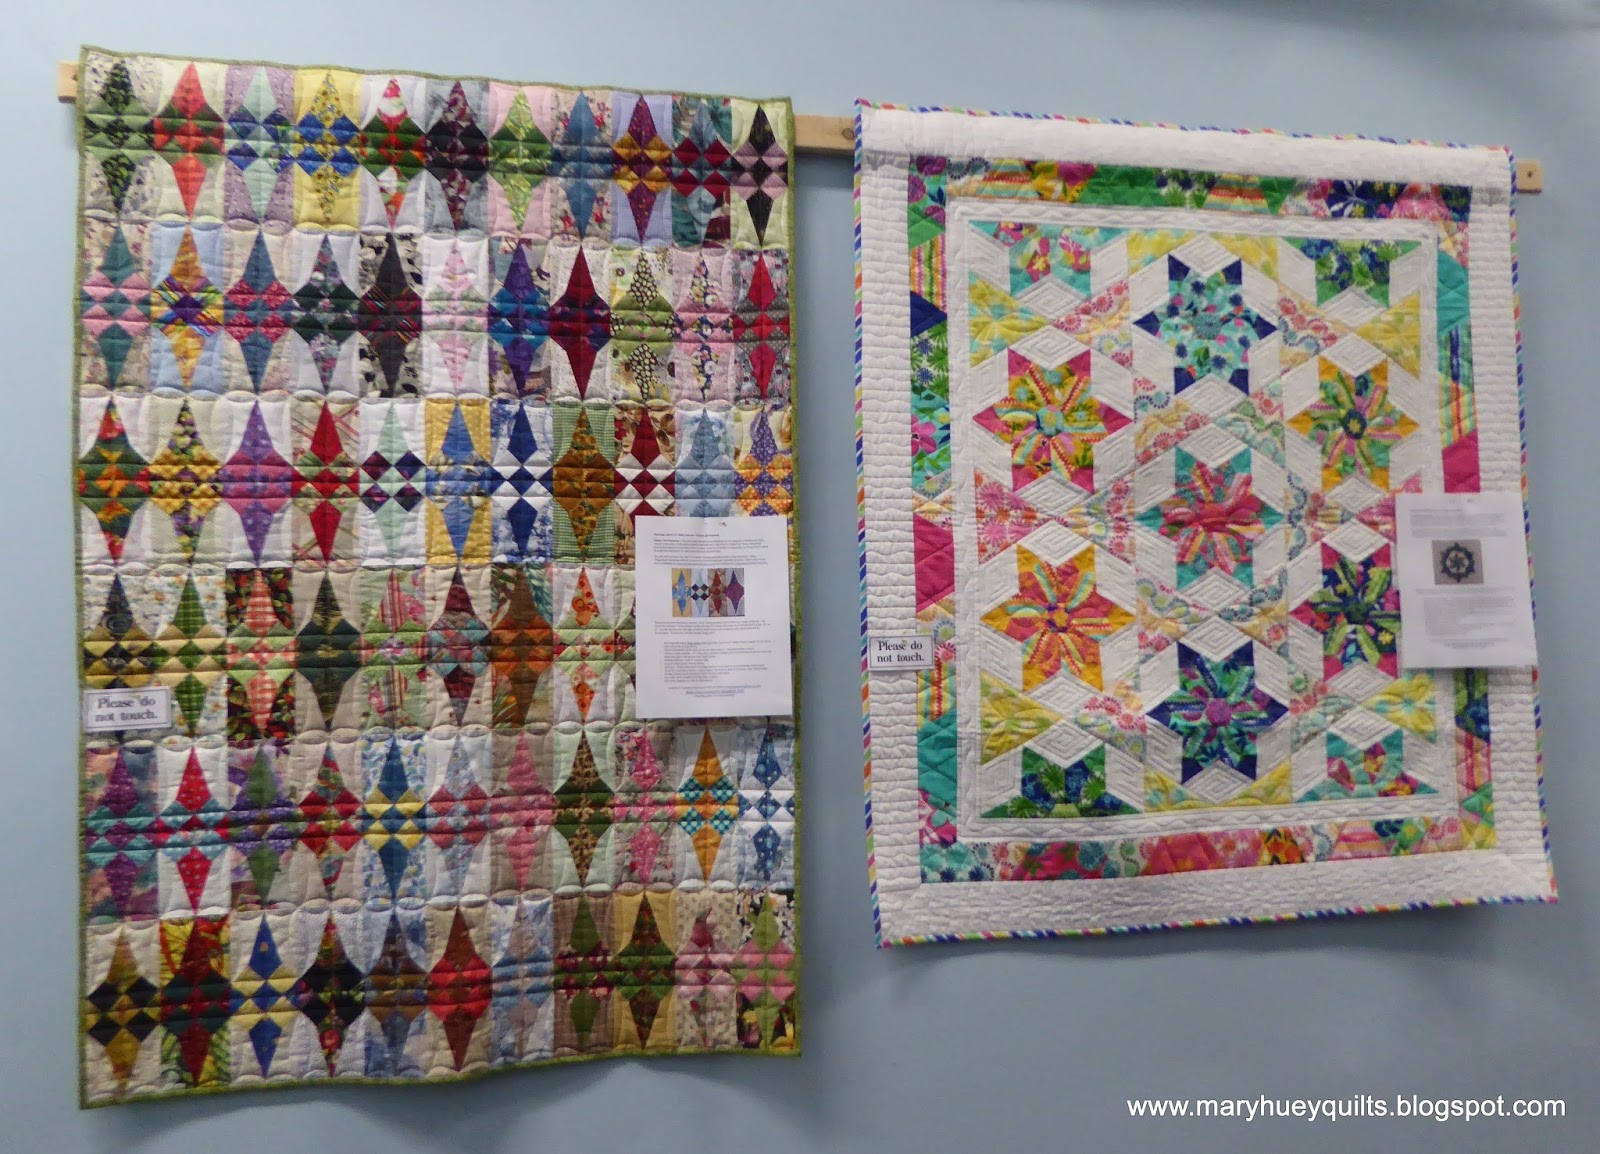
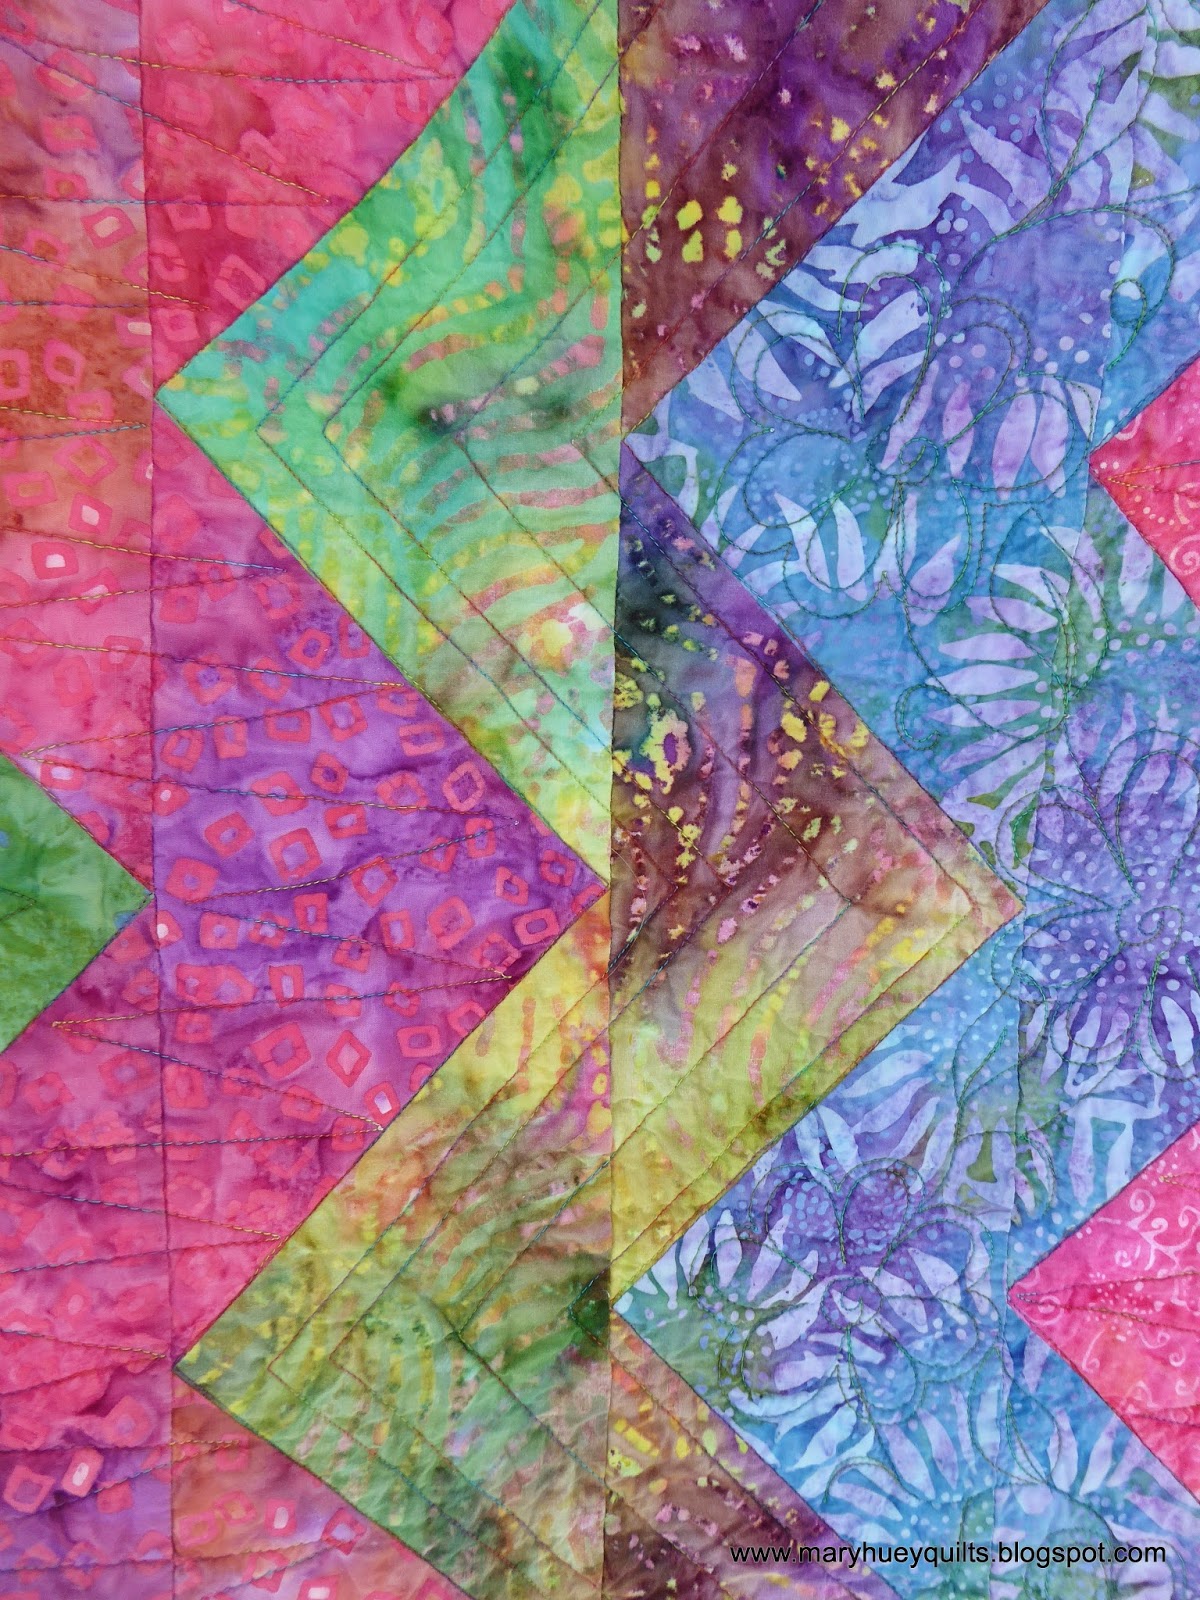
To carry out the "simple" theme, I chose to make a Giant Rick Rack quilt using Marti Michell's Flying Geese ruler.  It's a multi-size tool that I've used many times and I've made some delightful pieces with it like this batik laprobe.
The graphic element of this design is perfect for "simple".
Here are a couple pictures to illustrate how the ruler is used -- there is no waste!  The first cut is a standard half square triangle.  If you are making basic flying geese units, these will be the "background" smaller triangles.  The ruler is designed so you can cut both size triangles using one tool.  For the Giant Rick Rack, these smaller triangles will be used at the ends of the rows.
I needed fourteen of the large triangles cut from strips with the straight grain on the longest edges  as illustrated.  Five sizes can be cut with this tool and I used the second largest.
Before moving onto the next cut, I pull the corner of the tool up to match the corner of the triangle and trim that off -- very important step as you will see.
In this picture, you can see both the trimmed and untrimmed triangles.
Once all twenty-some fabrics were cut, I played with the order of them on my work wall (for about two days).  My goal was to minimize strong contrasts so there was lots of shifting around to achieve that.  I avoided setting the lightest prints next to the darkest prints choosing instead to gradate the values (light to medium to dark).  It's not a very exciting picture but a very necessary step!
The design is pieced in rows and I begin by assembling pairs.
This is where the trimmed corners simplify the process of matching the triangles perfectly.
  You may feel confident about "eyeballing" but these trimmed corners speed up the alignment process and assure straight rows.  Nothing goes askew!!
Once the rows are assembled, it's time to stitch them together and I have a tip to help with that.
Working with a basic ruler, line up one edge with the intersection of the seams at the point on the triangles.  Align one of the ruler's perpendicular lines with the opposite raw edge of the triangle (on the right in this picture).  Make a pencil mark at the right edge.
Now when you pin the rows together, you can match the pencil line to the point of the triangle on the row underneath. 
This assures you that the points of the zig zag rows will be level as you look across the quilt.
At this point, I have the rows set together into three sections of six rows ready to quilt. 
Once the Aurifil 40 wt thread arrives, I'll quilt each section and then do the final assembly and binding.  I plan to use some of the ideas from that bright quilt for the quilting designs!
If you live near a shop that sells Marti Michell's tools, ask about the Flying Geese Ruler and see if they carry her pattern, Zig Zag Geese which includes this and four other projects.


Let's all spend the weekend stitching!!

Mary Huey


Tuesday, February 16, 2016

My Workspace

Yesterday, I stumbled into a "linky" where stitchers are sharing their workspaces and it was fun to visit each of them and see how they organized the work area and the storage.  All of them were quite tidy, too!
 
One of the bloggers shares her space with her child's play area -- or does her child share his space with her??
It reminded me of the room just off the kitchen in our first house that my three children and I shared.  One wall was lined with toy storage and I got (okay, took) the big closet for my stitching supplies.  The floor was always in chaos but we shared nicely.  Since it was open to the kitchen, it was easy to keep an eye on the kids or just pop over to stitch up one more seam while the muffins finished baking.
 
In this house, I've moved the studio around looking for the best fit.  It started out on the first floor next to the dining room, but when my son came back home for a couple years, I moved it upstairs so I didn't hear him coming and going late at night and he wasn't bothered by me being up and stitching in the early morning.
 
I tried both bedrooms upstairs and settled on the (biggest) one across the front of the house. 
(It's also the hottest one in summer and the coldest one in winter.)
You've seen glimpses of it off and on, but today I'm taking you on a full blown tour. 
****Caution - this studio was not prepped for your viewing and the pictures are unedited so some viewers may be appalled that I can work in this space!?!
 
As you come up the stairs, you are greeted by a Huey wall of fame. 
Ancestors, kids, family portraits. 
The door is often closed because it's the hottest room in summer and the coldest in winter but I already said that didn't I?
Push open the door and there it is!!  It's interesting to me how immune I am to all this clutter.  That first corner of the cutting table is a constantly changing stack of things that just arrived or that need to be removed.  The front windows are being replaced in the next couple weeks so the curtains are stored away for the moment.  That board between the windows is my secondary work wall and is currently collecting blocks for Lucy Carson Kingwell's Smitten which is my February APQ Resolution project.  We'll take a closer look at those in a week or so.  The ironing board is strategically positioned so I can keep an eye on the street and the neighbors -- (-"
Look to the right and you see the business part of this room -- my machines!  I'm devoted to a Bernina 1031 for my piecing -- it's about 25 years old and recently earned a new set of feed dogs as a reward for lots of hard work!!
That laundry basket is almost unpacked from my retreat at the end of January.
And the artwork is Charley Harper bird posters.
As I sit at the machine, I can see my primary work wall.  It was an accident that it's organized this way, but I'll never change it -- even if I'm not working on that project, seeing it every time I look up keeps my subconscious focused on whatever the next design decision is that I'm seeking.
Just around the corner is the shelving unit where I keep the UFQ's.  Not many there these days!!  I recently moved all the BIG hunks of fabric to the bottom shelf.  There was a time that all four shelves were crammed full with UFQ's.  I'm impressed!!!
In the summer I open that window which looks out over a little wild zone in my yard -- I can see the nest box which is usually home to a pair of chickadees and enjoy the fragrance of the lilacs bushes that grown along the fence.
I use this end of the cutting table is as a stand-up desk -- lots of blog prep happens right there!
The other end is the real cutting area.  I "keep" the rulers in one of those slotted things in the middle so I can reach them from both ends -- though they do have a habit of not being there more often than I like.  There's a constant need to tidy up this end but I'm getting more regular about it.
One of the reasons I cut at that end is because the WALL OF FABRIC is right behind me and I can turn around and pull out dozens of pieces of fabric in the blink of an eye (I wish they would put themselves away).  The pieces hanging down are "inspiration" -- the ones on the left are the foundation of the Smitten blocks and that wonderful piece on the right is a new treasure that is fermenting!
When I squish back into the corner and aim the camera across the room diagonally, you can see how big it is.
There is one tidy zone -- this antique shelf I found 20 years ago is full of treasured books, family memorabilia and little hoards of things -- buttons, hankies, old candy tins.  I love this piece and it's going to the "home" with me!!
The one thing that is missing from my studio is a comfy chair for hand stitching (or reading).  Once the new windows are installed, I'm going to figure out how to remedy that.  I do more hand stitching these days and would enjoy having a space for it in the studio.
 
 I also want to add some lighting to eliminate some of the dark corners during winter days.
 
So you might envy the amount of space I have, but I hope it put your mind at ease about the need to have a very organized and beautiful work space.  If I had one of those, I'm not sure I'd work -- I'd be afraid to mess it up.
 
For a look at some other (tidied up) studios, visit Simple Simon HERE and click on the big LOVE badge to access the link-up.
 
Now go stitch, please!!
 
Mary Huey


Friday, February 12, 2016

Moments to ponder . . . .

One of my current goals is to post regularly to this blog -- Tuesday and Friday mornings.  I have a notebook with all the dates entered for the next couple months and I try to plan at least of half of my posts so that my brain and my hands can be working towards those topics.  Every now and then, there is a blank space or my brain just can't get "into" the intended topic. 

Today is one of those days.  I woke up feeling dull.  I hate feeling dull. 

There is a topic in my planning notebook, but it didn't work out -- perhaps because I was feeling dull yesterday, too?

So the question on days like this (as you know) is how to shed the dullness and get oneself moving in a positive direction.  I'm quite introspective and understand that there are two thought routes open to me -- go deeper into the dullness or lift oneself out of it.

I'm going for LIFTING!!
It's cold outside (17F) but my bird feeders are busy and I'm noticing that the tufted titmice are singing their territorial songs and the male goldfinches are showing little patches of yellow -- spring is just around the corner!

The office and the studio are drowning in clutter I haven't put away (yet) but I changed all the quilts in the living room from Christmas to the blue (winter) set -- my kind of redecorating -- no messing with paint!! 
 And there are two projects moving along at a steady pace in the studio!
Smitten is my APQ Resolution project for February -- don't you love the fabric combination in that one on the lower left?!?
The value palette of this "giant rick-rack" quilt is a challenge for me but my younger daughter requested a quilt specifically for her guest room -- how marvelous that after all the quilts I've pushed at her and her family, they still want another one!!
Both of my workshops at the Lake Metroparks Farm Park quilt show have reached the minimum enrollment!!  Good news for me and my students!!
(It's not to late to join one of them!)
And not only is this hexagon mosaic quilt no longer just a "wishlist" project, it's a ribbon winner! 
A great compliment. 
I happened to be standing around the corner from it last night at the show opening when a couple judges were looking it over -- they were surprised that it is entirely machine-pieced. 
"Aweeeesooome" as my grandchildren would say!
Mission accomplished!!
Okay!! 
Feeling much better -- thank you for providing the incentive to lift myself up this morning!
Today will be just fine!!

Reflect on all the love you get from YOUR people this weekend as we celebrate Valentine's Day!!

Mary Huey


Tuesday, February 9, 2016

Creative?

This week, I'm between projects with deadlines and focusing on workshop preparations.  A few more examples need to be organized to inspire my students in my new workshops this winter like this scrappy Dresden Star.
I'm also thinking quite a bit about "creativity" -- it came up in conversation at my retreat last month.   I interrupted a conversation about it not being important to finish projects with "never finishing projects has a negative impact on your sense of creative ability" or something like that.  The process quilters in the room reacted pretty quickly arguing that I was off base and as a recovering process quilter, I get that.  
Then yesterday in my weekly chair yoga class, the word came up again.  The instructor had each of us draw a card out of her new deck of affirmations.  The idea of these cards is to introduce each of us to new ways to affirm ourselves in positive ways.  Mine was "I believe in the process of life."  Interesting.  One of the other students drew out "I am creative" and after she shared it with the group, she pointed out that Mary (me) should have gotten that one because "she's creative and I'm not".  Well, she missed the point.
For the past 10 years, I've been working hard to transition from jumping around from process to process into a quilter who moves through my projects from start to finish in a pretty steady flow.  I'm not sure I'll ever make a complete transition -- I'm still easily distracted by interesting ideas but I hope to maintain a more middle of the road approach as the years pass.  The quilts I've made during the past decade are some of my favorite -- mostly because I learned so much in the process of finishing them -- and partly because I have the satisfaction of finishing them!!
So how do you build a sense that you are creative?  
Three approaches have helped me immensely in this area.

First, I find that technique classes are more helpful to me than project oriented classes.   I even prefer to teach technique classes that give my students basics and then help them find ways to customize that technique to their own work -- it's harder than teaching project classes because I have to guide students rather than saying this is wrong or right.  But my own experience and their feedback help me keep my mouth shut and focus on mentoring.
Around the turn of the century, I was fortunate to be able to attend teacher workshops with C&T Publishing authors several times.  The purpose of the workshops was to introduce teachers to the principles and ideas of the newest books so that we understood better how to use them as teaching texts.  It was very exciting to understand a book from the author's point of view.
I get the same sense of excitement and insight from the classes I've taken on Craftsy over the past few months -- to learn directly from the authors is an excellent opportunity.  I'm somewhat overwhelmed by the variety of classes they offer -- they just announced their 1000th class and you can use this LINK** to go look some of them over if you've never checked it out.  They are offering discounts on some of their classes to celebrate through Thursday, 2/11/2016.  I'm currently working my way through Amy Johnson's Quilting with Rulers on a Home Machine and the Tea Breads classes from King Arthur Flour!
Second, I'm learning that narrowing my scope and concentrating on the aspects of quilting that appeal to me the most is very helpful.  It has cut down on the number of projects I begin and because of this I build greater skill in those aspects and finish more projects.  Both of those aspects -- improved skills and more finishes -- has boosted my sense of success as a quilt maker. 
I find that when I feel good about what I'm doing, I feel creative. 
Finally, I glean so much inspiration from the virtual quilting community.  Between reading blogs and following Instagram, I get lots of inspiration and have broaden my perspective on how to approach my work!  I also appreciate all the support that comes from other quilt makers who follow me and leave encouraging comments regularly.
All the photos today are some of my favorite creative successes over the past decade!!
They make quite a collection and I rotate them through the house -- on beds and hanging -- year round!  I'm awed by them quite often wondering where the ideas arose. 
So now I'm wondering what do you do on a regular basis to build a sense of creative success?

Mary Huey

** This is an affiliate link and when you use it to access Craftsy, I may receive compensation if you make a purchase.  I appreciate your support for my work by using this link.


Friday, February 5, 2016

Two Finishes!!!

My teaching samples for the Lake Metroparks Farmpark Quilt Show are finished and will soon be hanging in the visitor center!!  I stitched the binding to my Glitter lap robe over the weekend at my retreat.  I love that I was able to finish it -- it's too pretty to become a UFQ!!
I'm very pleased with the Dresden Star sample.  It was made from an assortment of "layer cake" pieces of Moda's Good Karma that I won during an Instagram giveaway earlier this winter.
I decided I'd try an outdoor photo shoot once I arrived at the Farmpark -- lots of fences!!  By the time I arrived, there was a light dusting of snow -- made the photos even better!!

I used (almost) every bit of the stack of 10" squares.  For the border, I trimmed all the bits and pieces to the same width strips.
Then I used my Marti Michell 60 Degree Triangle Ruler to cut them up -- just pick any horizontal line and trim the right and left sides. 
Don't forget to trim off the corners of the "polygons" -- it makes matching them easy and keeps the row straight!  I joined them end to end randomly and made four strips for my borders.
It was my intention to make the pieced border the final one but it didn't "feel" finished.
Much to the astonishment of my stitching sidekicks for the weekend, I decided on one more border of white!  Surprise!!  It's works!
One of my quilting friends who finishes everything she starts in one continuous stream most of the time sat with me for a bit on Sunday and we imagined quilting designs so when I got up Monday morning, my brain was in gear!  After quilting the stars, I started to experiment with ideas for the background diamonds.
In the end, I stumbled onto a way to mark and stitch "mazes" that worked really well!!  And I'm going to walk you through it for two reasons -- first, so I can "remember" how to do it again and second, in case you'd like to try it.  First, you have to promise to let me know if this doesn't make sense -- if it doesn't make sense to you, it won't make sense to me in a couple months!!  And I'll have to edit this post!!

Sketch it out on paper first.  Begin with a drawing of the shape you are going to fill with the maze.  The first step is to divide the space into an odd number of segments.  This is trial and error -- I divided my diamonds by 7 and 9 -- decided 9 was too dense so went with 7.  I find it easier to do this with a metric ruler -- centimeters are easier to break down than inches. 
I made dots across the space and then parallel lines going both directions to make a grid. 
It worked best for me to stitch the inside of the maze and then around the outside -- my red line shows where I entered the diamond and the direction I traveled.
 
The markings on this diamond correspond to my red lines on the sketch above.
That was all I marked on each diamond.  I experimented with marking more but found I got confused about where I was going.
In this drawing, you can see the full maze.  I entered along the red arrows, then exited along the black pathway and back to the edge of each diamond.  Once I reach the edge at the end of the maze, I stitched in the ditch to the next diamond where I repeated the maze process. 
To mark the starter lines, I laid my small ruler on the sketch and noted how far from the seam line those first three lines needed to be drawn -- it was 7/8" from each side. 
I used my straight edge tool to keep the lines straight and kept the presser foot centered between the first lines and seams as I stitched back out of the maze.  After a few diamonds, the process became quite smooth and only having the first three lines eliminated lots of confusion about where to go!
I quilted this piece with Aurifil 40wt cotton, yellow -- you get the feel for it in this photo.
And these two quilts represent two finishes from my list of goals for the First Quarter of the 2016 Finish-A-Long!!  Wahoo!!   Three down and three to go!!  You can check out my original list HERE.

Number four is cut and patiently waiting for me in the studio!! 
I'm off to stitch!!

Mary Huey