Friday, April 4, 2014

Diamond Star Playtime Sew-Along -- Step 4 -- Splitting Diamonds

I hope you are enjoying the results of participating in this Sew-Along! 

The PDF for this step is here.  And if you are just discovering the Sew-Along, Step 1 is here, Step 2 is here, and Step 3 is here.  It's not too late to join the adventure!

Are you trying the chain-piecing technique from Set-In Piecing Simplified?  Are the demonstrations and guidelines in the DVD clear enough for you to learn the technique?  I'd love to hear how you are doing with that -- leave a comment below!

So let's split some diamonds!!  Both Sets G and H have templates that enable you to split the 60 degree diamonds lengthwise and crosswise.  We'll start with the lengthwise split.  (While preparing to write this step, I had some challenges -- grrr -- doing this with the 60 Degree Diamond tool and am preparing a separate PDF with photos explaining how to do this.) 

There are two lines down the length of the diamond templates in Sets G and H -- the dashed line is the stitching line and the solid one is the "cutting" lines. 

There are two way to cut these split diamond pieces.  You can cut individual half diamonds.  To do that cut a strip slightly wider than the template.  The lengthwise solid line is positioned on the edge of the fabric strip.  After cutting the first half diamond, twist the template around and cut on the opposite side of the strip so you'll have very little waste.  The two half diamonds are then sewn together and the center seam is pressed open.  

I prefer the second approach.  Two strips are stitched together and the seam is pressed open.  Then diamonds are cut by centering the dashed line down the center of the template on the seam.  There is more waste but my diamonds are more accurate and consistent. 

That waste can be eliminated by stitching the two strips together on both sides as in the photo below.  After some trial and error, I cut the strips 1/2" wider than half the diamond template.  The strip set only needs to be 4 times longer than the longest measurement of the diamond template.  So for template H52, I cut my strips 3" wide and 27" long.  For template G44, I cut strips 2 1/2" wide and 24" long.
Before cutting, press the strip set flat to set the stitching and then lay the template on one edge of the strip, cut a diamond and press the seam open.   
Pay attention to one fiddly little detail -- make sure the dashed lined is just inside the stitching line -- this allows for the fabric lost in folding open the seams allowances and if your 1/4" seam is a bit off, the diamonds will still be accurate. 
 Continue working down the strip set cutting on opposite sides until you have six diamonds.
When setting these diamonds together, it's easiest to manage the bulk of the outer points if you press those seams towards the background diamonds.  I only press the first seams open and then all the remaining seams are pressed to one side.  Make sure the central seams swirl in the same direction for the easiest assembly as your finish the block.
So here's one ready almost finished -- I forgot that my stripe will not be identical on all six diamonds when cutting this way -- but leaving it since it will be a good teaching example -- ended up with 3 of each -- next time, I won't use this double stitched seam with a stripe.  Who knew?

You can also split the diamonds crosswise.  In Set H and on the 60 Degree Diamond tool, there are lines on the templates.  In Set G, use the matching equilateral triangle template (#45 or #49).  This is my final arrangement, but I auditioned two others before deciding for sure. 
I like this one and think I'll use it with another fabric combination. 
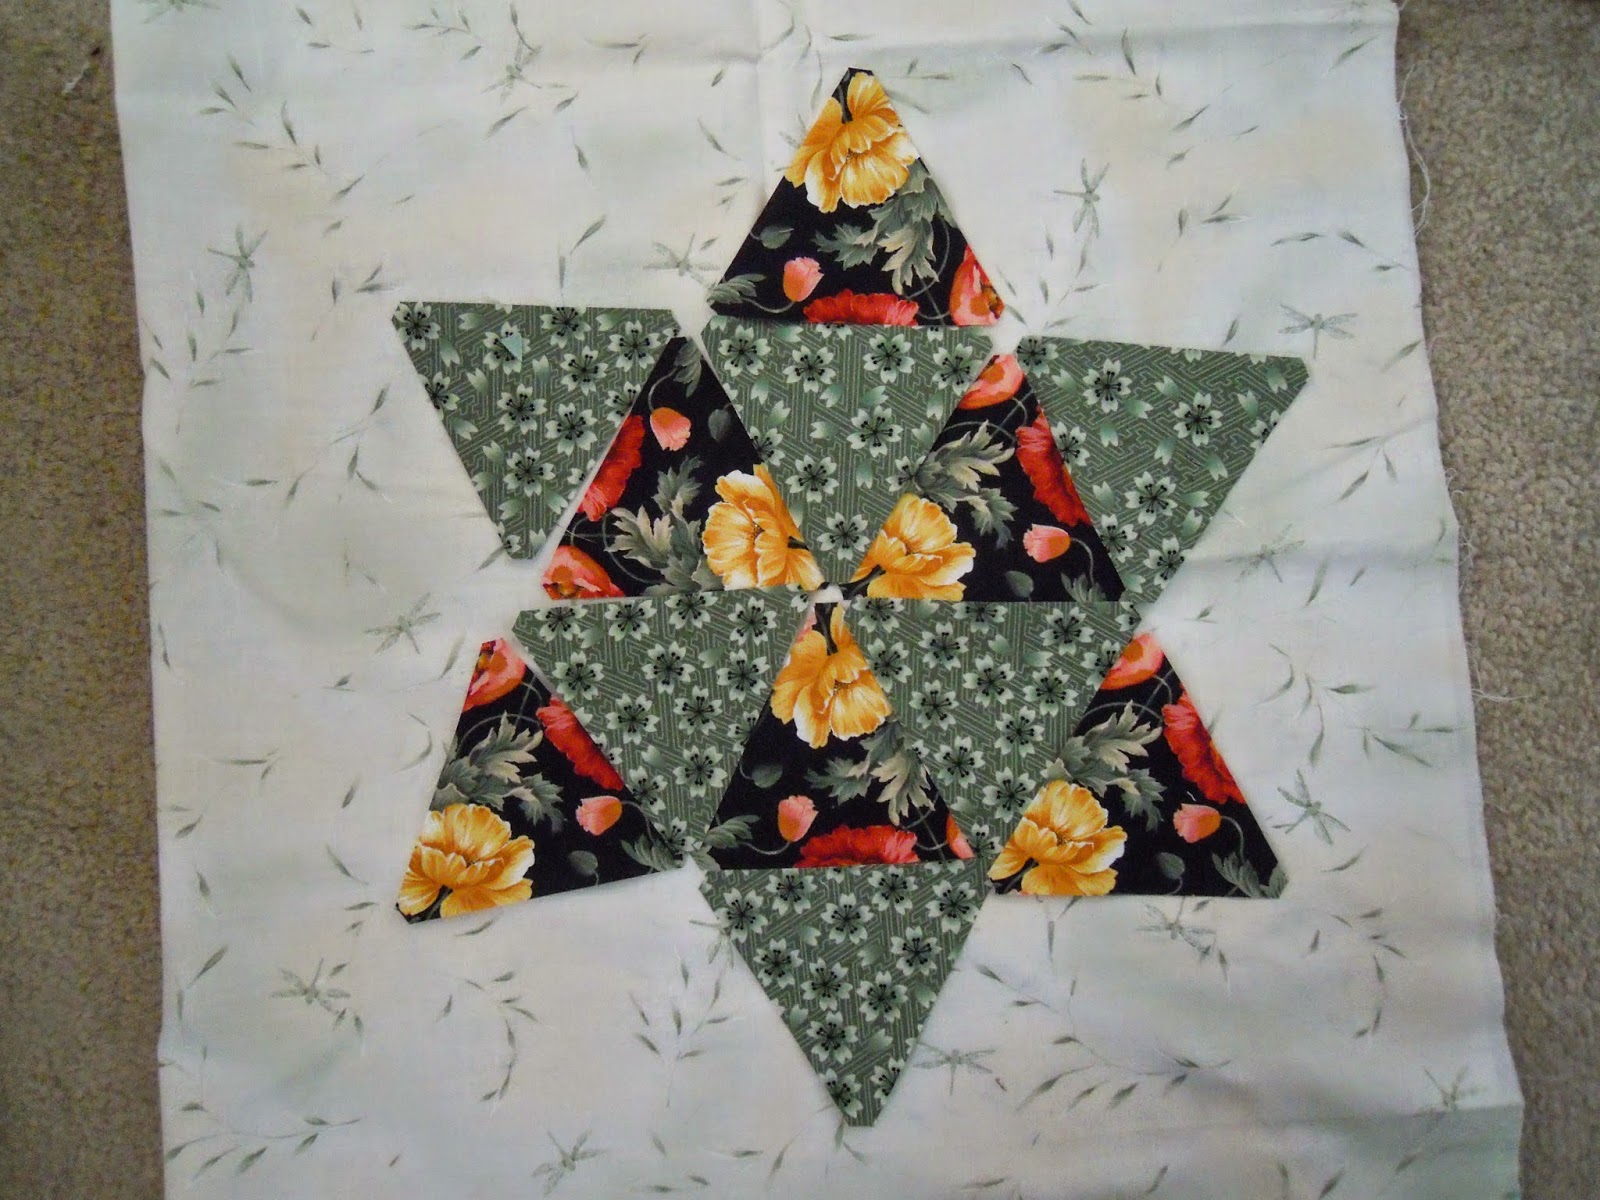
This one looks clunky to me -- I tried every rotation of the outer points but none of them appealed.  Perhaps for a smaller star, this would have worked, but these are large stars made with 3 1/2" diamonds using the 60 Degree Diamond tool. 
Here is the final arrangement with the background diamonds in place -- ready to sew.
Notice anything? 
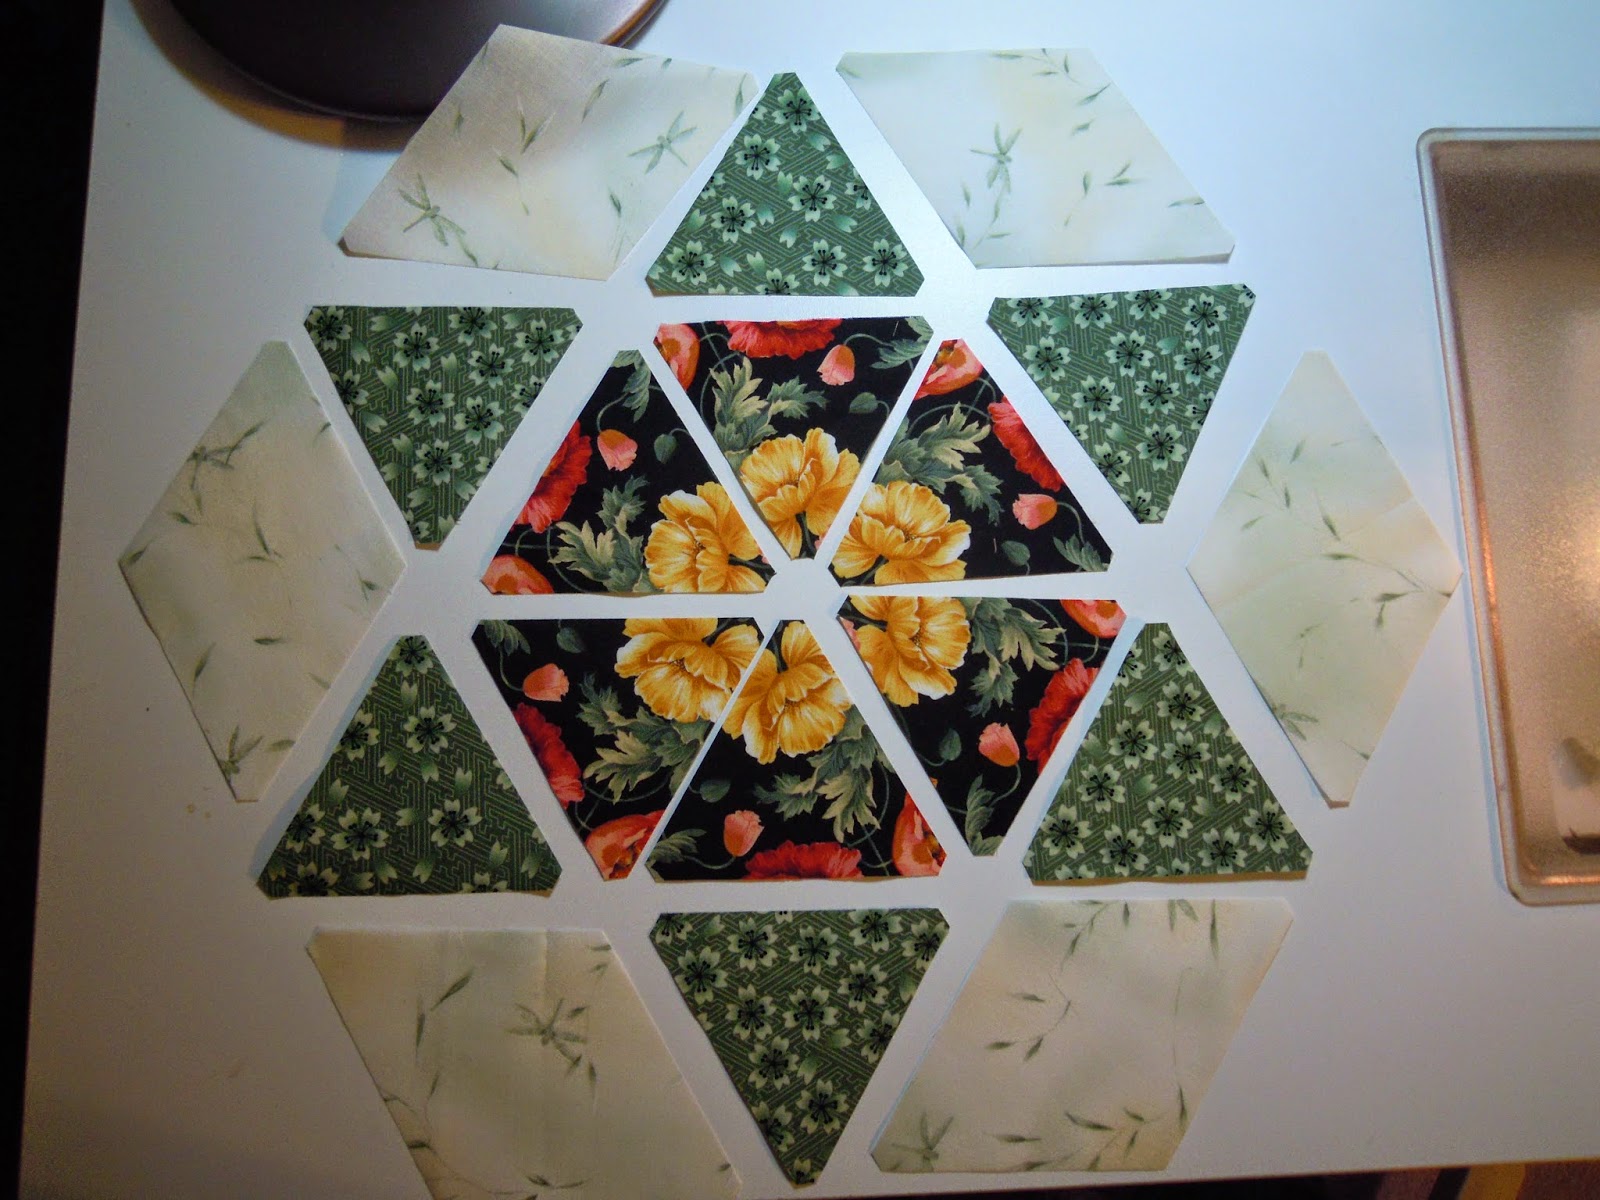
There are no set-in seams -- it's all straight lines.  Not that it matters so much to you at this point -- with all this practice, those set-in seams should be getting much easier by now! 
I'm stitching the sections together as my "leaders and enders" while make some of the other blocks.  I'm pressing as I go and ended up having to repress a few seams -- can't seem to come up with a repeatable formula for pressing this variation. 
You do want to press the seams that come into the center of the block so they can be swirled as in the set-in pieced stars to keep the center flatter.
The third variation works for the larger size stars.  When you piece together four of the smaller diamonds in Set G (use template #48) or Set H (use template 53), they make a diamond the same size as the larger template.  See the extra PDF for the 60 Degree Diamond tool if you are using that.
Be sure to take the time to nip off the points -- it makes accurate matching a breeze! 
Chain piece one half together for all six diamonds. 
Press the seams to one side. 
Repeat for the second set and press the seams so they will be opposite the first pair. 
Stitch the two halves together -- once again those trimmed points improve your accuracy.
Be sure to lay out the pairs before stitching so you don't experience this!!  Oops -- time to rip!
If you stitch a consistent 1/4" seam, the center seams will be aligned effortlessly! 
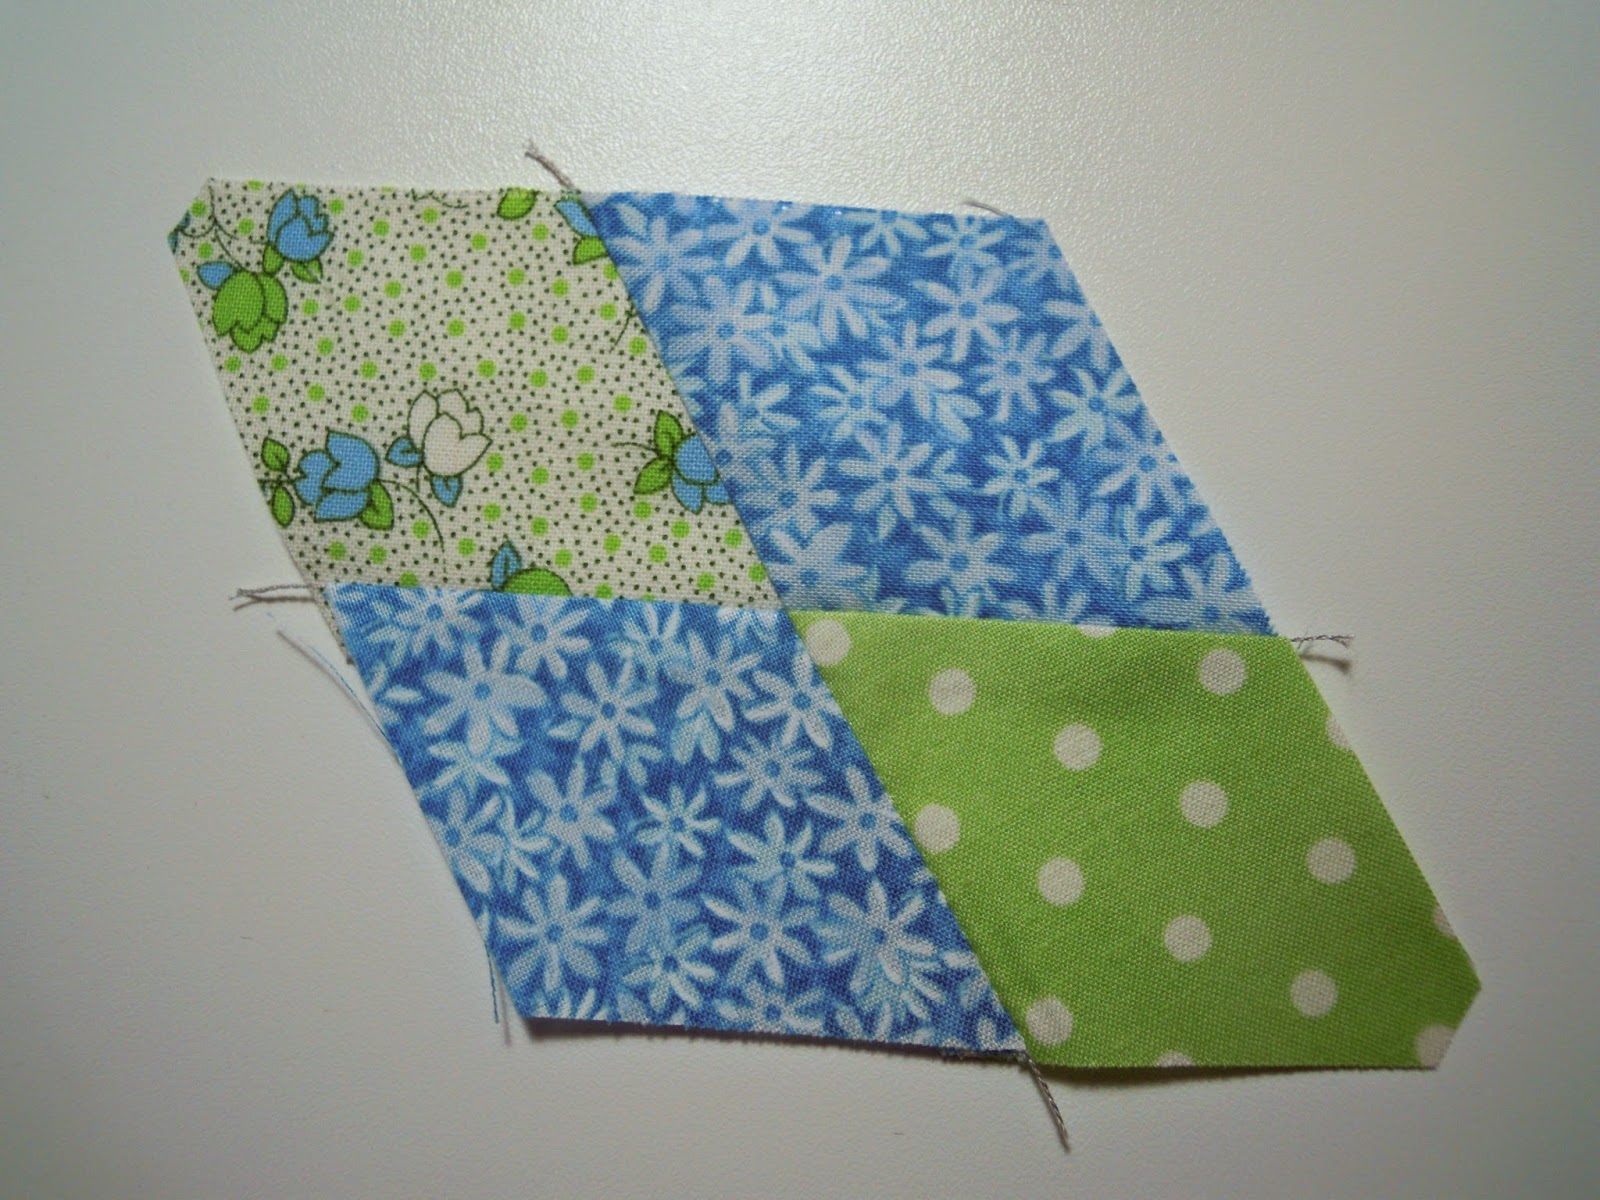
Lay out the block and assemble! 
Time to try it yourself.  Do at least one of the split variations -- maybe try all three! 

In Step 5, I'll introduce you to hexagons and cone heads (maybe you'd rather call them jewels) and show you how to incorporate them into your sampler of stars.  If you haven't already started to put your assortment of stars up onto your work wall, do that this week.  It's time to decide whether you like them better with a pointed end up or a flat side up.  That will help you make setting decisions when we get to Step 6.

Mary Huey

All material Copyrighted by Mary Huey Quilts!

If you can't find the templates locally, you can order them directly from Marti!


Friday, March 28, 2014

Diamond Stars Playtime Sew-Along -- Step 3 -- Working with Stripes

So how many stars have you made this week?  And are you feeling more comfortable with chain-piecing through the set-in seams?  If you haven't tried it yet, you need to!!  Don't have a copy of my DVD workshop, Set-In Piecing Simplified?  Order it HERE!

If you are just joining the fun, you can find Step 1 here and Step 2 here.


I keep a UFO handy so the chain-piecing never ends.  If you have more than one project going at a time, just keep a stack of pieces handy and use those for your "leaders and enders" (ala Bonnie Hunter).  I am currently piecing some hexagons into flower motifs for another project and that's what fills the chain-piecing gaps between the steps of the stars.

I found a stripe that works nicely with the colors in this assortment and so here are some tips for cutting stripes for your 60 degree diamonds!

You get to use those mysterious lines that criss-cross many of your rotary rulers.  Quilters use the 45 degree lines off and on, but using the 60 degree lines may be new for you.
The first step is to determine how you want to align the stripes with the shape you are cutting.  I'm going to cut a few where the stripe goes up and down the length of the diamond.  My stripe is an uneven one so the stripes won't repeat or mirror image as the eye moves across the diamonds.
With the template laying on the fabric centered lengthwise on a stripe, push the rotary ruler up against the edge of the template.   Notice that the 30 degree line is lined up with the selvedge of the fabric.  Use that to assure accuracy of the cut.
Pull the template away and cut along the edge of the rotary ruler to create an angle across your fabric.
Then use the template to set up your rotary ruler (as shown in Step 1).
Once you are sure the rotary ruler is positioned correctly, cut a strip.
Now use the template to cut the number of diamonds needed for the block you are making.

 Each diamond will have a different cluster of my stripe, but the stripes will all be oriented the same way.

Here are my stripped diamonds with a set of 3 floral diamonds from my "stack and whack" cutting last week -- this set of florals didn't make a very pretty star together, but I like the way they look with the stripe in this star.
I did an experiment to see if I could get a chevron by cutting diamonds with identical placement on the stripe.  I cut a strip wider than my diamond and folded it in half lengthwise with the wrong sides facing (so there are two layers of fabric under the template in this photo).
Then when I opened the pairs of diamonds out, I got chevrons!  I photographed this star at both angles (points north and south was the other one) but like this orientation better.  Seems a little unbalanced going north and south.  Tilt your head and see what you think.

I also flipped every other one around so the yellow stripe is on the right edge of each diamond -- not too bad. 
Here's another stripe that matches the blue/green star I fussy cut in Step 2.  It's a consistent repeat, but very wide and it's doesn't mirror itself.
Another experiment -- I cut a repeat of the stripe down the length of my yardage.  Once again, I folded it in half lengthwise, wrong sides together.
Before cutting, I laid the template in several different positions on the stripe.  I'm paying attention to where the dashed line (indicating the stitching line) is hitting.  I don't want it in the white because that would melt into the background fabric.  I finally settled on the orientation in the photo -- study it for a minute.
One, two, three cuts, trim the points and I have enough diamonds for a star.
First option for stitching?
Second option?
Third option?  I'm leaning towards the first option but will let it simmer for a couple days before finally stitching it.
I didn't cut the option below because I'm saving it for the next step which will focus on splitting the diamonds.  If I were going to cut it though, I would begin with a strip a bit wider than my template cut across the stripe and then use the flat tip of my template to align the color stripe that I want at the center.
So do you have a stripe in your fabric assortment?  If you do, experiment with it this week and make at least one star.  If you don't, you might want to pull a stripe out of your stash and play with it a bit just for the experience.  And remember if you don't like it at the audition stage -- don't stitch it up.  Set the diamonds aside and you may be able to repurpose them at another stage of our quilt.

As always, if you have questions, post them in the comments below so everyone can see the answers.  Now that we've addressed all the cutting options, we can begin to play more with the diamonds and their relatives to create interesting six-pointed stars.

Mary Huey

All material Copyrighted by Mary Huey Quilts!

If you are having trouble finding the templates locally, you can order them directly from Marti!


Monday, March 24, 2014

Diamond Star :Playtime Sew-Along -- Troubleshooting Step 2 and some other tidbits!!

Good morning all you followers!!  I hope you've had time to make a fussy cut 6-pointed star or two! 

The piecing should have been easier for this step if you did a few stars from Step 1.  The only pitfall I've experienced with a fussy cut block is when I don't like the fussy cut after I lay it out.  But never fear, don't discard those diamonds!!  Just use 3 of them with another print for a two fabric star like I did here. 

You'll see the other 3 diamonds later this week in the "cutting with stripes" post.

On this set, I flipped every other diamond 180 degrees -- don't think it works this time but someday it might so I often try it just in case!


Or hold onto the diamonds and perhaps trimming them for a "star flower" or "hexagons" for future steps will redeem them?

And if all else fails, they might be useful for trimming at the end of the Sew-Along for edge fill-ins. 

Be sure to take time to identify what specific aspect of the cut didn't work for you so you can learn from it and avoid repeating the same misstep in the future.

If you encountered any other pitfalls with the fussy cut 6-pointed stars, let me know in the comments section below and I'll respond so everyone can learn from it, too!

Mary Huey

All material Copyrighted by Mary Huey Quilts!

Friday, March 21, 2014

Diamond Star Playtime Sew-Along -- Step 2 -- Fussy Cuts!

Time to talk about fussy cutting with the diamonds.
  I've been playing with a couple different fabric pulls so hope it's not too distracting when I jump back and forth between them. 
You can also download a PDF of it by clicking here.
Many of you have fussy cut motifs out of a print for a special effect or made a "stack & whack" style quilt.  We'll use some of those same techniques.  The fabric you are working with will dictate what you can do to some extent.  A symmetrical print like the one below is the easiest to anticipate results -- when you set down a pair of mirrors at a 60 degree angle, what you see is pretty much what you will get (minus the seams).


But a print with a scattered, directional or asymmetrical design can't be auditioned as easily because you will never be able to reproduce what you see in the mirror.
And it might just be ugly!! 
What you get from prints like that are swirls of design motifs so you have to be open to a little surprise. 
There are two ways to cut these pieces.  The diamonds for this star (above) were cut using Bethany Reynolds "stack and whack" approach of layering up 6 pieces of fabric, matched identically, and then cutting all six diamonds at the same time.  The fun of these is that you always have two options.
The hardest part of fussy cutting is making the decision to chop a beautiful piece of fabric up like a slice of Swiss cheese.  But that's the only way to get beautiful stars like this one in my quilt, Pieceful Constellations!
I play with the mirrors to get a rough idea of what a motif will look like in a swirl of six.  Then I   rough cut the motif staying about 1/4" outside the template.   
I use that first rough cut piece to search out and rough cut five more pieces. 
When doing the final cut, I work on a small mat or my rotating mat so I can cut all the way around the template easily and safely -- twist and cut, twist and cut. 
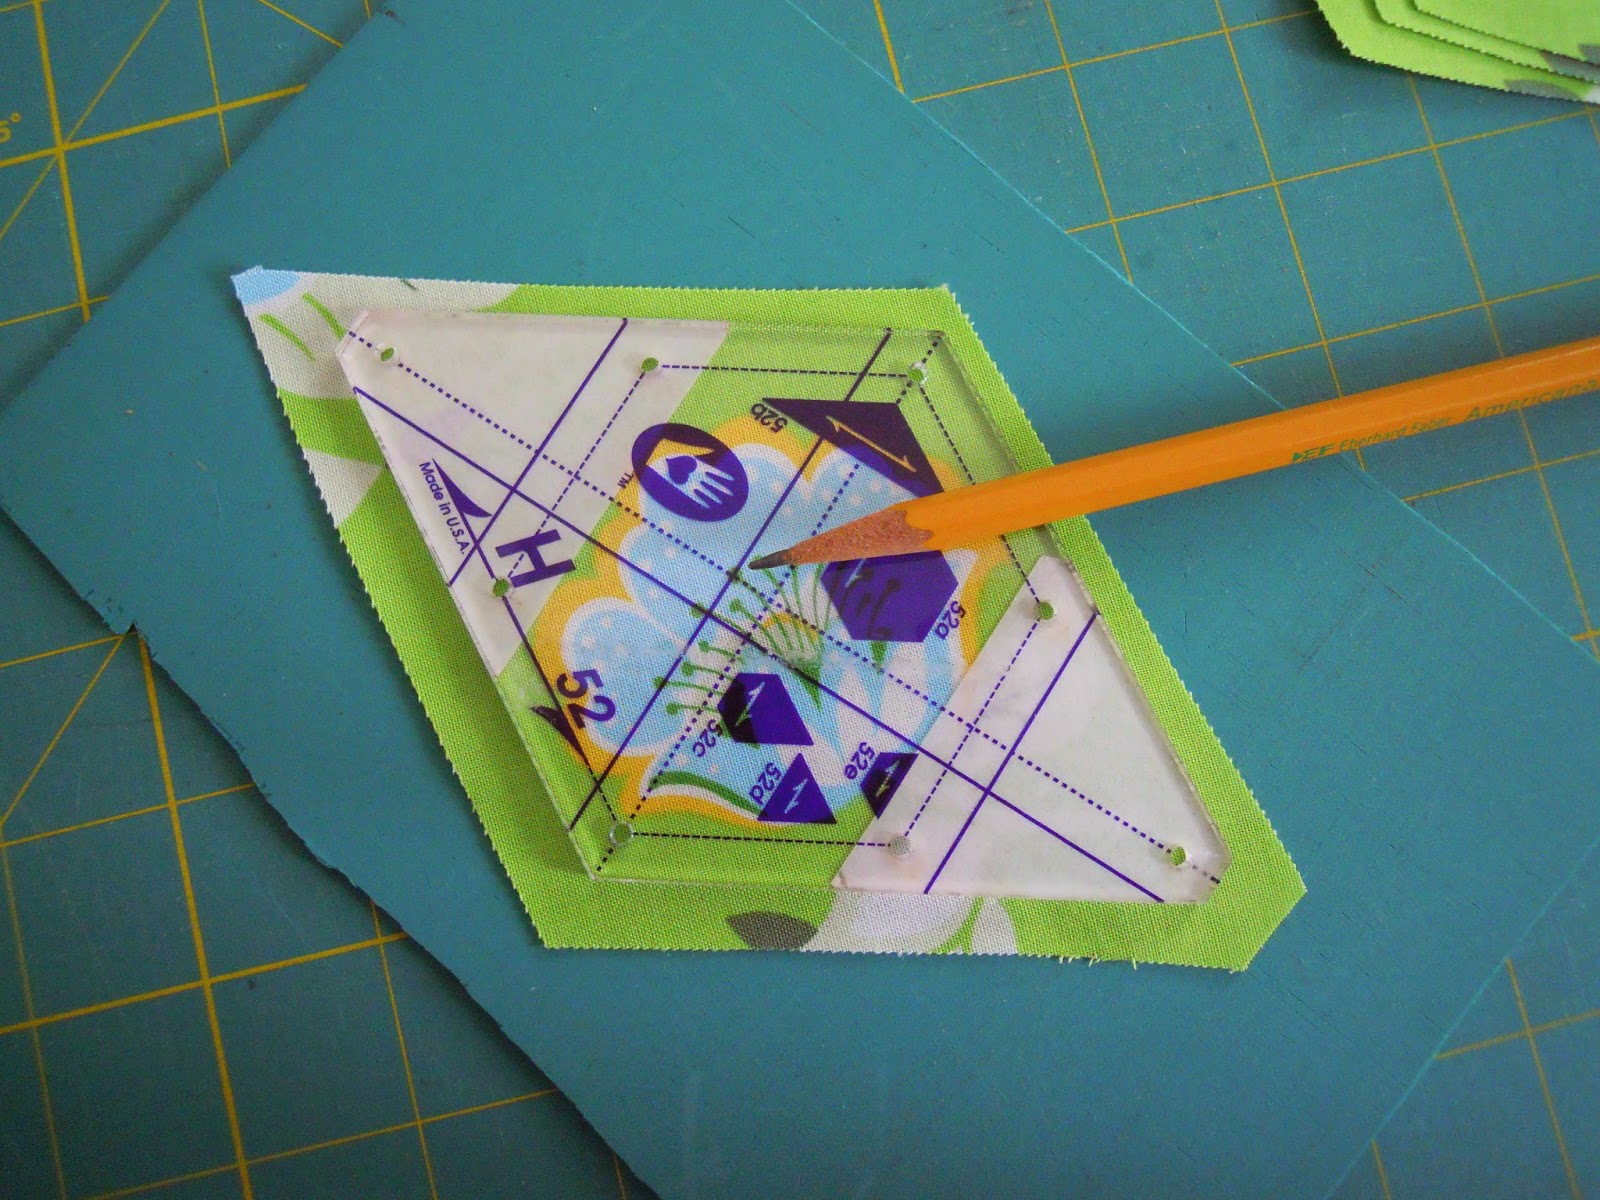
On this template, I used the intersection of two lines near the center of the template (where the pencil is pointing) as my register mark to cut each diamond. 
 I centered that register mark
on the same small dot near the center of the flower (where the pencil is pointing) for each piece.  Since the right and left sides of this motif are different, good placement works fine.  For a symmetrical repeat, setting up several register marks on the template might be necessary for better alignment.
Here's the finished block for that set of diamonds!
I had planned to talk about working with stripes today also, but it's long enough.  Next Friday, 3/28, I post a tutorial on several ways to cut stripes for interesting effects.  If you have a print that calls for some fussy cutting, make a couple stars this week. 

If you are looking for Step 1, it's here!

Mary Huey

All material Copyrighted by Mary Huey Quilts!

If you are having trouble finding Marti's templates locally, you can order them directly from her at 

Monday, March 10, 2014

Diamond Start Playtime Sew-Along -- Step 1 troubleshooting tips!

I hope you have had time!  I promised some troubleshooting tips and these are based on teaching the Set-in Piecing Simplified technique for almost two years. 
If you missed Step 1, click here to read it over.

#1 -- the center of a 3 diamond (tumbling block) unit has a pucker.

To diagnose the problem, look at the wrong side!  It's easy to fix and pressing isn't the fix.

The most common reason is that the stitching goes past the dot and that's one of the benefits of this technique, you can be up to a stitch short of the dot and still get excellent results because the end of the seam is so secure.

Another common cause of the pucker is when the end of one of the three seams is not lined up with the other two correctly.  After helping dozens of students trouble shoot this, it boils down to not matching the corners of the diamonds.  The first two diamonds are easy to match.  The problem usually pops up when adding the third diamond.  It's hard to see the inside corner.
You need to pull the upper diamond back so you can see the corner of the lower diamond.
Now when you lay the third diamond right side down, it must match the corner of the lower diamond to get good results. 
The photo below show poor alignment and the end result will be seams that don't meet and a pucker on the right side at the intersection of the three seams.   In this photo, the black diamond needs to be shifted up to the left until it aligns with the corner of the gray diamond.

#2 -- the center of the star is askew.  The most common cause of this is haphazard pressing which then makes it challenging to control the bulk where the six seams come together at the center.

EVERY subunit of the star must be pressed identically so when the three units are joined, the seams will always nest together flat.

 If you have encountered other problems, e-mail me at maryhueyquilts@hotmail.com
  
I'm ready to make another star!!  How about you?

Mary Huey

All material Copyrighted by Mary Huey Quilts!