Monday, October 20, 2014

I should be raking Maple Leaves

. . . . but it's more fun to write about making Maple Leaf blocks.
One of my daily tasks for the past 30 years has been to walk a dog.  Most of those walks have followed the same circle around my neighborhood.  One of the blessings of living in Northeast Ohio is the fall tree color.  I come home from fall walks with bouquets of leaves clutched in one hand.  If you don't live in a part of the world where the leaves change colors in the fall before dropping to the ground, this is the short version.

The chlorophyll breaks down because the trees stop manufacturing food in preparation for winter.  So the green color disappears, and the yellow to orange colors become visible and give the leaves part of their fall splendor. At the same time other chemical changes may occur, which form additional colors through the development of red anthocyanin pigments.
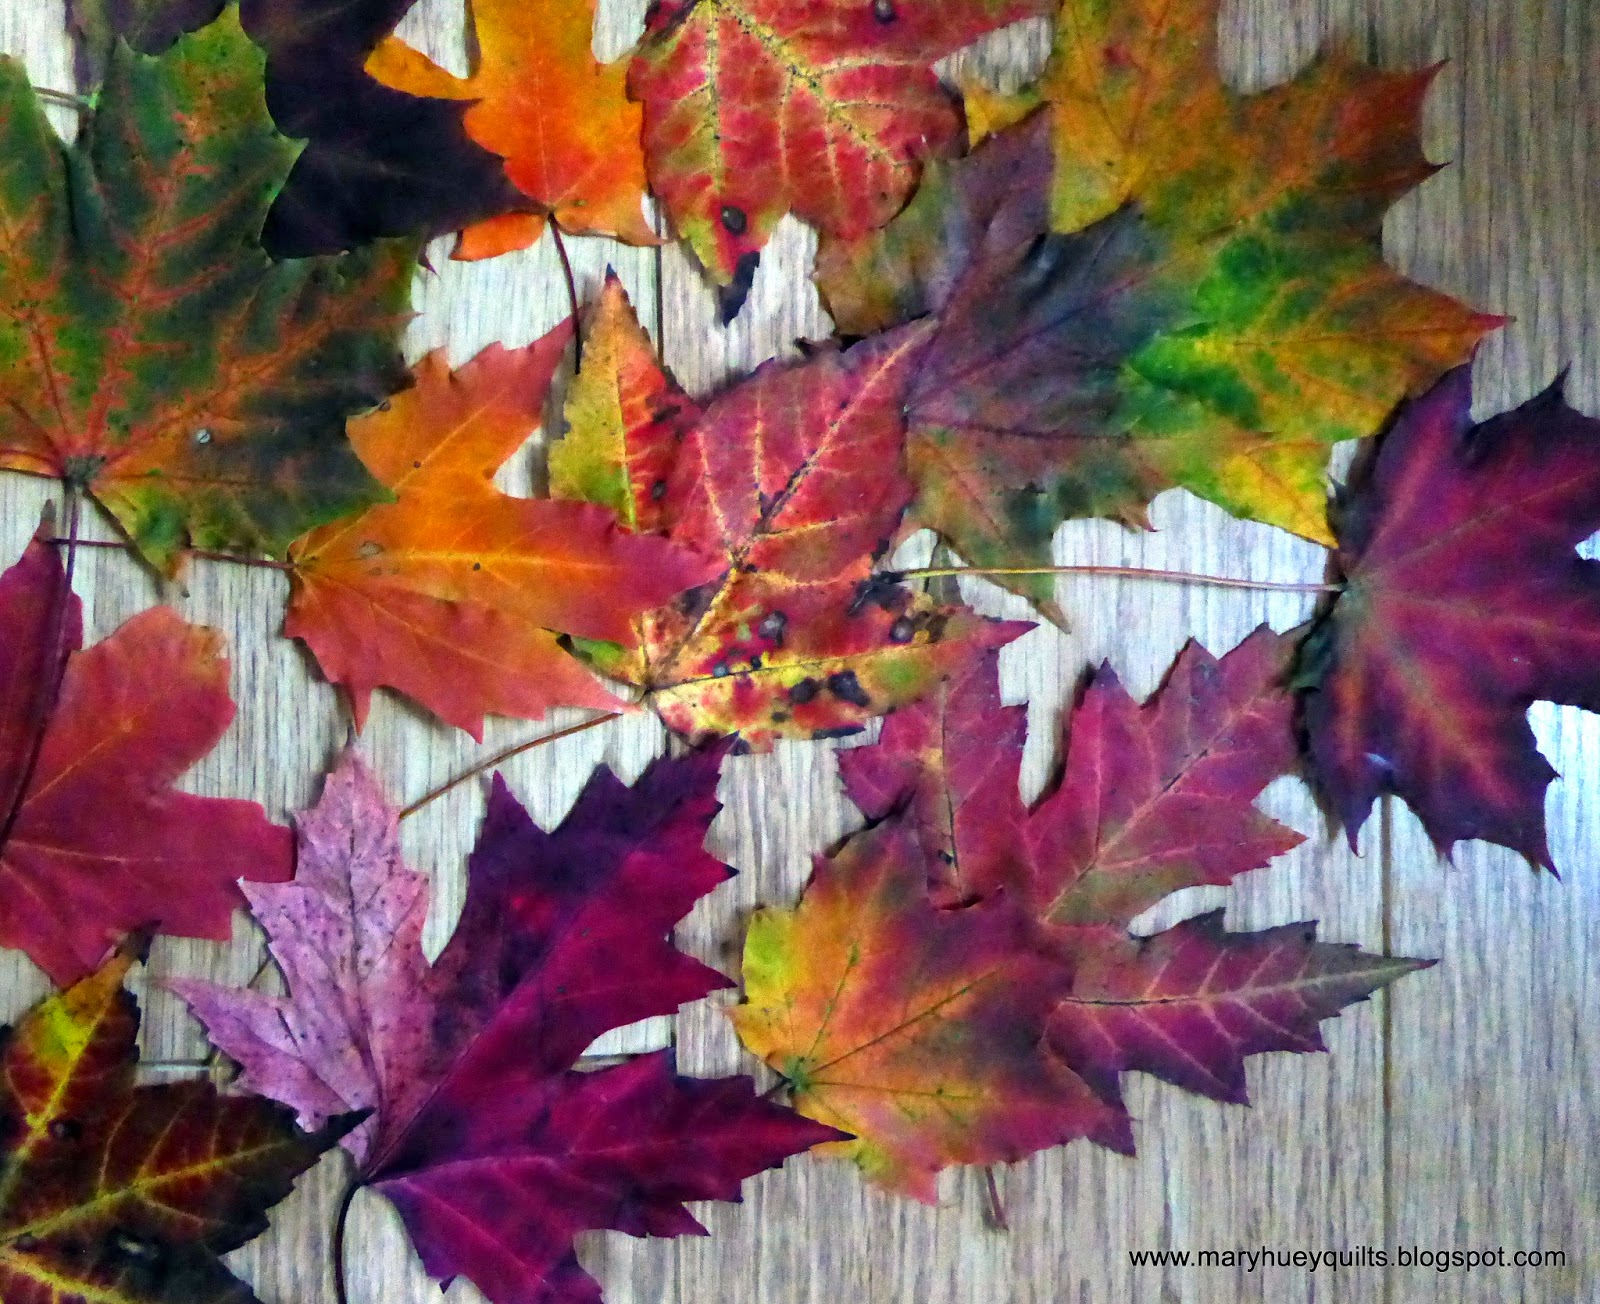
Once a leaf falls, the color begins to fade very quickly and they become dried up, brown crumbly food for the compost and mulching my flower beds.  But for a few hours, their color combinations are inspiring.  So several years ago I began to preserve those combinations with fabric by piecing maple leaf blocks using the leaves from my walks as a guide to pulling the fabrics.  I did not have a particular project in mind, I was just preserving an inspiration.
 
Here is a link to a huge glob of images for all sorts of maple leaf blocks and no doubt some of those will lead you to tutorials and instructions on piecing the blocks so I don't need to rewrite those.  Just keep exploring them until you find one you like!
 
 I will just say that I make 6" blocks as I find that size more versatile.  I use templates #12 to cut the squares needed and #13 to cut the triangles needed for each block from Marti Michell's Set B.  I prefer using the templates (which do take a little more time to cut initially) because I hate trimming HST units "down" to the correct size (which takes the same amount of time as using templates). 

If I used Set A, I could make 4 1/2" blocks . . . . hmmmm?!?   Without actually going through my templates, I'd guess I could perhaps make at least a dozen different sizes with the various sets -- some as large as 15".

This is my scrappy maple leaf quilt that is on my bed right now.  It's 11 by 12 blocks without a border.  Including the squares of the fall prints helped me achieve the size I wanted without the need to add a border. 
By the time I set the quilt together, I had made over 140 blocks but I kept using a few here and there for smaller projects.  Finally, I decided to make a large quilt for myself.  You need a lot of 6" blocks to make a big quilt so I bordered all of the blocks and then squared them up "wonky" style to 8 1/2" squares.  Here are some close-ups with leaves that might have inspired them.
Yellow is actually the predominate color in the trees, but where there are Norway maples there are often shades of purple.
Oranges and reds are abundant but there is a large maple nearby that always has touches of pink in it's fall leaves.
This is one of my favorite blocks in the quilt -- it was inspired by these rainbow like leaves from a sugar maple that my husband and I planted 35 years ago in our front yard. 
I included some plain squares of my favorite prints from the "fall" stash box just for fun -- spiders?  Yes!  I like how the leaves seem to float around the quilt -- that is achieved by the combination of the sashing and the plain squares.
And apples of course. 
So every night during the fall, Willie and I snuggle down under this beautiful quilt and enjoy sleeping in a pile of leaves!!
I'm off to get one more walk in the woods before the rain begins and the wind brings down all the beautiful leaves -- we are on the downhill side of the color peak and there's no time to waste!
 
Mary Huey


Friday, October 17, 2014

Joining a Round Robin!!

Have you ever participated in a "round robin"?  Over the years, I can think of a half-dozen that I've joined -- several that I ran while I had my quilt shop and several in my quilt guild.  A week ago, I took the plunge and joined a new one proposed by Bea at www.beaquilter.com.  I started following Bea last month for her EQ7 tutorials (growing my EQ skills!). 

At the retreat I attended last week, a gal was piecing a quilt designed by Elizabeth Hartman from her book Modern Patchwork.  There were birds in the windows of each house block -- something with birds always gets my attention.  I came home and borrowed that book from the library thinking that her house block would be a perfect starter block for my round robin.

Last evening I headed up to the studio to pin Bea's e-mail with the round robin schedule on my bulletin board.  I intended to pull out my stack of "bird" fabric and start organizing a color scheme for the round robin. 

The first thing that caught my eye (easily distracted) was this piece of fabric laying on the cutting table.  It arrived in the mail last week and hasn't been put away (can you imagine that) ?! Love the simplified bugs, love the size of them and love the color scheme!!
So I'm thinking about a house block for the center of my quilt, this wonderful bug fabric is in my face, and Elizabeth's house blocks are inspiring me.  Have you read anything about "insect" houses/ hotels/huts that are becoming popular with gardeners? 
 
Take a little break here, go to Pinterest and search for "insect hotel".   You'll quickly understand my block!  Not only are these little structures good for the insects, they are charming additions to a garden!
 
I'm inspired (or perhaps I've had too much caffeine today) and so I sketched out a rough block idea. 
Then I head over to my stack of "landscape" fabric thinking it will be a perfect stack to pull some textured pieces for my "bug hut" -- but it's all beige and brown and green -- doesn't really do anything for the bug fabric.
Black and white!?!  Not sure where that inspiration came from but it worked because there in that stack were quite a few pieces that reminded me of some of the visual "texture" that makes the insect hotels so appealing to me.  What do you think?
The white with the dragonflies will make a perfect "sky" and the white with the grid of black dots can be the dividers.  This is going to be great!  And this was as far as I intended to go since it was getting late.  But I decided to just cut out the "bug" that would be occupying the block and then just frame it up and soon I was lost to the idea of going to bed.
 
He was suppose to be a square and then I was inspired to make him a hexagon (though somehow, I've achieved seven sides?). 
The narrow divider strips are 3/4" cut and when I stitch the second seam of these, I measure the 1/4" seam allowance from the first line of stitching rather than the raw edge.  So I'm watching the left edge of my presser foot rather the right side -- this gives me a uniform skinny piece.
 
Here's how I cut the pieces for the roof unit.  I cut a 4" by 13" rectangle of the black and then trimmed the right and left angles -- just laid the ruler down and cut -- no measuring.  Then I laid the roof piece on a large rectangle of the sky fabric.
I positioned the edge of my ruler parallel to the upper left side of the roof and about 1/4" away and cut off a triangle of the sky fabric.
I repeated that on the right side. 
Now I had two triangles with the same angles as the roof triangle.
 
I removed the triangle of sky fabric laying under the roof fabric and I'm ready to stitch -- right side sky piece first, press and then the left side. 
Here's the finished block, ready to trim to 12 1/2" for the start of my round robin. 
The lower and upper halves of the "hotel" were the same measurement, but when I trimmed it, I reduced the size of the lower half because I felt it gave it better visual balance.
I have a string of fairly empty days on my calendar that will be devoted to studio time (and some house cleaning), so this weekend, I'll create a little journal to travel with the project and find a box to accompany it as it travels around the USA for the next six months.  All ready to go next week!!
 
I hope everything thing on my current "to-do" list is dispatched with as much inspiration and delight!!
 
Mary Huey


Monday, October 13, 2014

4th Quarter Finishing Goals

I have a dream!!  And it's to finish four quilts before Christmas!  I want to give my three children and my two grandchildren quilts this year.

I spent the past weekend at a retreat with gals from my guild -- Friday I started out with the usual question on my mind -- do I have enough to keep me busy all weekend?  (really?)
I did score one complete finish.  This set of two placemats has been patiently waiting for me to finish them for . . . mmmm, 10 years.  Needless to say, it's taken longer to start that process than it did to finish it.  Just needed a deadline -- sending them off to my grandchildren this weekend! 
So, the list . . . . I need five finished quilts by Christmas.  One is finished.  In fact it was my first finish for 2014!
One is layered -- did that over the weekend!  I even know how I'm going to quilt it -- Baptist fans!
Two tops are finished, backing are assembled, and they are ready to layer!!
Hey, those are the same quilts -- different borders!!  Short story about these 3 quilts.  In about 1981 (or 2), my husband's grandmother passed away and I had come to love her so the family gave me some mementos from her things including twelve large string-pieced quilt blocks.  For over thirty years, I waffled from one idea to another about what to do with the blocks.  Finally about three years ago, I settled on the idea of making three quilts using four blocks in each one for my three children.  I'll take you through the complete process another day, but for now, aren't they cheerful!!
 
The fifth quilt is for my grandson -- it will give him a second quilt for his other bunk.  It's cut and ready to piece.
So we'll see how it goes!!  Four finished quilts in a bit over two months?  Hopefully saying it out loud for the entire blogosphere to read will help keep my motivation high!! 
 Linking up over at Little Thistle!
 
To the studio!!
 
Mary Huey


Thursday, October 9, 2014

The Basket Sampler and a moon peek!

I began this post on Wednesday morning fresh from the observing the lunar eclipse and then life interrupted -- you know how that goes I'm sure.  So did you see the eclipse?  It was my first time ever!  Since the sky was clear at 11 p.m.,  I checked before I went to bed to see what the time it would occur in Northeast Ohio and on a whim set my alarm for 5:45 a.m. figuring that it would be cloudy as usual and I'd go back to bed.

To my great delight, the sky was clear and I could see the eclipse beginning from the front porch.   So my daughter and I pulled up  wicker chairs and watched for 45 minutes until the moon moved below the tree line.  I took the pictures with a Panasonic Lumix (point and shoot) at 30X zoom, hand held and left the rest of the settings up to the camera.
The moon is much redder in the pictures than it was to the naked eye but I see why it's called the blood moon!  It reached full eclipse before it slipped below the tree line so we didn't see the end but I'm pretty thrilled to have seen so much of it so clearly!! 
Back to quilting!!  Here is a beauty shot of my Basket Sampler that I shared with you in a couple posts last week.  I'm delighted to have this quilt finished!  It was displayed in the Streetsboro Quilt Show over the weekend and received a red ribbon -- that was something of a surprise to me since I had several issues during the finishing process but I just pressed onward!!  It was one of those times when I just try to learn from my mistakes and keep on moving.  Next time I'll do better.
Here's a close-up of one of the blocks and the surrounding sashing so you can see what creates those terrific stars!  I did that with Marti Michell's Long Skinny Stars Sashing set. 
It's a two-piece set that enables you lots of flexibility -- you can work with 2" to 4" finished sashing and the length is flexible as well.  The set comes with a detailed instruction booklet that also discusses several other ways to use the tools.  The tips of the "star points" are trimmed during the cutting process allowing you to position them easily for perfect points! 
This is the best picture I could get of the entire quilt -- can you see how the placement of the baskets achieved balance in the quilt?  And the outer sashing pieces only have the star points on one end which emphasizes the stars since there are no stray points along the outer edges.
I used Marti Michell's Template Set M to cut the thirteen 5-patch 12" blocks and the patterns can be found in her Encyclopedia of Patchwork Blocks, Volume 4 (pages 36 - 39).  This is my favorite block because it's so "scrappy".  And you can see one of the problems -- that dark brown fabric bled during the blocking process.  (Grrrr . . . . )
I've written a guide sheet for cutting and laying out this quilt and I'm happy to share it with you -- just e-mail me at maryhueyquilts at hotmail dot com. It includes yardage needed for this version (it's a 78" square quilt), a layout guide, and cutting instructions for the setting (sashing with points and setting triangles).  There is also a layout included for a larger quilt (78" by 99") but I haven't done the math for that one.

The setting will work with any group of blocks, not just baskets, and it can also be rescaled for other sizes blocks using the instructions in the booklet included with the sashing tool set.

And as always, if you have any questions, please don't hesitate to contact me!!

Off to a retreat for the weekend with a (typically optimistic) pile of UFQ's and I hope to come home with some finished pieces and significant progress on the rest!!

Hope you have a stitching weekend!!

Mary Huey
https://maryhueyquilts/blogspot.com


Monday, October 6, 2014

For you antique quilt lovers!

Two weeks ago, I encountered another group of quilts from The Christ Collection, an exquisite collection of antique quilts! I first saw some of this collection in 2012 at Quilt Odyssey in Hershey, Pennsylvania.  I was overwhelmed by it!   
 
Arlan and Pat Christ are the owners of this collection and their passion to understand the history of their quilts makes their collection a delight to view.
 
They work at this hobby participating in a number of "quilt study" groups to expand their historical understanding of quilting and quilts.  They offer lectures and display segments of their collection to allow interested quilters access to some amazing quilts.
 
The focus of the exhibit I saw in September was American Pride . . . Eagles & Stars.  It premiered at Quilt Odyssey in Hershey, Pennsylvania during July.  This was the fifth year they exhibited during the show. 
This is just five of the almost forty beauties they had with them.  While they don't allow photos (for all the obvious reasons), they do let quilters get their noses right up to a quilt.  The color was . . . well, you can see what it is!!  And the workmanship was so interesting.  Arlan and Pat were at hand constantly during the 3-day exhibit to talk with everyone about the quilts and their histories.   I love how eager they are to share these beautiful treasures.
 
To learn more about Arlan and Pat and their quilts, go to their website, http://www.thechristcollections.com/
There you will find the current list of their appearances and have a chance to purchase one of their catalogs or patterns that Pat creates from quilts in the collection.
 
I know I'll be watching for opportunities to see more of their beautiful quilts!
 
Mary Huey


Thursday, October 2, 2014

A Quick Fall Walk

Late this afternoon I made a quick loop around a small nature preserve here in Northeast Ohio -- it was a perfect afternoon -- mild (75 F), clear, and a light breeze.  My binoculars didn't get much use, but I snapped some delightfully fall pictures!

While we are known for the brilliant color of our sugar maples in this part of the United States, there are other plants that rival them for color.  This is a Black Gum -- good wildlife tree, too.  I have a Black Gum sapling in my garden that I hope will be this glorious by the end of this decade!

Some of the most colorful foliage is poison ivy vines which are becoming more prolific with global warming. 
 The leaves are pretty but one doesn't want to pick one of these up!
One of the first things I spotted were these jack-in-the-pulpit seed clusters!   Some critter will find those irresistible and haul them off to bury in another part of the woods!  Perfect!
 And this clematis vine has gone to seed but the breeze hasn't carried the feathered seed off yet.
 Not sure what sort of rose this is, but it's not invasive multiflora and I hope that's good.  The rose hips looked luscious!
I was surprised to see this large mushroom ready to pop open -- the weather has been rather dry for the past week and I always assume fungi want more wetness.
These bottle gentian are in full bloom -- what a gorgeous shade of blue.

There weren't many birds but every stalk of milkweed I saw had seed pods that were covered with these large milkweed beetles -- they eat the pods and silk according to my little book.
 There were hundreds of these meadowhawks (maybe ruby - I'm not a very educated dragonfly person) with rusty red bodies -- they were basking on the tips of reeds and stalks around all the ponds.
 And I found this fuzzy caterpillar in among the rose hips -- I also accidentally knocked him into the pond, but was able to rescue him before any damage was done.  I looked it up and it's likely a Hickory Tussock Moth caterpillar.
My target in this picture was a dragonfly on the tip of the twig.  The camera would not focus on the insect, but as I looked through the lens of the camera, I decided the background is breathtaking and took the picture anyway!
I hope I'll get in a few more fall walks before all the leaves come tumbling down!
 
Enjoy your weekend!!
Mary Huey