Wednesday, September 10, 2014

Placemat Frenzy

I know you'll find this hard to believe, but last week during the studio clean-up, I found a couple of UFQ's?!?  Actually I found more than a couple, but these two might come in handy very soon.  I hear I have nieces getting engaged and I need to be prepared.  So during September, I'm going to set a goal of finishing up the two sets of placemats I found. 

The first was made using Marti Michell's Flying Geese ruler to create these lightening streaks.  If you belong to a Marti and Me club at your local quilt shop, the pattern for these is included in one of the early club patterns -- I have 4 of them pieced and a lovely backing fabric already chosen. 
 For years, I have interlined placemats and table runners with flannel rather than batting -- it gives me a flatter finished product (no tipping wine glasses).  I buy a plain white flannel which I wash and dry two or three times to make sure it is preshrunk completely.
I also found 4 of these ready to assemble.  This set was made with a pack of 5" charm squares, 1/2 yard of border fabric, and Marti Michell's Tessellated Windmill tool.  They are 3" finished blocks and I love that there is NO waste using Marti's tool. 
One of the placemats is even finished -- why did I stop? 
Isn't the backing fabric lovely? 
Since I have no idea where my nieces' tastes fall in the area of decorating, I need a little more flexibility in case neither of these sets work.  During the clean-up, I found a stack of 8 fat quarters that I've been itching to cut up.   And placemats are perfect -- a simple project that doesn't require a huge investment of time.
I'm going to use another pattern which I wrote 12 years ago.  I use it over and over!!  My Fat Quarter Placemat pattern uses a stack of 8 fat quarters to make a set of 8 placemats.  Sometimes I've given away 6 and kept 2 for myself.  Sometimes I've given away two sets of 4.
I often make or purchase a set of napkins that coordinate.  For that bold group of fabrics, I'm going to make solid color napkins -- two each in gold, turq, red, and dark gray -- keep the fun, funky look going! 

These backings are very coordinated but sometimes I choose a much larger scale print or a different style to make a truly reversible set. 
One of the sets I made using this pattern several years ago (long since given away) used 8 background prints -- today, we would call them "low-volume".  Once the tops were pieced, I layered them with the flannel interlining and before adding the backing fabric, I added an herb embroidery design to each one (justifying that Bernina embroidery machine I bought!).


Mary Huey


Monday, September 8, 2014

Some Eye Candy to start the week!!

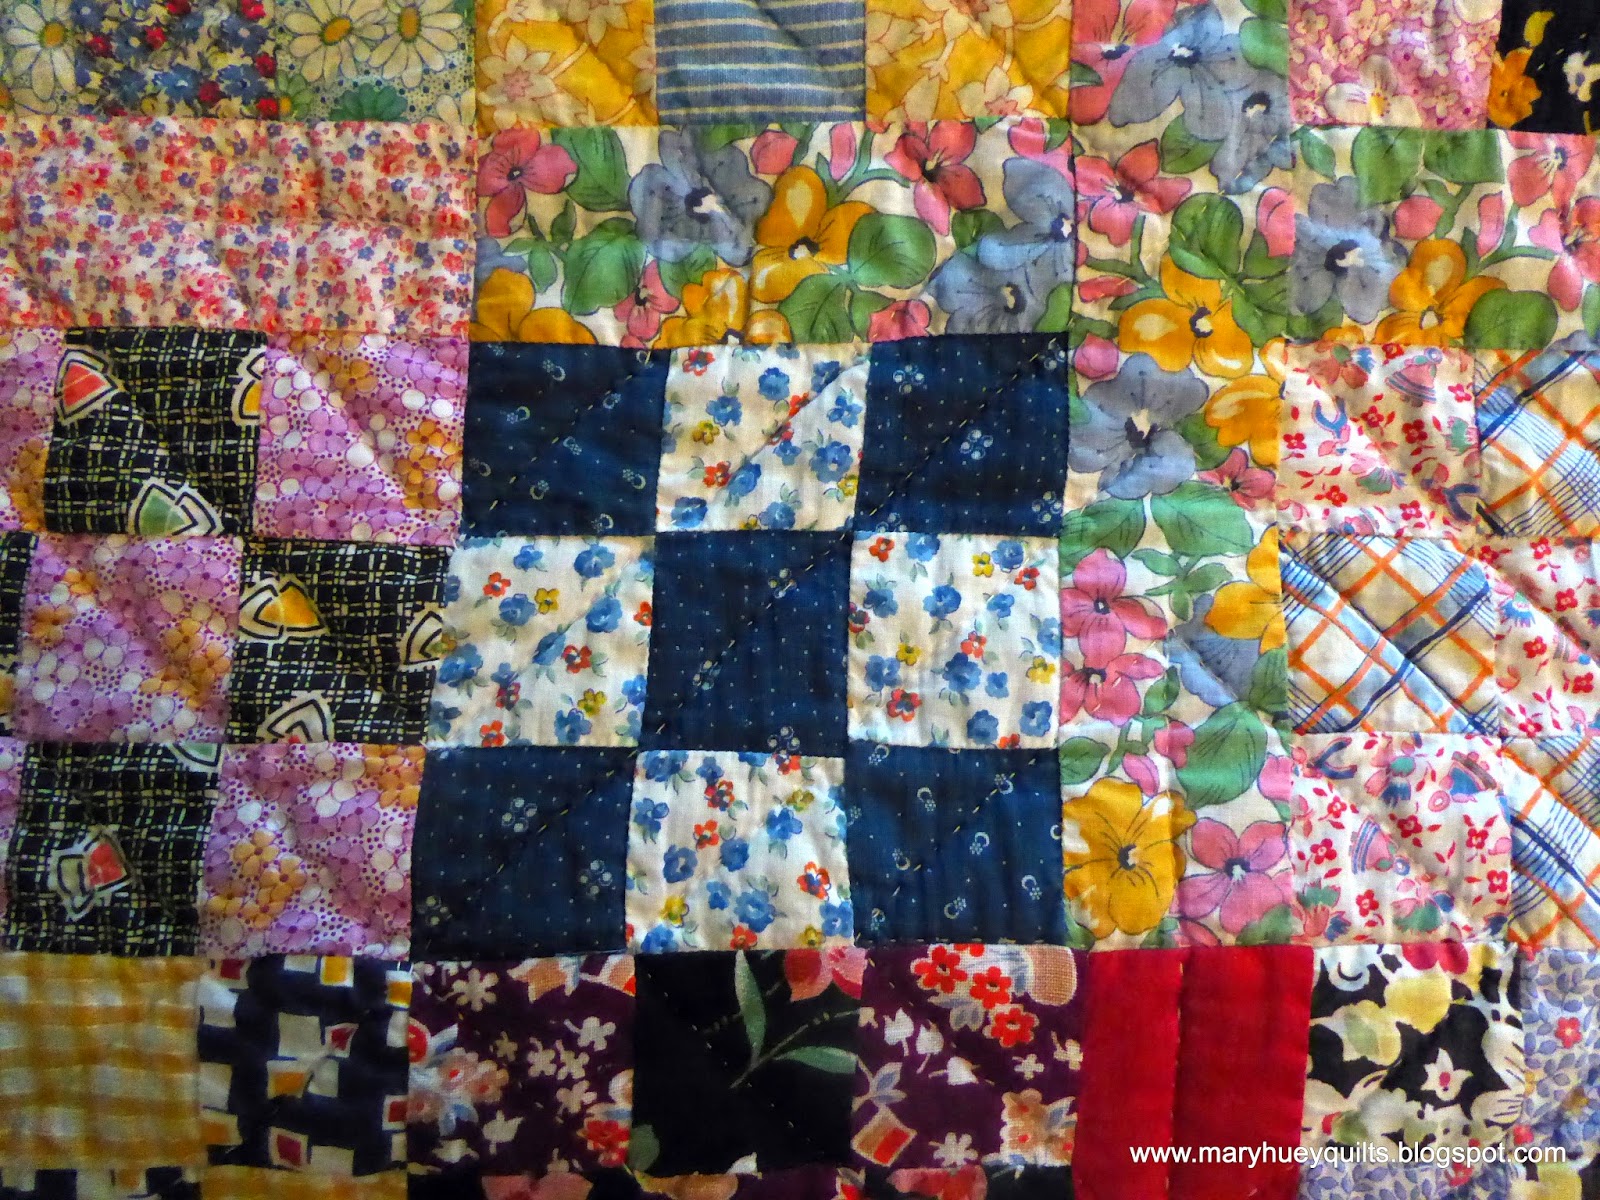
Last week during my studio clean-up, I was reminded that this quilt needed a couple small repairs.  I had marked them with safety pins and after I finished, I spread it out on my bed to go over it to look for any spots I might have missed. 
Sometime in the 80's my maternal grandfather asked my mother to quilt it saying it was pieced by my her mother -- probably in the late 30's or early 40's.
It's the only quilt attributed to my grandmother that I've ever seen -- were there more? 
My mother and her 5 sisters were all able to point out fabrics they remembered from their dresses.  I'm trying to picture myself in a dress made from one of these two -- perhaps that's why mom and her sisters were such tough women -- it would take a special kind of grit to wear that dress to school!
I am the exact middle grandchild -- 9 out of 19 -- and we lived the farthest away from my grandparents.  Grandma died when I was 14 and so I don't have too many memories of her except the food that she served anytime we went for Sunday dinner -- homemade bread, chunky applesauce, and orange cookies!!  The one interaction I recall is that she was quite upset with me the afternoon I occupied myself by "painting" the side of her house with unopened buds from her iris.  I bet you didn't know that a dark purple iris bud will make quite a lovely streak on white clapboard siding.  Thinking about that, I wonder which upset her more -- that I was picking off the iris buds or that I was defacing the house?  (I wasn't old enough to know better, no matter what anyone says!!)
This time when I opened out the quilt, the dark blue prints caught my eye for the first time -- not the placement so much, but those fabrics are from the 1890's -- to me that says they might be scraps from my great-grandmother's scrap bag rather than my grandmother.  I have this vague recollection that great-grandma Thome lived with my mother's family at the end of her life so perhaps both of them worked on it.  Hmmm? 
I remember helping my mother get the quilt into the frame and I know it was machine pieced.
To me it's an endlessly interesting quilt to look at -- all the funky fabric combinations and the charming prints.  Some blocks are so coordinated while others are a source of endless wonder.  If both of my grandmothers worked on the piecing -- was one a control freak and the other carefree?
And why didn't they teach my mother to make quilts?  Mom and I started quilt making together in the early 1970's . . . . although at the end of her life, she told everyone "I taught Mary everything she knows" when people would remark to her about my gift for quilt making.
Now that I've put a few of my own stitches into the quilt, I think I'll sleep under it when the weather cools off -- do some bonding with my mothers and their stitching!


Mary Huey
www.maryhueyquilts.com

Friday, September 5, 2014

A winner and a finished top!

Well, I still haven't found the Gingher shears but they are here somewhere. 
 
I have finished the little quilt top.  Most of you agreed with me about using the piece with some color to it.  And Laura (the 4th quilter to comment) was chosen by my "random" number companion who has no idea why I wanted her to chose a number between 1 and 13.   So when I hear from her, I'll be sending off about a yard of the fabric that I didn't use.
I'm pleased with this top -- it used up some more of my stash and I didn't have to throw away all those little squares!  And one of the early rejects is big enough to be the backing!
Now it has been added to the shelf of small quilts to be finished by my loyal group of "charity" quilt makers this fall.  It will be among at least a dozen small quilts, packed into a tote bag, and shared with a local women's crisis center to use as Christmas gifts for children.
Back in the studio, the cleaning has slowed down a bit -- once I got this table next to the machine cleared off I found myself stitching on a rediscovered project -- just taking a little break.  (-"
Then I worked on cutting up some of the sorting from the previous days and next thing I knew I had started a new project.  (Pretty surprising, huh?)  But it is the first new project I've started in two months. 
And I can justify it!!  I'm vending with my friend, Denise of Mercantile on Main in Coshocton, Ohio next weekend and I'll need stuff to demonstrate the y-seam piecing technique featured on my DVD, Set-In Piecing Simplified.  The yellow squares may change -- seems a bit loud, but on the other hand, I'll be figuring out the assembly strategy so I'm not ready to commit my best fabrics.  We'll see.
 
Denise and I will be at the
 Dalton is right on the edge of Amish country so you could do some of both.  The show hours are 10 a.m. to 5 p.m.   Denise will have fabric from her lovely shop including kits for her original quilt that was part of the Spring/Summer 2014 BHG Quilt Sampler magazine -- the quilt will be there, too.
 
I'll be demonstrating how to chain piece through set-in seams and have all of Marti Michell's templates available plus my DVD.  If you come to the show, be sure to stop by and say "hello"!
 
Have a pieceful weekend!!
 
Mary Huey


Wednesday, September 3, 2014

Studio Clean-up Progress!!!

I'm never quite sure how things get so messy in there but since me and the cats are the only ones who enter the studio on a regular basis (and they don't have opposable thumbs), it must be me.  Yesterday I finished the cutting table clean-off.  There is a little yellow basket where I drop small bits intending to cut them into 2 1/2" squares (my go-to scrap size).   But as is obvious by the gushing nature of the basket, I haven't actually done that in a while.   So I dove in and started.  Much to my great delight when I got to the bottom, there was a pair of scissors and the other 3 placemats that have been MIA since last fall.   I didn't realize the scissors were missing but I've been looking for those 3 placemats for months! 
 
Can't see placemats?  That's because they aren't placemats . . . . . yet.  They are the two piles on the right side of the picture -- they were only placemats in my mind.  There is one mat finished and every time I've laid my hands on it for the past 9 months, I wonder where the other 3 went.  So it's good to have a mystery solved -- just wish they were pieced and ready to layer!!
 
And here's a tidy cutting table, one leaf is down so my son can get in and out of the room more easily and the little yellow basket is ready for more scraps!! 
Since the project is replacing the windows, the next target needed to be the area under the windows.  The big bag holds my traveling mats and rulers so I just needed to find a different spot for it temporarily.  And that was the end of "easy".
This is what was lurking in a box under the bags.  What does the note mean?  I do try to leave myself clear notes so that when I return to a project, I can pick it up without too much puzzlement.  But this note took all afternoon to figure out that it had nothing to do with this fabric and in fact is already done -- I must have found the note laying on top of the pile and pinned it there so as not to lose it.  The note is recycled and the fabric is back in the color stacks!
When what to my wondering eyes should appear -- lurking under the green fabric -- oh, no!  There was a UFQ.  )-:  Not another one??  There are lots of notes, and some of it makes sense but at this point, I'm not sure I like the plan. 
I did stop and trim all the blocks to the prescribed size and will take it to my guild weekend retreat next month.  We'll see if I stay with the plan or come up with a new one.
Finally, the basket.
I'm suppose to clear out this 1/2 bushel basket when it's full and here it is overflowing. 
Perhaps I should get a bushel basket?  (-:
I made a tall glass of iced coffee and sat down to sort.  The pile on the left will become 2 1/2" strips and the pile on the right 2 1/2" squares.  The next nice day (with no breeze), I'll move out onto the patio and cut down through these piles!
These 4 piles are scrappy assortments that I'll sell at fall shows where I'm vending. 
Blues and greens are the most common colors in my stash so unloading a few bits has very little impact on me -- this clump totals over a yard and probably has 20 or so prints plus a bag of 1 1/2" squares.
These are some more modern leftovers from garments I've made my granddaughter plus a long held stash of scraps from Lily Pulitzer's fabric line -- fun stuff but after clutching them for 20 years, I'm probably not going to use them. 
I have stashed - no hoarded - neutrals since the early 80's when they were hard to find.  I'm glad they aren't so hard to find anymore and find it easier to let some go these days.
This is a wildly varied clump of bits and pieces perfect for string piecing projects -- most are two small for my 2 1/2" hoard but all are more than 1" wide. 
Mission accomplished!!  The basket is ready for new residents!
And it was 5 p.m. -- quitting time.  My daughter fixed supper and so I was able to piece for about 45 minutes -- ahhhh. 
The next target zone!!   I'm hoping it looks messier than it really is!
 
And if you think you need one of those scrappy bags shown above, make a comment below and I'll get in touch with you -- they could be had for $1 plus postage (USA only, please).
 
Friday, 9/5, I'll announce the winner of the "losing border fabric" from my post on Monday -- if you haven't read it or expressed your opinion, check it out here.  I'm still contemplating which fabric to use for the last border.
 
 
Back to the studio for me!!
 
Mary Huey


Monday, September 1, 2014

Labor Day Holiday?

It's the last big summer holiday weekend here in the USA and I'm cleaning my studio!  I spent three shifts up there yesterday.  I cleared the top layer off the cutting table (yes, it was pretty bad).  I still haven't found my Gingher shears but there's more to be done.
There is no fabric on the floor in front of the "color" shelves and the box of scrap batting is tidy and organized!  I even aborted a couple projects that never quite got started -- I don't even remember what one of them was suppose to be -- it was a good looking pile of fabric, but I'm clueless beyond that.
 I hope by the end of today, I'll be able to fold down half of the cutting table so my son can install the remaining two new windows which I hope will make the room cozier this winter!!
Just in case you couldn't tell, I don't clean the studio often enough, but the window job means I have to move quite a bit of stuff out of the way and so I might as well clean at the same time.  One of the challenges of cleaning the studio is maintaining my momentum.  Something usually distracts me from the goal.
Since I'm touching so much stuff, I'm also making another feeble attempt to shift a few things out of the house.  And that led to this session's diversion.  I've found a small quilt top (a sample for Marti Michell's Tessellating Windmill tool) that just needs borders and it won't take long?!  Thirty minutes before I took this picture, that border of squares was just a pile left over from something else and because I cut them (maybe 15 years ago), I must use them.  Happily, they are from the same fabric collection as the windmills.  (I think I deserve bonus points for being able to find the squares with very little effort!!)
The floor was at that moment the only clear space in the room -- I didn't want to take the hexagon project off the work wall -- and so I began to audition for an outer border.  I auditioned some dark prints before deciding to add the strips of squares but nothing caught my fancy.  The piles in the photo above are "the big hunks" suitable for borders and the beginnings of backings so I started pulling possibilities out of there since they were so handy.  (No, they don't live on the floor but their shelf needed to be moved temporarily.) 
It's going to be child size or perhaps wheel chair lap size.   I think the print on the right is too sophisticated for the prints in the windmills.  And also the upper left print.  I would be happy with either the upper right or the left side one.  Each one gives the quilt a different look. 
 
  What do you think?  Do your own audition.  Cover up each of the prints in the photo and see what your first thought is.   Leave me a comment and you might be the lucky quilter who will get the hunk I don't use!
 
You know I'm going to sew before I clean, don't you?
 
Mary Huey


Friday, August 29, 2014

To Pin or Not to Pin . . . .

. . . . that was a question I had this week from one of you who has been learning to use the Set-In Piecing Simplified technique.  I thought some others might like to read my response, too.

My usual response to the question of "pinning or not pinning" is that I don't pin very often, but that doesn't mean you shouldn't pin.  If pinning is helpful to you, then by all means pin!!

But this time, I decided to try it out and see if pinning was helpful to me.  The reproduction hexie piece that I'm machine piecing is growing steadily thanks to the self-imposed deadline of finishing it before my spring 2015 workshop at the Lake Metroparks Farmpark. 

I'm currently adding the last row around the large center star motif
and finishing up the third round of the sixth motif for the central part of the quilt.  Doing both at the same time enables me to employ the chain-piecing approach demonstrated in the DVD. 
After a few attempts, I realized placing one pin in the center of the hexagon was quite helpful.  It's easier to get it under the needle and presser foot when the motif is so large and eliminates the shifting that I encounter at that stage.

  The pin needs to be parallel to the seam I'm stitching! 
Placing it parallel made it easier to remove the pin just before I made the final pivot for that seam.  So I guess I have a new answer for the question, to pin or not to pin?
Yesterday I started to audition for the final layout.  My version isn't going to be an exact copy of the original quilt which dates to the late 1800's.
I have an EQ layout of it and have been playing around with the "filler" units on paper -- just can't decide which orientation I like for the large central unit. 
What do you think? 

Mary Huey