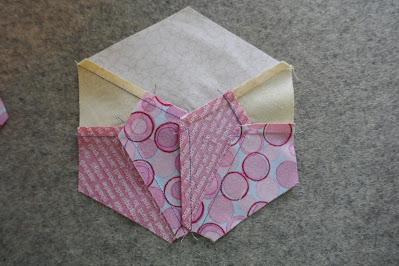
My blocks are finished!!
Time to set them into the quilt top!
For the lap robe size, I'm setting the rows horizontal -- for the crib size in the pattern, I set the rows vertical. Here, I cropped the photo of my current quilt and rotated it 90 degrees to illustrate that option.
NOTE: There are some other setting options that might appeal to you for hexagon shaped star blocks from a sew-along I did here on the blog in 2014 -- you can review them HERE.
Anytime I'm making a "scrappy" quilt, I begin the setting process by putting my finished blocks onto the design wall in a random order -- I start at the top left corner and lay the blocks in position as they come off my pile of finished blocks.
Then I step away for a couple hours.
When I come back, what ever "jumps" out at me is what I change.
The only block that jumped this time is the second from the right in the second of the bottom row.
It grabbed my attention immediately (not in a good way) so I started moving it around.
My goal was to minimize it's impact. Positioning it in a corner and making sure the other corner blocks were also "strong" seems to do the trick for me. I also organized the center horizontal row with the brightest blocks and that gives a focal point. I could have also put the "difficult" block in the center of the quilt if I wanted to draw attention to it.
Once I was happy with the block positions, I added the setting triangles -- random placement to begin.
Looking through my camera is a good way to pick-up on "glaring" spots.
At this point, the quilt felt chaotic and unbalanced so I began to move triangles around.
What worked for me was to organize the triangles with teal prints around the center Dresden Star -- it creates a subtle secondary star which I like but there could have been a dozen other arrangements.
It's all about what appeals to your design sense.
Trust your intuition -- if you are waffling, it means you don't like it!
Be sure the straight of grain on the setting triangles is laying horizontal to the quilt. This controls stretching when sewing the rows together.
Can you find the four triangles that are pieced from half triangles?
After a day of rest (to be sure I liked the layout), I was ready to assemble the quilt top.
The beauty of this layout is that it doesn't require any more set-in seams -- all straight from this point!!
These are the basic units to make.
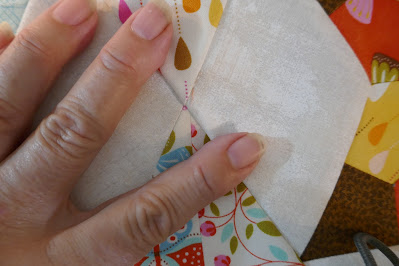
If you took the time to trim the corners of the triangles and half triangles as you were cutting, all that you need to do to position them is match the corners as shown here.
and here!
Press the seams toward the triangles.
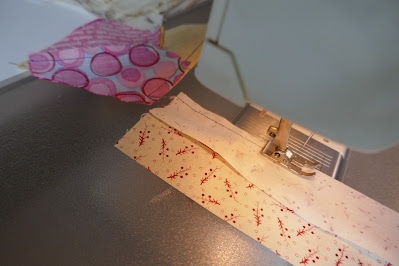
Once you have all the diamond shaped units and the end units,
There is one little trick you need to know to avoid mismatched intersections as you join the units to assemble the rows. This can happen if you don't match properly.
This is what you want!
You can poke pins through the seam allowances and fiddle or if the seams allowances are a consistent accurate 1/4", do this.
I hope I got close enough with the photo
Looking down "into" the seam allowances, I've discovered if I align the corner of the seam allowances on the top unit with the end of the stitching line on the lower unit -- the seams will cross/intersect 1/4" from the raw edge. It might take a few practices to do this but once you figure it out, it streamlines the matching. It's hard to convey in a picture or words, but if you do it with your units and compare it to the picture, it will make sense.
I had to fix a couple.
Usually my bad ones happen because the unit seams weren't exactly 1/4".
It's a good idea to "label" the right end units with a pin or something. I flipped a row 180 degrees and while looked okay at a quick glance, it messed up my setting triangle arrangement at the center of the quilt. That will teach me not to be such a cocky bugger?!?
Since the seams within the rows are angled, you can press them to either side.
Here's the finished top ready for borders! Right now it's about 36" wide and 52" long. Once the borders are added, it should be 51" by 67".
If you want to make a larger quilt, every block added to the width of a horizontal setting increases the width of the quilt by about 12" and every row added increase the length by about 10".
I'll be back in a week to walk you through the borders and share some quilting ideas!
And happy dance, I found a hunk of fabric for a backing in my stash!! With all the finishing I've been doing the past few years, those big pieces are becoming more rare in my stash?!?
Mary
.JPG)
.JPG)
.JPG)
.JPG)
.JPG)
.JPG)
.JPG)
.JPG)
.JPG)
.JPG)


.JPG)
.JPG)
.JPG)

.JPG)
.JPG)
.JPG)
.JPG)


.JPG)

.JPG)
.JPG)
.JPG)
.JPG)

.JPG)
.JPG)

.JPG)


.JPG)
.JPG)


.JPG)


.JPG)


.JPG)
.JPG)
.JPG)