Are you susceptible to the lure of interesting ideas?
I certainly am!! That's why I have so many "oars out of the boat" all the time. Something catches my fancy and I'm off like it is the most important thing in the world for me to do or learn. I love the thrill of the original curiosity and then the conquest of learning about it or being able to do it! Sometimes that is all I need to accomplish but other times, I fall down a rabbit hole of obsession.
Enter the Forever Friends pattern by Sandy Klop in Sisterhood of Scraps. It's so scrappy and I just love that! I've had the book for almost two years and been cutting strips for over a year but I held back (such restraint) during 2021 in my drive to #quilt21in2021. It didn't hurt that every time I read through the directions, I was puzzled -- the instructions made no sense and that made it easier to delay the deep dive.
But last weekend, as I hid in the sewing room (in an attempt to reverse a mental health downturn) I decided to tackle the instructions the way my mother taught me -- read one sentence, do it, read the next sentence, do it and so on. The first block took three hours on Saturday afternoon and I was exhausted mentally!?! But when I returned on Sunday, my inclination to build a personal work process enabled me to complete two blocks in just two hours. The instructions were beginning to make sense and they are thoughtfully written.
Since the weekend I've been up there every day, cracking out another block (or two) and I'm in love with the results and the process.
So I decided that I'd share some tips on pushing through the early stages of this project in hopes that it might either give you the courage to try this pattern or to push through to understanding with a pattern that has you intimidated.
As a quilt making teacher for almost 40 years, I saw lots of students and customers suffer from the intimidation of trying new patterns because "it didn't make sense". As a pattern writer who traveled regionally to teach those patterns, I learned that how each of us approaches instructions is based on how we were taught to read instructions and the skills we learned. While my local students could take one of my patterns and whiz through it because they learned their basic skills and terminology from me, students in other regions who learned a different sets of skills and terminology were puzzled.
So it might not be you and I hope that encourages you to try!
This isn't a call to change the way you work through a new pattern. I'm going to share the reasons I was puzzled by these instructions and how I moved through them as an illustration for you to consider how your skills and work habits influence the way you approach a new project.
To begin, I was trained by Mary Ellen Hopkins to be a machine piecing teacher and learned to cut as you go. We never cut all the pieces for a project before doing any sewing. The reason for that was we didn't have 1/4" presser feet, so seam allowances varied a bit from machine to machine. We cut the first step, stitched the first step, and then measured the results before cutting for the second step.
The result of that is that I'm skeptical of any pattern that tells me to cut everything up front.
And so I always skip that step which is okay because it works for me!
(BONUS -- if I get bored with the project, I can quit and repurpose easier with no guilt because I don't have all that fabric cut up.)
Second, when my mother taught me to knit and sew, she waited to explain things to me until I had attempted to figure it out for myself. Read one sentence, do it. Read the next sentence, do it.
Often, we read all the instructions before starting a project and they make no sense because we can't visualize how the process is working. But if we go sentence by sentence even though we don't understand why we are doing something, we get to the end and can look back to see how things went together and THEN we understand the process because we've experienced it.
Finally, I could be wrong but I'm under the impression that the restrictions of editors on pattern writers (especially in books) can oversimplify explanations that might benefit readers so it might not be that the designed is a poor instruction writer - there could be other reasons.
(That's why some elect to self-publish!)
I've watched quilters work through this pattern on Instagram and all seem to work block by block but when I read the instructions (over and over), the implication is that all the strip sets are made first ("make 252 each of A, B, C, and D units") and then arranged?
Where's the "shocked" emoji??
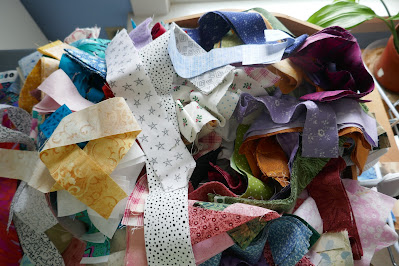
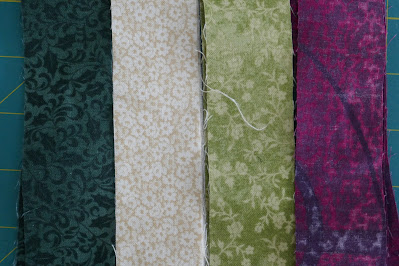
So I began with my chaotic pile of strips (see first picture) and proceeded one sentence at a time for just ONE block even though I could not make sense of how it would come together.
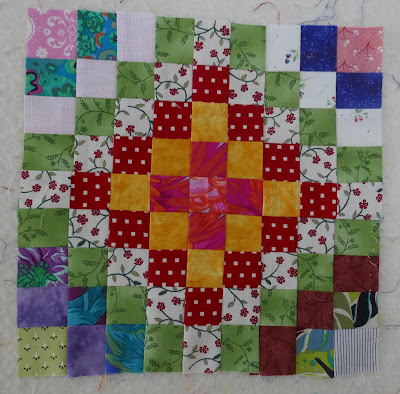
It took three blocks before the process made sense and it's brilliant.
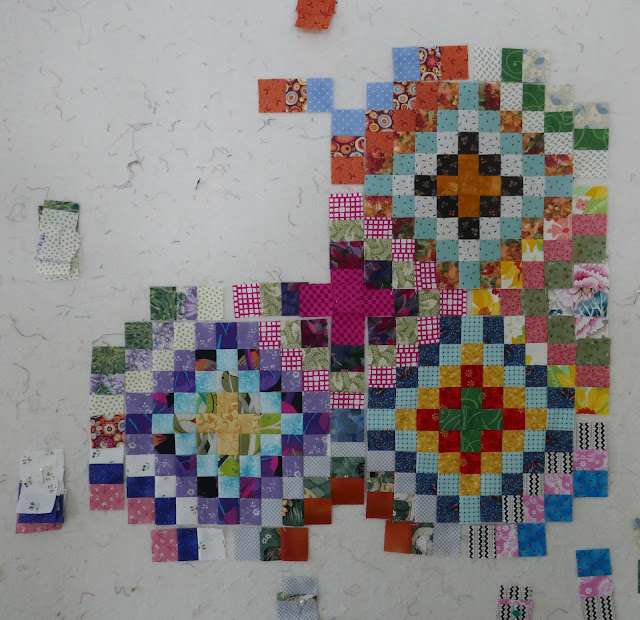
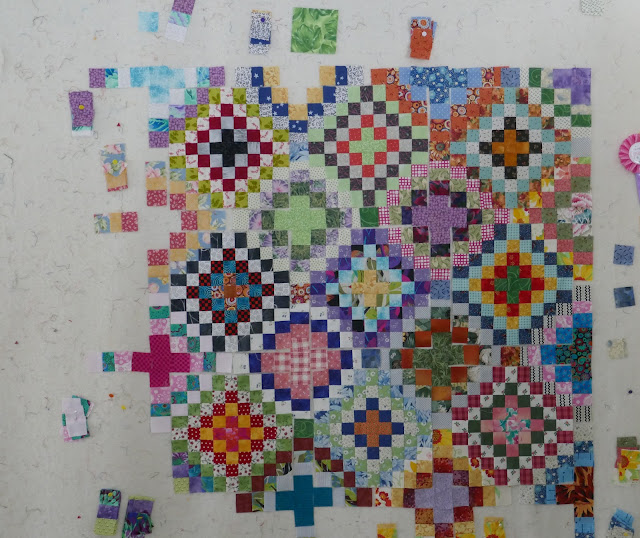
Here's the block I just made in place on the work wall. Notice above that the center of the block stops at the green round and the four corners are different.

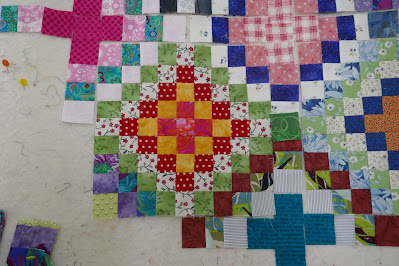
Each adjacent block shares two corners and with the addition of sashing units, a new Trip around the World motif is created. Now I get it!! The more "blocks" I make, the easier the process becomes and I'm happy with the results.
If this beauty is on your "want to do" list -- here's a couple tips.
Page 38 to 40 -- Steps 1 through 4 make the central "trip" motif and use 4 fabrics. I pick those as I'm finishing a work session so they are ready and waiting when I return making it easier to dive back in.
This is a dull combo but that's the beauty of scrappy quilts -- the dull has a place!
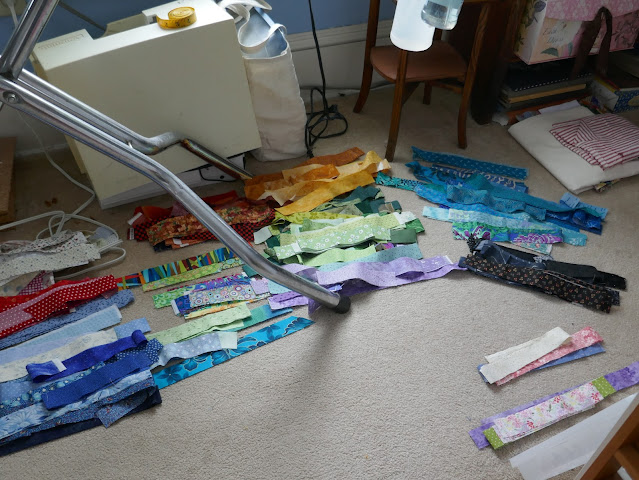
Steps 6 through 8 make four corner units and four different ones are needed for each block. After the first block, you always have at least two corner units already done each time you start a new block. Since these units use three different prints, I set aside groups of three that catch my eye as I'm rummaging through the pile so they are ready to pick up and stitch.
And most important, follow the pressing directions to the "T" -- they are thoughtful and will make the assembly so easy but if you ignore them . . . . . . . . . . big mess!!
I set aside strips once used so they aren't repeated too close together. Last evening, I returned all the strips used for the first 9 blocks into the "stash of strips" and sorted them out into color families - yes, on the floor -- which will make it easier to pull combos (and less messy).
(Notice the two "corner combos" in lower right corner that I pulled during the tidy-up.)
 As soon as I finish editing this post, I'm headed back up to the sewing room to crack out another block! My original idea was to make a lap robe size quilt with 20 blocks but I might go bigger depending on how much fun I'm having at the 20 block mark?!?
(Those units pinned to the wall around the edges are corner units waiting for their block to be made.)
And I'm not falling behind on my Homage to Grandmother's Flower Garden because I can use it for "leaders and enders" as I assemble the Forever Friends blocks!!!
Part 7 almost finished.

LOL -- at this rate, it won't be long before I have another 21 quilt tops stacked up?!?
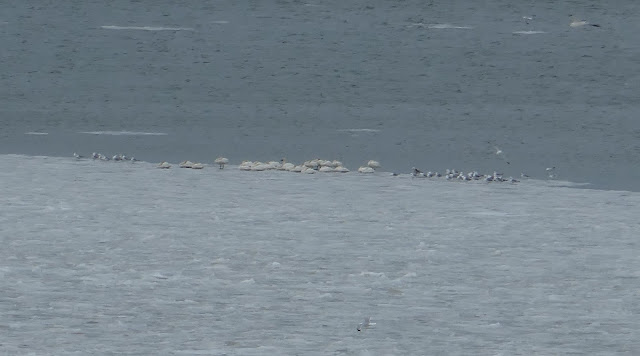
Enjoy your weekend and try to get outside especially if you are up "north" -- it's good for our mental health!! My foray a couple days ago led me to this group of tundra swans resting on the ice out on Lake Erie! One never knows what wonders are waiting out there even in crummy weather!
Back to puttering around in my current "rabbit hole"!
Mary
I never have cut "all at one go" either--I find it hard to figure out patterns that don't give you instructions to cut for just one block! (Sometimes I only want ONE block--not to cut a ga-zillion pieces first!!
ReplyDeleteI think your quilt is going to be just gorgeous, Mary;))) I love that pattern--but oh so many pieces ...good luck and have fun Hugs, Julierose
Wow this is gorgeous. I just cut up a bunch of skinny strips for another quilt, and you are making me go down this rabbit hole. The TATW is on my list of quilts to make.
ReplyDeleteLove the breakdown on the "steps"!
ReplyDeleteYah I find that sometimes I need to go a step at a time but I always read all the way thru to start so I have an idea of where I am going even if I do not know how I will get there!