Even though I'm not a fan, it was encouraging to me that the Macy's Thanksgiving Day Parade figured out a way to happen this year! If they can blow up those monster balloons to walk around the block, maybe I can inflate myself back into a daily machine piecing routine!?!
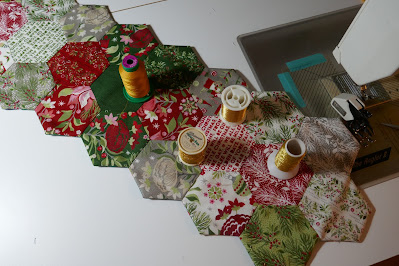
So for the past couple weeks, I've been finishing up a table runner I cut out late in October. I used the large hexagon template in Marti Michell's Set G (template #42 - 2" finished on each edge) and a pack of 5" Moda holiday charm squares. To piece it, of course, I used the Set-In Piecing Simplified technique from my teaching guide. By assembling it in sections, I can employ the chain piecing strategy without any "leader or enders". It's an easy project for practicing or refreshing this skill.

As I get back to daily piecing, I've noticed I'm making more little mistakes than typical. Each time I need to "undo", I'm trying to remind myself how lucky I am to have such excellent "ripping" skills. My mom started me early and the sentence I remember clearly from those days -- "Mary, I think you better rip that out" -- so here I am, sixty years later, ripping out seams with professional skill!!
When I had this all assembled, I put it on the design wall to enjoy the surge of pride that comes with a finished piecing project. "That's not right" -- sad face. Leave the studio, come back later, take it down and start to rip out the seams to fix it. Fifteen minutes into it, I realize I'm ripping apart the wrong end of the runner -- arghhh. I'll be back later.
It's all fixed now!!
I'm so glad I wrote up a tutorial about finishing zigzag edges without binding several years ago so I could go back and see what I did!!
The complete process is HERE along with another link to how I set up the backing so I can stitch all the way around the piece with no stops! If you don't have the 1" fusible batting tape available, you can cut strips of any lightweight fusible interfacing to use. And definitely trim 3/8" from the edge of the batting instead of just a bit over 1/4"!
The plan for today is to quilt it with a simple grid and gold metallic thread!
One more finish for the year!!
I made this one 9 hexagons long down the middle and it measures 10" by 30".
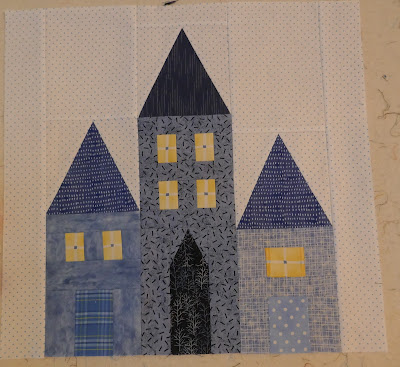
To keep the momentum going, I decided to follow along with the Moda Winter Frost sewalong -- here
is a link to the startup post. Their model quilt uses a palette of blues and the Bear Creek setting option just sucked me right in!! I have a lot of blues plus that shelf is very tidy since using them for the finish of my Halo Quilt in the fall.
And then my favorite blue winter quilt that hangs in the dining room is moving out this winter with it's owner, so . . . . . . . . totally justified that new project like a pro, didn't I?!?
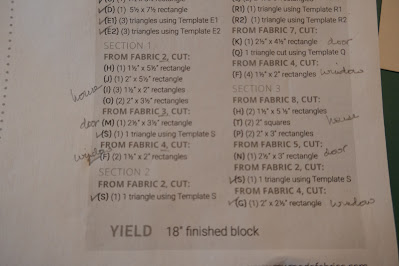
The working pile on the floor next to my cutting table grows a bit every day. I'm printing out the instructions in "black and white" making it easier to focus on the value placement rather than getting frustrated by not having "that specific print".
I've kept up with piecing the daily blocks (except for one which I don't like and might leave out). I will confess to being a bit cranky about some of the instructions so if I have a different technique that I know gives me good results, I'm not above substituting that.
(Sorry, Moda designers.)
So I'm not pressing seams open -- doing that interferes with my ability to accurately line up seam intersections and it makes the pressing more time consuming.

These cutting lists can look daunting so I taking time to analyze and add notations helps me to be efficient -- is there a common denominator for print A which means I can cut all the pieces needed from a 2" strip rather than cutting four 2" by 1 1/2" rectangles and then four 2" squares, etc.
There has only been one set of "templates", so I rough cut them from the paper pattern I printed, laid them on top of the fabric, and used a rotary ruler to guide my cutting -- quick and accurate.
I'm not a fan of making units bigger than necessary and then trimming them down to the correct size. I know that's a popular teaching technique these days, but it only works on simple units.
It does not work on this unit!
The principle only works when you can align a central point or line and trim evenly on all sides.
The instructions called for trimming this unit after all four pieces are assembled.
If you must trim it, it needs to be done before the center diagonal seam is stitched, not after!
Can you hear the cranky tone in my voice?
Trouble is that piecers will think they've done something wrong when the last diagonal seam misses the mark at the corner of the square but the error is the instruction, not the piecing.
After the poor results of the first one, I rescued mine by trimming the large triangle to the correct size before stitching the diagonal seam, laying it on top of the pieced unit and measuring the seam allowance from the edge of the plain triangle -- better but not perfect.
The only way to make "trimming" work for this unit is to cut the corner square, 2 1/4" not 2", and then trim the pieced triangle unit and the large triangle to the correct size before stitching the diagonal seam.
That is easier with a tool like Marti Michell's Multi-size Half Square Triangle.
While I'm here, let me explain my experience as an instructor working with piecers who trim all their work to the "right" size. Because they rely on trimming, they have not developed the skill of stitching consistently accurate 1/4" seams because they don't have to. That's fine until they tackle complex units with irregular shapes some of which may require templates.
Trimming doesn't build piecing skills.
End of rant!
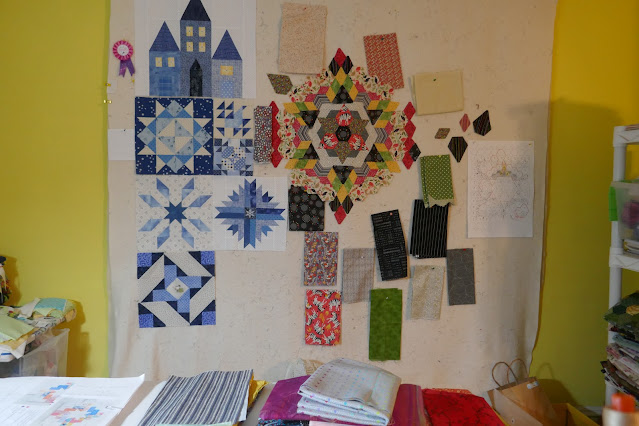
So the view from the sewing machine is looking busy.
I'm pleased with the Winter Frost blocks (I love blue quilts!) -- check out my Instagram feed to see some of the other blocks I've pieced -- @hueymary
The hexagon piece on the right isn't growing very fast but looking at it every day will eventually pay off -- my subconscious is on the job and one day, I'll walk into the studio, look at the design wall and just know what to do!!
Almost all of us have some sort of holiday ahead of us this month and it won't be typical.
I'm trying to override "not typical" and make it "unique" instead.
Gift making and shopping needs to be done sooner.
Celebrations need to be smaller and simpler but more festive and more frequent --
(i.e., eating the Christmas baking now instead of saving it for the BIG day).
How about you? Have a plan?
Stay well and strong!
Mary


Hi Mary! My grandmother was an expert tailor and I can still hear her voice suggesting I "realign my patterns" to match seams. She made me purchase additional yardage when my sleeves were off by an inch and a half (I did not account for the large repeat). She was absolutely horrified and offended that Princess Diana's plaid trousers did not have matched seams!
ReplyDeleteAh yes, matching plaids was very important 50 years ago!
DeleteNice post Mary! I continue to learn from you. I wish I immediately knew which MM template or tool would come to my rescue as you do! I've been following the Moda sew along and like your idea of printing the clues in B&W to help with fabric selection-the castle is too perfect a block not to stitch for my grandchild. It looks like yours went together nicely!
ReplyDeleteThanks, Tammy -- the castle did go together easily!
DeleteMarti has a book about maximizing the use of her tools called More Bang For Your Buck and it includes how to translate rotary cutting instructions to her templates -- http://www.frommarti.com/mm5/merchant.mvc?Screen=PROD&Store_Code=FMM&Product_Code=8352&Category_Code=B_PPT_Books Hope it helps!!