Last week, I showed you this little sweetie made for the Make Modern Magazine's
#mmminimini quilt challenge. I finished it over the weekend -- yea!!
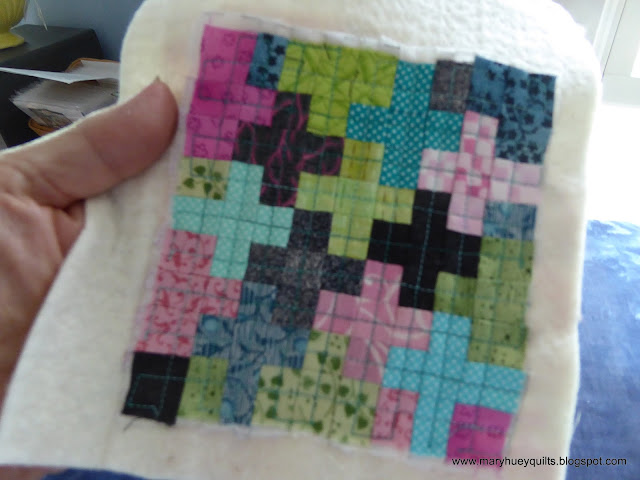
I also sketched out another one -- teeny, tiny pluses?!?
Happily, I stumbled across an old project using fusible grid and it occurred to me that it would be the perfect way to piece these little 1" squares together. Since the fusible grid I have is set up with 2" squares, I customized it by adding lines.
Time to cut up some fabric -- I cut the squares 7/8" -- it makes the grid easier to fold on the lines.
This certainly wasn't a stash busting project -- I only used a 4 1/2" strip of each print. I started in the scrap bag and intended to only use aquas and greens but in experimenting with dark grays for one of the pluses, I was forced to add some pink. (-;
The fusing dots are right side up on the grid.
Midway through the process, I realized aligning the squares would be easier if I laid the fusible grid on my light table.
That space in between disappears into the seam allowance. I did this on my ironing board so it would be the shortest possible distance to the iron when I moved it off the light table.
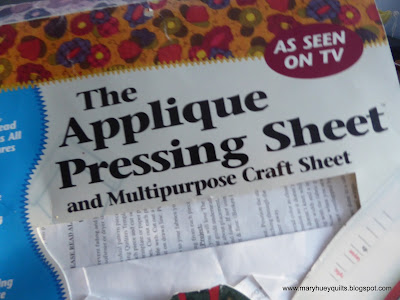
I also got my pressing sheet out so that the fusible didn't get on my iron or ironing board cover.
After transferring the grid to the ironing board, I laid the pressing sheet over it and pressed carefully.
Then I flipped everything over and pressed once more from the back side of the grid with everything still laying on the pressing sheet.
If you've never used one before, the fusible doesn't stick to the pressing sheet, so after the second pressing, I peeled the fusible off the sheet and all the squares were stuck to the fusible. The pressing sheet might seem expensive, but I've had mine for perhaps 15 years so it's paid for itself several times over.
The stitching took about 20 minutes -- everything one way first.
And then the other way.
I kept the quilting simple and it took all of 5 minutes.
Though perhaps if I'd proceeded more slowly, this would not have happened -- aarrgh!
No worries! I have lots of experience fixing this sort of goof-up!?! I meant to add a "hanging corner".
So there it is -- all finished. Gotta love a finish!!
And check out these iris!!! Such a luminescent shade it almost hurts the eyes. I think it's really the elusive periwinkle!
Is there another "minimini" on the horizon -- maybe?
I can feel something pushing out of my brain.
I hope your week is off to a good start!
Mary Huey
6/8/2016 Update -- Lorna at Sew Fresh Quilts has created a never ending mini-mini link-up!! You can check it out HERE. What fun!!


I love these minis! I never thought about using the fusible grid and since I'm getting ready to make a few minis, this is perfect. Thanks for the idea! :-)
ReplyDeleteYou made simple work of the Plus Mini, great idea and tutorial, thanks!
ReplyDeleteWow! Still meticulous work but made a little easier. Thanks for sharing.
ReplyDeleteNow I know how to use the grid I bought after a Georgia Bonesteel talk. Thank you, Mary!
ReplyDeleteI've never used the fusible grid before, I think I will give it a try, your mini pluses are great! I want to make one!!
ReplyDeleteNini~
Oh heavens, what fun!!! And somewhere is my stuff is a piece of that grid that I used years ago making a Santa! Thanks for the inspiration....once I get this all fused, I can play with my Singer Featherweight for the stitching!!
ReplyDeleteLove you mini's. I have to make a ribbon for a fair prize and last year I did something similar to using tiny squares to make a tiny banner. I love your plus quilt.
ReplyDeleteI enjoy seeing you tiny sewing things. They make me smile.
ReplyDeleteKathleen Mary
https://kathysnest32.wordpress.com/
Super cute - they are definitely all the rage right now. Good use of scraps I would say, too.
ReplyDeleteBoth of your mini mini quilts are simply gorgeous, Mary. I especially love the little pluses and sure do appreciate your mini mini tutorial showing us how you managed to tame those wee squares. Thanks so much for sharing!
ReplyDeleteHaha! I love your solution to the quilting error! What a great idea! Thanks for sharing the process.
ReplyDeleteBoth of your miniminis are just beautiful Mary! Such teeny tiny squares!
ReplyDeleteYou did a great tutorial and using the light box is what I do too, but it never occurred to me to put it on the ironing board first. LOL I like the hanging corner solution. :)