Showing posts with label #smorgasblocks. Show all posts

Friday, September 22, 2017

Smorgasblocks Sampler -- Blogger's Quilt Festival

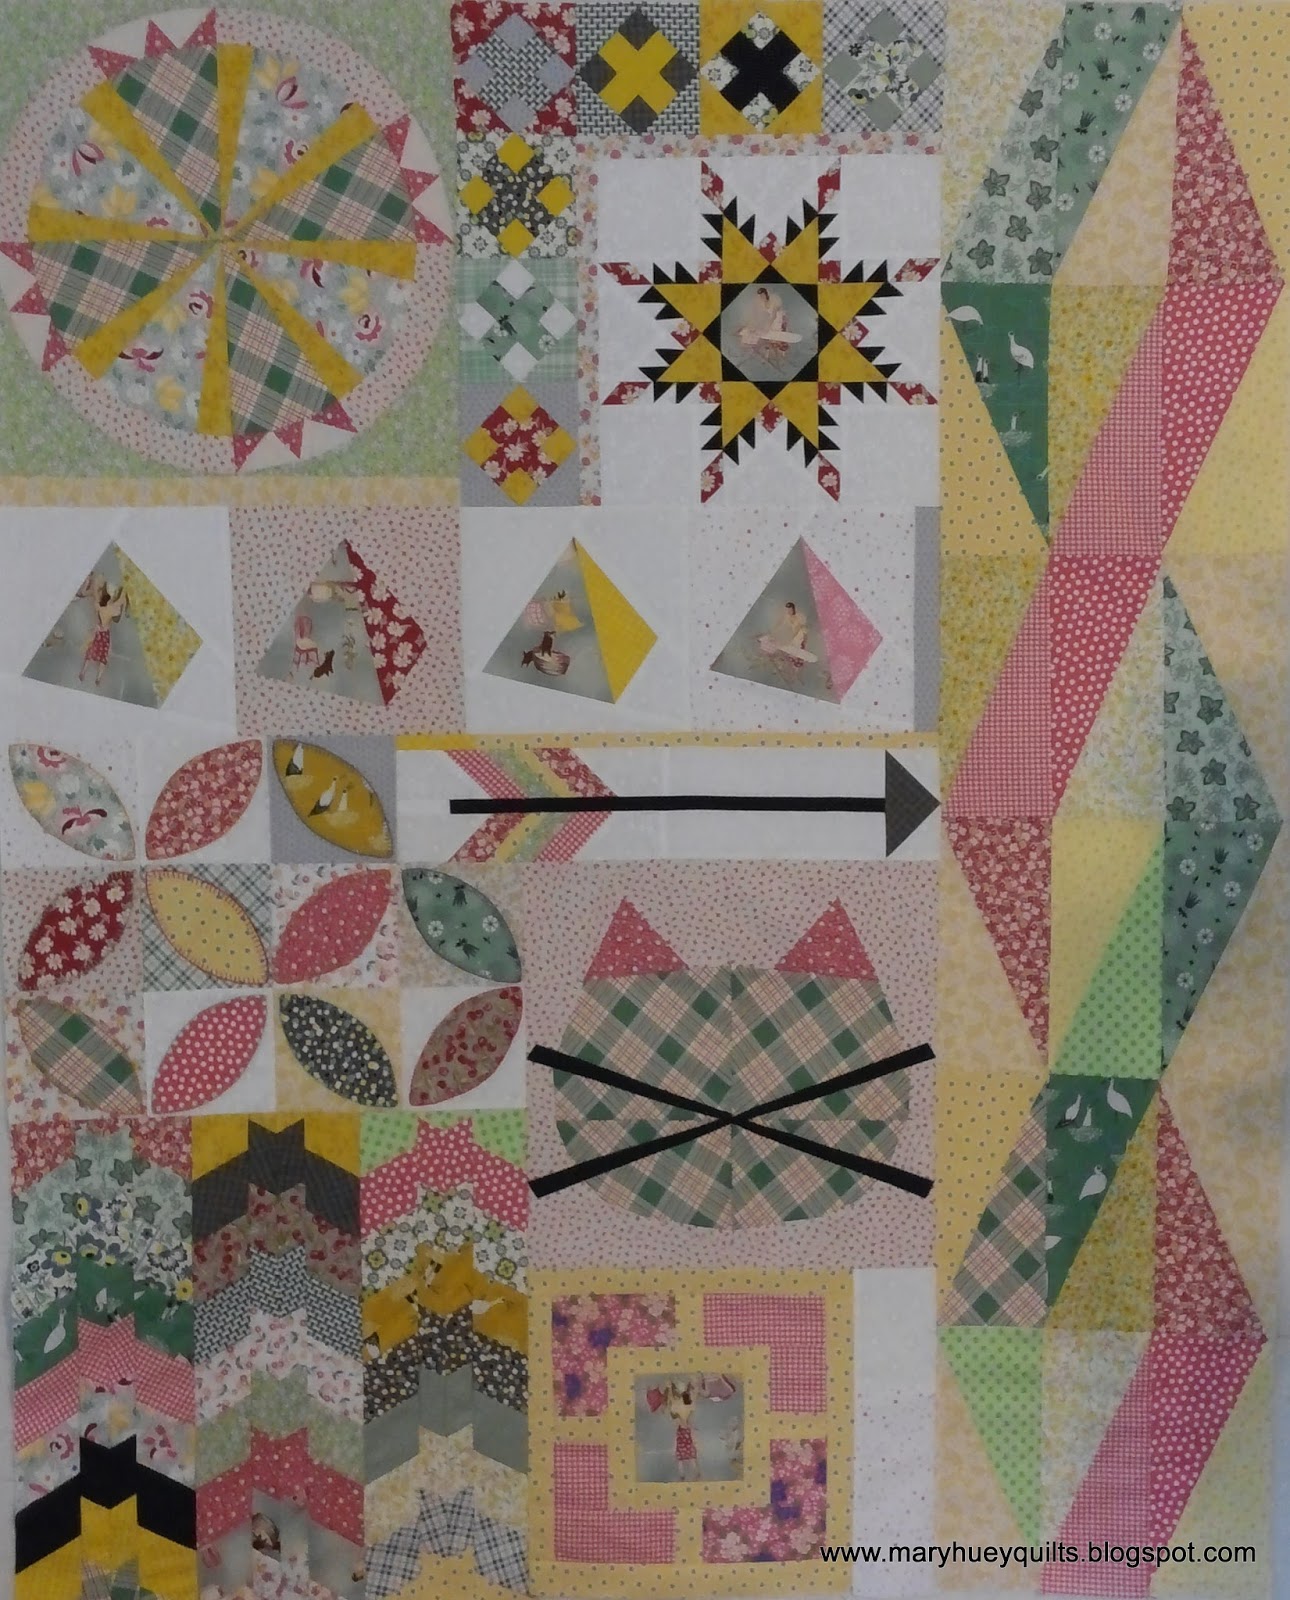
I finished my Smorgasblocks Sampler a couple weeks ago and shared it here on my blog so when I decided to enter it into the Blogger's Quilt Festival (HERE), I did a new set of photographs and have included close-ups of all the blocks with links to their patterns!
The quilt is the brain child of Anneliese at Eye Candy Quilts and it began last June (HERE is the first blogpost about it!)
The sampler is made up of a collection of FREE patterns from a ten quilting blog authors.
We started with Jessica's Feathered Star -- get that pattern HERE.
The fussy cut center of that gal doing her ironing set the tone for the rest of the quilt.
Also in this picture are the Raspberry Kiss blocks from Rachel at Wooden Spoon Quilts -- you might recognize the block if you follow the campaign on Instagram to help @craftycop produce a stash of blue quilts to be given to families of fallen police officers around the country.  Rachel resized the block just for that purpose!!  The original pattern is HERE.

Here's two more of the patterns.  The upper ones are Spinning Pyramids by Jesse, The Art School Dropout.  She designed the pattern for Kaufman Fabrics a couple years ago to show off their wide assortment of solids and to play with values.  
The arrow is a tutorial from Carla of Grace and Favour -- had been on to-do list and now I was doing it!!  You can get to the tutorial HERE!

Sarah at No Hats Quilts provided the Scandi Windmills block -- foundation piecing and curved piecing.  I recall being a bit intimidated, but once through the first quarter section, I was okay!
Surprising to me, it's one of my favorite blocks in the quilt.
When we worked on the section below, I was really puzzled.    It's called Twizzle and was designed by Heidi at Buttons and Butterflies.  How was it going to work into the quilt? And why did I make so many mistakes while piecing it. 
Happily all the mistakes ended up being used in the border!!
It really is a great pattern, just read the instructions very carefully.
I was so excited to find Barn Bats by Elizabeth Hartman as part of the sampler!!
I had it bookmarked but you know how that goes -- lots of bookmarks, not many starts.
It's fun to make and quite clever!
It was originally a Halloween idea and you can find the pattern HERE.
Whiskers is a big block -- whimsical needs to be the mindset for this one from Anna at Six White Horses.  The pink ears redeemed it for me because the scale of the block (15") felt all wrong.
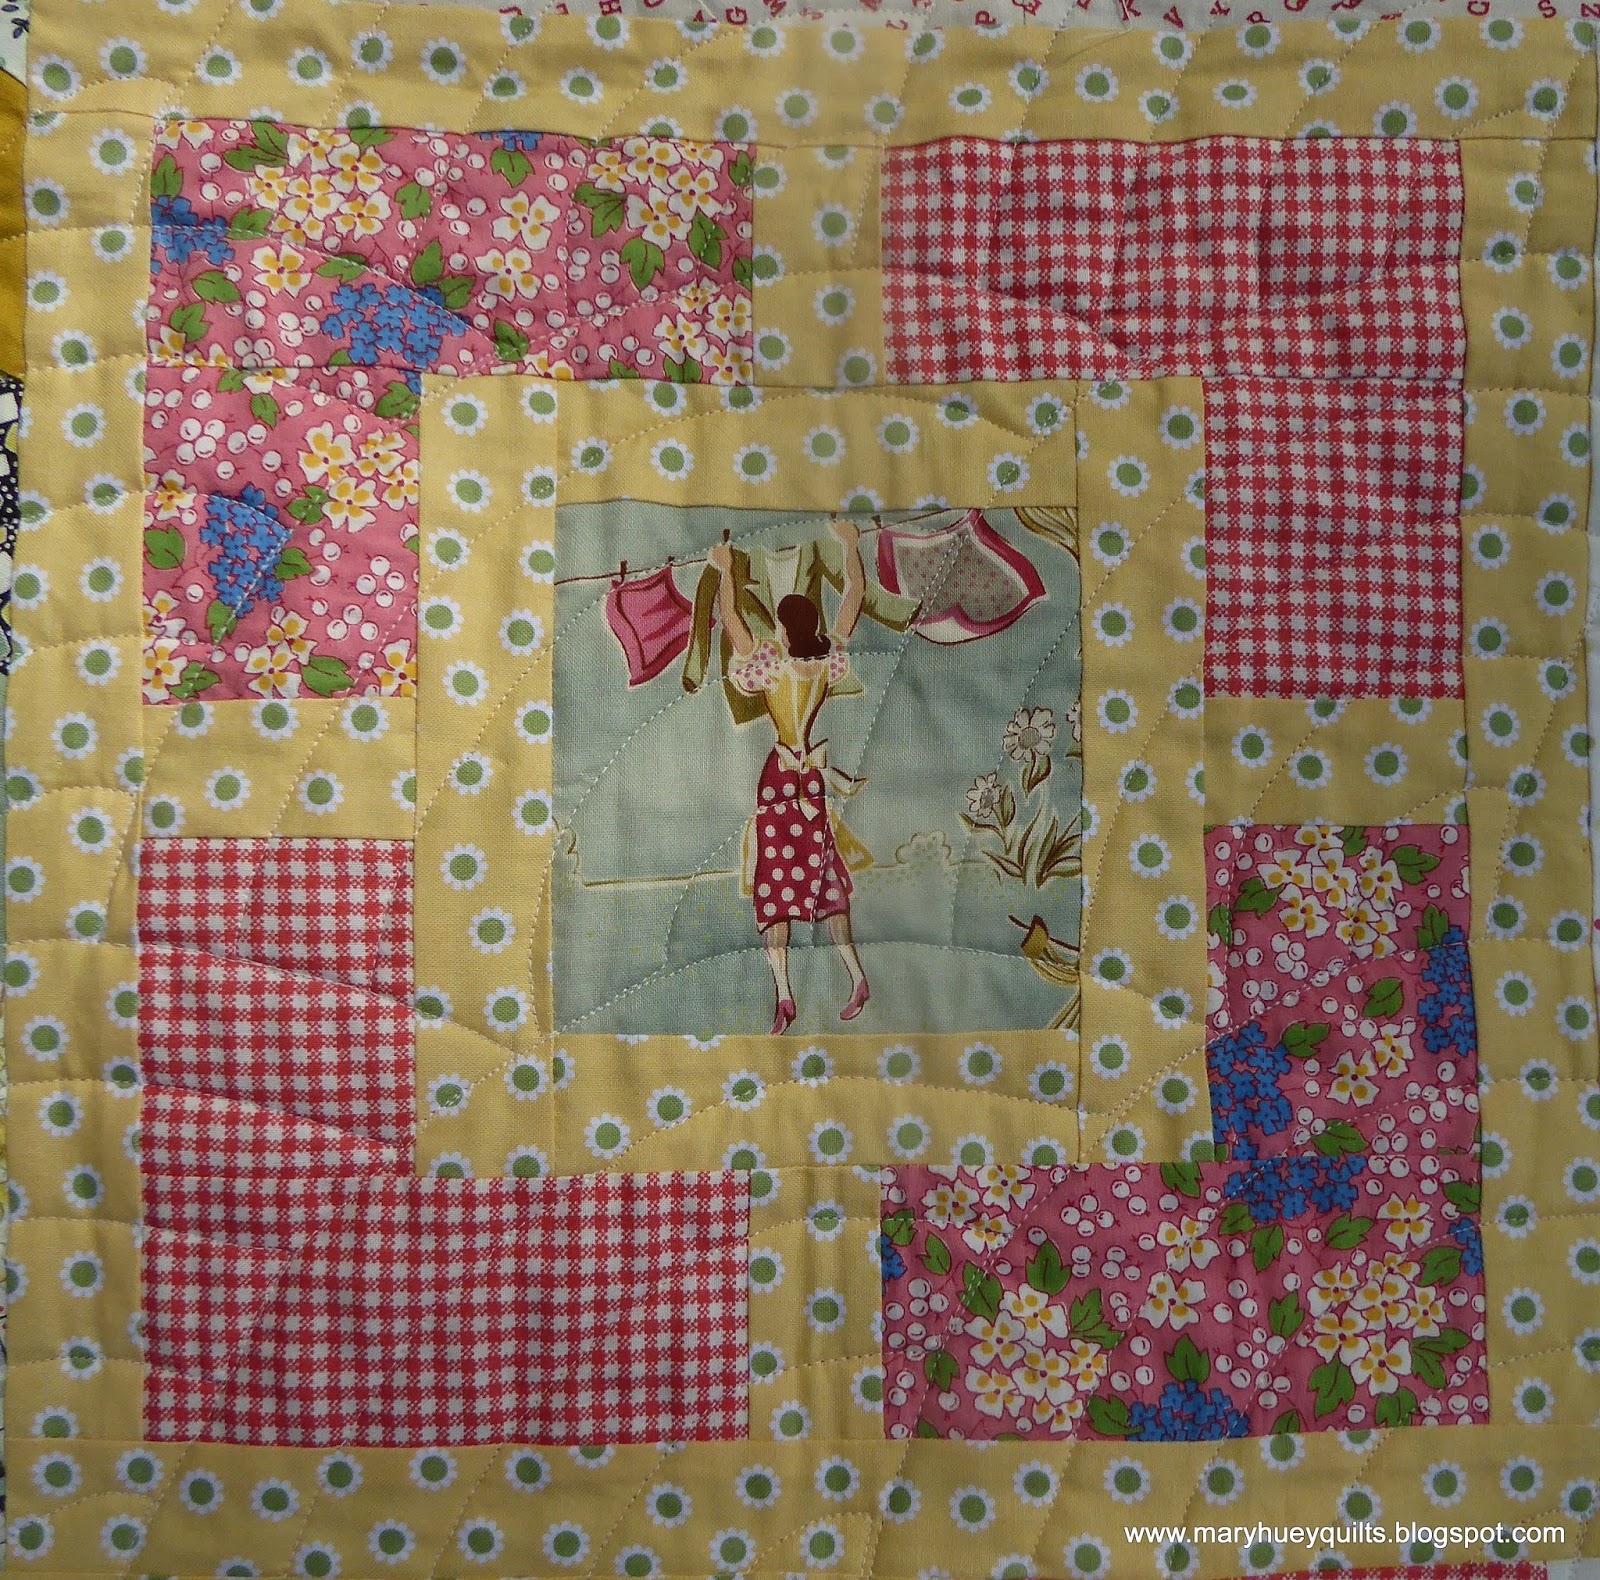
Garden Fence was perhaps the easiest block to piece in the quilt.  It was designed by Cynthia at Hyacinth Quilt Designs.  More of the 1950's laundry routine and I think that floral print is a scrap of vintage fabric that I found in my stash!
The pattern is HERE and the block itself ends at the pink but we added sashing.
Last but not least came Orange You Glad by Emily at Crazy Old Ladies!
The hand stitched buttonhole applique with some silk embroidery thread was my personal touch.
This would make a great scrappy project to carry around for a bit of hand-stitching now and then!
The instructions for making this section are right HERE.
It was a fun project -- I discovered new designers and made a great quilt in the process. 
I worked completely out of my stash and used up all the mistakes and cutting leftovers for the free form borders!

Thanks for coming over from the Blogger's Quilt Festival to see it close up and read about it.  Perhaps you found some new patterns to try out!

It's our first weekend of Fall here in Northeast Ohio and I'm going to spend it birding!!
Hope you have fine weather and good times, too!!

Mary


Tuesday, September 5, 2017

A Finish -- Smorgasblocks Sampler!!

I love to cross items off a list -- don't you!!
Quilting my Smorgasblocks Sampler provided lots of good breaks this past week from the annoying task of sanding woodwork (now finished) and painting (75% finished).
Two years ago, I used Baptist Fan to quilt three scrappy quilts for my three children made with heirloom blocks from their great-grandmother.
I shared how I moved through the design in this POST.
This little tool set I shared a couple weeks ago inspired me to use that quilting pattern again!
These are Ruler Foot Echo Guide disks, made by the Sew Steady folks (they make those wonderful Dream Tables that fit on any sewing machine) to be used with the Westalee domestic machine ruler feet -- they slip around the presser foot so you can follow along a ruler edge 1/2", 3/4", or 1" away. 
Happily they fit on the new APQS George ruler follower presser foot, too!!
In my Baptist Fan post from 2014, I illustrate the stitching path I found easiest to use.
With one of these ruler foot echo guide disks, it was even easier!!
I used the 1" disk and echo stitched along the previous arc.
I love how smooth (most of) the arcs look.
No marking necessary!!
It took eight 45 minute work sessions to complete the quilting.
Ready to trim and bind!
This is my favorite block in the quilt!
I discovered I have an alarming quantity of the yellow print I used in it -- 4 yards in three cuts?!?
Apparently, I really loved it or was afraid of running out of it?
Perfect binding!!
I even remembered to sign the quilt as I finished up the quilting.
The finished quilt!
#4 on my third quarter list for the 2017 Finish-A-Long!!
(It's windy here today.)
It's easier to see the old-fashioned quality of the Baptist Fan quilting on the back!
Doesn't it look cozy?
That was so easy, I might just quilt everything I touch with Baptist Fan!?!
I'm planning to give this quilt to a special person (must not change my mind).
Next up for a date with my APQS George -- a baby quilt!
I'm thinking a smaller scale Baptist Fan using the 3/4" disc!!

Hope your September is off to a great start!!
Mary
9/26/2017 - linking up to the 3rd quarter 2017 Finish A Long!!


Friday, October 21, 2016

Pattern Testing!!

This summer, while following Anneliese (at Eye Candy Quilts) Smorgasblocks project on Instagram, I became acquainted with Jess at Threaded Quilting.  The Smorgasblocks project began HERE with her paper pieced 12" feathered star pattern.  About a month ago, she began to post pictures of a new set of larger feathered stars made with NO paper-piecing.  Last week, she posted a request for pattern testers to stitch one of the two sizes included in her soon to be released Fierce Feathered Star.  I responded and the next morning, I was choosing fabric for a test run of the 36" block!!
After reading, okay skimming, through the instructions, I picked a feature print for the center block and pulled fabrics from my stash to complement it.  The cutting instructions are set up with numbered shapes and space to make color notations which I find saves me lots of mental energy and eliminates confusion.
It took me about 2 hours to choose the fabrics and getting the cutting finished -- ready for stitching the next day!
This was my first experience with this technique for HST's -- I've always used a preprinted triangle paper which stabilizes the fabric and eliminates this crinkling.  I was a bit alarmed at first but a good pressing flattened everything out and the cutting went just fine.  Another time, I would give the two fabrics for this step a Best Press treatment before cutting the basic squares.  I think that would eliminate this crinkling!
I didn't tell Jess this, but I'm not an HST trimming fan!!
But my job was to test her pattern, not adapt it to my own preferences.  So I soldiered on!
You'll notice I went from handling one at a time to laying out 3 at a time for some mass processing.
One of the trickiest parts of getting a good feathered star pattern is sizing these triangles.
Frankly, I don't know of any manufactured templates (my typical approach) that would have achieved the right size for this pattern. 
I also took the time to stitch an extra line before trimming the stitch and flip corners so I have sixteen of these HST units for the scrap box.
With the HST's and star points finished, it was time to assemble the star!!
I have to confess, this is not my first feathered star.  I have taught it almost annually over the last 10 years with Marti Michell's template sets so I know the potential pitfalls.
Look closely at Figure 16 (upper right) and compare that to my four corner units.
Going too fast, twisted something around (not once, but all four times) -- out came the ripper!
There is only one way to assemble this unit and mine version wasn't it!!
For the second feather strip, I double checked my layout with the diagram and assembled them correctly (the first time).  I haven't seen the final draft of the pattern yet, but I suggested to Jess that she add the word "exactly" and perhaps an underline to emphasize the importance of both reading and using the photos of these steps.
Two stitching sessions (about 3 hours total) and I had a finished 36" block. 
My plan is to expand it a bit on the top and bottom to make a 40" by 54" child's quilt which I'll donate as a Christmas gift to a local transistional home for young women working to turn their lives around.
Jess introduced her pattern Wednesday and you can purchase it HERE.  It comes as a downloadable PDF so you can get to work instantly -- love that about PDF's. (Part of the test was to be sure it printed accurately and so I learned to select "actual size" to assure that -- who knew??)  The pattern also includes a 20" block which a friend of Jess's is offering as a kit for a Christmas version of the block HERE.

It's reassuring to know that a pattern writer is testing her instructions.  I've written enough instructions to know that what makes perfect sense to me doesn't always ring clear with another person.  I found the instructions to be thorough and complete . . . . you do need to read all the words not just look at the pictures . . . . and then you need to pay attention to the orientation of things in the pictures!! 

I love the size of it and can visualize four of them set up with some large scale sashing in modern fabrics for a stunning modern quilt!

Let me know if you give the pattern a try!!

For those of you in Northeast Ohio -- the second Mutton Hill Quilt Show is Saturday, 10/22 and Sunday 10/23 in Akron, Ohio -- all the info is HERE.  My version of SMITTEN is hanging out there and I'll be there on Sunday afternoon!

Mary


Friday, September 9, 2016

Between the Quilting

Smitten is layered! 
The quilting has begun!!
I appreciated all the lovely comments and compliments about it in my last post!
Very gratifying!! 
My goal is to finish the quilting by September 25 before I head out on a couple teaching trips so the finishing details -- burying threads and binding -- will be my travel stitching.
 
The plan is to complete at least two blocks a day -- hopefully that pace will prevent me from getting too tired and impatient and stitching too fast and getting sloppy.  My arthritis is limiting so more than an hour at the quilting machine is tough. 
So far, so good.
While I'm working on this, I'm catching up on some odds and ends of piecing.  First in line were the last two blocks for Anneliese's #smorgasblocks project at http://eyecandyquilts.com
If you haven't checked this delightful sewalong out, she gathered up ten free patterns from ten bloggers and organized them into a "sampler" style quilt.
 
One of the things I enjoyed about it was trying out some blocks I've admired but never tried like this arrow!!  So simple and I added my own little personal (secret) touch.  Years from now, quilt historians will ponder why I did it.  They'll never guess! 
I was moving too fast as I'm prone to doing.
Then I set to work on the orange peel blocks -- 11 of them.  Isn't that an odd number?  How is that even going to work.  I decided to glam them up with some hand buttonhole stitch using pearle cotton.  I took advantage of two beautiful late summer afternoons to stitch in the back garden.
I've stitched miles of buttonhole around appliques finishing a quilt top that a friend started so here are a few pics of turning a corner that might be useful to you.
 
The stitch at the point needs to be secured or it will slip around.
So after I've made the stitch, I make a small stitch by going to the back on the outside of the loop.  This secures the loop at the point. 
Then I come back up inside the loop catching just the point of the fabric and everything is secure and I'm ready to head down the next side of the motif. 
My quilt has evolved a kitschy, mid-century modern look and I think the buttonhole stitch is a perfect accent for that theme!
And here are all the units together!
So that's why 11 blocks will work!
This might be the end but there is a border plan Anneliese will be sharing this weekend, so I'm waiting to see what that is before making the final decision. 
It's a pretty cute quilt!
I'm awed by how she organized the layout -- must be interesting inside her head!!
I think I might have someone in mind to get this quilt, too!!
 
It's been fun to explore new blogs, try techniques and patterns, and trust that it would all work!
I believe if you are working with a stack of fabric that you like, the results are always good!
 
Next up!
Mary


Friday, August 19, 2016

All Caught Up!!

Now there's an exaggeration if I've ever written one!?!
All Caught Up??
I don't think I'll every really enter that state but I am caught up with the second quilt along I'm currently enjoying -- the #smorgasblocks project led by the creative Anneliese at Eye Candy Quilts.
 
(Click above to read all the posts and find the links to the patterns featured here today.)
 
I was delighted to have a reason to piece Barn Bats as shared by Elizabeth Hartman on her blog.
I had bookmarked that tutorial quite some time ago, but of course never actually indulged in the process of making it.  It felt like it took longer to organize the fabric than it did to piece the block.
Every bat is a different fabric and my goal was to spread the blacks and yellows evenly around the block since they seem to stand out most -- interesting that they ended up paired together -- I didn't notice that until just now looking at the photo.
I'll be doing this again for sure!  Two notations I made on my instructions -- first, don't put my favorite prints on the top or bottom of each row since those will be trimmed when squaring up the block (which I have not done yet).  Second, the order of the colors is reversed from top to bottom from the layout I planned.  It's not a problem for me visually, but it confused me for a few minutes when I was piecing since I knew where I had placed certain prints.
 
The second block in my catch-up binge is Whiskers, a larger than life cat's face.  I have to confess I was disappointed to encounter yet another paper piecing block and didn't love the scale of the block.
In the end, the paper piecing wasn't such a chore after all.
Here are all the units as finished and ready for the next step.
One of the aspects of this pattern from Anna of Six White Horses that I appreciated is that she shaded the seam allowances of her pattern units and it was easier for me to remember not to cut the seams off during the trimming step!!  Thank you, Anna!
Since I wasn't thrilled with the scale of the block, I choose to break it up a bit with two fabrics for the face.  And the choice of plaid with a print background kept the overall image softer and more in keeping with the feel of the other blocks.
I'm listening to A Man Named Ove on Hoopla right now and the weather has cooled enough to turn off the air conditioning in the studio and open the windows, so it all made for a pleasant evening of piecing and trimming and watching Whiskers evolve on the floor next to my machine.
In the end, I'm happy with the block and it blends into the mix perfectly.
The third block in the backlog is Garden Fence from Hyacinth Quilt Designs -- so easy -- yea!!
And the next day, I saw a quilt on Instagram made with this block that inspired me to save this design for a future charity quilt -- it even uses 2 1/2" strips which fill my go-to sourdough scrap box!
I hope the block isn't as crooked as it looks in this picture!  I hope I had the camera cocked at a funny angle.  If not, I might have to revisit the outer sashing.
 
So that's eight blocks assembled so far -- two or three more?  I need to use more white background in the remaining blocks to balance things out a bit but I'm happy with the results and beginning to think about a simple quilting strategy for this.
What will I do this weekend now that I'm caught up?
Seriously, Mary?!?
I believe the living room requires some focused attention!!
 
Have a good weekend!
 
Mary