Something fun has been happening in my space!?!
.JPG)
A couple weeks ago while tidying a shelf of fabric in my stash, a forgotten layer cake surfaced -- it had fallen behind the stack of fabric. I recall ordering it on-line quite some time ago -- the flyer says 2015? So it is properly aged at this point. 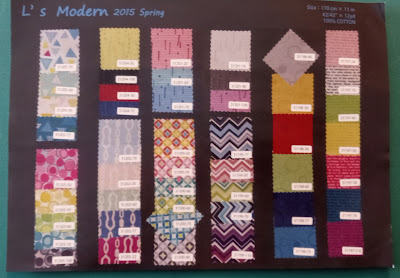


It only took me about a minute to realize it would be perfect for a new make -- Exploding Heart! I'm pretty sure I've save every picture of this quilt I've ever seen on Instagram so in January, I bought the pattern!

I found the instructions to be excellent (and as a pattern writer myself, I don't say that very often). Laura of Slice of Pi Quilts is the author and she gives instructions for rotary cutting and using a "fabric cutter" machine. That impressed me even though I don't own one of those.
Since I was starting with a layer cake, I cut each piece into 5" squares until I had the number needed which only used 33 of the layer cake's 10" squares. I used a muckled-up assortment of white-on-white prints from my stash for the background and only cut the number specified for the "larger" background square. I waited to cut the "smaller" background squares until I had trimmed all the pieced units -- since my colored squares were smaller than the pattern specified, my pieced units came out smaller and I needed to adjust that size accordingly.

You could also use four 5" charm packs of fabrics -- they wouldn't need to be the same collection but could be four different collections from the same designer since I've noticed many designers use a color palette over and over. And it would be a lot of fun using scraps from your favorite designer -- Kaffe Fassett or Anna Marie Horner?? And four packs equals more squares than you need to begin, so you could eliminate the ones you didn't like as much?
At one point, a line needs to be drawn across the back of triangle sets -- make sure that line is perpendicular to the first seam!! I lined up the "5 line" on my ruler with the stitching every time to be sure my units were easier to square up during the final trimming step!

Every day last week, I worked on one group of the units -- since I try not to spend more than 45 minutes with my "nose-down" at the sewing machine these days, it was a perfect work flow. I could do all the piecing and pressing for one group in less than an hour.
I knew I wouldn't enjoy trimming the units to a uniform size - I never do. Since I cut patchwork with templates and have pieced for so many years, my work doesn't need trimmed. But I was determined to follow Laura's directions faithfully. My finished units are 1/2" smaller than the pattern specified since I started out with slightly smaller squares and so my quilt top will be a bit smaller.
Happily, I was going to a retreat last weekend and only taking handwork, no sewing machine. I took all the units with me and trimmed them in small batches, working on it for 15 minutes at a time to minimize shoulder strain that is now one of the perks of rotary cutting for me?!?
.JPG)
If you are a "trimmer", you already know that it's important to "center" the ruler correctly. In this case, notice that the "4" line is matching the left side "corners" and the diagonal line is aligned perfectly. If you don't take the time to do this, when you assemble the units, corners will not align no matter what you do!
I came home with all the units trimmed units ready to assemble into the top!
I emptied the design wall and started to work through the pattern, one row at a time. It only took about 3 rows for me to see this was going to be wonderful!! And when I got to row 5, it was hard to stop.
.jpg)


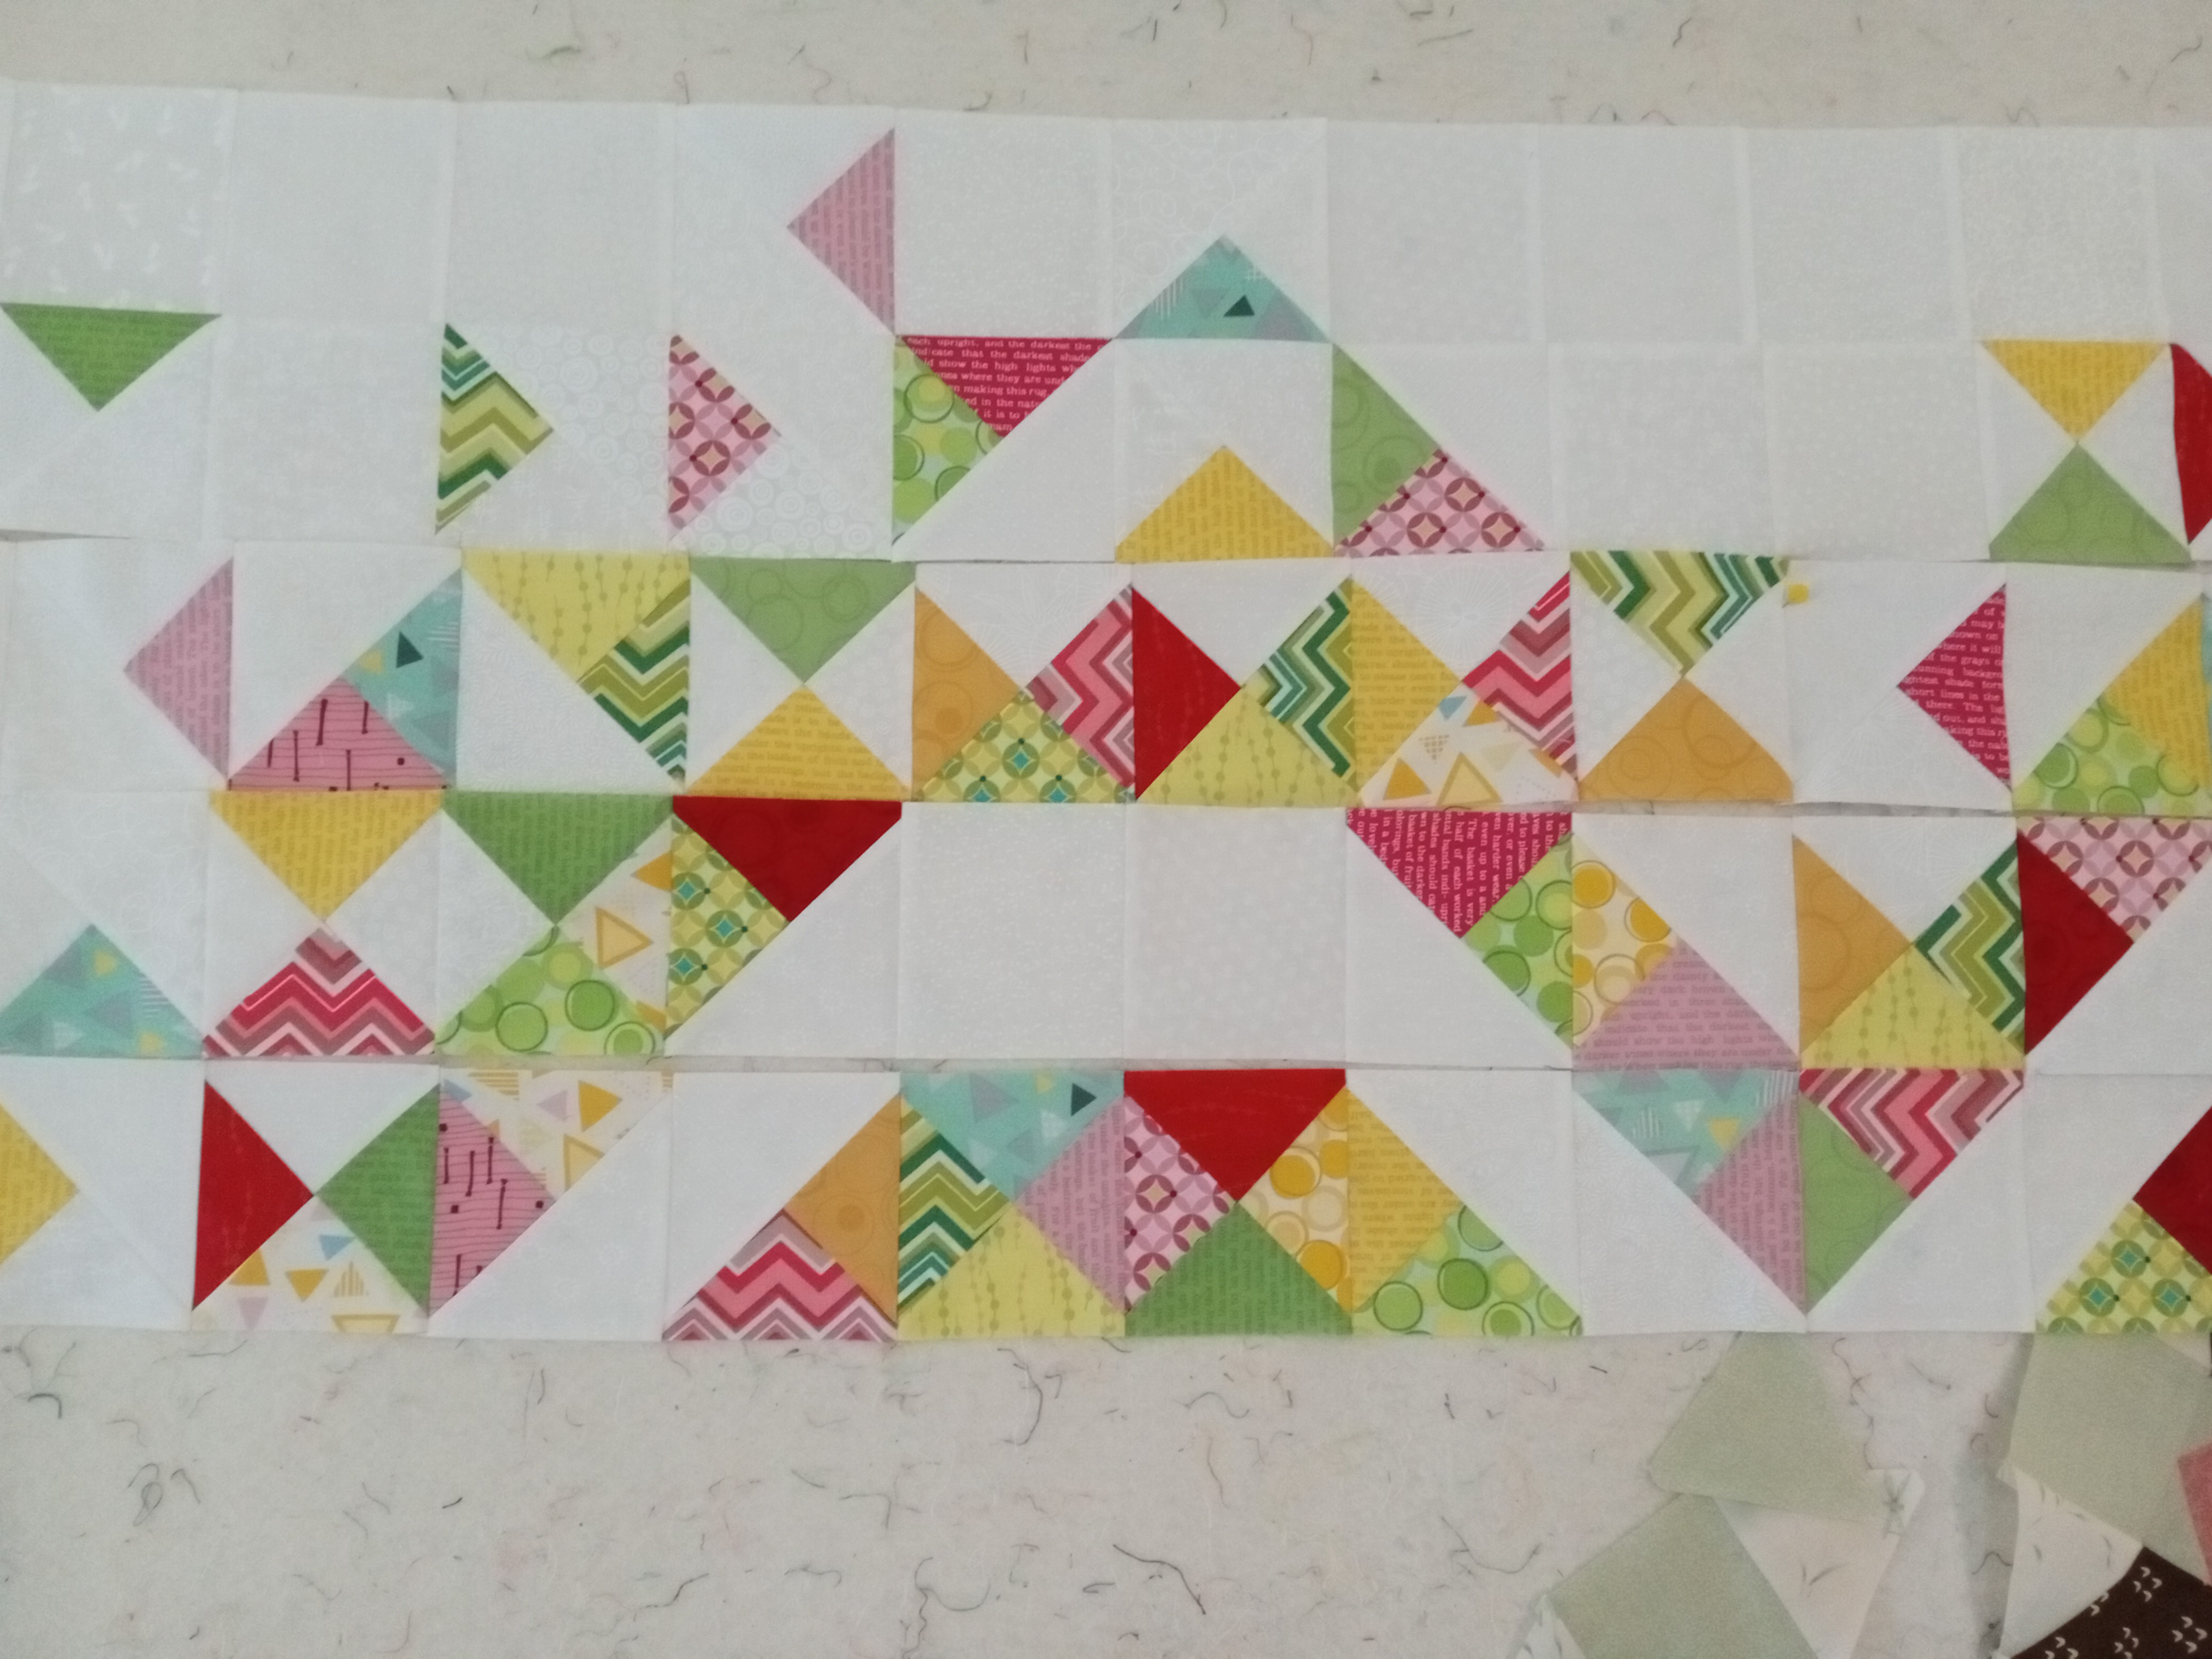
All week, I've been assembling two or three rows and adding them to the design wall.
It just keeps getting better and better!!
Today, I pieced the last row and started thinking about whether to add a border. The pattern doesn't call for it, but it will upsize my version a bit and I like the idea of a white border to "float" the design. Inspiration arrived in the form of "incorporated" borders which was a favorite tactic of my long-time mentor, Mary Ellen Hopkins. Piecing the border will blend in with the "muckled-up" background better, so I cut enough rectangles to add a 2" finished border. Since I haven't finished sewing the rows together, I'll add rectangles to the ends of each row. A row of rectangles will make the top and bottom borders. You can see them in place on the design wall (top edge and right edge).
.jpg)
I won't get the top completely assembled today (avoiding aching shoulders and neck) but I'm already envisioning a stripped fabric for the binding and studying my collection of pictures of other quilters versions for quilting inspiration.
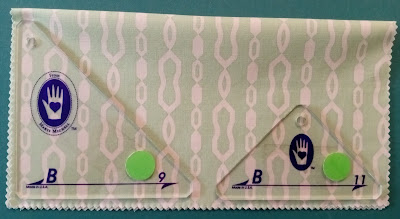
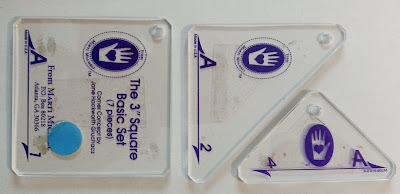
I can see myself making this quilt again!! The only thing I would do different is to cut the pieces with one of Marti Michell's Basic Template sets -- A, B, or T maybe?*** My unit size might be different than the pattern and so the quilt would be a different size, but I wouldn't have to trim any of the units. And there would be no wasted fabric.
I could have used B-9 and B-11 to cut the triangles for the size in the pattern, getting 4 large triangles and 8 small triangles from a 10" layer cake square for the 72" square top.
I could also use these templates with 5" charm square packs.

Use template B-8 for the background squares.

Others sizes would be easy to achieve using a different group of the templates.
Using these templates (below) from Set A (1, 2, and 4) would make a 54" quilt top.

Using the smaller templates from Set B (10, 11, & 13) would make about a 52" quilt top.

And the smaller templates from Set A (3, 4, and 6) would make a 38" quilt top

I don't own Set T (that's odd?) but looking at it on frommarti.com, using 102, 103, & 104 would result in a 90" quilt top.
Wouldn't this make a great graduation quilt?
I might set out the templates for a 54" throw size and cut from scraps as I tidy up the overflowing scrap basket next to my cutting table?!? Hmmm??
I love it when one idea morphs into another!!
Are you ready for the change of seasons? I brought out some spring quilts to change the hangings around the house this coming week. We haven't had much of a winter -- no snow to speak of, so I'm tired of the brown weather and ready for lots of green and pink!!
Talk soon!
Mary
P.S. Let me know if you are rushing out to your local quilt shop to get the pattern!!
***EDIT April 2025
Marti Michel closed her business in late in 2024 and while some shops may still have a stock of her templates, you can also find them on Ebay and Etsy.
Looks great, Mary. I've been pondering lately why I always feel the need to properly age fabric. ls it procrastination or careful planning? 😀
ReplyDelete